S
2026年9月 · Patch 7.2d
Marksman · JUNGLE

Kindred Wild Rift カウンターガイド

Kindredは、序盤のJungleにinvadeしてmarks(印)を奪い合うことができる編成に対して脆弱です。機動力があるものの、高いburstを持つチャンピオンは彼女を直接脅かします。他を無力化することで彼女のアルティメットを無視するdive編成は特に効果的です。

★ JUNGLE Tier S
ダメージ
UTIL
TANK
DIFF
Win 49.8% #41 · ↓6pt
Pick 2.6% #27
Ban 0.5% #107

Kindred Wild Rift カウンターガイド ★ Counter Sheet

マッチアップ一覧
マッチアップ 判定 有利度 勝率 ピック率
Rammus ハードカウンター +3 54.7% 4.3%
Nocturne ハードカウンター +2 50.3% 5.5%
Rengar ハードカウンター +2 47.8% 1.6%
Nilah ハードカウンター +2
Poppy ハードカウンター +2
Olaf 不利なマッチアップ +1 52.5% 2.4%
Diana 不利なマッチアップ +1 52.1% 2.9%
Vi 不利なマッチアップ +1 51.9% 9.3%
Gwen 不利なマッチアップ +1 51.8% 1.9%
Pantheon 不利なマッチアップ +1 51.7% 5.5%
Xin Zhao 不利なマッチアップ +1 50.7% 9.5%
Kayn 不利なマッチアップ +1 50.6% 9.2%
Skarner 不利なマッチアップ +1 50.6% 1.1%
Wukong 不利なマッチアップ +1 50.3% 3.7%
Nidalee 不利なマッチアップ +1 50.2% 2.4%
Kha'Zix 不利なマッチアップ +1 50.0% 4.9%
Talon 不利なマッチアップ +1 49.1% 2.8%
Jax 不利なマッチアップ +1 48.4% 2.1%
Master Yi 不利なマッチアップ +1 48.0% 9.3%
Lee Sin 不利なマッチアップ +1 47.3% 12.0%
Gragas 不利なマッチアップ +1
Warwick スキル次第のマッチアップ ±0 52.6% 2.7%
Lillia スキル次第のマッチアップ ±0 51.9% 3.3%
Ekko スキル次第のマッチアップ ±0 51.6% 4.3%
Yone スキル次第のマッチアップ ±0 49.1% 2.0%
Cho'Gath スキル次第のマッチアップ ±0 47.6% 5.4%
Camille スキル次第のマッチアップ ±0
Maokai スキル次第のマッチアップ ±0
Mordekaiser スキル次第のマッチアップ ±0
Amumu 有利なマッチアップ −1 55.1% 3.3%
Nunu & Willump 有利なマッチアップ −1 54.8% 1.9%
Jarvan IV 有利なマッチアップ −1 52.4% 8.5%
Tryndamere 有利なマッチアップ −1 50.6% 6.8%
Ambessa 有利なマッチアップ −1 50.3% 1.2%
Volibear 有利なマッチアップ −1 49.9% 3.3%
Hecarim 有利なマッチアップ −1 49.2% 2.6%
Riven 有利なマッチアップ −1 48.8% 1.2%
Graves 有利なマッチアップ −1 48.3% 7.6%
Zed 有利なマッチアップ −1 47.6% 1.8%
Fizz 有利なマッチアップ −1 47.4% 2.1%
Viego 有利なマッチアップ −1 46.0% 3.4%
Nautilus 有利なマッチアップ −1
Twitch 有利なマッチアップ −1
Darius 有利なマッチアップ −2 51.5% 8.1%
Shyvana 有利なマッチアップ −2 51.1% 7.0%
Fiddlesticks 有利なマッチアップ −2 50.8% 2.7%
Dr. Mundo 有利なマッチアップ −2 48.6% 1.1%
Evelynn 有利なマッチアップ −2 48.6% 2.4%
Aatrox 有利なマッチアップ −2

Edge: Wild Rift Core canonical verdict (−3 to +3), shown from the point of view of the champion named in the row. Win rate and pick rate: the opponent's own rate in this role — Wild Rift CN · Challenger, Patch 7.2d. Not a head-to-head win rate.

ハードカウンター

5

これらのチャンピオンは、こちらのビルドやプレイスタイルを真正面から上回る構成を持ち、レーン戦のコントロールとファームを極めて難しくする。彼らのスキルはこちらの主要な強みを無効化し、いつも通りのプランを実行しようとした瞬間に手痛い反撃を受けさせてくる。こうしたマッチアップでは、ミスを最小限に抑え、正面からの対決以外で解決策を探すことが重要になる。

Rengar

Rengar+2

stealthburst Rengar completely neutralizes your ultimate defense because his Thrill of the Hunt allows him to leap directly onto you from camouflage. He can instantly chain a high-damage Savagery to deplete your health bar before you can even react to press Lamb's Respite. Since he strikes from unseen angles, his burst threshold is reached faster than your cast animation, turning your primary survival tool into a useless ability. Rengarのビルド → 詳細を見る
Rengar

理由

Rengar completely neutralizes your ultimate defense because his Thrill of the Hunt allows him to leap directly onto you from camouflage. He can instantly chain a high-damage Savagery to deplete your health bar before you can even react to press Lamb's Respite. Since he strikes from unseen angles, his burst threshold is reached faster than your cast animation, turning your primary survival tool into a useless ability.

レーン戦への影響

This threat forces you into a highly defensive posture within your own jungle. You cannot mindlessly contest Mark of the Kindred spawns in the river or enemy camps, as Rengar uses Unseen Predator to control the bushes around them. Every rotation becomes a deadly gamble; a single facecheck near a brush leads to an instant gray screen, stripping away your early pressure and starving your passive scaling.

立ち回り方

To survive, you must secure deep vision at his jungle exits to spot him before he activates Thrill of the Hunt. Never enter a skirmish without tracking his position first. If he does manage to leap, immediately use Dance of Arrows to dash over a wall and put distance between you, then apply the slow from Mounting Dread to prevent him from chasing. If caught in the open without vision, concede the camp and retreat.

チャンピオン詳細 → Rengarのビルド →
Nocturne

Nocturne+2

spell shieldvision loss Nocturne completely neutralizes your kit during duels. When he isolates you with Paranoia, he forces an early Lamb's Respite just to survive his burst. Worse, as you attempt to fight back, Nocturne can easily reactively block the third-strike execute of your Mounting Dread using Shroud of Darkness, turning your primary self-defense tool into an attack speed steroid for himself. Nocturneのビルド → 詳細を見る
Nocturne

理由

Nocturne completely neutralizes your kit during duels. When he isolates you with Paranoia, he forces an early Lamb's Respite just to survive his burst. Worse, as you attempt to fight back, Nocturne can easily reactively block the third-strike execute of your Mounting Dread using Shroud of Darkness, turning your primary self-defense tool into an attack speed steroid for himself.

レーン戦への影響

This matchup warps your entire jungle routing. Securing your Mark of the Kindred on camps becomes highly dangerous, as crossing the river alone invites a sudden Paranoia dive. You cannot contest crabs or duel him over objectives because Unspeakable Horror will tether and terrify you out of Wolf's Frenzy, leaving you unable to kite effectively with Dance of Arrows.

立ち回り方

To survive, never activate Mounting Dread immediately; instead, use Dance of Arrows to break the tether range of Unspeakable Horror. If he initiates with Paranoia, delay casting Lamb's Respite until the very last second of his burst. Once inside your ultimate, time your attacks so you only trigger the third strike of Mounting Dread after his Shroud of Darkness has expired.

チャンピオン詳細 → Nocturneのビルド →
Nilah

Nilah+2

dodge areamelee marksman This matchup is exceptionally punishing because Nilah directly neutralizes your primary damage source. When you engage, she will activate Jubilant Veil, which completely blocks all of your basic attacks, rendering your Mounting Dread setup useless. Since you cannot stack your E or land basic attacks to trigger Wolf's Frenzy co-attacks effectively during this shroud, you are left entirely vulnerable to her high melee burst. Nilahのビルド → 詳細を見る
Nilah

理由

This matchup is exceptionally punishing because Nilah directly neutralizes your primary damage source. When you engage, she will activate Jubilant Veil, which completely blocks all of your basic attacks, rendering your Mounting Dread setup useless. Since you cannot stack your E or land basic attacks to trigger Wolf's Frenzy co-attacks effectively during this shroud, you are left entirely vulnerable to her high melee burst.

レーン戦への影響

In the jungle, Nilah will actively invade you or contest marks knowing she wins any straight duel. If she catches you, her Slipstream allows her to close the gap instantly, forcing you to burn Dance of Arrows defensively rather than offensively. Any skirmish around early Scuttle Crabs or neutral objectives becomes highly volatile, as she can share her defensive shroud with her allies while pulling you out of safety with Apotheosis.

立ち回り方

To survive, you must bait out Jubilant Veil before committing. When Nilah activates her shroud, immediately cast Wolf's Frenzy and use the reduced cooldown on Dance of Arrows to vault backward, refusing the fight until her dodge duration ends. Never initiate with Mounting Dread; hold this ability until her veil expires so you can guarantee the three-hit execute. If she catches you with Apotheosis, use Lamb's Respite defensively, but prepare to dash out immediately as the healing phase ends.

チャンピオン詳細 → Nilahのビルド →
Poppy

Poppy+2

dash blockdisplacement Poppy is a structural nightmare for Kindred because Steadfast Presence completely neutralizes your mobility. Every time you attempt to kite or reposition using Dance of Arrows, her barrier grounds and knocks you up, leaving you vulnerable inside Wolf's Frenzy. Furthermore, even if you survive to cast Lamb's Respite, Poppy can simply charge Keeper's Verdict to smash you out of your own invulnerability zone, turning your ultimate into a trap. Poppyのビルド → 詳細を見る
Poppy

理由

Poppy is a structural nightmare for Kindred because Steadfast Presence completely neutralizes your mobility. Every time you attempt to kite or reposition using Dance of Arrows, her barrier grounds and knocks you up, leaving you vulnerable inside Wolf's Frenzy. Furthermore, even if you survive to cast Lamb's Respite, Poppy can simply charge Keeper's Verdict to smash you out of your own invulnerability zone, turning your ultimate into a trap.

レーン戦への影響

This interaction ruins your early skirmishing and jungle invades. You cannot safely contest your Mark of the Kindred in the river because Poppy can pin you against walls or block your escape route. If she catches you, you will be forced to burn Lamb's Respite prematurely, only for her to knock you away from the healing circle, meaning she controls the neutral objectives.

立ち回り方

To survive, you must play with extreme patience. Never initiate a fight with Dance of Arrows; instead, walk up to apply the slow from Mounting Dread, forcing Poppy to activate Steadfast Presence defensively. Once her barrier expires, you can safely use your dash. During teamfights, position yourself near solid walls to block the knockback of Keeper's Verdict, or wait until she wastes her ultimate before deploying Lamb's Respite.

チャンピオン詳細 → Poppyのビルド →
Rammus

Rammus+3

armor stackcc lockdown This matchup is a nightmare due to how Rammus's Defensive Ball Curl directly punishes your high attack speed. When he catches you with Powerball and uses Frenzying Taunt, you are forced to relentlessly attack him while his armor is massively buffed. Because of Defensive Ball Curl, your own rapid auto-attacks are reflected back at you, meaning you quickly shred your own health bar with no way to stop the self-inflicted damage. Rammusのビルド → 詳細を見る
Rammus

理由

This matchup is a nightmare due to how Rammus's Defensive Ball Curl directly punishes your high attack speed. When he catches you with Powerball and uses Frenzying Taunt, you are forced to relentlessly attack him while his armor is massively buffed. Because of Defensive Ball Curl, your own rapid auto-attacks are reflected back at you, meaning you quickly shred your own health bar with no way to stop the self-inflicted damage.

レーン戦への影響

Rammus completely dictates the map pressure, making your Mark of the Kindred hunts incredibly risky. If he intercepts you in the river, you cannot rely on Dance of Arrows to escape once hit by Powerball. Any skirmish turns into a death trap because you cannot safely execute targets with Mounting Dread while Rammus is nearby to peel, forcing you to use Lamb's Respite defensively and delaying your crucial mark milestones.

立ち回り方

To survive, you must adapt your build by prioritizing heavy armor-penetration and magic resistance to mitigate the reflected damage, completely avoiding pure attack-speed items that would only speed up your own death. In fights, never deploy Wolf's Frenzy or commit with Mounting Dread while his Powerball is active. Wait out his Defensive Ball Curl before attacking him, and save Lamb's Respite specifically for when his Frenzying Taunt wears off so you can survive the burst.

チャンピオン詳細 → Rammusのビルド →

不利なマッチアップ

16

これらのチャンピオンは、マッチアップ自体を絶望的にするわけではないが、対面で優位に立ちやすいツールを持っている。射程が長かったり、攻撃を受け止める力が高かったり、エンゲージへの対応手段が豊富だったりする。アプローチを調整し、戦闘を受け入れるタイミングを慎重に選ぶ必要がある。

Diana

Diana+1

skirmishultimate interaction Diana's rapid AP burst poses a massive threat to Kindred, but the matchup is truly defined by how their ultimates collide. While Lamb's Respite is your ultimate safety net against her Crescent Strike and Lunar Rush dive, a skilled Diana will hold Moonfall until the very last second. By pulling you out of the healing zone right before it expires, she completely bypasses your immortality. Dianaのビルド → 詳細を見る
Diana

理由

Diana's rapid AP burst poses a massive threat to Kindred, but the matchup is truly defined by how their ultimates collide. While Lamb's Respite is your ultimate safety net against her Crescent Strike and Lunar Rush dive, a skilled Diana will hold Moonfall until the very last second. By pulling you out of the healing zone right before it expires, she completely bypasses your immortality.

レーン戦への影響

In the jungle, contesting Mark of the Kindred becomes highly dangerous once Diana has access to her burst. In early skirmishes, her Pale Cascade shield absorbs your Dance of Arrows poke, forcing you into extended fights where her Moonsilver Blade passive excels. If you are forced to deploy Lamb's Respite early during an objective fight, you lose all zone control.

立ち回り方

To survive this matchup, you must track her Crescent Strike cast. Use Dance of Arrows to dodge the curved projectile; if it misses, she cannot reset Lunar Rush, neutralizing her burst. During skirmishes, never stand near the edge of your Lamb's Respite. Position yourself dead center, and save your Mounting Dread slow to execute her the moment your ultimate expires, preventing her from lining up a clean Moonfall displacement.

チャンピオン詳細 → Dianaのビルド →
Gragas

Gragas+1

peeldisplacement Gragas directly neutralizes your ultimate survival tool. The moment you cast Lamb's Respite to save yourself or an ally, he can instantly deploy Explosive Cask to blast you out of the healing circle, leaving you vulnerable to his burst. Furthermore, his Body Slam disrupts your mobility, making it extremely difficult to kite him within Wolf's Frenzy, turning what should be your safe zone into a trap. Gragasのビルド → 詳細を見る
Gragas

理由

Gragas directly neutralizes your ultimate survival tool. The moment you cast Lamb's Respite to save yourself or an ally, he can instantly deploy Explosive Cask to blast you out of the healing circle, leaving you vulnerable to his burst. Furthermore, his Body Slam disrupts your mobility, making it extremely difficult to kite him within Wolf's Frenzy, turning what should be your safe zone into a trap.

レーン戦への影響

During skirmishes over Mark of the Kindred camps, you cannot contest objectives safely if his ultimate is available. Gragas can easily zone you away from critical targets with Barrel Roll. If you attempt to secure a mark, he can engage with Body Slam while absorbing your damage with Drunken Rage, forcing you to retreat early and giving up crucial passive stacks to his team.

立ち回り方

To survive, never initiate trades with Dance of Arrows when his crowd control is up. Keep your distance and bait out his Body Slam before dropping Wolf's Frenzy. Crucially, hold your Lamb's Respite until Gragas has already wasted Explosive Cask, or position yourself near terrain so that his knockback pushes you against a wall instead of out of your healing zone. If he holds his barrel, you must disengage immediately.

チャンピオン詳細 → Gragasのビルド →
Gwen

Gwen+1

zone controlburst timing Gwen directly counters your identity as a ranged marksman using Hallowed Mist, which nullifies your auto-attacks and Mounting Dread from outside her zone. Furthermore, her kit makes your ultimate extremely risky. Because Lamb's Respite keeps everyone alive at a flat health threshold, Gwen can easily charge up Snip Snip! during the delay and unleash its true damage snips the exact millisecond your healing zone expires, instantly executing you. Gwenのビルド → 詳細を見る
Gwen

理由

Gwen directly counters your identity as a ranged marksman using Hallowed Mist, which nullifies your auto-attacks and Mounting Dread from outside her zone. Furthermore, her kit makes your ultimate extremely risky. Because Lamb's Respite keeps everyone alive at a flat health threshold, Gwen can easily charge up Snip Snip! during the delay and unleash its true damage snips the exact millisecond your healing zone expires, instantly executing you.

レーン戦への影響

In the jungle, this matchup restricts your freedom to contest Mark of the Kindred in the river. If Gwen meets you at a camp, she can force you out using Skip 'n Slash to close the distance while remaining untargetable. Your skirmish potential drops heavily whenever Hallowed Mist is available, forcing you to concede early crab priorities and scuttle marks unless you have clear lane pressure to back you up.

立ち回り方

To survive encounters, you must never commit your full damage while Hallowed Mist is active. Use the mobility of Dance of Arrows inside Wolf's Frenzy to kite backwards and wait out her zone. When using Lamb's Respite, do not just stand still; use the final moments of the ultimate to reposition or prepare Mounting Dread on her, but be ready to dash away instantly to dodge the final, lethal snip of her Snip Snip!.

チャンピオン詳細 → Gwenのビルド →
Jax

Jax+1

skirmishmobility Jax directly counters your ranged advantage by using Leap Strike to instantly close the distance. Once he is on top of you, his Counter Strike completely negates your basic attacks, which means the crucial third-strike execution damage from your Mounting Dread is entirely blocked. Without that burst, you cannot win duel scenarios, especially since his Relentless Assault ramp-up outpaces your sustained damage in close quarters. Jaxのビルド → 詳細を見る
Jax

理由

Jax directly counters your ranged advantage by using Leap Strike to instantly close the distance. Once he is on top of you, his Counter Strike completely negates your basic attacks, which means the crucial third-strike execution damage from your Mounting Dread is entirely blocked. Without that burst, you cannot win duel scenarios, especially since his Relentless Assault ramp-up outpaces your sustained damage in close quarters.

レーン戦への影響

This matchup makes securing your Mark of the Kindred in the river incredibly risky. Jax can easily contest Scuttle Crabs or invade your camps because he wins early skirmishes if he saves his jump. If you get caught without Dance of Arrows available, you are forced to deploy Lamb's Respite defensively, giving Jax's team total priority over neutral objectives and forcing your laners to play without jungle pressure.

立ち回り方

Never initiate fights with Mounting Dread; hold it until Jax has wasted Counter Strike. Keep Wolf's Frenzy active to maximize your mobility, and only use Dance of Arrows to dash away after he commits his Leap Strike. If he jumps on you, immediately reposition backward to let his evasion stance expire before turning back to trigger your execute. If he holds his jump, focus on farming your safe camps and out-scaling his single-target pressure.

チャンピオン詳細 → Jaxのビルド →
Vi

Vi+1

lockdownkiting The danger in this matchup lies in Vi's crowd control chain. If she lands Vault Breaker, she can easily burst you down or chain Cease and Desist before you can even reactivate Lamb's Respite. Your safety entirely rests on using Dance of Arrows to sidestep her initial charge. If Vault Breaker connects, you will be locked down and eliminated without any chance to drop your saving zone. Viのビルド → 詳細を見る
Vi

理由

The danger in this matchup lies in Vi's crowd control chain. If she lands Vault Breaker, she can easily burst you down or chain Cease and Desist before you can even reactivate Lamb's Respite. Your safety entirely rests on using Dance of Arrows to sidestep her initial charge. If Vault Breaker connects, you will be locked down and eliminated without any chance to drop your saving zone.

レーン戦への影響

This threat severely limits your freedom when contesting Mark of the Kindred in the river. If Vi holds Vault Breaker, you cannot safely step forward to secure camps or force skirmishes. A single mistake near her Blast Shield means losing your health bar, forcing an early retreat and giving Vi complete control over neutral camps and scuttle crabs, which starves your passive scaling.

立ち回り方

Never initiate a fight by dashing forward with Dance of Arrows. Keep this spell ready specifically to react to her Vault Breaker charge. Once you successfully dash sideways to avoid her punch, immediately drop Wolf's Frenzy to reduce your cooldowns and apply Mounting Dread to slow her down. If she bypasses this by forcing Cease and Desist directly, immediately trigger Lamb's Respite to survive her burst, then turn the fight.

チャンピオン詳細 → Viのビルド →
Kha'Zix

Kha'Zix+1

skirmishultimate management Kha'Zix excels at isolating you in the jungle to maximize his Taste Their Fear damage, which easily forces an emergency Lamb's Respite. Instead of fighting inside your healing circle, he uses the stealth of Void Assault or the mobility of Leap to wait out your ultimate's duration, repositioning himself to easily execute you the moment the safety zone disappears. Kha'Zixのビルド → 詳細を見る
Kha'Zix

理由

Kha'Zix excels at isolating you in the jungle to maximize his Taste Their Fear damage, which easily forces an emergency Lamb's Respite. Instead of fighting inside your healing circle, he uses the stealth of Void Assault or the mobility of Leap to wait out your ultimate's duration, repositioning himself to easily execute you the moment the safety zone disappears.

レーン戦への影響

Securing your Mark of the Kindred becomes a high-risk task. Kha'Zix will constantly invade your marked camps, utilizing Unseen Threat from bushes to slow and chunk your health. If he successfully forces you to blow Lamb's Respite defensively in your own jungle, you lose all pressure, making you unable to contest objectives without risking a swift, isolated death.

立ち回り方

To survive, avoid fighting in open corridors where isolation triggers Taste Their Fear. Keep active jungle camps between you to block his isolation bonus. When forced to drop Lamb's Respite, deploy Wolf's Frenzy and stack Mounting Dread up to two hits. The instant your ultimate ends, use Dance of Arrows to kite away from his Leap range while delivering the third executing strike.

チャンピオン詳細 → Kha'Zixのビルド →
Talon

Talon+1

assassinwall hop Talon dominates the jungle tempo because Assassin's Path lets him bypass traditional wards to ambush you. His entire kit is designed to stack Blade's End instantly using Rake and Noxian Diplomacy. When he unleashes Shadow Assault, his invisible burst can delete you before you can react, making your survival completely dependent on a split-second activation of Lamb's Respite. Talonのビルド → 詳細を見る
Talon

理由

Talon dominates the jungle tempo because Assassin's Path lets him bypass traditional wards to ambush you. His entire kit is designed to stack Blade's End instantly using Rake and Noxian Diplomacy. When he unleashes Shadow Assault, his invisible burst can delete you before you can react, making your survival completely dependent on a split-second activation of Lamb's Respite.

レーン戦への影響

This matchup forces you into defensive pathing, as Talon can easily contest your Mark of the Kindred spawns by jumping walls. Fighting him over neutral camps is extremely risky; if he catches you using Wolf's Frenzy on a camp, he will jump on you. You cannot secure marks safely without tracking his location, sacrificing early pressure to avoid giving him kill momentum.

立ち回り方

To survive, never use Dance of Arrows aggressively when Talon's position is unknown. The moment he activates Shadow Assault, immediately trigger Lamb's Respite to absorb his ultimate's converging blades. As the invulnerability zone ends and his cooldowns are fully spent, apply Mounting Dread to slow him, then use the rapid attacks inside Wolf's Frenzy to execute him before his Noxian Diplomacy comes back online.

チャンピオン詳細 → Talonのビルド →
Kayn

Kayn+1

scalingcounter jungling Kayn gains a massive advantage by farming his blue orbs directly from your ranged attacks due to The Darkin Scythe. In direct duels, his ultimate Umbral Trespass completely counters your main defensive tool; he can simply infest you to bypass the entire duration of Lamb's Respite, executing you with Reaping Slash the millisecond your healing zone expires. Kaynのビルド → 詳細を見る
Kayn

理由

Kayn gains a massive advantage by farming his blue orbs directly from your ranged attacks due to The Darkin Scythe. In direct duels, his ultimate Umbral Trespass completely counters your main defensive tool; he can simply infest you to bypass the entire duration of Lamb's Respite, executing you with Reaping Slash the millisecond your healing zone expires.

レーン戦への影響

This dynamic forces you into a defensive posture in the jungle. Kayn will use Shadow Step to bypass standard wards and invade your camps, looking to trade hits just to accelerate his Shadow Assassin transformation. If he successfully transforms early, your map pressure collapses, as he can out-pace Dance of Arrows and easily burst you down before you can react with Lamb's Respite.

立ち回り方

To survive, pivot your game plan toward secure neutral objectives where Kayn's skirmishing is less effective. Never cast Lamb's Respite proactively when he has Umbral Trespass available; instead, use Mounting Dread to slow him and force his retreat before he gets in range. If he invades, pull camps away from walls to deny him easy escapes with Shadow Step, and focus on collecting Mark of the Kindred on the opposite side of the map.

チャンピオン詳細 → Kaynのビルド →
Nidalee

Nidalee+1

invademobility Nidalee dominates this jungle matchup through long-range assassination threat. Her entire clear and skirmish power relies on landing Javelin Toss from fog of war to trigger her hunt passive, enabling a devastating Pounce and Takedown execution. Because Kindred is fragile, eating a single spear means death or giving up your camps. However, your low-cooldown Dance of Arrows provides the perfect reactive tool to sidestep her projectile and nullify her entire leap-in burst. Nidaleeのビルド → 詳細を見る
Nidalee

理由

Nidalee dominates this jungle matchup through long-range assassination threat. Her entire clear and skirmish power relies on landing Javelin Toss from fog of war to trigger her hunt passive, enabling a devastating Pounce and Takedown execution. Because Kindred is fragile, eating a single spear means death or giving up your camps. However, your low-cooldown Dance of Arrows provides the perfect reactive tool to sidestep her projectile and nullify her entire leap-in burst.

レーン戦への影響

This dynamic makes securing your early Mark of the Kindred highly volatile. If Nidalee establishes vision control in your jungle, she will camp bushes to throw Javelin Toss, forcing you out of your camps and delaying your marks. If you get chunked early, you lose all scuttle priority and cannot contest her invades, which heavily impacts your lanes as she gains free reign to dive your allies while you are forced to play defensively.

立ち回り方

Never initiate a camp or a skirmish with Dance of Arrows. Keep this dash strictly as a defensive reaction. Walk forward to bait her throw, then use Dance of Arrows laterally to make her miss. Once Javelin Toss is wasted, immediately drop Wolf's Frenzy to reduce your dash cooldown, slow her with Mounting Dread, and turn the duel. If she catches you off-guard, stand your ground inside Lamb's Respite to survive her initial burst, then execute her as the zone expires.

チャンピオン詳細 → Nidaleeのビルド →
Pantheon

Pantheon+1

burstinvade Pantheon's ability to lock you down instantly with Shield Vault completely neutralizes your early mobility. Since his stun is point-and-click, you cannot dodge it using Dance of Arrows. This setups his entire burst combo, amplified by Mortal Will, before you can even retaliate with Mounting Dread. Until you unlock Lamb's Respite to survive this lethal burst, he holds a massive advantage in every direct duel. Pantheonのビルド → 詳細を見る
Pantheon

理由

Pantheon's ability to lock you down instantly with Shield Vault completely neutralizes your early mobility. Since his stun is point-and-click, you cannot dodge it using Dance of Arrows. This setups his entire burst combo, amplified by Mortal Will, before you can even retaliate with Mounting Dread. Until you unlock Lamb's Respite to survive this lethal burst, he holds a massive advantage in every direct duel.

レーン戦への影響

This threat restricts your freedom to contest Mark of the Kindred in the river or his jungle. If Pantheon finds you near his camps, Shield Vault prevents any escape, forcing you to burn Flash or die. You must concede early Scuttle Crabs if your laners lack priority, slowing down your passive scaling and leaving your lanes vulnerable to his aggressive Grand Starfall ganks.

立ち回り方

Track his movement constantly to clear camps on the opposite side of the map. When skirmishing, never initiate with Dance of Arrows; keep it to distance yourself the moment he steps forward to cast Shield Vault. If he commits and stuns you, drop Wolf's Frenzy immediately upon recovery to kite backwards. Once you have Lamb's Respite, you can bait his burst, survive inside your ultimate, and execute him with Mounting Dread as the zone expires.

チャンピオン詳細 → Pantheonのビルド →
Wukong

Wukong+1

cloneknockup Wukong dominates this jungle duel because his gap-close negates your range advantage, while his defensive tools neutralize your execute. When you apply Mounting Dread, he can deploy Warrior Trickster to let his clone absorb the third-strike burst. Worse, if you drop Lamb's Respite to survive, his Cyclone can knock you completely out of the safe zone, rendering your ultimate useless. Wukongのビルド → 詳細を見る
Wukong

理由

Wukong dominates this jungle duel because his gap-close negates your range advantage, while his defensive tools neutralize your execute. When you apply Mounting Dread, he can deploy Warrior Trickster to let his clone absorb the third-strike burst. Worse, if you drop Lamb's Respite to survive, his Cyclone can knock you completely out of the safe zone, rendering your ultimate useless.

レーン戦への影響

This matchup severely limits your freedom to contest Mark of the Kindred in the river or enemy camps. Early skirmishes turn deadly if Wukong catches you with Nimbus Strike, forcing you into defensive retreats rather than securing crab priority. You cannot comfortably contest neutral objectives because his Golden Staff armor shred, combined with clone-swapping, makes direct duels near major pits highly unfavorable.

立ち回り方

To survive, never initiate trades with Mounting Dread; instead, poke with basic attacks and use Dance of Arrows to glide backward when he initiates with Nimbus Strike. Only trigger your execute once his Warrior Trickster clone is visible on the board. When forced to deploy Lamb's Respite, stand near thick terrain or walls so his Cyclone cannot easily push you out of the boundary, allowing you to instantly hop back inside.

チャンピオン詳細 → Wukongのビルド →
Lee Sin

Lee Sin+1

displacementearly pressure The core danger in this jungle matchup revolves around how your ultimates interact. While Lamb's Respite is designed to save you from Lee Sin's lethal burst, his Dragon's Rage completely nullifies this safety. A skilled blind monk will wait for you to deploy your sanctuary, then immediately kick you out of its boundaries, leaving you vulnerable to an easy Sonic Wave follow-up execute. Lee Sinのビルド → 詳細を見る
Lee Sin

理由

The core danger in this jungle matchup revolves around how your ultimates interact. While Lamb's Respite is designed to save you from Lee Sin's lethal burst, his Dragon's Rage completely nullifies this safety. A skilled blind monk will wait for you to deploy your sanctuary, then immediately kick you out of its boundaries, leaving you vulnerable to an easy Sonic Wave follow-up execute.

レーン戦への影響

This interaction completely shifts how you contest marks in the river. You cannot safely bait low-health duels near neutral camps because Lee Sin's high mobility with Safeguard and Sonic Wave lets him choose when to engage. If you drop your healing zone during a skirmish, he instantly gains absolute control over who gets the final heal, forcing your team to abandon the zone or watch you die outside it.

立ち回り方

To survive, you must never cast Lamb's Respite preemptively while Dragon's Rage is available. Use Dance of Arrows to constantly reposition and bait his Sonic Wave before committing. When dueling inside Wolf's Frenzy, position yourself with your back against a thick jungle wall. This physical barrier prevents his ultimate from kicking you out of your healing circle, allowing you to safely trigger Mounting Dread for the counter-kill.

チャンピオン詳細 → Lee Sinのビルド →
Olaf

Olaf+1

cc immunitywall hop Olaf's ultimate, Ragnarok, grants him complete crowd control immunity, which entirely negates the slowing effect of your Mounting Dread. Without this crucial self-peel tool, Kindred cannot kite him traditionally in the open. You are forced to rely on the mobility of Dance of Arrows to leap over terrain, as Olaf's raw movement speed bonus and relentless pursuit will otherwise overwhelm you in a direct duel. Olafのビルド → 詳細を見る
Olaf

理由

Olaf's ultimate, Ragnarok, grants him complete crowd control immunity, which entirely negates the slowing effect of your Mounting Dread. Without this crucial self-peel tool, Kindred cannot kite him traditionally in the open. You are forced to rely on the mobility of Dance of Arrows to leap over terrain, as Olaf's raw movement speed bonus and relentless pursuit will otherwise overwhelm you in a direct duel.

レーン戦への影響

This interaction severely limits your ability to contest Mark of the Kindred camps or Scuttle Crabs in wide-open river corridors. Olaf can confidently invade your jungle, knowing that if he lands Undertow, you cannot fight back without immediate wall access. This pressure forces you to yield early neutral objectives, giving Olaf free reign to dictate the map tempo while you play defensively near protective terrain.

立ち回り方

When pathing through the jungle, always position yourself adjacent to thin ledges. When Olaf charges with Ragnarok active, do not waste Mounting Dread; instead, drop Wolf's Frenzy and immediately use Dance of Arrows to hop over a wall. Stay on the opposite side of the barrier to wait out his ultimate. Only engage or re-apply your slow once his crowd control immunity expires and you have successfully broken his line of sight.

チャンピオン詳細 → Olafのビルド →
Skarner

Skarner+1

suppressiondisplacement The jungle matchup hinges on how Skarner completely invalidates Kindred's ultimate survival tool. While you rely on Lamb's Respite to survive lethal damage during skirmishes, Skarner's Impale can suppress and physically drag you out of your healing circle. This leaves you completely exposed to his team's burst right as the zone ends, turning your primary defensive utility into a death trap. Skarnerのビルド → 詳細を見る
Skarner

理由

The jungle matchup hinges on how Skarner completely invalidates Kindred's ultimate survival tool. While you rely on Lamb's Respite to survive lethal damage during skirmishes, Skarner's Impale can suppress and physically drag you out of your healing circle. This leaves you completely exposed to his team's burst right as the zone ends, turning your primary defensive utility into a death trap.

レーン戦への影響

This interaction severely limits your freedom to contest Mark of the Kindred in the river or enemy jungle camps. If Skarner catches you near walls with Ixtal's Impact, you cannot simply fight back and drop Lamb's Respite safely, as he will immediately suppress you. Consequently, you must concede early crab priority and play reactively, delaying your passive scaling.

立ち回り方

To survive, never cast Lamb's Respite while Skarner still has Impale available, unless you have successfully baited it or are separated by a wall. Use Dance of Arrows constantly to kite backward and dodge his Ixtal's Impact charge. If he activates Seismic Bastion and runs at you, drop Wolf's Frenzy to maximize your mobility and keep him out of melee range. If he does lock you down, rely on your team to interrupt his drag before your ultimate expires.

チャンピオン詳細 → Skarnerのビルド →
Master Yi

Master Yi+1

untargetableslow immunity Master Yi holds a massive advantage in direct duels because Highlander completely immunizes him against the slow from Mounting Dread, preventing you from kiting him. Furthermore, a disciplined Yi will hold Alpha Strike to dodge the critical third-strike execute of your Mounting Dread, rendering your primary burst tool useless while he shreds your health bar with Wuju Style. Master Yiのビルド → 詳細を見る
Master Yi

理由

Master Yi holds a massive advantage in direct duels because Highlander completely immunizes him against the slow from Mounting Dread, preventing you from kiting him. Furthermore, a disciplined Yi will hold Alpha Strike to dodge the critical third-strike execute of your Mounting Dread, rendering your primary burst tool useless while he shreds your health bar with Wuju Style.

レーン戦への影響

This interaction shifts all skirmish power to Yi, making early contests for your Mark of the Kindred incredibly risky. You cannot safely fight him over neutral camps, as he can force you to blow Lamb's Respite defensively inside your own jungle. This constantly delays your passive marks and forces you into a defensive, low-pressure routing.

立ち回り方

To survive his pressure, never initiate combat by casting Mounting Dread. Instead, use Dance of Arrows inside Wolf's Frenzy to bait out his Alpha Strike first. Only apply Mounting Dread after he reappears from his leap. If he pops Highlander to run you down, drop Lamb's Respite early and hold Dance of Arrows to hop over a wall the moment your ultimate's healing circle expires.

チャンピオン詳細 → Master Yiのビルド →
Xin Zhao

Xin Zhao+1

ranged blockearly skirmish Xin Zhao naturally shuts down your ranged advantage the moment he unlocks Crescent Guard. While you want to kite him from a distance using Dance of Arrows inside your Wolf's Frenzy, his ultimate creates a defensive barrier that completely nullifies all your basic attacks and Mounting Dread damage from outside his circle. To hurt him, you are forced to step directly into his melee threat range, where his Three Talon Strike and Audacious Charge can easily tear you apart. Xin Zhaoのビルド → 詳細を見る
Xin Zhao

理由

Xin Zhao naturally shuts down your ranged advantage the moment he unlocks Crescent Guard. While you want to kite him from a distance using Dance of Arrows inside your Wolf's Frenzy, his ultimate creates a defensive barrier that completely nullifies all your basic attacks and Mounting Dread damage from outside his circle. To hurt him, you are forced to step directly into his melee threat range, where his Three Talon Strike and Audacious Charge can easily tear you apart.

レーン戦への影響

This dynamic makes early contesting of Mark of the Kindred in the river incredibly risky. If Xin Zhao catches you, his Wind Becomes Lightning slows and marks you, enabling an instant Audacious Charge gap-closer. You cannot comfortably win 1v1 skirmishes once he has ultimate priority, meaning you must concede early scuttle crabs or marks unless your laners rotate first, slowing down your passive scaling and forcing you into defensive pathing.

立ち回り方

To survive, never initiate trades with Dance of Arrows; save this dash exclusively to escape after he uses Audacious Charge. When he deploys Crescent Guard, do not panic-step inside his arena. Instead, drop Wolf's Frenzy and back away to waste his ultimate's duration. If forced to fight inside his circle, delay your Mounting Dread until his Three Talon Strike knock-up is on cooldown, then use Lamb's Respite at the absolute last second to bait him under your team's focus.

チャンピオン詳細 → Xin Zhaoのビルド →

スキル次第のマッチアップ

8

このマッチアップは何よりもまず実行力の勝負であり、両者ともに優位を取れる現実的な手段を持っている。重要なスキルを一つ避けられるか、エンゲージを正しく読めるか、あるいはたった一つの位置取りのミスが、勝敗を分けることもある。マッチアップを理解し、行動すべき瞬間を見極める力がとりわけ重要になる。

Ekko

Ekko±0

skirmishzone control This jungle duel revolves entirely around the interaction of your ultimate abilities. While Lamb's Respite saves lives, it creates a static zone that Ekko can easily abuse. He can place Parallel Convergence directly on top of your healing circle to stun you right as it expires, while positioning his clone to trigger Chronobreak at the exact moment of the heal, instantly deleting you with massive area-of-effect magic damage. Ekkoのビルド → 詳細を見る
Ekko

理由

This jungle duel revolves entirely around the interaction of your ultimate abilities. While Lamb's Respite saves lives, it creates a static zone that Ekko can easily abuse. He can place Parallel Convergence directly on top of your healing circle to stun you right as it expires, while positioning his clone to trigger Chronobreak at the exact moment of the heal, instantly deleting you with massive area-of-effect magic damage.

レーン戦への影響

In the jungle, this dynamic transforms every skirmish and objective contest. You cannot rely on Lamb's Respite as a safe fallback when Ekko possesses his ultimate. If you trigger your circle near a wall, Ekko will use Phase Dive to reposition his clone or escape, forcing you to delay your execution with Mounting Dread. A single miscalculated ultimate timing completely swings the neutral objective priority and map pressure.

立ち回り方

To win this mental chess match, you must track Ekko's holographic trail constantly during teamfights. Never activate Lamb's Respite if his clone is already resting inside your projected healing zone. If forced to use it, save your Dance of Arrows dash and Mounting Dread slow to immediately reposition outside the circle's center just before it vanishes, dodging the Chronobreak explosion and the Parallel Convergence stun that Ekko will inevitably attempt to layer.

チャンピオン詳細 → Ekkoのビルド →
Warwick

Warwick±0

kitingsuppression This jungle duel hinges on a delicate balance of distance and healing. Warwick relies on Eternal Hunger to outlast you in close-quarters combat, turning low-health skirmishes in his favor. To survive, you must use Dance of Arrows to constantly reposition and stay out of range of his Jaws of the Beast. If he manages to latch onto you, his healing will quickly overwhelm your damage output. Warwickのビルド → 詳細を見る
Warwick

理由

This jungle duel hinges on a delicate balance of distance and healing. Warwick relies on Eternal Hunger to outlast you in close-quarters combat, turning low-health skirmishes in his favor. To survive, you must use Dance of Arrows to constantly reposition and stay out of range of his Jaws of the Beast. If he manages to latch onto you, his healing will quickly overwhelm your damage output.

レーン戦への影響

Every skirmish around scuttle crabs or marked camps becomes a high-stakes standoff. Warwick's Blood Hunt allows him to track you across the river if you drop low, meaning any greedy clear can result in a fatal counter-jungle. If you misuse your mobility, his Primal Howl will fear you, forcing early summoner spells and giving him free reign over objective control.

立ち回り方

Never initiate a fight with Dance of Arrows; instead, deploy Wolf's Frenzy and use basic attacks to kite backwards. Only trigger your dash to break away the moment he lunges with Jaws of the Beast. Crucially, you must hold Lamb's Respite specifically to counter his Infinite Duress. If he suppresses you, press your ultimate immediately after the suppression ends, then turn the fight with Mounting Dread.

チャンピオン詳細 → Warwickのビルド →
Lillia

Lillia±0

kitingsleep mechanic This duel is a high-speed dance of spacing and kiting. Lillia relies on stacking movement speed from Blooming Blows to close the gap, but Kindred can neutralize this threat by using Dance of Arrows to dodge the outer sweet spot. However, Lillia's ultimate Lilting Lullaby can completely shut down your aggression unless you precisely time Lamb's Respite to protect yourself while asleep. Lilliaのビルド → 詳細を見る
Lillia

理由

This duel is a high-speed dance of spacing and kiting. Lillia relies on stacking movement speed from Blooming Blows to close the gap, but Kindred can neutralize this threat by using Dance of Arrows to dodge the outer sweet spot. However, Lillia's ultimate Lilting Lullaby can completely shut down your aggression unless you precisely time Lamb's Respite to protect yourself while asleep.

レーン戦への影響

Fighting over Mark of the Kindred in the river becomes highly unpredictable. If Lillia lands Swirlseed from fog of war, she can instantly trigger Lilting Lullaby to setup a deadly collapse. In tight jungle corridors, your safety depends entirely on dodging her epicenter of Watch Out! Eep!. Missing your spacing here means giving up camp control, losing crucial marks, and letting Lillia freely out-tempo your team.

立ち回り方

Save Dance of Arrows for the exact moment Lillia winds up her Blooming Blows to dash out of its outer edge. When she applies Dream-Laden Bough and triggers Lilting Lullaby, watch your drowsiness indicator closely. You must deploy Lamb's Respite right before the sleep activates. This ensures you sleep safely inside your ultimate's protective ring, allowing you to survive her burst and retaliate with Mounting Dread once you wake up.

チャンピオン詳細 → Lilliaのビルド →
Maokai

Maokai±0

tankpeel The balance of this jungle matchup hinges on how Maokai uses Twisted Advance against your mobility. As a marksman, you rely on Dance of Arrows to kite and maintain distance. However, Maokai's point-and-click root completely bypasses your dash, locking you in place. Once rooted, he can easily follow up with Bramble Smash to push you into his allies, rendering Lamb's Respite your only desperate survival tool. Maokaiのビルド → 詳細を見る
Maokai

理由

The balance of this jungle matchup hinges on how Maokai uses Twisted Advance against your mobility. As a marksman, you rely on Dance of Arrows to kite and maintain distance. However, Maokai's point-and-click root completely bypasses your dash, locking you in place. Once rooted, he can easily follow up with Bramble Smash to push you into his allies, rendering Lamb's Respite your only desperate survival tool.

レーン戦への影響

Around neutral objectives and jungle camps, Maokai uses Sapling Toss to scout brushes, preventing you from securing your Mark of the Kindred safely. In skirmishes, his Twisted Advance turns any facecheck into an immediate death sentence. If he catches you before you can cast Lamb's Respite, his team will burst you down, instantly swinging map control and neutral priority in his team's favor.

立ち回り方

Never lead the charge into un-warded jungle corridors where Nature's Grasp can trap you. During teamfights, stay behind your frontline and wait for Maokai to commit Twisted Advance to someone else before using Dance of Arrows forward. If he holds his root specifically for you, focus on hitting his frontline with Mounting Dread to trigger the slow, and prepare to deploy Lamb's Respite the exact moment he dives to neutralize his team's burst.

チャンピオン詳細 → Maokaiのビルド →
Mordekaiser

Mordekaiser±0

isolationkiting This matchup is defined by your movement inside Mordekaiser's ultimate. When he traps you in Realm of Death, you are cut off from help, but Dance of Arrows gives you the mobility to constantly dodge Obliterate and Death's Grasp. If he closes the gap and ignites Darkness Rise, Lamb's Respite serves as your ultimate survival tool, neutralizing his burst within his own arena. Mordekaiserのビルド → 詳細を見る
Mordekaiser

理由

This matchup is defined by your movement inside Mordekaiser's ultimate. When he traps you in Realm of Death, you are cut off from help, but Dance of Arrows gives you the mobility to constantly dodge Obliterate and Death's Grasp. If he closes the gap and ignites Darkness Rise, Lamb's Respite serves as your ultimate survival tool, neutralizing his burst within his own arena.

レーン戦への影響

Contesting Mark of the Kindred in the river becomes highly volatile once both junglers reach level five. Mordekaiser can easily secure neutral camps by threatening to drag you into his Realm of Death. You cannot easily invade his camps because Indestructible makes him exceptionally tanky. Skirmishes revolve entirely around whether he isolates you before you can deploy Lamb's Respite for your allies.

立ち回り方

When Mordekaiser initiates with Death's Grasp, do not panic-dash immediately. Save Dance of Arrows to dodge his Obliterate right after he pulls you. Inside his Realm of Death, immediately drop Wolf's Frenzy to maximize your dash uptime. Apply Mounting Dread to slow his advance and keep him at maximum range. If your health drops dangerously low, delay casting Lamb's Respite until the final seconds of his ultimate, ensuring you exit the realm with your safety zone active.

チャンピオン詳細 → Mordekaiserのビルド →

その他のマッチアップ

有利なマッチアップ

20

これらのチャンピオンは、こちらの主要な強みに効果的に対応するのが難しく、より自由に対面を組み立てることができる。プレッシャーをかけて有利な交換を引き出す手段は複数あることが多い。相手が態勢を立て直す時間を与えるのではなく、この優位を活かして主導権を握ろう。

Amumu

Amumu−1

kitinganti burst Kindred dominates this matchup because Lamb's Respite completely nullifies Amumu's primary tool: his massive area-of-effect crowd control burst. When Amumu commits with Bandage Toss and unleashes Curse of the Sad Mummy, your zone prevents your allies from dying to his subsequent magic damage. Furthermore, your superior range and constant repositioning with Dance of Arrows allow you to easily kite his sluggish, melee-range Despair and Tantrum. Amumuのビルド → 詳細を見る
Amumu

理由

Kindred dominates this matchup because Lamb's Respite completely nullifies Amumu's primary tool: his massive area-of-effect crowd control burst. When Amumu commits with Bandage Toss and unleashes Curse of the Sad Mummy, your zone prevents your allies from dying to his subsequent magic damage. Furthermore, your superior range and constant repositioning with Dance of Arrows allow you to easily kite his sluggish, melee-range Despair and Tantrum.

レーン戦への影響

In the jungle, this interaction strips Amumu of his teamfight threat during early skirmishes and objective contests. You can aggressively invade his camps to secure Mark of the Kindred because he cannot duel you alone; his Tantrum passive is useless against your ranged basic attacks. This pressure forces him to play defensively, lagging behind in gold, while you secure early Rift Heralds and Drakes by threatening to turn any of his engages into wasted cooldowns.

立ち回り方

Never waste Lamb's Respite early; hold it specifically for when Amumu initiates with Curse of the Sad Mummy. Use Dance of Arrows horizontally to dodge his incoming Bandage Toss rather than using it forward. Once his crowd control is spent and your ultimate ends, immediately apply Mounting Dread to slow him down and execute him as he tries to retreat. If he catches you off-guard without your ultimate, use Wolf's Frenzy to constantly reset your dash and stay outside his Despair radius.

チャンピオン詳細 → Amumuのビルド →
Hecarim

Hecarim−1

kitingultimate interaction This matchup swings heavily in your favor because Hecarim relies entirely on the momentum of Devastating Charge and Onslaught of Shadows to burst targets down. By casting Lamb's Respite the moment he commits his ultimate, you completely neutralize his deadly dive. Once his initial speed burst fades inside your invulnerability zone, you can easily reposition and kite his low-range Rampage using Dance of Arrows. Hecarimのビルド → 詳細を見る
Hecarim

理由

This matchup swings heavily in your favor because Hecarim relies entirely on the momentum of Devastating Charge and Onslaught of Shadows to burst targets down. By casting Lamb's Respite the moment he commits his ultimate, you completely neutralize his deadly dive. Once his initial speed burst fades inside your invulnerability zone, you can easily reposition and kite his low-range Rampage using Dance of Arrows.

レーン戦への影響

In the jungle, this interaction gives you absolute control over neutral objectives and Mark of the Kindred spawns. Hecarim cannot safely contest Epic Monsters because your ultimate denies his smite-steal burst potential. If he attempts to invade or rush a Drake, you can force a prolonged skirmish where his Spirit of Dread healing cannot save him from your Mounting Dread execute once your ultimate expires.

立ち回り方

Always hold Lamb's Respite specifically for his Onslaught of Shadows engage; never waste it early. When you see him charging with Devastating Charge, drop Wolf's Frenzy immediately to maximize your mobility. Use Dance of Arrows to dash over terrain or away from his path, then apply Mounting Dread to him while inside your ultimate. Delay your third hit perfectly so the execution damage triggers the exact millisecond Lamb's Respite ends, leaving him zero room to recover.

チャンピオン詳細 → Hecarimのビルド →
Ambessa

Ambessa−1

kitingexecute denial Kindred dominates this duel because Lamb's Respite completely neutralizes Ambessa's primary execution tool, Public Execution. Since Ambessa relies on killing low-health targets to reset her basic abilities and regain energy, the invulnerability zone leaves her stranded with empty resources. Additionally, Kindred can easily space away from Drakehound's Step dashes, keeping Ambessa at a distance where her Cunning Sweep cannot land its outer-edge sweet spot. Ambessaのビルド → 詳細を見る
Ambessa

理由

Kindred dominates this duel because Lamb's Respite completely neutralizes Ambessa's primary execution tool, Public Execution. Since Ambessa relies on killing low-health targets to reset her basic abilities and regain energy, the invulnerability zone leaves her stranded with empty resources. Additionally, Kindred can easily space away from Drakehound's Step dashes, keeping Ambessa at a distance where her Cunning Sweep cannot land its outer-edge sweet spot.

レーン戦への影響

This dynamic secures Kindred's freedom to invade and mark camps across the river. Ambessa cannot safely contest Mark of the Kindred because she cannot burst you down before you trigger your ultimate. Skirmishes around neutral objectives become highly favored for your team; Ambessa is forced to delay her ultimate, which severely reduces her teamfight threat and prevents her from getting the resets she needs to sweep through your backline.

立ち回り方

To execute this plan, never deploy Lamb's Respite early in a skirmish. Wait for Ambessa to commit her Drakehound's Step dashes to close the distance, then place Wolf's Frenzy to spam Dance of Arrows backward, keeping yourself outside her Lacerate range. Once she channels Public Execution, activate your ultimate. As the zone ends, trigger the third strike of Mounting Dread to burst her down instantly while she is starved of energy.

チャンピオン詳細 → Ambessaのビルド →
Graves

Graves−1

marksman duelscaling Kindred dictates this duel because New Destiny forces Graves to get close to deal full damage, allowing you to abuse your range advantage. By kiting his shots with Dance of Arrows and slowing him with Mounting Dread, you easily control the spacing. However, the fight hinges on Lamb's Respite: Graves can time Collateral Damage perfectly to burst you down or force you out of the zone right before the healing triggers. Gravesのビルド → 詳細を見る
Graves

理由

Kindred dictates this duel because New Destiny forces Graves to get close to deal full damage, allowing you to abuse your range advantage. By kiting his shots with Dance of Arrows and slowing him with Mounting Dread, you easily control the spacing. However, the fight hinges on Lamb's Respite: Graves can time Collateral Damage perfectly to burst you down or force you out of the zone right before the healing triggers.

レーン戦への影響

Your range advantage translates directly into superb neutral objective control, as Graves cannot easily contest Scuttle Crabs or Epic Monsters without taking heavy poke. If he attempts to invade, Wolf's Frenzy secures your territory, forcing him to waste Quickdraw defensively. The jungle matchup is decided during these early skirmishes, where your ability to stack passive marks safely from a distance starves Graves of his defensive scaling, giving your laners total freedom.

立ち回り方

To secure your advantage, never stand near the edge of Lamb's Respite when low on health. Always hold Dance of Arrows until the very end of your ultimate's duration; this allows you to quickly reposition or dodge Collateral Damage if Graves attempts to blast you out of the healing circle. Furthermore, delay casting Mounting Dread until Graves uses Quickdraw, ensuring the slow and third-strike execute land after his mobility is depleted.

チャンピオン詳細 → Gravesのビルド →
Tryndamere

Tryndamere−1

kitinginvincibility This matchup favors you because Tryndamere relies entirely on closing the gap with Spinning Slash to land critical strikes. By casting Dance of Arrows, you easily jump away from his dash, maintaining your range advantage. When he activates Undying Rage to survive fatal damage, you can immediately counter with Lamb's Respite. This completely wastes his five seconds of invincibility, leaving him extremely vulnerable once both zones expire. Tryndamereのビルド → 詳細を見る
Tryndamere

理由

This matchup favors you because Tryndamere relies entirely on closing the gap with Spinning Slash to land critical strikes. By casting Dance of Arrows, you easily jump away from his dash, maintaining your range advantage. When he activates Undying Rage to survive fatal damage, you can immediately counter with Lamb's Respite. This completely wastes his five seconds of invincibility, leaving him extremely vulnerable once both zones expire.

レーン戦への影響

In the jungle, this interaction prevents Tryndamere from contesting your marks or invading your camps. Because he cannot safely dive you under towers with Undying Rage, his early pressure is heavily mitigated. You can aggressively secure scuttle crabs and neutral objectives, knowing that if he attempts to steal them, your Mounting Dread slow will ruin his escape, forcing his Spinning Slash defensively rather than offensively.

立ち回り方

To execute this perfectly, never use Lamb's Respite before Tryndamere presses Undying Rage; wait for his health bar to hit zero and trigger his ultimate first. Keep your face turned toward him when he casts Mocking Shout to avoid the slow, then immediately use Dance of Arrows inside your Wolf's Frenzy to kite his Spinning Slash. If he manages to spin onto you, trigger Mounting Dread to keep him at bay until his rage expires.

チャンピオン詳細 → Tryndamereのビルド →
Jarvan IV

Jarvan IV−1

marksmankiting Jarvan IV relies heavily on locking you down with his Demacian Standard and Dragon Strike combo before executing with Cataclysm. Kindred completely neutralizes this high-impact burst. When Jarvan IV traps you or your allies inside his arena, you can simply cast Lamb's Respite directly inside Cataclysm. This completely negates his burst potential, turning his own terrain against him as he remains stuck alongside invulnerable targets. Jarvan IVのビルド → 詳細を見る
Jarvan IV

理由

Jarvan IV relies heavily on locking you down with his Demacian Standard and Dragon Strike combo before executing with Cataclysm. Kindred completely neutralizes this high-impact burst. When Jarvan IV traps you or your allies inside his arena, you can simply cast Lamb's Respite directly inside Cataclysm. This completely negates his burst potential, turning his own terrain against him as he remains stuck alongside invulnerable targets.

レーン戦への影響

This matchup dynamic changes how you contest marks. Since Jarvan IV cannot burst you, his aggressive invades and early pressure are severely neutralized. You can confidently defend your camps and secure Mark of the Kindred in the river. If he tries to force a fight at your camps, his Demacian Standard engage leaves him committed, allowing you to turn the fight once his initial cooldowns are spent.

立ち回り方

When navigating skirmishes, never panic-cast Lamb's Respite early. Hold it specifically for the moment Jarvan IV commits with Cataclysm. Once inside his arena, lay down Wolf's Frenzy and use the low cooldown of Dance of Arrows to maneuver around his spear thrusts. As the ultimate's healing phase ends, apply Mounting Dread to him to guarantee a slow and a heavy execute trade just as his arena wall collapses.

チャンピオン詳細 → Jarvan IVのビルド →
Viego

Viego−1

skirmishreset champ Viego relies entirely on securing a quick takedown to trigger Sovereign's Domination, healing and chaining his possessions. Kindred completely neutralizes this win condition with Lamb's Respite. By placing the zone over Viego's low-health focus target, you prevent the kill, halting his passive reset loop and leaving him vulnerable in melee range with no escape tools or cooldown refreshes once his initial burst is spent. Viegoのビルド → 詳細を見る
Viego

理由

Viego relies entirely on securing a quick takedown to trigger Sovereign's Domination, healing and chaining his possessions. Kindred completely neutralizes this win condition with Lamb's Respite. By placing the zone over Viego's low-health focus target, you prevent the kill, halting his passive reset loop and leaving him vulnerable in melee range with no escape tools or cooldown refreshes once his initial burst is spent.

レーン戦への影響

This dynamic shifts the power during early scuttle crab skirmishes and major neutral objective fights. Viego cannot safely dive your backline or commit to a high-risk execute with Heartbreaker if your ultimate is ready. Since he cannot easily force you out of your jungle, you can aggressively contest your Mark of the Kindred camps, knowing that any skirmish he attempts to force will stall out in your favor.

立ち回り方

Do not panic-cast Lamb's Respite when Viego jumps in with Spectral Maw. Instead, track his focus target and wait until they are below the death threshold before deploying it. Once your ultimate is active, use Dance of Arrows to kite inside the circle while placing Wolf's Frenzy to chip him down. Prepare Mounting Dread on him, but delay the third hit until the ultimate ends to execute him the moment the invulnerability expires.

チャンピオン詳細 → Viegoのビルド →
Nunu & Willump

Nunu & Willump−1

kitingobjective secure Kindred dominates this matchup because Dance of Arrows completely neutralizes Nunu's primary ganking tool, Biggest Snowball Ever!, by allowing you to easily hop aside. While you can kite him relentlessly inside Wolf's Frenzy, the dynamic shifts dramatically around neutral monsters. Nunu’s instant execution combo of Consume paired with Smite out-bursts your raw damage, meaning you cannot easily contest raw secure thresholds against him. Nunu & Willumpのビルド → 詳細を見る
Nunu & Willump

理由

Kindred dominates this matchup because Dance of Arrows completely neutralizes Nunu's primary ganking tool, Biggest Snowball Ever!, by allowing you to easily hop aside. While you can kite him relentlessly inside Wolf's Frenzy, the dynamic shifts dramatically around neutral monsters. Nunu’s instant execution combo of Consume paired with Smite out-bursts your raw damage, meaning you cannot easily contest raw secure thresholds against him.

レーン戦への影響

In the jungle, Nunu's gank pressure is heavily mitigated since you can intercept his rotations or dodge his engage. However, this matchup turns into a tense race for neutral objectives. You cannot afford to let Nunu start Epic Monsters undetected, as his Consume guarantees the objective. You must use your early skirmishing power to invade his camps, forcing him low so he cannot safely contest.

立ち回り方

Never coin-flip a Baron or Dragon against Nunu. Instead of hitting the monster, focus your damage on Nunu himself. Apply the slow from Mounting Dread to keep him at bay, and save Dance of Arrows specifically to hop out of his Absolute Zero channel or dodge his incoming Biggest Snowball Ever!. If he tries to rush an objective, force him out of the pit or kill him before the monster drops below his secure threshold.

チャンピオン詳細 → Nunu & Willumpのビルド →
Volibear

Volibear−1

kitingjungle clear Kindred dominates this jungle duel because Volibear relies entirely on running directly at targets to start his skirmishes. Whenever the bear activates Thundering Smash to sprint forward and stun, you can immediately deploy Wolf's Frenzy to reduce the cooldown of your Dance of Arrows. This allows you to hop backward effortlessly, rendering his engage useless while you shred him from maximum range. Volibearのビルド → 詳細を見る
Volibear

理由

Kindred dominates this jungle duel because Volibear relies entirely on running directly at targets to start his skirmishes. Whenever the bear activates Thundering Smash to sprint forward and stun, you can immediately deploy Wolf's Frenzy to reduce the cooldown of your Dance of Arrows. This allows you to hop backward effortlessly, rendering his engage useless while you shred him from maximum range.

レーン戦への影響

This kiting superiority shapes the entire map dynamic. Volibear cannot contest you at Scuttle Crabs or secure his own camps if you decide to invade, as his Frenzied Maul healing requires him to stay in melee range. Your early pressure forces him to rely on Sky Splitter to farm safely, preventing him from building his passive stacks of The Relentless Storm to match your clear speed.

立ち回り方

To execute this flawlessly, never use Dance of Arrows offensively until Volibear commits his sprint. Keep your distance, land basic attacks to bait his Thundering Smash, and only then drop Wolf's Frenzy to leap away. If he attempts to escape or turn the tide with Stormbringer, apply the heavy slow from Mounting Dread on his landing spot. Save Lamb's Respite solely to counter his high-damage execution dive when fighting under your own turrets.

チャンピオン詳細 → Volibearのビルド →
Darius

Darius−2

kitingexecute denial Darius relies entirely on pulling you in with Apprehend to stack Hemorrhage and execute you. However, Kindred completely neutralizes this threat. Dance of Arrows allows you to constantly jump backward or sideways, staying outside his Decimate sweet spot while chipping his health down. If he ever manages to reach five stacks and casts Noxian Guillotine, Lamb's Respite instantly denies his entire ultimate reset and survival tool. Dariusのビルド → 詳細を見る
Darius

理由

Darius relies entirely on pulling you in with Apprehend to stack Hemorrhage and execute you. However, Kindred completely neutralizes this threat. Dance of Arrows allows you to constantly jump backward or sideways, staying outside his Decimate sweet spot while chipping his health down. If he ever manages to reach five stacks and casts Noxian Guillotine, Lamb's Respite instantly denies his entire ultimate reset and survival tool.

レーン戦への影響

In the jungle, this matchup translates into total map control for you. Darius cannot contest your Mark of the Kindred in his camps because entering Wolf's Frenzy allows you to shred him safely. If he tries to clear his camps, your ability to jump walls with Dance of Arrows lets you steal his monsters and escape if he tries to walk up. He is forced to play defensively, losing pressure.

立ち回り方

Never initiate a fight by dashing forward. Keep Dance of Arrows ready to reactively dodge his Apprehend pull or slide away from the outer edge of Decimate. Apply the slow from Mounting Dread only when he tries to retreat or desperately run at you. If an skirmish turns bloody, delay casting Lamb's Respite until the very last second, baiting him into wasting Noxian Guillotine inside your invulnerability circle so you can finish him off immediately after.

チャンピオン詳細 → Dariusのビルド →
Aatrox

Aatrox−2

kitinganti burst This matchup is highly advantageous because Aatrox relies entirely on landing slow, predictable skillshots to close the gap. When he attempts to lock you down using Infernal Chains, you can instantly react by casting Dance of Arrows to dash laterally out of the pull zone. This completely negates his setup, leaving him vulnerable to your ranged basic attacks while his primary crowd control is on cooldown. Aatroxのビルド → 詳細を見る
Aatrox

理由

This matchup is highly advantageous because Aatrox relies entirely on landing slow, predictable skillshots to close the gap. When he attempts to lock you down using Infernal Chains, you can instantly react by casting Dance of Arrows to dash laterally out of the pull zone. This completely negates his setup, leaving him vulnerable to your ranged basic attacks while his primary crowd control is on cooldown.

レーン戦への影響

In the jungle, this interaction allows you to aggressively contest Mark of the Kindred in his territory without fear. If Aatrox tries to defend his camps, you can easily bait out The Darkin Blade and punish his slow animations. He will constantly find himself low on health, forced to choose between yielding his jungle camps or risking a fatal skirmish where he cannot heal via Deathbringer Stance.

立ち回り方

To execute this perfectly, never initiate a fight by using Dance of Arrows aggressively. Always walk up, drop Wolf's Frenzy to reduce your cooldowns, and use basic attacks first. Once Aatrox fires Infernal Chains, immediately dash sideways to escape the pull, then apply Mounting Dread to slow his retreat. If he activates World Ender to close the distance, kiting backwards while utilizing your range advantage will prevent him from ever landing a sweetspot.

チャンピオン詳細 → Aatroxのビルド →
Evelynn

Evelynn−2

invulnerabilitymarksman Evelynn relies entirely on stealth from Demon Shade to close the distance and execute targets with her massive Last Caress burst. However, Kindred's Lamb's Respite completely neutralizes this assassination threat. By timing your ultimate to catch her execution threshold, you nullify her primary tool, leaving her vulnerable and exposed without her main escape since she is forced to blink back. Evelynnのビルド → 詳細を見る
Evelynn

理由

Evelynn relies entirely on stealth from Demon Shade to close the distance and execute targets with her massive Last Caress burst. However, Kindred's Lamb's Respite completely neutralizes this assassination threat. By timing your ultimate to catch her execution threshold, you nullify her primary tool, leaving her vulnerable and exposed without her main escape since she is forced to blink back.

レーン戦への影響

Knowing you can survive her burst changes the rhythm of jungle skirmishes. Evelynn cannot contest you at neutral camps or pressure your Marks because she cannot threaten a quick kill. Once you both reach level five, her map pressure is heavily stifled. You can invade her camps aggressively, knowing that even if she lands Allure, your ultimate guarantees you survive the initial ambush and win the extended duel.

立ち回り方

When Evelynn marks you with Allure, do not panic-dash away. Instead, hold Dance of Arrows to reposition only when she attempts to trigger the charm. Force her to commit her Whiplash and Hate Spike, keeping your health low enough to bait her Last Caress. The exact moment she casts her ultimate, activate Lamb's Respite. Once her execute fails and she blinks away, use Mounting Dread to slow her down and finish her off.

チャンピオン詳細 → Evelynnのビルド →
Dr. Mundo

Dr. Mundo−2

kitinganti execute This matchup heavily favors you because Dr. Mundo relies on whittling you down with Infected Bonesaw before executing you with Blunt Force Trauma. By deploying Lamb's Respite during skirmishes, you completely nullify his high-damage low-HP scaling, rendering his Maximum Dosage healing useless as he cannot secure the kill while you wait out his ultimate inside your invulnerability zone. Dr. Mundoのビルド → 詳細を見る
Dr. Mundo

理由

This matchup heavily favors you because Dr. Mundo relies on whittling you down with Infected Bonesaw before executing you with Blunt Force Trauma. By deploying Lamb's Respite during skirmishes, you completely nullify his high-damage low-HP scaling, rendering his Maximum Dosage healing useless as he cannot secure the kill while you wait out his ultimate inside your invulnerability zone.

レーン戦への影響

Throughout the jungle phase, you dictate the pace of skirmishes because Dr. Mundo lacks hard crowd control to lock you down, making his passive Goes Where He Pleases virtually useless against you. You can aggressively contest marks in his jungle, using the safety of your range to safely chip away his health pool while keeping him away from neutral objectives.

立ち回り方

Always maintain your spacing by constantly dashing with Dance of Arrows inside your Wolf's Frenzy zone, preventing him from landing Infected Bonesaw. Never panic when he activates Maximum Dosage; instead, wait for him to commit his Blunt Force Trauma before dropping Lamb's Respite. Once his ultimate's offensive window expires, trigger the third strike of Mounting Dread to execute him as your invulnerability ends.

チャンピオン詳細 → Dr. Mundoのビルド →
Fiddlesticks

Fiddlesticks−2

hard counterultimate interaction This jungle matchup heavily favors you due to how your ultimate abilities interact. When Fiddlesticks channels Crowstorm from fog of war to ambush your team, your Lamb's Respite completely negates his massive area-of-effect magic burst. Fiddlesticks relies on this single high-damage moment to swing skirmishes, but your ability to deny those kills on reaction strips away his primary threat, leaving him vulnerable once his ultimate ends. Fiddlesticksのビルド → 詳細を見る
Fiddlesticks

理由

This jungle matchup heavily favors you due to how your ultimate abilities interact. When Fiddlesticks channels Crowstorm from fog of war to ambush your team, your Lamb's Respite completely negates his massive area-of-effect magic burst. Fiddlesticks relies on this single high-damage moment to swing skirmishes, but your ability to deny those kills on reaction strips away his primary threat, leaving him vulnerable once his ultimate ends.

レーン戦への影響

In the jungle, this completely shifts how skirmishes around objectives play out. Fiddlesticks wants to clear camps and set up blind-spot ambushes using A Harmless Scarecrow. Knowing you hold Lamb's Respite prevents him from executing clean team wipes. If he tries to sustain through duels with Bountiful Harvest, you can easily kite out of his range with Dance of Arrows while stacking Mounting Dread for an execution.

立ち回り方

To succeed, always keep track of walls where Fiddlesticks might hide to channel Crowstorm. Never cast Lamb's Respite prematurely; wait for his ultimate's crows to hit your allies to completely absorb his burst window. If he targets you with Terrify or silences you with Reap, use Dance of Arrows inside Wolf's Frenzy to reposition quickly, allowing your team to turn the fight once his main damage tool is wasted.

チャンピオン詳細 → Fiddlesticksのビルド →
Shyvana

Shyvana−2

kitingcounter jungle Shyvana's complete lack of pre-6 crowd control makes her incredibly vulnerable to Kindred's mobility. While she relies on Burnout to close the distance and Flame Breath to mark you, you can easily keep her at bay. Activating Wolf's Frenzy grants you the low cooldown on Dance of Arrows, allowing you to effortlessly hop away and kite her melee-heavy kit into oblivion. Shyvanaのビルド → 詳細を見る
Shyvana

理由

Shyvana's complete lack of pre-6 crowd control makes her incredibly vulnerable to Kindred's mobility. While she relies on Burnout to close the distance and Flame Breath to mark you, you can easily keep her at bay. Activating Wolf's Frenzy grants you the low cooldown on Dance of Arrows, allowing you to effortlessly hop away and kite her melee-heavy kit into oblivion.

レーン戦への影響

This dynamic completely shifts the jungle pressure in your favor during the early levels. Since Shyvana cannot lock you down, you can aggressively invade her camps to secure early stacks of Mark of the Kindred. She is forced to play defensively or cede her camps, delaying her ability to stack Fury of the Dragonborn and charge Dragon's Descent, which starves her of her late-game scaling potential.

立ち回り方

Track her starting buff and plan an aggressive level 2 or 3 invade directly into her jungle. When you encounter her, drop Wolf's Frenzy immediately to maximize your mobility. Save Dance of Arrows to dodge her Flame Breath projectile; if she misses that mark, she loses her main damage source. Use Mounting Dread to slow her when she tries to retreat with Burnout, securing easy marks and keeping her permanently behind.

チャンピオン詳細 → Shyvanaのビルド →

その他のマッチアップ

Kindred対策アイテム

これらのアイテムを購入すると、このチャンピオンの影響力を抑えられます。

Randuin's Omen
Randuin's Omen
Frozen Heart
Frozen Heart
Thornmail
Thornmail
Plated Steelcaps
Plated Steelcaps
Stasis Enchant
Stasis Enchant

このチャンピオンへの対策

カウンターアングル

Kindredを倒すことだけが対策ではありません。本当の目的は、彼女のリズムを崩すことです。簡単なマークを阻止し、優先度が低い状況でjungleに追い込ませ、Q/Wでのカイトを防ぎ、Lamb's Respiteの使用を困難にしましょう。Kindredは、戦闘場所を選び、Wを地面に置き、Eを準備し、アルティメット後も離脱手段がある場合に危険になります。したがって、最善の対策は、その自由を奪うことです。ターゲットされたエンゲージ、侵略によるプレッシャー、アルティメット終了時のバースト、またはマークの閾値に達する前にリバーでの小競り合いに勝つ能力がそれにあたります。彼女がクリーンに4マークに到達し、視界を確保してオブジェクトをプレイすることを許せば、彼女が望むゲーム展開を与えてしまうことになります。

パッチの文脈

Kindredは、テンポを早めるジャングラーか、レンジでのプレイを妨げるジャングラーに対して主に苦戦します。中立的なデュエルでは、彼女はカイトし、Lamb's Respiteで時間を稼ぎ、Eで反撃できるため、常に勝てるとは限りません。しかし、敵がレーン優先度、確実なコントロール、または彼女にQを防御的に使わせるプレッシャーを持って現れた場合、彼女のDPSは急激に低下します。最善の対応は、彼女のマークをトラップとして扱うことです。キャンプの周りに視界を張り、素早くローテーションし、彼女がスケーリングの優位性を確保していると思っている時に罰しましょう。

クイックリード

  • レーン優先度で最初のマークを競いましょう。Kindredは、4/7マークの閾値が遅れると、はるかに脅威ではなくなります。
  • Lamb's Respiteが終わるまで重要なクールダウンを温存しましょう。多くのKindredプレイヤーは、フリーのQがなくなった直後に死にます。
  • 彼女をサイドアングルなしでプレイさせましょう。Kindredが正面からダメージを与えなければならない場合、カイトの価値は大きく失われます。

カウンターの原型

ターゲットされたエンゲージと直接的なロックダウン

Kindredは戦闘距離を選びたいのです。Wを地面に置き、Qで位置を変え、Eで処刑を脅かします。ターゲットされたエンゲージチャンピオンは、彼女にカイトを求めるだけでなく、特定のインパクトポイントでの生存を強いるため、その計画を破ります。KindredがQを逃げるためだけに使う必要がある場合、もはやDPSを維持できません。そして、Lamb's Respiteが早すぎる場合、敵はゾーンが終わるのを待ってから再びコントロールを適用するか、バーストを完了できます。

チャンピオンの適応方法. Kindredは、戦闘入口から遠く離れてプレイし、実際のエンゲージのためにフラッシュまたはQを温存し、敵に既にコントロールされているエリアの中央にLamb's Respiteを置くのを避ける必要があります。また、オブジェクト前に視界を確保しないと、最初のインパクトを受けることになります。

彼女のマークよりも前にテンポを加速させるデュエリストと侵略者

Kindredは、カイトする余地があれば多くのデュエルに勝てますが、最初の本当の閾値よりも前にペースを設定するジャングラーを嫌います。速い侵略者は彼女のキャンプを競い、防御的なパスを強要し、すべてのマークをリスクのある戦いに変えることができます。このカウンタータイプは、彼女の計画の基盤を攻撃するため強力です。Kindredは、小競り合いを選びたいのであり、既にjungleに確立されたプレッシャーに遅れて対応したくはないのです。

チャンピオンの適応方法. Kindredは、より規律あるパスを受け入れ、強力なレーンを通してプレイし、危険なマークを反対側のキャンプまたはオブジェクトと交換する必要があります。目標はすべてのデュエルに勝つことではなく、敵が序盤をテンポの急落に変えるのを防ぐことです。

アルティメット終了後のアサシンとバースト

Lamb's Respiteは即死を防ぎますが、終了後の危険をなくすわけではありません。アサシンとバーストの脅威は、Kindredにアルティメットを防御的に使わせ、ゾーンの終了を待ち、彼女がカイトを再開する必要がある時に攻撃できます。このプロファイルは、Kindredが視界を失っている場合、特に危険です。なぜなら、Wを配置し、Eのターゲットを選び、正しい方向のためにQを節約するために必要な情報が失われるからです。

チャンピオンの適応方法. Kindredは、視界への投資を増やし、ピールできる味方の近くでプレイし、オブジェクト前の暗いエリアを避ける必要があります。彼女のアルティメットは、離脱計画を持って配置する必要があります。そうでなければ、アサシンは適切なタイミングを待つだけで済みます。

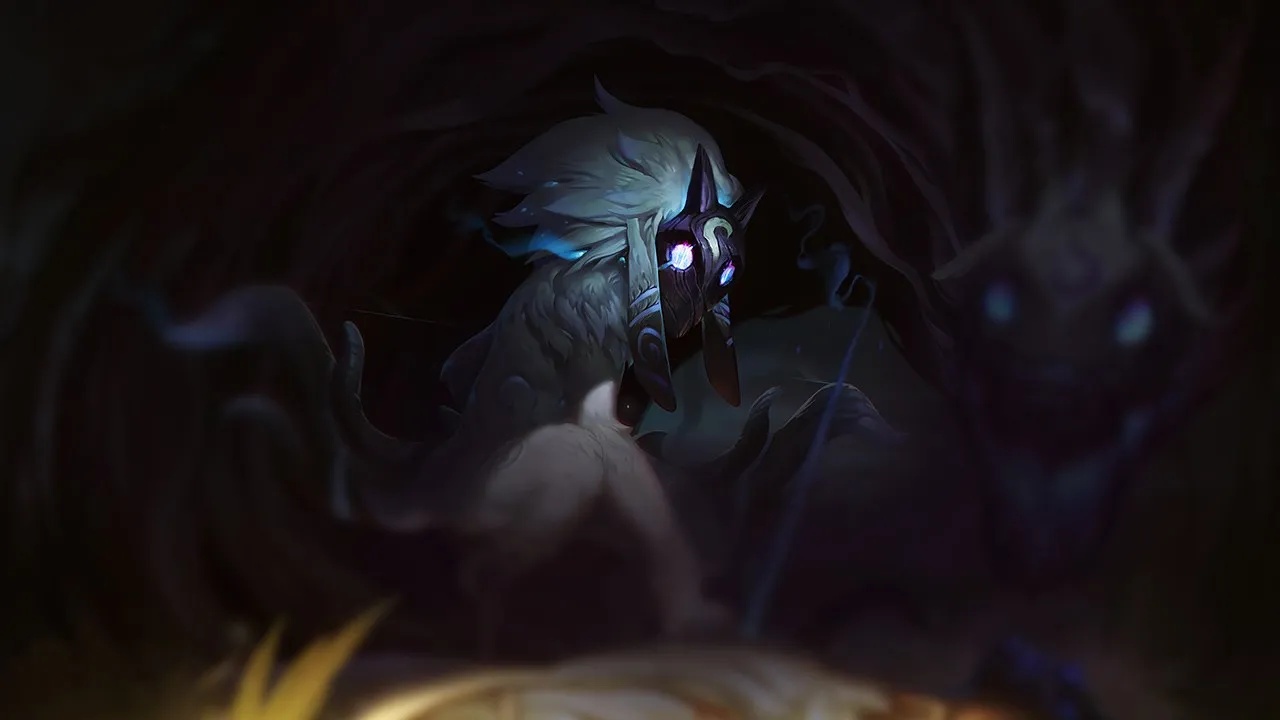
優先度の高いマッチアップ

Vi

Viは、Kindredの弱点を理解する上で最も重要なマッチアップの1つです。なぜなら、彼女はリポジショニングの自由を大幅に制限するからです。Kindredは多くのジャングラーをカイトできますが、ターゲットされたエンゲージを無視することはできません。ViがLamb's Respiteを早すぎると強制した場合、Kindredはゾーンが終了しても生き残る必要があり、しばしば攻撃的なQが利用できない状態になります。Kindredの計画は、オブジェクト前に視界をプレイし、最初のターゲットとして表示されるのを避け、ViがKindredのチームによって既にコントロールされている空間にエンゲージしなければならないように十分な距離を保つことです。

Lee Sin

Lee Sinは、単純なデュエルよりもテンポでKindredを脅かします。彼はスカトルに早く到着し、マークの閾値前に戦闘を強制し、過度に明白な侵入を罰することができます。Kindredにとって、このマッチアップはエゴデュエルを拒否する必要があります。優先度なしで競われたマークは勇気ではなく、通常はマップのミスです。彼女は移動できるレーンの周りでプレイし、クロスマップトレードを受け入れ、最初の本当のスパイクを待ってカイトを持続的な優位性に変える必要があります。

対面時のよくある間違い

対面時のよくある間違い

  • W内でQがまだ利用可能な状態で彼女と単独で戦うこと。これは、彼女が望むタイプのデュエルを彼女に与えることになります。
  • Lamb's Respiteを、それが終わった後の計画なしに競うこと。ゾーン内でクールダウンがすべて費やされた場合、Kindredは生き残り、その後Eでフィニッシュできます。
  • 彼女の最初のマークを無視し、無料で閾値に到達させること。そして、彼女のレンジがオブジェクトファイトを変えることに気づくのが遅すぎること。
  • 川に一人ずつ入ること。Kindredは、カイトして位置をリセットできる乱雑な小競り合いを好みます。

  • Qで追いかけすぎると、フォーメーションを崩して追撃した場合、相手はあなたを孤立したEのターゲットに変えることができます。

コーチングノート

  • Kindredに対しては、デュエルではなく、まずマップを意識しましょう。マークにワードを置き、きれいにローテーションする方が、即興の戦闘よりも価値があることが多いです。

  • 相手を最も punish できるのは、多くの場合、Lamb's Respite の直後です。すべてをゾーン内に費やすのではなく、その瞬間のためにコントロールツール、ダッシュ、またはバーストを温存しましょう。

FAQ

マークでKindredの snowballing を止めるにはどうすればいいですか?

マークは一時的な目標として扱い、単純なキャンプとして扱わないようにする必要があります。出現する前に視界を確保し、優先度のあるレーンと連携し、孤立したデュエルを避けるようにしましょう。マークを contested できない場合は、すぐに反対側のキャンプ、dragon、Herald、プレート、またはレーンプレッシャーなど、別の場所で何かを強制してください。間違いは、Kindredがマークを取るのを、何も得ずに見ていることです。たとえ彼女が scaling しても、すべてのマークを高くつくことでテンポを遅らせることができます。

Lamb's Respite の中でKindredと戦うべきですか?

自動的に戦うべきではありません。ゾーン内でバーストをすべて使い切ると、Kindredの生存を助け、アルティメット終了時に戦闘に負ける可能性があります。正しい判断はポジショニング次第です。相手を閉じ込め、出口をコントロールし、アルティメット終了のためにクールダウンを温存できるなら、近くに留まることができます。もしコントロールを失ったり、相手チームが到着したりした場合は、少し後退し、主要なスペルを温存し、アルティメットが消えたときに攻撃しましょう。戦闘はゾーン中ではなく、ゾーン後に勝たれることが多いです。

Kindredを最も悩ませるジャングラーはどのようなタイプですか?

Kindredを最も悩ませるジャングラーは、彼女が好む距離でプレイさせないジャングラーです。これには、防御的なQの使用を強制するターゲットエンゲージ、初期のマークを contested できるインベーター、そしてLamb's Respite が終了する際に脅威となるアサシンが含まれます。共通点は単純です。彼女にWを置かせず、Eのターゲットを選ばせず、自分のリズムで kite させないことです。Kindredが戦闘の準備をするのではなく、即時のプレッシャーに対応しなければならない場合、彼女のバリューは大きく失われます。

Kindredに対するオブジェクトのプレイはどうすればいいですか?

Kindredに対しては、彼女よりも先にオブジェクトを準備する必要があります。彼女が視界を持って先に到着した場合、poke し、入口を kite し、Lamb's Respite を使用してスモークファイトを非常に困難にすることができます。正しい計画は、入口をコントロールし、彼女のワードを削除し、Qを自由に撃てないエリアに彼女を追い込むことです。また、オブジェクトをバーストするか、Kindredをゾーンするか、アルティメット終了のためにスペルを温存するかを事前に決定する必要があります。その計画なしでは、彼女はしばしばオブジェクトを有利な延長された小競り合いに変えてしまいます。


















































