S
2026年9月 · Patch 7.2d
Assassin · JUNGLE · TOP

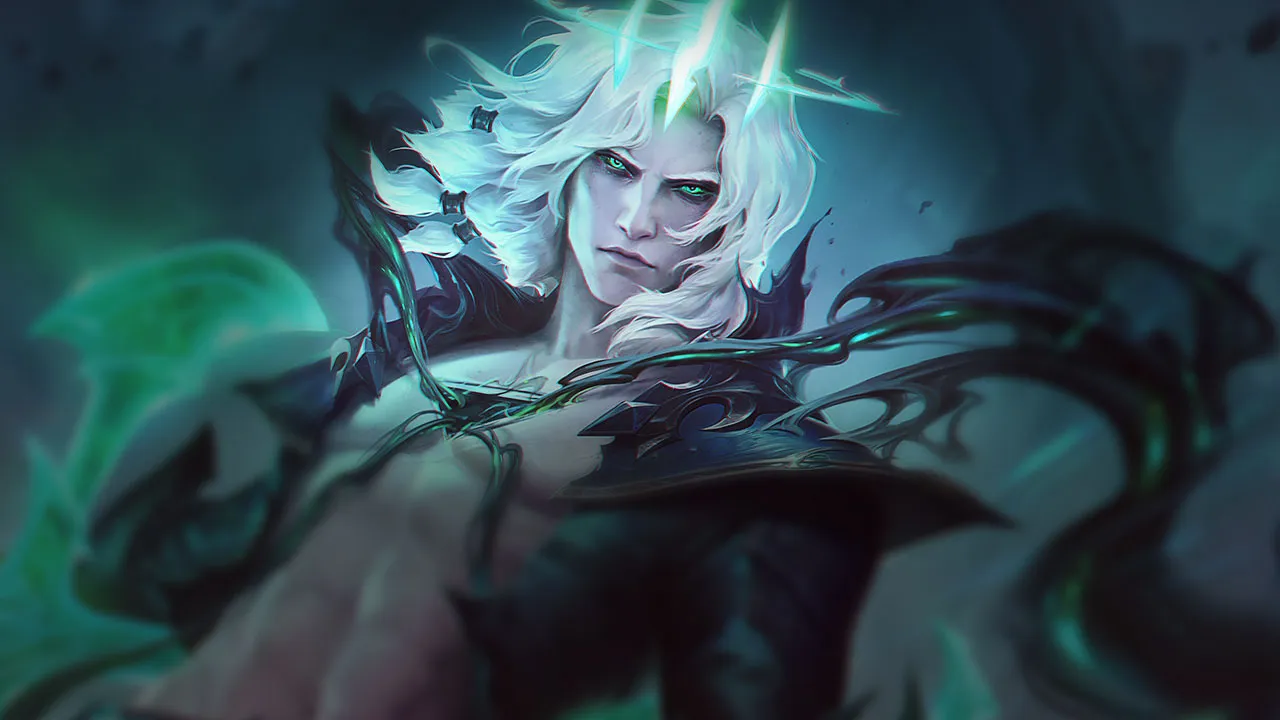
Viego Wild Rift カウンターガイド

Viegoは、ポゼッションを阻止するタイトなpeel構成や、ポゼッションしたチャンピオンが彼にとって価値の低いチームに対して効果が低下します。即時のburstプロファイルは、ポゼッション前に彼を無力化します。CCは彼のポゼッション移行を妨害します。

★ JUNGLE · TOP Tier S
ダメージ
UTIL
TANK
DIFF
Win 46.0% #71 · ↓4pt
Pick 3.4% #18
Ban 2.2% #61

Viego Wild Rift カウンターガイド ★ カウンターシート

マッチアップ一覧
マッチアップ 判定 有利度 勝率 ピック率
Rammus ハードカウンター +2 54.7% 4.3%
Warwick ハードカウンター +2 52.6% 2.7%
Poppy ハードカウンター +2
Olaf 不利なマッチアップ +1 52.5% 2.4%
Diana 不利なマッチアップ +1 52.1% 2.9%
Lillia 不利なマッチアップ +1 51.9% 3.3%
Vi 不利なマッチアップ +1 51.9% 9.3%
Gwen 不利なマッチアップ +1 51.8% 1.9%
Pantheon 不利なマッチアップ +1 51.7% 5.5%
Darius 不利なマッチアップ +1 51.5% 8.1%
Shyvana 不利なマッチアップ +1 51.1% 7.0%
Xin Zhao 不利なマッチアップ +1 50.7% 9.5%
Tryndamere 不利なマッチアップ +1 50.6% 6.8%
Skarner 不利なマッチアップ +1 50.6% 1.1%
Wukong 不利なマッチアップ +1 50.3% 3.7%
Ambessa 不利なマッチアップ +1 50.3% 1.2%
Nocturne 不利なマッチアップ +1 50.3% 5.5%
Nidalee 不利なマッチアップ +1 50.2% 2.4%
Kha'Zix 不利なマッチアップ +1 50.0% 4.9%
Volibear 不利なマッチアップ +1 49.9% 3.3%
Kindred 不利なマッチアップ +1 49.8% 2.6%
Hecarim 不利なマッチアップ +1 49.2% 2.6%
Yone 不利なマッチアップ +1 49.1% 2.0%
Talon 不利なマッチアップ +1 49.1% 2.8%
Riven 不利なマッチアップ +1 48.8% 1.2%
Evelynn 不利なマッチアップ +1 48.6% 2.4%
Jax 不利なマッチアップ +1 48.4% 2.1%
Graves 不利なマッチアップ +1 48.3% 7.6%
Master Yi 不利なマッチアップ +1 48.0% 9.3%
Rengar 不利なマッチアップ +1 47.8% 1.6%
Cho'Gath 不利なマッチアップ +1 47.6% 5.4%
Fizz 不利なマッチアップ +1 47.4% 2.1%
Camille 不利なマッチアップ +1
Mordekaiser 不利なマッチアップ +1
Nilah 不利なマッチアップ +1
Taliyah 不利なマッチアップ +1
Amumu スキル次第のマッチアップ ±0 55.1% 3.3%
Jarvan IV スキル次第のマッチアップ ±0 52.4% 8.5%
Ekko スキル次第のマッチアップ ±0 51.6% 4.3%
Fiddlesticks スキル次第のマッチアップ ±0 50.8% 2.7%
Kayn スキル次第のマッチアップ ±0 50.6% 9.2%
Lee Sin スキル次第のマッチアップ ±0 47.3% 12.0%
Aatrox スキル次第のマッチアップ ±0
Gragas スキル次第のマッチアップ ±0
Maokai スキル次第のマッチアップ ±0
Nautilus スキル次第のマッチアップ ±0
Dr. Mundo 有利なマッチアップ −1 48.6% 1.1%
Twitch 有利なマッチアップ −1

Edge: Wild Rift Core canonical verdict (−3 to +3), shown from the point of view of the champion named in the row. Win rate and pick rate: the opponent's own rate in this role — Wild Rift CN · Challenger, Patch 7.2d. Not a head-to-head win rate.

ハードカウンター

3

これらのチャンピオンは、こちらのビルドやプレイスタイルを真正面から上回る構成を持ち、レーン戦のコントロールとファームを極めて難しくする。彼らのスキルはこちらの主要な強みを無効化し、いつも通りのプランを実行しようとした瞬間に手痛い反撃を受けさせてくる。こうしたマッチアップでは、ミスを最小限に抑え、正面からの対決以外で解決策を探すことが重要になる。

Warwick

Warwick+2

skirmish powerearly dueling Warwick absolutely dominates the early jungle duels because his Primal Howl grants immense damage reduction right when you try to burst him down with Blade of the Ruined King and Spectral Maw. Once the damage reduction ends, the subsequent fear interrupts your basic attack flow, letting his Eternal Hunger and Jaws of the Beast easily out-sustain your damage before you can ever trigger Sovereign's Domination. Warwickのビルド → 詳細を見る
Warwick

理由

Warwick absolutely dominates the early jungle duels because his Primal Howl grants immense damage reduction right when you try to burst him down with Blade of the Ruined King and Spectral Maw. Once the damage reduction ends, the subsequent fear interrupts your basic attack flow, letting his Eternal Hunger and Jaws of the Beast easily out-sustain your damage before you can ever trigger Sovereign's Domination.

レーン戦への影響

This matchup forces you off active scuttle crab contests and early invades. If Warwick tracks you with Blood Hunt, he can force duels you cannot win, leaving you low on health and forcing premature recalls. This lack of early pressure means your laners must play defensively, as Warwick can freely dive them with Infinite Duress while you are stuck clearing camps to safely reach your item spikes.

立ち回り方

Never initiate with Spectral Maw when Warwick is healthy. Instead, bait out Primal Howl by kiting backward using the camouflage and movement speed from Harrowed Path. Once his damage reduction expires and his fear is wasted, you have a brief window to strike with Blade of the Ruined King. If he catches you with Infinite Duress, immediately use Heartbreaker defensively to reposition over a wall to survive his relentless pursuit.

チャンピオン詳細 → Warwickのビルド →
Poppy

Poppy+2

anti divecc chain Poppy completely disables your offensive threat because her Steadfast Presence acts as an impassable barrier for your primary gap-closers. If you attempt to initiate with the dash from Spectral Maw or try to execute a target using Heartbreaker, her active aura will instantly ground and stun you. This reaction shuts down your assassination potential and leaves you completely exposed to her team's follow-up. Poppyのビルド → 詳細を見る
Poppy

理由

Poppy completely disables your offensive threat because her Steadfast Presence acts as an impassable barrier for your primary gap-closers. If you attempt to initiate with the dash from Spectral Maw or try to execute a target using Heartbreaker, her active aura will instantly ground and stun you. This reaction shuts down your assassination potential and leaves you completely exposed to her team's follow-up.

レーン戦への影響

In the jungle, this dynamic severely limits your skirmishing freedom. You cannot contest Scuttle Crabs or secure early neutral objectives safely if Poppy is nearby, as she can interrupt your escape routes through walls. Ganking lanes becomes highly risky because she can counter-gank and lock you down mid-dash, preventing you from triggering Sovereign's Domination and snowballing the map.

立ち回り方

To survive, you must play with extreme patience and track her defensive cooldowns meticulously. Never lead an engagement with Spectral Maw. Instead, use Harrowed Path's camouflage to hover near skirmishes, baiting Poppy into activating Steadfast Presence prematurely. Once her defensive aura fades, you have a brief window to strike. If she holds her skill, focus your Blade of the Ruined King on her front-line allies to melt them safely without committing your dashes.

チャンピオン詳細 → Poppyのビルド →
Rammus

Rammus+2

lockdownpunish auto attacks This matchup is a nightmare because Viego's core damage loop actively kills him. The passive double-strike from Blade of the Ruined King triggers Rammus's Defensive Ball Curl twice in rapid succession. When Rammus activates this defense alongside Rolling Armordillo, your high-frequency basic attacks are reflected back as massive magic damage, amplified further if he catches you with Frenzying Taunt to force your self-destructive targeting. Rammusのビルド → 詳細を見る
Rammus

理由

This matchup is a nightmare because Viego's core damage loop actively kills him. The passive double-strike from Blade of the Ruined King triggers Rammus's Defensive Ball Curl twice in rapid succession. When Rammus activates this defense alongside Rolling Armordillo, your high-frequency basic attacks are reflected back as massive magic damage, amplified further if he catches you with Frenzying Taunt to force your self-destructive targeting.

レーン戦への影響

You cannot contest Rammus in direct 1v1 jungle skirmishes or dual-scuttle fights. If you attempt to invade, a simple Powerball interception followed by Frenzying Taunt under his armor buff guarantees your health bar melts before you can even cast Heartbreaker. This forces you into a passive, reactive clearing style, giving him free rein to gank lanes with high speed while you struggle to match his map pressure.

立ち回り方

To survive, shift your build away from pure attack speed and physical penetration toward magic resistance and health. During teamfights, never initiate on Rammus. Keep Harrowed Path active near terrain to obscure your position and wait out his Defensive Ball Curl. Only commit your Spectral Maw and Heartbreaker to execute squishy backline targets; once you trigger Sovereign's Domination, use the stolen champion's kit to bypass his armor scaling entirely rather than fighting him in your base form.

チャンピオン詳細 → Rammusのビルド →

不利なマッチアップ

33

これらのチャンピオンは、マッチアップ自体を絶望的にするわけではないが、対面で優位に立ちやすいツールを持っている。射程が長かったり、攻撃を受け止める力が高かったり、エンゲージへの対応手段が豊富だったりする。アプローチを調整し、戦闘を受け入れるタイミングを慎重に選ぶ必要がある。

Darius

Darius+1

duelingextended fights Direct duels in the river are lethal because Darius thrives on the extended skirmishes Viego usually wants. Your DPS relies on continuous Blade of the Ruined King procs, but this gives Darius the exact time he needs to stack Hemorrhage. If Darius uses Apprehend to cancel your Spectral Maw dash or simply sidesteps it, his Noxian Guillotine will execute you before your passive can trigger. Dariusのビルド → 詳細を見る
Darius

理由

Direct duels in the river are lethal because Darius thrives on the extended skirmishes Viego usually wants. Your DPS relies on continuous Blade of the Ruined King procs, but this gives Darius the exact time he needs to stack Hemorrhage. If Darius uses Apprehend to cancel your Spectral Maw dash or simply sidesteps it, his Noxian Guillotine will execute you before your passive can trigger.

レーン戦への影響

Darius will actively seek to invade your camps, knowing he wins 1v1 clashes. If he invades you while you are clearing with Harrowed Path, you are forced to retreat and cede camp priority, which slows down your gold generation. This pressure forces your laners to play defensively, as any skirmish near the river risks giving Darius an easy reset chain with Noxian Guillotine.

立ち回り方

Never fight Darius alone without a massive health advantage. Track his pathing and invade the opposite side of the map to secure camps safely. When skirmishing with allies, do not initiate with Spectral Maw; hold it until Darius locks himself in his Decimate animation so he cannot dodge or pull you with Apprehend. If he stacks Hemorrhage to four, immediately disengage using Harrowed Path towards a wall to escape his execution range.

チャンピオン詳細 → Dariusのビルド →
Graves

Graves+1

skirmishdueling In skirmishes, Graves holds the upper hand because he can reactively use Quickdraw to slide out of your Spectral Maw path. Missing this stun is disastrous; not only does Graves dodge your crowd control, but his dash immediately grants him True Grit. This bonus armor severely mitigates your physical damage from Blade of the Ruined King, leaving you extremely vulnerable during his close-range shotgun blasts. Gravesのビルド → 詳細を見る
Graves

理由

In skirmishes, Graves holds the upper hand because he can reactively use Quickdraw to slide out of your Spectral Maw path. Missing this stun is disastrous; not only does Graves dodge your crowd control, but his dash immediately grants him True Grit. This bonus armor severely mitigates your physical damage from Blade of the Ruined King, leaving you extremely vulnerable during his close-range shotgun blasts.

レーン戦への影響

This dynamic restricts your freedom in the river and inside your own jungle. If Graves invades, you cannot easily duel him. Initiating with Spectral Maw is too risky, meaning you must often yield Scuttle Crabs or your raptor camp. If you get caught in his Smoke Screen, your Harrowed Path stealth is useless since you lose target vision, forcing early retreats that forfeit jungle priority.

立ち回り方

Never lead your ganks or duels with Spectral Maw. Instead, activate Harrowed Path to gain attack speed and approach Graves, forcing him to make the first move. Watch for him to waste Quickdraw to clear a camp or close a gap. Once his dash is on cooldown, you have a brief window where he cannot dodge your stun or easily stack True Grit, allowing you to safely execute him with Heartbreaker.

チャンピオン詳細 → Gravesのビルド →
Diana

Diana+1

skirmishdueling Diana excels in sudden skirmishes because her Moonfall pull and burst happen instantly, melting your health bar before you can stack the passive of Blade of the Ruined King. While you rely on landing Spectral Maw and executing consecutive auto-attacks to ramp up your damage, her combination of Crescent Strike and Lunar Rush resets allows her to drop her entire rotation and secure an execution before you can trigger Sovereign's Domination. Dianaのビルド → 詳細を見る
Diana

理由

Diana excels in sudden skirmishes because her Moonfall pull and burst happen instantly, melting your health bar before you can stack the passive of Blade of the Ruined King. While you rely on landing Spectral Maw and executing consecutive auto-attacks to ramp up your damage, her combination of Crescent Strike and Lunar Rush resets allows her to drop her entire rotation and secure an execution before you can trigger Sovereign's Domination.

レーン戦への影響

This makes direct river duels extremely hazardous once you both unlock your ultimates. You cannot contest her head-on if Moonfall is available, forcing you to concede early skirmishes or risk giving her an early lead. If she catches you in the jungle without Harrowed Path active for camouflage, her Pale Cascade shield will absorb your initial retaliatory damage, leaving you vulnerable to an immediate dive.

立ち回り方

To survive, never lead with Spectral Maw unless you know her Crescent Strike has just missed, as she will easily dodge or counter-engage. Instead, use the camouflage from Harrowed Path to bait out her Pale Cascade shield before committing. If she initiates with Moonfall, immediately disengage using Heartbreaker to reposition backward rather than using it as an execute, then counter-engage once her marks expire to stack Blade of the Ruined King.

チャンピオン詳細 → Dianaのビルド →
Ambessa

Ambessa+1

duelingreset denial Ambessa holds a massive advantage in direct skirmishes because her Repudiation completely absorbs the stun of your Spectral Maw while granting her a shield. This denial prevents you from safely applying and detonating the marks from Blade of the Ruined King. Without this burst healing and damage, Ambessa easily out-duels you using Drakehound's Step and Lacerate to dance around your Harrowed Path mist. Ambessaのビルド → 詳細を見る
Ambessa

理由

Ambessa holds a massive advantage in direct skirmishes because her Repudiation completely absorbs the stun of your Spectral Maw while granting her a shield. This denial prevents you from safely applying and detonating the marks from Blade of the Ruined King. Without this burst healing and damage, Ambessa easily out-duels you using Drakehound's Step and Lacerate to dance around your Harrowed Path mist.

レーン戦への影響

This interaction forces you to cede early river priority and scuttle crab contests. If Ambessa catches you in the river, she can force a fight where Public Execution will execute you if you drop low. You cannot contest her invades directly, meaning your clear speed and neutral objective setups are constantly delayed, forcing you to play defensively around your turrets.

立ち回り方

To survive, never initiate with Spectral Maw. Instead, activate Harrowed Path near walls to gain attack speed and force her to guess your position. Bait out her Repudiation by charging your stun without releasing it immediately. Once her shield expires, launch Spectral Maw to lock her down, then quickly stack Blade of the Ruined King. If she activates Public Execution, use Heartbreaker to dodge the trajectory and reposition to safety.

チャンピオン詳細 → Ambessaのビルド →
Jax

Jax+1

skirmishreset denial Jax is a nightmare in 1v1 because Counter Strike completely neutralizes your primary damage source. When he activates it, he dodges all your basic attacks, which directly blocks your Blade of the Ruined King passive double-strikes. This denies your vital healing and stops you from quickly building up your combat stacks, turning what should be a fast trade into a one-sided beatdown where he rampages with Relentless Assault. Jaxのビルド → 詳細を見る
Jax

理由

Jax is a nightmare in 1v1 because Counter Strike completely neutralizes your primary damage source. When he activates it, he dodges all your basic attacks, which directly blocks your Blade of the Ruined King passive double-strikes. This denies your vital healing and stops you from quickly building up your combat stacks, turning what should be a fast trade into a one-sided beatdown where he rampages with Relentless Assault.

レーン戦への影響

This interaction dictates the entire jungle dynamic, rendering direct skirmishes at Scuttle Crabs or early invades highly unfavorable for you. If Jax catches you in the river, his Leap Strike combined with Empower allows him to force trades on his terms. Getting stunned by Counter Strike means losing half your health bar, forcing premature recalls that surrender early neutral objectives and map pressure to his team.

立ち回り方

To survive, you must bait out Counter Strike before fully committing. Use the stealth from Harrowed Path to position safely and charge Spectral Maw defensively. If Jax leaps on you with Leap Strike, do not retaliate immediately; instead, release Spectral Maw to stun him and walk away during his defensive stance. Once his evasion ends, you have a brief window to turn the fight with Heartbreaker and claim his soul via Sovereign's Domination.

チャンピオン詳細 → Jaxのビルド →
Master Yi

Master Yi+1

skirmishreset mechanics Master Yi holds the upper hand in direct duels because his Alpha Strike allows him to seamlessly dodge both your Spectral Maw stun and your Heartbreaker execute. Since Viego relies on landing Spectral Maw to set up his Blade of the Ruined King burst and needs Heartbreaker to finish the kill, Master Yi can reactively disappear from the map to negate your entire combo while shredding you with Wuju Style true damage. Master Yiのビルド → 詳細を見る
Master Yi

理由

Master Yi holds the upper hand in direct duels because his Alpha Strike allows him to seamlessly dodge both your Spectral Maw stun and your Heartbreaker execute. Since Viego relies on landing Spectral Maw to set up his Blade of the Ruined King burst and needs Heartbreaker to finish the kill, Master Yi can reactively disappear from the map to negate your entire combo while shredding you with Wuju Style true damage.

レーン戦への影響

This dynamic limits your freedom in the jungle. You cannot contest crabs or invade his camps safely without tracking his Alpha Strike. If you encounter him in the river, you are forced to play defensively, sacrificing early scuttle control. Failing to respect this matchup results in Master Yi getting early kills, which accelerates his Highlander resets and compromises your team's objective security.

立ち回り方

To survive and win the 1v1, never initiate with Spectral Maw. Instead, activate Harrowed Path near walls to gain attack speed, and use basic attacks enhanced by Blade of the Ruined King to force him to use Alpha Strike first. Once he reappears, immediately unleash Spectral Maw to lock him down, or execute him with Heartbreaker if his health is low. If he channels Meditate to stall, use your charged stun to interrupt him instantly.

チャンピオン詳細 → Master Yiのビルド →
Lillia

Lillia+1

kitingdodge This matchup is defined by a severe mobility mismatch once combat begins. Lillia gains massive movement speed stacks from Blooming Blows, allowing her to easily react to and dodge your Spectral Maw charge. Without that crucial stun, Viego cannot close the gap or lock her down, leaving him entirely exposed to being run down and kited by her continuous magic damage. Lilliaのビルド → 詳細を見る
Lillia

理由

This matchup is defined by a severe mobility mismatch once combat begins. Lillia gains massive movement speed stacks from Blooming Blows, allowing her to easily react to and dodge your Spectral Maw charge. Without that crucial stun, Viego cannot close the gap or lock her down, leaving him entirely exposed to being run down and kited by her continuous magic damage.

レーン戦への影響

In the jungle, this interaction makes direct skirmishes near Scuttle Crabs or early neutral camps incredibly risky. If Lillia lands Swirlseed, she can slow you down, build her speed stacks, and force you out of your Harrowed Path camouflage. You will find yourself unable to force favorable trades, often giving up river priority and being forced to cede camps to avoid being put to sleep by Lilting Lullaby.

立ち回り方

To survive this matchup, never lead with an unassisted Spectral Maw. Instead, use the camouflage of Harrowed Path hugging the jungle walls to approach unseen and close the distance. Hold your stun until she commits to her Watch Out! Eep! animation, which briefly locks her in place. If she manages to hit you with Swirlseed and prepares Lilting Lullaby, use the unstoppable frames of Heartbreaker to escape over a wall or reposition to safety before the sleep takes effect.

チャンピオン詳細 → Lilliaのビルド →
Wukong

Wukong+1

teamfight impactskillshot timing Wukong's ability to completely negate your primary crowd control dictates this duel. When you charge Spectral Maw to initiate or peel, Wukong can deploy Warrior Trickster to leave a clone in his place, absorbing the projectile stun entirely. With your only crowd control wasted on a decoy, he can immediately counter-engage with Cyclone to knock you up, using his passive Stone Skin to easily win the extended physical trade. Wukongのビルド → 詳細を見る
Wukong

理由

Wukong's ability to completely negate your primary crowd control dictates this duel. When you charge Spectral Maw to initiate or peel, Wukong can deploy Warrior Trickster to leave a clone in his place, absorbing the projectile stun entirely. With your only crowd control wasted on a decoy, he can immediately counter-engage with Cyclone to knock you up, using his passive Stone Skin to easily win the extended physical trade.

レーン戦への影響

This interaction strips away your early skirmishing power around the Scuttle Crabs and jungle camps. Knowing he can block your stun, Wukong will confidently invade your territory with Nimbus Strike. You cannot easily contest neutral objectives or secure double-scuttle because missing your stun means giving him a free path to ultimate setups. This forces you to play defensively, ceding early map pressure and delaying your gold spikes.

立ち回り方

To survive, never lead with Spectral Maw when invading or defending. Instead, mask your presence inside Harrowed Path and use the bonus attack speed to strike with Blade of the Ruined King first. Force Wukong to panic-use Warrior Trickster under pressure. Once his decoy fades, you have a brief window to unleash your fully charged stun. If he initiates with his ultimate, use Heartbreaker defensively to hop over a wall and reset.

チャンピオン詳細 → Wukongのビルド →
Xin Zhao

Xin Zhao+1

early pressureskirmish power Viego struggles against Xin Zhao because of how their kit interactions clash during skirmishes. When you attempt to close the distance and lock him down using Spectral Maw, Xin Zhao can immediately deny your follow-up. By activating Crescent Guard, he sweeps you backward and neutralizes your incoming damage from Blade of the Ruined King, leaving you stranded outside his defensive ring. Xin Zhaoのビルド → 詳細を見る
Xin Zhao

理由

Viego struggles against Xin Zhao because of how their kit interactions clash during skirmishes. When you attempt to close the distance and lock him down using Spectral Maw, Xin Zhao can immediately deny your follow-up. By activating Crescent Guard, he sweeps you backward and neutralizes your incoming damage from Blade of the Ruined King, leaving you stranded outside his defensive ring.

レーン戦への影響

This interaction dictates a fierce race for jungle clear speeds and level spikes. Since direct duels in the river are highly risky due to his Audacious Charge and Three Talon Strike knock-up, you cannot contest early Scuttle Crabs blindly. If Xin Zhao secures an early lead, his pressure forces you to abandon active counter-ganking, delaying your crucial level five spike where Heartbreaker finally offers you a response.

立ち回り方

To survive and outscale, track his pathing and avoid straight 1v1s in the river. Never lead an engagement with Spectral Maw if his Crescent Guard is available; instead, use Harrowed Path to bait out his Wind Becomes Lightning while staying near walls. If he initiates with Audacious Charge, wait out his third strike of Three Talon Strike before committing. Save Heartbreaker to reposition inside his ultimate ring or to secure a reset via Sovereign's Domination.

チャンピオン詳細 → Xin Zhaoのビルド →
Kindred

Kindred+1

skirmishreset champ The entire dynamic of this matchup revolves around your passive, Sovereign's Domination. Viego relies heavily on securing early takedowns to trigger possession and chain resets. However, Kindred completely counters this snowball potential with Lamb's Respite. By casting this ultimate, they create a zone where no one can die, effectively denying your resets, stalling your Heartbreaker execution, and leaving you vulnerable as a squishy melee assassin stuck inside their Wolf's Frenzy. Kindredのビルド → 詳細を見る
Kindred

理由

The entire dynamic of this matchup revolves around your passive, Sovereign's Domination. Viego relies heavily on securing early takedowns to trigger possession and chain resets. However, Kindred completely counters this snowball potential with Lamb's Respite. By casting this ultimate, they create a zone where no one can die, effectively denying your resets, stalling your Heartbreaker execution, and leaving you vulnerable as a squishy melee assassin stuck inside their Wolf's Frenzy.

レーン戦への影響

During jungle skirmishes or objective contests, Kindred's ranged advantage with Dance of Arrows makes early dueling painful. If you attempt to ambush them using Harrowed Path, they can easily kite you out. The real issue arises in 2v2 or 3v3 fights: your team cannot burst down targets because Lamb's Respite saves them, turning guaranteed early kills into prolonged fights where Kindred's Mounting Dread can safely execute you or your allies.

立ち回り方

To survive and win, you must change how you use Heartbreaker. Never initiate the fight by dumping all your damage into a target that Kindred can save. Instead, secure your Harrowed Path and Blade of the Ruined King combos to force Kindred to panic-cast Lamb's Respite early. Once their ultimate is active, do not commit. Back off slightly, use Spectral Maw to lock down anyone trying to escape the circle, and drop Heartbreaker only the split second the zone disappears to secure the delayed reset.

チャンピオン詳細 → Kindredのビルド →
Vi

Vi+1

burst clashskirmish Vi directly shuts down your skirmish loop because her unstoppable Cease and Desist completely negates your entry. When you attempt to dive in to secure a low-health target and trigger Sovereign's Domination, her ultimate locks you down without any channel interruption. You cannot dodge her targeted suppression, meaning you get bursted down by her Denting Blows and Relentless Force before you can ever claim a soul to reset. Viのビルド → 詳細を見る
Vi

理由

Vi directly shuts down your skirmish loop because her unstoppable Cease and Desist completely negates your entry. When you attempt to dive in to secure a low-health target and trigger Sovereign's Domination, her ultimate locks you down without any channel interruption. You cannot dodge her targeted suppression, meaning you get bursted down by her Denting Blows and Relentless Force before you can ever claim a soul to reset.

レーン戦への影響

This matchup forces a passive early clear since contesting crabs or early skirmishes is highly volatile. If Vi charges Vault Breaker from a bush, you are forced to burn Harrowed Path defensively. Once she unlocks her ultimate, your ability to contest neutral objectives drops significantly; if you commit your Heartbreaker first, she immediately retaliates with her ultimate, turning any dragon fight into an immediate grey screen for you.

立ち回り方

Never initiate skirmishes. You must play like a clean-up assassin, hiding in Harrowed Path until Vi commits Cease and Desist onto one of your teammates. Keep your Spectral Maw fully charged but unreleased to deter her Vault Breaker engage. If she targets you anyway, use Heartbreaker defensively toward a wall to gain distance, accepting that you must forfeit the immediate fight and wait for her Blast Shield to decay before re-engaging.

チャンピオン詳細 → Viのビルド →
Riven

Riven+1

skirmishburst Viego struggles in direct jungle skirmishes because Riven can effortlessly dodge Spectral Maw using the swift dashes of Broken Wings. If you release your stun charge too early, she will slip past the projectile and immediately punish you. Without the lockdown from Spectral Maw, Viego is left completely exposed to her devastating Runic Blade enhanced combos and Ki Burst stun, which shred his squishier assassin health bar before he can retaliate. Rivenのビルド → 詳細を見る
Riven

理由

Viego struggles in direct jungle skirmishes because Riven can effortlessly dodge Spectral Maw using the swift dashes of Broken Wings. If you release your stun charge too early, she will slip past the projectile and immediately punish you. Without the lockdown from Spectral Maw, Viego is left completely exposed to her devastating Runic Blade enhanced combos and Ki Burst stun, which shred his squishier assassin health bar before he can retaliate.

レーン戦への影響

This mobility advantage dictates the early river contests and jungle invades. Riven will actively seek 1v1 encounters near the Scuttle Crab, knowing she can shield your Blade of the Ruined King pokes with Valor. If she baits out your Spectral Maw, you are forced to retreat using Harrowed Path to hide, giving up objective control and letting her dictate map pressure while threatening your camps.

立ち回り方

To survive this jungle matchup, never initiate combat by charging Spectral Maw. Instead, use the camouflage of Harrowed Path to close the distance and strike first with Blade of the Ruined King. Force Riven to expend her Broken Wings dashes defensively or wait for her to execute the third strike of her combo before launching your stun. If she activates Blade of the Exile, disengage immediately with Heartbreaker to waste her ultimate's duration rather than fighting her head-on.

チャンピオン詳細 → Rivenのビルド →

その他のマッチアップ

スキル次第のマッチアップ

10

このマッチアップは何よりもまず実行力の勝負であり、両者ともに優位を取れる現実的な手段を持っている。重要なスキルを一つ避けられるか、エンゲージを正しく読めるか、あるいはたった一つの位置取りのミスが、勝敗を分けることもある。マッチアップを理解し、行動すべき瞬間を見極める力がとりわけ重要になる。

Aatrox

Aatrox±0

skirmishoutplay potential This jungle duel revolves around the precise timing of Aatrox's The Darkin Blade. Aatrox relies on hitting those sweetspots to trigger knockups and sustain via Umbral Dash. However, Viego possesses the ultimate counter-tool: launching Heartbreaker allows you to leap over his third Q strike, completely dodging the critical sweetspot damage and crowd control while closing the gap to instantly burst him down before he can reset his Deathbringer Stance. Aatroxのビルド → 詳細を見る
Aatrox

理由

This jungle duel revolves around the precise timing of Aatrox's The Darkin Blade. Aatrox relies on hitting those sweetspots to trigger knockups and sustain via Umbral Dash. However, Viego possesses the ultimate counter-tool: launching Heartbreaker allows you to leap over his third Q strike, completely dodging the critical sweetspot damage and crowd control while closing the gap to instantly burst him down before he can reset his Deathbringer Stance.

レーン戦への影響

Jungle skirmishes over Scuttle Crabs or objective entries become high-stakes duels where missing a single ability shifts the pressure. If Aatrox misses Infernal Chains, he cannot prevent you from closing in. Viego's stealth from Harrowed Path forces Aatrox to guess his Q angles blindly. The player who mismanages their cooldown windows loses total control over their jungle camps, granting the opponent free reign to invade.

立ち回り方

When fighting Aatrox, never waste Heartbreaker early. Bait out the first two strikes of The Darkin Blade, then cast your ultimate to blink through the final sweetspot and strike him. If he snares you with Infernal Chains, charge Spectral Maw to either stun him out of his combo or dash out of the pull zone. Always fight near walls where Harrowed Path provides the movement and attack speed necessary to out-DPS his World Ender healing.

チャンピオン詳細 → Aatroxのビルド →
Ekko

Ekko±0

duelingresets This duel hinges entirely on how you telegraph your crowd control. Charging Spectral Maw is highly visible, giving Ekko the perfect cue to react with Phase Dive. By blinking out of your line of fire, he easily avoids the stun, closes the distance, and rapidly triggers Z-Drive Resonance for massive burst and a movement speed escape. If he succeeds, his mobility makes it impossible to trade back. Ekkoのビルド → 詳細を見る
Ekko

理由

This duel hinges entirely on how you telegraph your crowd control. Charging Spectral Maw is highly visible, giving Ekko the perfect cue to react with Phase Dive. By blinking out of your line of fire, he easily avoids the stun, closes the distance, and rapidly triggers Z-Drive Resonance for massive burst and a movement speed escape. If he succeeds, his mobility makes it impossible to trade back.

レーン戦への影響

In the jungle, this interaction dictates who controls the river skirmishes and crab contested zones. Missing your stun means losing half your health bar to his retaliation, forcing you to use Heartbreaker defensively to escape over walls rather than executing him. It shifts the map pressure entirely, as a failed gank encounter leaves you too low to contest neutral objectives or protect your lanes.

立ち回り方

Never initiate with a fully charged Spectral Maw from open ground. Instead, use the camouflage of Harrowed Path near jungle walls to mask your wind-up, or simply walk up and strike with Blade of the Ruined King first. Force Ekko to panic-cast Phase Dive defensively. Once he spends his dash, you have a clear window to release your stun point-blank, preventing him from setting up his own Parallel Convergence or executing a safe Chronobreak.

チャンピオン詳細 → Ekkoのビルド →
Amumu

Amumu±0

lockdownteamfight presence This jungle matchup revolves around Viego's ability to chain resets versus Amumu's teamfight disruption. The central clash occurs when Viego tries to trigger Sovereign's Domination. If Viego attempts to possess a fallen enemy, Amumu can easily time Curse of the Sad Mummy to lock him down mid-animation. However, if Amumu wastes his ultimate early, Viego's Blade of the Ruined King and Heartbreaker will shred through the mummy's tankiness during skirmishes. Amumuのビルド → 詳細を見る
Amumu

理由

This jungle matchup revolves around Viego's ability to chain resets versus Amumu's teamfight disruption. The central clash occurs when Viego tries to trigger Sovereign's Domination. If Viego attempts to possess a fallen enemy, Amumu can easily time Curse of the Sad Mummy to lock him down mid-animation. However, if Amumu wastes his ultimate early, Viego's Blade of the Ruined King and Heartbreaker will shred through the mummy's tankiness during skirmishes.

レーン戦への影響

In the jungle, Amumu clears quickly using Despair and Tantrum, matching your speed but preferring 5v5 skirmishes. If you get caught by Bandage Toss in the river, you risk getting locked down before you can set up your Harrowed Path. This pressure forces you to fight in tight corridors where your camouflage is effective, or wait out the initial engage so you don't get focused down first during major objective contests.

立ち回り方

Do not rush to claim a soul with Sovereign's Domination immediately if Amumu is lurking nearby with his ultimate ready. Instead, use Harrowed Path along walls to scout and bait out Bandage Toss. Charge Spectral Maw from the fog of war to disrupt his channels or pin him down. If he holds Curse of the Sad Mummy, delay your possession, staying on the outskirts of the fight, and use Heartbreaker to execute other targets first.

チャンピオン詳細 → Amumuのビルド →

その他のマッチアップ

有利なマッチアップ

2

これらのチャンピオンは、こちらの主要な強みに効果的に対応するのが難しく、より自由に対面を組み立てることができる。プレッシャーをかけて有利な交換を引き出す手段は複数あることが多い。相手が態勢を立て直す時間を与えるのではなく、この優位を活かして主導権を握ろう。

その他のマッチアップ

Viego対策アイテム

これらのアイテムを購入すると、このチャンピオンの影響力を抑えられます。

Thornmail
Thornmail
Plated Steelcaps
Plated Steelcaps
Randuin's Omen
Randuin's Omen
Force of Nature
Force of Nature
Stasis Enchant
Stasis Enchant

このチャンピオンへの対策

カウンターアングル

Viegoを倒すことは、単に1対1で勝つことだけではありません。真の目的は、彼に最初の所有権(リセット)を渡さないことです。リセットがないViegoは依然として危険ですが、読みやすいままです。彼は歩いて入り、接続し、実行し、生き残る必要があります。一度彼がボディ(リセット対象)を得ると、一時的なキット、実質的な無敵時間、そして新しいアルティメットの角度を得るため、戦闘の制御ははるかに困難になります。したがって、最良のカウンターは、レベル5より前に彼を罰する者、ターゲット指定されたコントロールで彼の侵入を阻止する者、または最初の(リセットを)高価にする者です。彼に対しては、ダメージを与えることだけでなく、チェーンを中断することを考える必要があります。

パッチの文脈

Viegoは、彼に応答を早めることを強いるジャングラーに対して苦戦します。彼の理想的な計画は、きれいにクリアし、レベル5に到達し、次に1人のターゲットがチェーンを開始するのに十分な低体力になるような小競り合いを作成することです。優先度を持って侵入し、彼の侵入を封じ込め、または彼のミスト(霧)を利用することを防ぐチャンピオンは、そのウィンドウを大幅に減らします。彼の最初のバーストを生き残ったタンクも、チームが簡単なターゲットを与えるのではなく、彼に焦点を合わせ続けるなら、彼を妨害できます。したがって、最も信頼できるカウンタープレイは、最初のアイテムの前に彼のテンポを破り、次にリセットの瞬間のために防御ツールを節約することです。

クイックリード

  • Viegoに対して最も重要なことは、最初のリセットを防ぐことです。スタシス、ピール、フォーカス、そしてクラウドコントロールは、ターゲットが低体力になった瞬間のために保存されるべきです。
  • レーンに優先度があり、侵入が孤立した長引くデュエルにならない場合、早期のジャングラーはレベル5より前に彼を罰することができます。
  • 彼に無料のボディ(リセット対象)を与えないでください。20% HPの十分に保護されていないターゲット1体は、勝った戦いを全滅に変える可能性があります。

カウンターの原型

彼の早期テンポを破るジャングラー

Viegoは、最初のしきい値に到達することを望んでいますが、不利な戦いを強いられることなく。侵入、スカトルの争奪、またはレーン優先度での2v2を強いることができる早期ジャングラーは、彼の真のスパイク(強力になるタイミング)の前に彼をプレイさせます。Lee SinとJarvan IVは、Viegoが十分な持続ダメージを得る前に直接的なプレッシャーを作成できますが、Viは彼の再配置スペースを制限する単純なロックダウンを脅かします。Viegoがレベル5の前にテンポを失うと、彼の最初の目標はプレイするのがはるかに難しくなります。

チャンピオンの適応方法. Viegoは、エゴ(無謀な)デュエルを避ける必要があります。彼は敵のスタートを追跡し、争う前に優先度を求め、必要ならミラークリアを受け入れるべきです。目標は、無料のキルを与えずにレベル5に到達することです。

ターゲット指定されたコントロールとアンチリセットツール

Viegoは、彼の侵入を選択し、最初の実行後にチェーンを組むことができるようになると恐ろしくなります。彼をロックダウンしたり、リセットのリズムを否定したりできるチャンピオンは、彼に戦闘をリサイクルするのではなく、耐えさせることを強います。Viは、彼の侵入のために彼女のロックダウンを保存できます。Rammusは、彼のオートアタックを罰し、ターゲットを素早く仕留める能力を遅くすることができます。一方、Olafは、いくつかのコントロールを無視して、クリーンなリセットではなく、過酷なデュエルを強いることができます。このプロファイルは、Viegoが小さなリードを即座の雪だるま(有利の連鎖)に変えるのを防ぎます。

チャンピオンの適応方法. Viegoは、メインのロックダウンが使用されるまで待つか、防御コアから遠いターゲットを狙う必要があります。彼が最初に入手可能なクラウドコントロールに突入した場合、彼はこれらのチャンピオンに彼らが望むまさにその戦いを与えます。

彼の最初のバーストを生き残るデュエリストとブルーザー

Viegoは、真の実行プレッシャーを作成するために最初のトレードが必要です。抵抗する、彼の侵入の一部を回避する、またはデュエルを遅くしてその重要な閾値を回すジャングラー。Gravesは、短距離、アーマー、そしてリターンのバーストを活かすことができます。Wukongは、クローンとコントロールでターゲティングを妨害できます。Rengarは、悪いミストの角度を爆発的なデュエルに変えることができます。これらのマッチアップは、必ずしもすべてのシナリオでViegoを倒すわけではありませんが、チームの助けなしにクリーンなリセットを得る彼の能力を減らします。

チャンピオンの適応方法. Viegoは、これらのマッチアップを生の1v1に変えることを避けるべきです。彼は優先度を持ってレーンをプレイし、味方のクラウドコントロールの後に入り、デュエルを発表するのではなく、角度を選択するために彼のミストを使用する必要があります。

優先度の高いマッチアップ

Vi

Viは、Viegoに対する最も決定的なマッチアップの1つです。なぜなら、彼女はカウンタープレイを単純化するからです。彼女はすべてのミストの角度を推測する必要はなく、Viegoが侵入したり、実行を狙ったりする瞬間のために彼女のロックダウンを保存できます。Viegoにとって、鍵はViを避けるだけでなく、コミットする前に彼女に他の誰かに彼女のコントロールを使わせることです。Viがメインツールを保持し、Viegoが最初のリセットを待つ場合、戦闘はリサイクルするのがはるかに困難になります。

Olaf

Olafは異なる問題を作成します。彼はViegoを正面からの戦いに追い込みますが、そこでは所有権が速すぎない場合があります。Olafが早期にペースを設定した場合、Viegoは実行を準備するために味方のクラウドコントロールに単純に頼ることはできません。したがって、このマッチアップには真のテンポ規律が必要です。アイテムの前に不要なデュエルを避け、優先度なしで争わず、次にOlafがすでにリソースを消費したか、チームから遠すぎた場所での戦いを求めます。

対面時のよくある間違い

対面時のよくある間違い

  • 低体力のターゲットを保護または引き戻すのではなく、範囲内に留まらせること。それがViegoが必要とする最初のボディ(リセット対象)であることがよくあります。

  • Viegoが侵入する前に敵の前衛にすべてのクラウドコントロールを使用し、次にリセットを止めるものがなくなること。
  • ビジョンなしで、オブジェクトの周りのミスト(霧)がかかったエリアをフェイスチェックすること。Viegoはまさにそのような隠れた侵入を望んでいます。

  • アンチヒールまたはクリアバーストなしで、Blade of the Ruined King(悲鳴の刃)の後で長引くデュエルを取ること。彼のサステインとオートアタックは最終的に実行を生み出します。

  • 味方のViegoを倒したから勝ったと思ったら、敵が複数瀕死の状態だと、むしろ一番危険になることがある。

コーチングノート

  • Viegoに対して、ただ生き残ることだけを考えるな。誰が最初に彼の「依代」になるかを考えろ。そのターゲットが守られていれば、彼は脅威の大部分を失う。
  • 彼を罰するのに最適なタイミングは、リセット後ではなく、リセット直前であることが多い。依代を変えられたら、その戦闘はすでに二度目の読みを要求される。

FAQ

Viegoがチームファイトで勢いづくのをどうやって止める?

最初の瀕死ターゲットを守り、Viego自身のために少なくとも一つのツールを残す必要がある。多くのチームが彼に敗北するのは、最初のエンゲージですべてを使い果たし、Viegoが実行するために現れたときに、ステイシス、ピール、またはクラウドコントロールが残っていないからだ。ターゲットが瀕死になったら、後退するか、すぐにカバーしなければならない。目標は、最初のバーストを生き延びるだけでなく、最初の憑依を阻止することだ。

序盤にViegoに侵入すべきか?

すべきだが、レーン優先権と明確な計画がある場合に限る。Viegoはレベル5前、特に序盤のコントロールやバーストが強力なジャングラーによって罰せられる可能性があるが、準備不足の侵入は、彼がオートアタックとサステインで逆転できる長引くデュエルになり得る。良い侵入とは、midまたはサイドの優先権を持って到着し、テンポを盗み、視界を確保し、彼にとって有利な戦闘になる前に立ち去ることだ。

なぜハードCCはViegoに対してそれほど強力なのか?

Viegoは非常に正確なウィンドウを通過しなければならないからだ:侵入し、ターゲットを仕留め、憑依し、そして続行するか離脱するかを決定する。実行前にかけられたクラウドコントロールは、そのシーケンスを破り、リセットなしで戦闘の真っただ中に彼を残す可能性がある。最良のCCは、常に最初に使われるものではない。Viegoがターゲットが最終的に変換可能だと考える瞬間に取っておかれるものだ。

Viegoに対してオブジェクトはどうプレイすべきか?

オブジェクトを開始する前に、ミストの角度をコントロールする必要がある。Viegoが壁を通して見えずに接近できるなら、誰かが瀕死になるのを待ち、アルティメットで侵入し、戦闘を変えることができる。最良の対応は、早期にワードを置き、サイドの角度をクリアし、キャリーを狭い通路から遠ざけ、DragonまたはBaronが複数人のメンバーがすでに彼に実行を与えるのに十分なほど瀕死である場合に開始するのを避けることだ。















































