








S
2026年9月 · Patch 7.2d
Assassin · JUNGLE · TOP

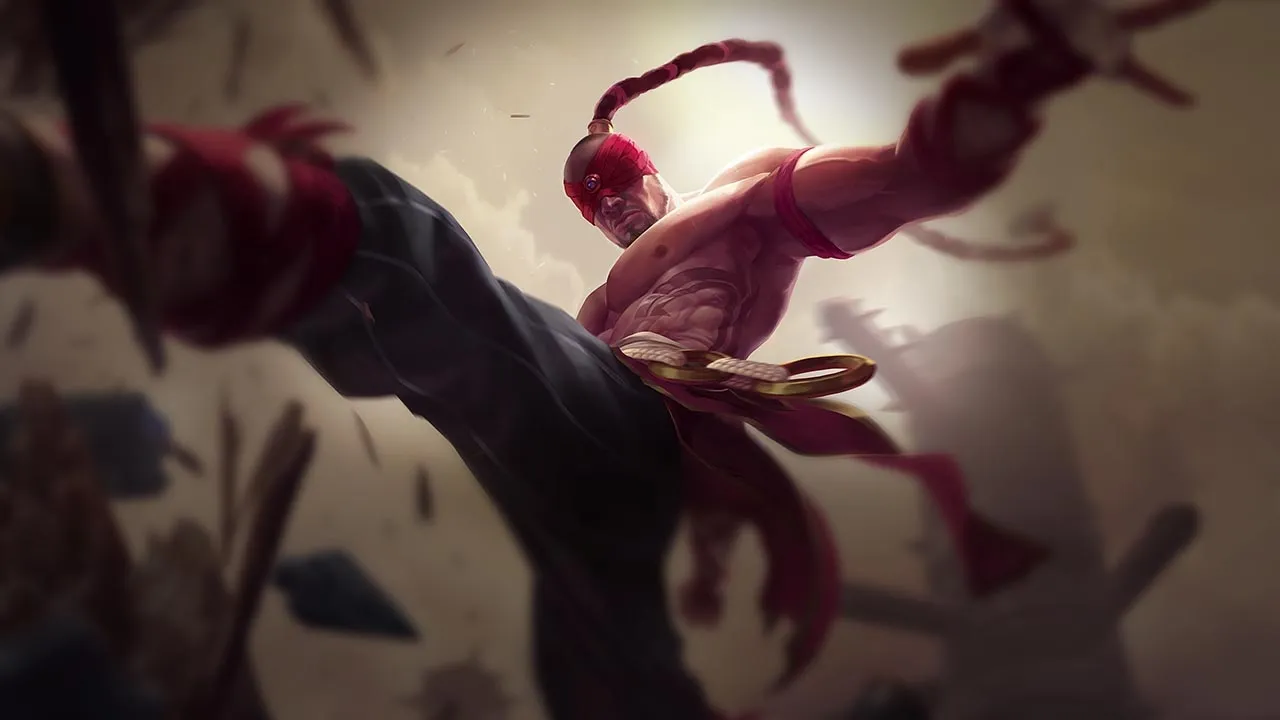
Lee Sin Wild Rift カウンターガイド

Lee Sinは、序盤のJungleをpokeinvadeしてくる編成に弱く、early action(序盤の主導権)への依存度を対策されてしまいます。後半にかけてパワーが低下するため、終盤はscalingチャンピオンの標的になります。複数のCCを持つ編成は、彼のテクニカルなplaysを制限します。

★ JUNGLE · TOP Tier S
ダメージ
UTIL
TANK
DIFF
Win 47.3% #67 · ↑2pt
Pick 12.0% #1
Ban 8.7% #27

Lee Sin Wild Rift カウンターガイド ★ Counter Sheet

マッチアップ一覧
マッチアップ 判定 有利度 勝率 ピック率
Rammus ハードカウンター +2 54.7% 4.3%
Olaf ハードカウンター +2 52.5% 2.4%
Poppy ハードカウンター +2
Warwick 不利なマッチアップ +1 52.6% 2.7%
Pantheon 不利なマッチアップ +1 51.7% 5.5%
Xin Zhao 不利なマッチアップ +1 50.7% 9.5%
Skarner 不利なマッチアップ +1 50.6% 1.1%
Wukong 不利なマッチアップ +1 50.3% 3.7%
Nocturne 不利なマッチアップ +1 50.3% 5.5%
Volibear 不利なマッチアップ +1 49.9% 3.3%
Dr. Mundo 不利なマッチアップ +1 48.6% 1.1%
Maokai 不利なマッチアップ +1
Mordekaiser 不利なマッチアップ +1
Amumu スキル次第のマッチアップ ±0 55.1% 3.3%
Nunu & Willump スキル次第のマッチアップ ±0 54.8% 1.9%
Jarvan IV スキル次第のマッチアップ ±0 52.4% 8.5%
Diana スキル次第のマッチアップ ±0 52.1% 2.9%
Vi スキル次第のマッチアップ ±0 51.9% 9.3%
Gwen スキル次第のマッチアップ ±0 51.8% 1.9%
Darius スキル次第のマッチアップ ±0 51.5% 8.1%
Ambessa スキル次第のマッチアップ ±0 50.3% 1.2%
Nidalee スキル次第のマッチアップ ±0 50.2% 2.4%
Kha'Zix スキル次第のマッチアップ ±0 50.0% 4.9%
Riven スキル次第のマッチアップ ±0 48.8% 1.2%
Jax スキル次第のマッチアップ ±0 48.4% 2.1%
Graves スキル次第のマッチアップ ±0 48.3% 7.6%
Cho'Gath スキル次第のマッチアップ ±0 47.6% 5.4%
Viego スキル次第のマッチアップ ±0 46.0% 3.4%
Gragas スキル次第のマッチアップ ±0
Morgana スキル次第のマッチアップ ±0
Taliyah スキル次第のマッチアップ ±0
Lillia 有利なマッチアップ −1 51.9% 3.3%
Ekko 有利なマッチアップ −1 51.6% 4.3%
Shyvana 有利なマッチアップ −1 51.1% 7.0%
Tryndamere 有利なマッチアップ −1 50.6% 6.8%
Kayn 有利なマッチアップ −1 50.6% 9.2%
Kindred 有利なマッチアップ −1 49.8% 2.6%
Hecarim 有利なマッチアップ −1 49.2% 2.6%
Yone 有利なマッチアップ −1 49.1% 2.0%
Talon 有利なマッチアップ −1 49.1% 2.8%
Master Yi 有利なマッチアップ −1 48.0% 9.3%
Rengar 有利なマッチアップ −1 47.8% 1.6%
Zed 有利なマッチアップ −1 47.6% 1.8%
Fizz 有利なマッチアップ −1 47.4% 2.1%
Aatrox 有利なマッチアップ −1
Camille 有利なマッチアップ −1
Nautilus 有利なマッチアップ −1
Nilah 有利なマッチアップ −1
Fiddlesticks 有利なマッチアップ −2 50.8% 2.7%
Evelynn 有利なマッチアップ −2 48.6% 2.4%
Twitch 有利なマッチアップ −2

Edge: Wild Rift Core canonical verdict (−3 to +3), shown from the point of view of the champion named in the row. Win rate and pick rate: the opponent's own rate in this role — Wild Rift CN · Challenger, Patch 7.2d. Not a head-to-head win rate.

ハードカウンター

3

これらのチャンピオンは、こちらのビルドやプレイスタイルを真正面から上回る構成を持ち、レーン戦のコントロールとファームを極めて難しくする。彼らのスキルはこちらの主要な強みを無効化し、いつも通りのプランを実行しようとした瞬間に手痛い反撃を受けさせてくる。こうしたマッチアップでは、ミスを最小限に抑え、正面からの対決以外で解決策を探すことが重要になる。

Poppy

Poppy+2

mobility counterpeel Poppy represents a mathematical wall for Lee Sin because her Steadfast Presence completely neutralizes your entire mobility kit. The moment she activates this barrier, any attempt to execute your Sonic Wave dash or escape with Safeguard is instantly blocked, leaving you grounded, knocked up, and utterly defenseless. You cannot out-damage her tankiness when your signature high-velocity initiations are turned into self-inflicted crowd control. Poppyのビルド → 詳細を見る
Poppy

理由

Poppy represents a mathematical wall for Lee Sin because her Steadfast Presence completely neutralizes your entire mobility kit. The moment she activates this barrier, any attempt to execute your Sonic Wave dash or escape with Safeguard is instantly blocked, leaving you grounded, knocked up, and utterly defenseless. You cannot out-damage her tankiness when your signature high-velocity initiations are turned into self-inflicted crowd control.

レーン戦への影響

This interaction cripples your early-game aggression and neutralizes your skirmishing power. You cannot safely contest Rift Scuttlers or invade her territory, as any duel near walls risks you getting pinned, while Steadfast Presence denies your escape routes. Your ganking lanes becomes incredibly risky; if Poppy counter-ganks, she simply presses one button to turn your aggressive Sonic Wave dives into fatal, immobile disasters under enemy turrets.

立ち回り方

To survive, you must change how you initiate. Never lead with the second cast of Sonic Wave. Instead, walk up to apply the slow from Tempest and force her to waste Steadfast Presence early. If she holds her barrier, use Dragon's Rage to kick her away, creating space to safely use Safeguard to a ward. If you get caught with your dashes on cooldown, rely on walking patterns to dodge her wall-pins.

チャンピオン詳細 → Poppyのビルド →
Rammus

Rammus+2

peeltempo Duelist patterns of Lee Sin rely heavily on weaving fast auto-attacks via Flurry between skills to maintain energy. However, Rammus's Defensive Ball Curl turns this attack speed buff into a self-destructive mechanism, reflecting massive magic damage for every strike. If you land Sonic Wave and commit to the dash, a simple Frenzying Taunt forces you to shred your own health bar against his spiked armor. Rammusのビルド → 詳細を見る
Rammus

理由

Duelist patterns of Lee Sin rely heavily on weaving fast auto-attacks via Flurry between skills to maintain energy. However, Rammus's Defensive Ball Curl turns this attack speed buff into a self-destructive mechanism, reflecting massive magic damage for every strike. If you land Sonic Wave and commit to the dash, a simple Frenzying Taunt forces you to shred your own health bar against his spiked armor.

レーン戦への影響

You cannot contest Rammus in direct 1v1 skirmishes in the river or jungle camps. Trying to invade or fight over Scuttle Crabs is suicidal because he can quickly catch you with Powerball and force a deadly duel. This shifts your focus entirely toward cross-map pressure; while he slowly clears with Defensive Ball Curl, you must use your mobility to execute rapid ganks before he can roll in to counter-gank.

立ち回り方

Avoid initiating onto Rammus. If he engages with Powerball, use Safeguard to hop to a position off his path to break his momentum, or knock him away using Dragon's Rage before he can land Frenzying Taunt. Only use Tempest to check bushes and secure neutral monsters. If caught, prioritize disengaging immediately rather than trying to stack Flurry. Focus your ganking efforts on lanes with high magic damage to melt his heavy armor stack.

チャンピオン詳細 → Rammusのビルド →
Olaf

Olaf+2

duelingskirmish Olaf completely neutralizes your defensive tools in the jungle. The moment he activates Ragnarok, he gains absolute immunity to the knockback of Dragon's Rage and the slow of Tempest. This means your primary tools for creating space or peeling him off are useless. He can easily shrug off your crowd control, run you down with Undertow's slows, and shred your health bar with Vicious Strikes without any fear of displacement. Olafのビルド → 詳細を見る
Olaf

理由

Olaf completely neutralizes your defensive tools in the jungle. The moment he activates Ragnarok, he gains absolute immunity to the knockback of Dragon's Rage and the slow of Tempest. This means your primary tools for creating space or peeling him off are useless. He can easily shrug off your crowd control, run you down with Undertow's slows, and shred your health bar with Vicious Strikes without any fear of displacement.

レーン戦への影響

This matchup strips away your early skirmishing power in the river and neutral areas. You cannot contest objectives directly because if Olaf activates Ragnarok, he dominates the zone. Your Sonic Wave cannot be followed up safely, as he will out-duel you with Undertow resets. You are forced to abandon scuttle crabs and burn Safeguard over walls to escape, conceding jungle pressure and letting him invade your camps freely.

立ち回り方

To survive, you must adapt your movement and ability usage. Never initiate with Sonic Wave when his Ragnarok is available. Instead, hold Safeguard specifically to hop over jungle walls, as terrain is your only reliable barrier against his CC-immune chase. If he activates his ultimate, immediately disengage and wait out the duration. Only use Dragon's Rage to peel his non-ultimate teammates or to kick him away after his Ragnarok buff has completely expired.

チャンピオン詳細 → Olafのビルド →

不利なマッチアップ

10

これらのチャンピオンは、マッチアップ自体を絶望的にするわけではないが、対面で優位に立ちやすいツールを持っている。射程が長かったり、攻撃を受け止める力が高かったり、エンゲージへの対応手段が豊富だったりする。アプローチを調整し、戦闘を受け入れるタイミングを慎重に選ぶ必要がある。

Pantheon

Pantheon+1

invadingburst Pantheon controls this Jungle matchup because his Aegis Assault can completely negate the execution damage of your Sonic Wave dash if he faces you during your flight. Since your early skirmishing relies heavily on landing this burst, a well-timed shield from him leaves you stranded in melee range without your primary damage, while his Mortal Will-infused Comet Spear and Shield Vault quickly turn the duel in his favor. Pantheonのビルド → 詳細を見る
Pantheon

理由

Pantheon controls this Jungle matchup because his Aegis Assault can completely negate the execution damage of your Sonic Wave dash if he faces you during your flight. Since your early skirmishing relies heavily on landing this burst, a well-timed shield from him leaves you stranded in melee range without your primary damage, while his Mortal Will-infused Comet Spear and Shield Vault quickly turn the duel in his favor.

レーン戦への影響

This defensive advantage translates into massive early pressure across the river. You cannot safely contest Rift Scuttlers or invade his camps when his cooldowns are ready, as a single blocked engage leads to your death. This forced passivity allows him to secure early map control and freely set up his Grand Starfall to impact lanes before you can establish a lead.

立ち回り方

To survive and outplay, never immediately reactivate Sonic Wave if Pantheon has his shield up. Instead, throw the first projectile, then use Safeguard toward a nearby position to bait out Aegis Assault. Once his defensive shield is on cooldown, you have a brief window to commit. During skirmishes, you can also use Dragon's Rage to kick him away, forcing him to waste his frontal protection in the wrong direction.

チャンピオン詳細 → Pantheonのビルド →
Dr. Mundo

Dr. Mundo+1

anti engageoutscaling Your signature playmaking tool, Dragon's Rage, is entirely absorbed by Dr. Mundo's Goes Where He Pleases. Instead of launching the giant tank into his own backline for massive collateral damage, your ultimate will merely drop a canister on the ground, leaving him unmoved. This passive immunity forces you to commit extra resources just to enable your primary displacement tool, giving him a massive defensive advantage in direct skirmishes. Dr. Mundoのビルド → 詳細を見る
Dr. Mundo

理由

Your signature playmaking tool, Dragon's Rage, is entirely absorbed by Dr. Mundo's Goes Where He Pleases. Instead of launching the giant tank into his own backline for massive collateral damage, your ultimate will merely drop a canister on the ground, leaving him unmoved. This passive immunity forces you to commit extra resources just to enable your primary displacement tool, giving him a massive defensive advantage in direct skirmishes.

レーン戦への影響

Because you cannot rely on Dragon's Rage to peel or isolate Dr. Mundo, his front-line pressure during early Dragon or Rift Herald contests is oppressive. He can walk straight through choke points, zoning your team with Infected Bonesaw while ignoring your self-peel. This forces your laners to retreat under tower earlier, bleeding map pressure because you cannot threaten him with high-impact displacement under your own structures.

立ち回り方

To play around this, never initiate with Dragon's Rage. Instead, you must first pop Goes Where He Pleases by catching him with Tempest's slow or triggering an ally's crowd control. Once the canister drops, use Safeguard to position yourself over it, stepping on the canister to prevent him from recovering his health and reducing his passive's cooldown. Only during this brief vulnerability window should you commit Sonic Wave to execute or kick him.

チャンピオン詳細 → Dr. Mundoのビルド →
Wukong

Wukong+1

teamfightsdisengage Wukong holds a distinct advantage in direct skirmishes because his decoy completely neutralizes your main threat. Whenever you attempt to close the distance or burst him down, a well-timed Warrior Trickster allows him to absorb your Sonic Wave with his clone. This interaction leaves you without your primary damage tool and gap-closer, while his Stone Skin armor bonus makes him incredibly durable if you try to commit to an extended fight. Wukongのビルド → 詳細を見る
Wukong

理由

Wukong holds a distinct advantage in direct skirmishes because his decoy completely neutralizes your main threat. Whenever you attempt to close the distance or burst him down, a well-timed Warrior Trickster allows him to absorb your Sonic Wave with his clone. This interaction leaves you without your primary damage tool and gap-closer, while his Stone Skin armor bonus makes him incredibly durable if you try to commit to an extended fight.

レーン戦への影響

This dynamic severely limits your freedom to invade his jungle or contest neutral objectives early. You cannot safely face-check brushes or force duels in the river, as Wukong can easily turn your missed engage into a devastating counter-offensive using Nimbus Strike and Golden Staff. Once he unlocks Cyclone, any failed engage from your side results in a heavy knock-up that leaves you completely exposed to his team's follow-up.

立ち回り方

To survive this matchup, you must discipline your trigger finger. Never lead your engage with Sonic Wave; instead, use Safeguard to dash to a nearby position, forcing Wukong to panic-cast Warrior Trickster. Once his clone disappears, you can safely target him with Tempest to slow him down before committing your main damage. If he initiates with Cyclone, immediately use Dragon's Rage to kick him away and neutralize his ultimate's knock-up potential.

チャンピオン詳細 → Wukongのビルド →
Nocturne

Nocturne+1

duelingvision control Nocturne holds the upper hand because his Shroud of Darkness completely nullifies your primary threat tools. Blocking your Sonic Wave prevents the crucial execution follow-up, while absorbing Dragon's Rage denies your main self-peel and burst. Once Shroud of Darkness successfully intercepts either of these abilities, Nocturne gains a massive attack speed boost, enabling him to easily shred you while you are tethered by Unspeakable Horror. Nocturneのビルド → 詳細を見る
Nocturne

理由

Nocturne holds the upper hand because his Shroud of Darkness completely nullifies your primary threat tools. Blocking your Sonic Wave prevents the crucial execution follow-up, while absorbing Dragon's Rage denies your main self-peel and burst. Once Shroud of Darkness successfully intercepts either of these abilities, Nocturne gains a massive attack speed boost, enabling him to easily shred you while you are tethered by Unspeakable Horror.

レーン戦への影響

This matchup dynamic forces you into a defensive posture during early jungle skirmishes. You cannot safely contest isolated neutral monsters or invade his territory without knowing his defensive cooldowns. Once Paranoia is active, Nocturne can bypass your Safeguard escape routes to dive your laners, and your ability to counter-gank is crippled if he blocks your Dragon's Rage, turning potential rescues into double kills for him.

立ち回り方

To survive duels, you must bait out Shroud of Darkness before committing your main damage. Start fights with Tempest to slow him, or use Safeguard to hop to a nearby ward when he casts Duskbringer, forcing him to waste his shield. Never lead with Sonic Wave. If he channels Unspeakable Horror, immediately use Safeguard to break the tether distance. Only launch Dragon's Rage after his spell shield is completely down.

チャンピオン詳細 → Nocturneのビルド →
Warwick

Warwick+1

duelingdisengage Warwick's extreme sustain from Eternal Hunger makes direct duels highly unfavorable for you, but the real danger lies in your mobility being negated. When you attempt to disengage using Safeguard, Warwick can latch onto you with Jaws of the Beast, following you directly to your landing position. This interaction completely neutralizes your safety net, forcing you into extended fights where his healing outlasts your burst. Warwickのビルド → 詳細を見る
Warwick

理由

Warwick's extreme sustain from Eternal Hunger makes direct duels highly unfavorable for you, but the real danger lies in your mobility being negated. When you attempt to disengage using Safeguard, Warwick can latch onto you with Jaws of the Beast, following you directly to your landing position. This interaction completely neutralizes your safety net, forcing you into extended fights where his healing outlasts your burst.

レーン戦への影響

This interaction alters how you navigate the river and neutral camps. You cannot safely invade or contest Scuttle Crabs, as any skirmish can turn deadly if Warwick tracks you with Blood Hunt. Since you cannot reliably escape with Safeguard, getting caught in your own jungle usually results in giving away first blood or forcing you to burn Flash prematurely, severely delaying your early-game pressure.

立ち回り方

To survive this matchup, you must alter your ability sequence during skirmishes. Never use Safeguard defensively while Warwick still has Jaws of the Beast available. Instead, initiate with Sonic Wave and use Tempest to slow him down. If he commits and uses his bite, that is your cue to disengage with Safeguard or blast him away using Dragon's Rage. Always play around his cooldowns, fighting only when you can burst him before his healing kicks in.

チャンピオン詳細 → Warwickのビルド →
Volibear

Volibear+1

duelingdisengage Volibear thrives in prolonged skirmishes because his Frenzied Maul provides massive healing on marked targets while The Relentless Storm ramps up his attack speed. Lee Sin relies on quick burst sequences with Sonic Wave and Flurry to chunk targets. In a straight duel, Volibear easily absorbs your burst with Sky Splitter and out-sustains you, forcing you to use Safeguard to escape rather than to fight. Volibearのビルド → 詳細を見る
Volibear

理由

Volibear thrives in prolonged skirmishes because his Frenzied Maul provides massive healing on marked targets while The Relentless Storm ramps up his attack speed. Lee Sin relies on quick burst sequences with Sonic Wave and Flurry to chunk targets. In a straight duel, Volibear easily absorbs your burst with Sky Splitter and out-sustains you, forcing you to use Safeguard to escape rather than to fight.

レーン戦への影響

This interaction dictates jungle priority. You cannot contest the Scuttle Crab or neutral camps in a direct 1v1 if Volibear has his cooldowns ready. An early skirmish where you fail to secure the kill with Sonic Wave leaves you vulnerable to a counter-engage with Thundering Smash. This forces you to concede deep vision, delaying your active gank pressure while Volibear threatens your lanes with Stormbringer dives.

立ち回り方

To survive this matchup, never commit to long duels. Initiate with Sonic Wave, trigger Flurry for quick attacks, and immediately use Safeguard to dash away before he can land a second Frenzied Maul. If he activates Thundering Smash to chase you down, slow him with Tempest and save Dragon's Rage specifically to kick him away when he attempts to dive with Stormbringer, neutralizing his ultimate's disable effect.

チャンピオン詳細 → Volibearのビルド →
Maokai

Maokai+1

teamfightspeel Maokai dominates this jungle duel because his Twisted Advance completely neutralizes your offensive pressure. When you launch yourself with the second cast of Sonic Wave, Maokai can reactively trigger his root. The brief untargetability during his dash lets him dodge your execution damage entirely while instantly securing you in place for a crushing follow-up with Bramble Smash. Maokaiのビルド → 詳細を見る
Maokai

理由

Maokai dominates this jungle duel because his Twisted Advance completely neutralizes your offensive pressure. When you launch yourself with the second cast of Sonic Wave, Maokai can reactively trigger his root. The brief untargetability during his dash lets him dodge your execution damage entirely while instantly securing you in place for a crushing follow-up with Bramble Smash.

レーン戦への影響

This interaction strips away your early skirmish dominance, forcing you into defensive pathing. Invading his camps is highly risky, as getting caught near his Sapling Toss in bushes leads to an instant collapse. You cannot easily contest Scuttle Crabs if he is waiting, because his crowd control turns your Safeguard escapes into death traps.

立ち回り方

To survive and outplay Maokai, never initiate with Sonic Wave. Instead, clear your camps quickly using Flurry to keep your energy high, and use Safeguard to dash next to him to bait his Twisted Advance first. Once he commits and roots you, kick him away immediately using Dragon's Rage to disengage, or wait out his untargetability before landing your projectile.

チャンピオン詳細 → Maokaiのビルド →
Mordekaiser

Mordekaiser+1

duelingdisengage This jungle matchup hinges entirely on how Mordekaiser's ultimate neutralizes your unmatched mobility. Once he traps you inside Realm of Death, you are completely stripped of your primary defensive tool, Safeguard. Safeguard still moves you, but the death dimension is far too cramped to escape through it, leaving you locked in a raw duel against his passive Darkness Rise. Mordekaiserのビルド → 詳細を見る
Mordekaiser

理由

This jungle matchup hinges entirely on how Mordekaiser's ultimate neutralizes your unmatched mobility. Once he traps you inside Realm of Death, you are completely stripped of your primary defensive tool, Safeguard. Safeguard still moves you, but the death dimension is far too cramped to escape through it, leaving you locked in a raw duel against his passive Darkness Rise.

レーン戦への影響

This dynamic completely paralyzes your ability to contest neutral monsters or fight in the river. Attempting to steal an objective with Sonic Wave becomes incredibly risky because Mordekaiser can pull you into Realm of Death, forcing an unwinnable duel. You lose the freedom to invade his camps, forcing your laners to play defensively as you cannot safely secure early river priority or counter-gank his lanes.

立ち回り方

To survive this matchup, you must hold Dragon's Rage strictly as a defensive counter-measure. The moment Mordekaiser drags you into his Realm of Death, immediately kick him away to waste his ultimate's duration. Never commit your Sonic Wave dash while his crowd control is up, and use Tempest's slow to kite him around terrain obstacles if you are trapped without your ultimate to push him back.

チャンピオン詳細 → Mordekaiserのビルド →
Skarner

Skarner+1

peelteamfights Skarner naturally counters your high-mobility skirmishing style because of his ultimate suppression. While you rely on landing Sonic Wave to initiate trades and immediately escape with Safeguard, Skarner can reactively cast Impale the moment you dash in. This suppression completely locks you down, rendering Safeguard unusable and leaving you exposed to his high maximum health damage from Threads of Vibration. Skarnerのビルド → 詳細を見る
Skarner

理由

Skarner naturally counters your high-mobility skirmishing style because of his ultimate suppression. While you rely on landing Sonic Wave to initiate trades and immediately escape with Safeguard, Skarner can reactively cast Impale the moment you dash in. This suppression completely locks you down, rendering Safeguard unusable and leaving you exposed to his high maximum health damage from Threads of Vibration.

レーン戦への影響

This interaction severely limits your invading power in the jungle. You cannot safely contest Skarner near walls, where his Ixtal's Impact can easily pin you for a follow-up stun. Because you must respect his Impale, your aggressive jungle skirmishes become incredibly risky, forcing you to play defensively. This concedes early river priority, slowing down your transition into a dominant map-wide playmaker.

立ち回り方

To survive this matchup, you must alter your engagement rules. Never trigger the second cast of Sonic Wave if Skarner is holding Impale unless you have allies ready to burst him down. Fight exclusively in open river spaces to nullify the wall-stun from Ixtal's Impact. If Skarner charges at you, use Dragon's Rage defensively to launch him away mid-dash, then utilize Tempest to slow his pursuit and safely retreat.

チャンピオン詳細 → Skarnerのビルド →

その他のマッチアップ

スキル次第のマッチアップ

18

このマッチアップは何よりもまず実行力の勝負であり、両者ともに優位を取れる現実的な手段を持っている。重要なスキルを一つ避けられるか、エンゲージを正しく読めるか、あるいはたった一つの位置取りのミスが、勝敗を分けることもある。マッチアップを理解し、行動すべき瞬間を見極める力がとりわけ重要になる。

Amumu

Amumu±0

early skirmishscaling gap The early game belongs to you, but Amumu dominates late-game teamfights. Your tracking determines the pace of this match. In skirmishes, Amumu relies on landing Bandage Toss to initiate, while his Despair melts health pools over time. Your ultimate, Dragon's Rage, is the ultimate disengage tool; kicking Amumu away when he tries to dive in prevents his Curse of the Sad Mummy from trapping your entire team. Amumuのビルド → 詳細を見る
Amumu

理由

The early game belongs to you, but Amumu dominates late-game teamfights. Your tracking determines the pace of this match. In skirmishes, Amumu relies on landing Bandage Toss to initiate, while his Despair melts health pools over time. Your ultimate, Dragon's Rage, is the ultimate disengage tool; kicking Amumu away when he tries to dive in prevents his Curse of the Sad Mummy from trapping your entire team.

レーン戦への影響

Early jungle tracking is critical because Amumu's clear with Tantrum is fast but leaves him vulnerable to counter-jungling. If you track his path and use Sonic Wave to invade, you can delay his high-impact Curse of the Sad Mummy power spike. Failing to shut him down early allows him to secure neutral objectives easily, shifting the map pressure and forcing your team into passive defensive play.

立ち回り方

When teamfights begin, never waste Dragon's Rage on a random target. Hold it specifically to peel Amumu off your squishy allies the moment he uses Bandage Toss. If he manages to flash-engage, use Safeguard to quickly reposition outside the radius of Curse of the Sad Mummy, then kick him out of the fight. Keep deep wards in his jungle to track his camps and execute aggressive skirmishes before he scales.

チャンピオン詳細 → Amumuのビルド →
Diana

Diana±0

skirmishmobility This matchup is a pure race for early-game tempo where execution dictates the victor. Diana relies on landing Crescent Strike to reset her Lunar Rush and pull off a devastating Moonfall combo. However, Lee Sin possesses the ultimate counter-engage tool: timing Dragon's Rage the moment she dashes in completely cancels her momentum, leaving her isolated and vulnerable without her primary burst setup. Dianaのビルド → 詳細を見る
Diana

理由

This matchup is a pure race for early-game tempo where execution dictates the victor. Diana relies on landing Crescent Strike to reset her Lunar Rush and pull off a devastating Moonfall combo. However, Lee Sin possesses the ultimate counter-engage tool: timing Dragon's Rage the moment she dashes in completely cancels her momentum, leaving her isolated and vulnerable without her primary burst setup.

レーン戦への影響

The jungle dynamic revolves around early pressure and skirmish control. Diana uses Pale Cascade and Moonsilver Blade for a fast, healthy clear to reach her ultimate spike, while you must leverage Flurry to contest her camps early. If you fail to disrupt her early pathing, her teamfight threat scales rapidly. Conversely, shutting down her initial ganks sets her back significantly, rendering her too fragile to dive.

立ち回り方

Never waste Dragon's Rage defensively or as a simple execute if Diana has her dash available. Keep your eyes on her Crescent Strike trajectory and use Safeguard to dash out of its arc, denying her the mark. If she does manage to connect and uses Lunar Rush, immediately buffer your ultimate to kick her away before she can channel Moonfall. If she catches you off-guard, rely on Tempest to slow her and disengage.

チャンピオン詳細 → Dianaのビルド →
Darius

Darius±0

disengageearly pressure This jungle duel revolves entirely around Darius trying to stack Hemorrhage and land Decimate, while Lee Sin attempts to burst or disengage. The matchup swings on how you handle Darius's healing and execution. By using Dragon's Rage, you can physically interrupt his Decimate swing or push him away right as he casts Noxian Guillotine, completely neutralizing his fight-turning high-damage windows. Dariusのビルド → 詳細を見る
Darius

理由

This jungle duel revolves entirely around Darius trying to stack Hemorrhage and land Decimate, while Lee Sin attempts to burst or disengage. The matchup swings on how you handle Darius's healing and execution. By using Dragon's Rage, you can physically interrupt his Decimate swing or push him away right as he casts Noxian Guillotine, completely neutralizing his fight-turning high-damage windows.

レーン戦への影響

Jungle skirmishes around Scuttle Crabs or during counter-ganks are highly volatile. If Darius misses Decimate or gets kicked away from his execution target, his DPS collapses and Hemorrhage stacks drop. However, if he pulls you with Apprehend and gets five stacks, he dominates the jungle. This tension dictates who controls the river and forces both of you to delay major objective takes until one is forced out.

立ち回り方

Do not commit Sonic Wave and Tempest blindly. Instead, bait his Apprehend first, using Safeguard to dodge his Decimate outer ring. When Darius prepares his Decimate or leaps for Noxian Guillotine, immediately cast Dragon's Rage to blow him back. While his crucial cooldowns are down, recast Sonic Wave to close the gap and secure the kill. If he manages to stack five Hemorrhage stacks early, use Safeguard to a ward and disengage immediately.

チャンピオン詳細 → Dariusのビルド →
Ambessa

Ambessa±0

mobility duelcc block This duel is a high-speed game of chicken determined by split-second reaction times. While your mobility with Sonic Wave and Safeguard allows you to dance around her skillshots, the entire skirmish hinges on your ultimate. If Ambessa anticipates your Dragon's Rage, she can activate Repudiation to absorb the damage and completely negate the displacement, turning your primary isolation tool into a wasted cooldown. Ambessaのビルド → 詳細を見る
Ambessa

理由

This duel is a high-speed game of chicken determined by split-second reaction times. While your mobility with Sonic Wave and Safeguard allows you to dance around her skillshots, the entire skirmish hinges on your ultimate. If Ambessa anticipates your Dragon's Rage, she can activate Repudiation to absorb the damage and completely negate the displacement, turning your primary isolation tool into a wasted cooldown.

レーン戦への影響

In the river and jungle corridors, neither of you can easily force a decisive kill without risking a massive counter-punish. An early duel near the neutral camps becomes an intricate dance where missing your second activation of Sonic Wave or letting her stack Drakehound's Step passive triggers a snowball. If you fail your kick, her Public Execution will quickly shut down your escape routes and secure the skirmish.

立ち回り方

To win this tactical chess match, never lead with Dragon's Rage when she has her shield available. Instead, initiate with Sonic Wave, but delay the second cast or dash sideways using Safeguard to bait out her Repudiation. Once she wastes her defensive shield trying to predict your kick, use Tempest to slow her down, then execute her or kick her into your team without fear of her blocking the knockback.

チャンピオン詳細 → Ambessaのビルド →
Gwen

Gwen±0

scaling gapzone control This skill matchup centers on how you handle Gwen's safety zone. While Hallowed Mist grants her untargetability and bonus resistances against your ranged Sonic Wave, you possess the ultimate tool to disrupt it. By positioning yourself correctly, Dragon's Rage can physically kick Gwen out of her protective fog. This immediately strips away her defensive buffs and exposes her to your high burst damage. Gwenのビルド → 詳細を見る
Gwen

理由

This skill matchup centers on how you handle Gwen's safety zone. While Hallowed Mist grants her untargetability and bonus resistances against your ranged Sonic Wave, you possess the ultimate tool to disrupt it. By positioning yourself correctly, Dragon's Rage can physically kick Gwen out of her protective fog. This immediately strips away her defensive buffs and exposes her to your high burst damage.

レーン戦への影響

In active skirmishes around camps or river crabs, Gwen relies on Skip 'n Slash to reposition and land maximum snips from Snip Snip!. If you engage recklessly, her A Thousand Cuts passive will quickly shred your health bar during extended trades. However, because you can neutralize her primary defensive tool, neither of you can blindly commit. Fights are decided by who baits the other's defensive active first.

立ち回り方

Never initiate with Sonic Wave if Gwen has her shroud ready, as she will block it. Instead, dash close to her with Safeguard, use Tempest to slow her, and wait for her to panic-cast Hallowed Mist. Once she does, walk inside her circle to bypass the untargetability, then immediately cast Dragon's Rage to boot her out of it, instantly following up with your projectile combo to finish her off.

チャンピオン詳細 → Gwenのビルド →
Jarvan IV

Jarvan IV±0

early gamemobility This skill matchup revolves around high-tempo early skirmishes where neither jungler holds a natural advantage. While Jarvan IV relies on his Demacian Standard and Dragon Strike combo to lock you down, your mobility matches his aggression step-for-step. The absolute turning point is Cataclysm; its terrain-based lock-in is completely neutralized because you can instantly use Safeguard to hop over the arena walls to safety, leaving him isolated. Jarvan IVのビルド → 詳細を見る
Jarvan IV

理由

This skill matchup revolves around high-tempo early skirmishes where neither jungler holds a natural advantage. While Jarvan IV relies on his Demacian Standard and Dragon Strike combo to lock you down, your mobility matches his aggression step-for-step. The absolute turning point is Cataclysm; its terrain-based lock-in is completely neutralized because you can instantly use Safeguard to hop over the arena walls to safety, leaving him isolated.

レーン戦への影響

Skirmishes in the river and lanes dictate the early game. Since Jarvan IV has great gank setup with Golden Aegis and his knockup, you must focus heavily on counter-ganking. Tracking his pathing is essential; arriving right after he commits his Demacian Standard allows you to turn the fight. If he traps your laner in Cataclysm, you can dive in with Safeguard or kick him away with Dragon's Rage.

立ち回り方

Always keep a stealth ward available specifically to execute a Safeguard jump when Cataclysm is active. During skirmishes, avoid initiating with Sonic Wave immediately; wait for him to commit his Demacian Standard dash. Once his main mobility is on cooldown, land your Sonic Wave and trigger Flurry to win the auto-attack trade. If he activates Golden Aegis to slow you, use Tempest to match his utility and slow him back while escaping.

チャンピオン詳細 → Jarvan IVのビルド →
Graves

Graves±0

early gamemobility matchup This jungle matchup revolves entirely around whether you can land Sonic Wave. Graves relies on Quickdraw to dash sideways, easily slipping past your crucial projectile. If he successfully evades your engage, his True Grit armor stacks will ramp up during the duel while you are left without your primary execution tool, turning a potential burst kill into a protracted, losing skirmish. Gravesのビルド → 詳細を見る
Graves

理由

This jungle matchup revolves entirely around whether you can land Sonic Wave. Graves relies on Quickdraw to dash sideways, easily slipping past your crucial projectile. If he successfully evades your engage, his True Grit armor stacks will ramp up during the duel while you are left without your primary execution tool, turning a potential burst kill into a protracted, losing skirmish.

レーン戦への影響

In the river and camps, neither of you can blindly invade without tracking the other's location. A missed Sonic Wave near a wall allows Graves to instantly counter-engage with End of the Line for massive ricochet damage, forcing you to use Safeguard defensively to escape. This constant threat slows down your neutral objective takes, as starting a dragon or herald makes you highly vulnerable to his Smoke Screen.

立ち回り方

To win these skirmishes, do not lead with Sonic Wave. Instead, use Safeguard to dash straight onto Graves, then immediately apply Tempest to slow his movement. This slow forces him to reactively burn Quickdraw to gain distance. Only once he has committed his dash should you fire Sonic Wave to secure the execute, or use Dragon's Rage to kick him into a wall to guarantee the projectile hits.

チャンピオン詳細 → Gravesのビルド →
Jax

Jax±0

early pressureskirmish This jungle duel revolves entirely around neutralizing Jax's defensive windows. When Jax activates Counter Strike to block your Flurry-empowered basic attacks, he aims to jump in with Leap Strike and land his stun. Your ultimate tool to deny this tempo is Dragon's Rage. Kicking him away mid-spin completely wastes his defensive duration and prevents the stun, turning a deadly duel into an even fight. Jaxのビルド → 詳細を見る
Jax

理由

This jungle duel revolves entirely around neutralizing Jax's defensive windows. When Jax activates Counter Strike to block your Flurry-empowered basic attacks, he aims to jump in with Leap Strike and land his stun. Your ultimate tool to deny this tempo is Dragon's Rage. Kicking him away mid-spin completely wastes his defensive duration and prevents the stun, turning a deadly duel into an even fight.

レーン戦への影響

Because your clear speeds are neck-and-neck, this matchup becomes a race for map pressure. Since Counter Strike has a massive cooldown early on, a failed skirmish for Jax means he loses the ability to contest objectives. If you successfully disengage his primary defense, you can easily secure crabs or invade, whereas failing to time your kick gives Jax the double-kill opportunity on your lanes.

立ち回り方

Never commit your Sonic Wave second cast while Jax has Counter Strike ready, as he will easily absorb the follow-up burst. Instead, bait his jump by positioning near walls, using Safeguard to escape his initial leap. Hold your Dragon's Rage specifically for the moment he winds up his stun. If he initiates with Leap Strike and spins, press your ultimate immediately to reset the gap, then re-engage with Sonic Wave once his defense expires.

チャンピオン詳細 → Jaxのビルド →
Vi

Vi±0

duelingmobility This duel is a pure mechanical check of reaction speed. Vi relies heavily on landing her fully charged Vault Breaker to trigger Denting Blows and shred your armor. If she misses or if you successfully sidestep her charge using Safeguard, her sustained damage drops significantly. However, you cannot mindlessly burst her down if she activates Blast Shield, as its massive temporary shield absorbs your execution damage from Sonic Wave. Viのビルド → 詳細を見る
Vi

理由

This duel is a pure mechanical check of reaction speed. Vi relies heavily on landing her fully charged Vault Breaker to trigger Denting Blows and shred your armor. If she misses or if you successfully sidestep her charge using Safeguard, her sustained damage drops significantly. However, you cannot mindlessly burst her down if she activates Blast Shield, as its massive temporary shield absorbs your execution damage from Sonic Wave.

レーン戦への影響

Jungle skirmishes are decided entirely by who initiates first and how the cooldowns trade. When contesting Scuttle Crabs or invading, whoever wastes their mobility spell first is at a massive disadvantage. If Vi misses her punch, you can easily counter-engage. Conversely, if she catches you without Safeguard up, her Cease and Desist guarantees a lockup that allows her team to collapse, forcing you to play defensively.

立ち回り方

Never commit your second Sonic Wave cast while her Blast Shield is active; instead, use the first mark to track her, then disengage or wait out the shield. Keep a ward ready or stay near a camp to instantly Safeguard away when you hear her charging Vault Breaker. If she locks you down with Cease and Desist, immediately buffer Dragon's Rage to boot her away the millisecond you land, neutralizing her follow-up.

チャンピオン詳細 → Viのビルド →
Kha'Zix

Kha'Zix±0

skirmishoutplay This jungle duel is dictated by a high-stakes reaction game. Landing Sonic Wave is your absolute win condition, as it grants vision of Kha'Zix, completely neutralizing his Void Assault invisibility and Unseen Threat resets. However, a skilled Kha'Zix will hold Void Assault to dodge your Sonic Wave. If he successfully jukes your projectile, you lose your gap-closer and execution damage, tilting the duel entirely in his favor. Kha'Zixのビルド → 詳細を見る
Kha'Zix

理由

This jungle duel is dictated by a high-stakes reaction game. Landing Sonic Wave is your absolute win condition, as it grants vision of Kha'Zix, completely neutralizing his Void Assault invisibility and Unseen Threat resets. However, a skilled Kha'Zix will hold Void Assault to dodge your Sonic Wave. If he successfully jukes your projectile, you lose your gap-closer and execution damage, tilting the duel entirely in his favor.

レーン戦への影響

This volatile dynamic turns every river skirmish and jungle invasion into a tense standoff. You cannot safely contest Rift Scuttler or invade his camps without knowing if his Leap or Void Assault is available. A single missed Sonic Wave in the river instantly forfeits your pressure, forcing you to use Safeguard defensively to escape his isolated Taste Their Fear damage, costing your laners crucial jungle support.

立ち回り方

Never lead your engage with Sonic Wave when fighting him head-on. Instead, use Safeguard to dash straight onto him, slowing him with Tempest to force his reaction. Hold your Sonic Wave until he either commits to Leap or tries to activate Void Assault to escape. If he vanishes before you mark him, immediately sweep the area with Tempest to reveal him, or use Safeguard to retreat to a nearby ally or jungle camp.

チャンピオン詳細 → Kha'Zixのビルド →
Viego

Viego±0

duelingscaling This direct jungle duel pivots entirely on the interaction between Viego's charged stun and your mobility. When Viego attempts to lock you down using Spectral Maw, reacting instantly with Safeguard to a ward or nearby camp lets you completely bypass his crowd control. Once his stun is wasted, you can immediately retaliate with Flurry-infused basic attacks, easily out-trading him before his active cooldowns recover. Viegoのビルド → 詳細を見る
Viego

理由

This direct jungle duel pivots entirely on the interaction between Viego's charged stun and your mobility. When Viego attempts to lock you down using Spectral Maw, reacting instantly with Safeguard to a ward or nearby camp lets you completely bypass his crowd control. Once his stun is wasted, you can immediately retaliate with Flurry-infused basic attacks, easily out-trading him before his active cooldowns recover.

レーン戦への影響

Skirmishes around the Scuttle Crab and early river entries become high-stakes mind games. Viego will use Harrowed Path along the walls to mask his approach, forcing you to remain hyper-vigilant. If you successfully dodge his initial burst, you secure immediate priority over neutral camps. However, failing this dodge allows Viego to execute you with Heartbreaker, quickly snowballing the map through his Sovereign's Domination resets.

立ち回り方

Never initiate a skirmish by blindly throwing Sonic Wave if Viego's stun is available. Instead, walk up or use Tempest to reveal him inside Harrowed Path, keeping your Safeguard ready to escape his Spectral Maw trajectory. If he misses his charge, press the advantage immediately with Flurry-boosted strikes. Should you get caught off-guard, use Dragon's Rage to peel him away and reset the fight on your own terms.

チャンピオン詳細 → Viegoのビルド →
Gragas

Gragas±0

early skirmishmobility clash The matchup hinges entirely on how you navigate Gragas's ability to disrupt your mobility. Your primary damage loop relies on landing Sonic Wave and using the second cast to fly in. However, a competent Gragas will reactively use Body Slam to collide with you mid-dash. This instantly cancels your execution damage, leaves you CC'd in close quarters, and allows him to retaliate with a fully charged Drunken Rage strike. Gragasのビルド → 詳細を見る
Gragas

理由

The matchup hinges entirely on how you navigate Gragas's ability to disrupt your mobility. Your primary damage loop relies on landing Sonic Wave and using the second cast to fly in. However, a competent Gragas will reactively use Body Slam to collide with you mid-dash. This instantly cancels your execution damage, leaves you CC'd in close quarters, and allows him to retaliate with a fully charged Drunken Rage strike.

レーン戦への影響

Because of this interruption risk, you cannot blindly contest Gragas in the river or during early jungle skirmishes. If he holds his displacement, you are forced to delay your burst, slowing down your clear and making neutral objective contests highly tense. A failed gank where he interrupts your dash can instantly turn a skirmish into a double kill for him, especially once Explosive Cask is available to scatter your team.

立ち回り方

To outplay him, never take the bait of a maximum-range Sonic Wave second cast if his Body Slam is off cooldown. Instead, use Safeguard to dash close to him, baiting out his tackle or his Barrel Roll. Once he wastes Body Slam, you can freely unleash your full combo. If you get caught, use Dragon's Rage to boot him away before he can lock you down with Explosive Cask, allowing you to safely disengage.

チャンピオン詳細 → Gragasのビルド →
Riven

Riven±0

mobilitydueling This jungle duel is a pure test of reflexes where Riven's high burst mobility meets your execution power. The outcome hinges on how you manage your Sonic Wave recast against her Valor. If Riven absorbs your second kick with her shield, you lose the damage threshold needed to win the duel, whereas exploiting her cooldown windows when Broken Wings is down gives you a massive advantage. Rivenのビルド → 詳細を見る
Riven

理由

This jungle duel is a pure test of reflexes where Riven's high burst mobility meets your execution power. The outcome hinges on how you manage your Sonic Wave recast against her Valor. If Riven absorbs your second kick with her shield, you lose the damage threshold needed to win the duel, whereas exploiting her cooldown windows when Broken Wings is down gives you a massive advantage.

レーン戦への影響

Skirmishes in the river are highly volatile. A single misstep during a scuttle contest can swing the jungle momentum entirely. Because Riven cleared with Broken Wings and Ki Burst, you can invade her if she wastes her dashes, but failing your engage means she can chase you down with Blade of the Exile. The winner gains total control over objective setups and neutral pressure.

立ち回り方

To win the 1v1, land Sonic Wave but do not immediately reactivate it. Instead, use Safeguard to a nearby ward or lane minion to position yourself safely, baiting out her Valor shield. Once her shield decays and she has exhausted her Ki Burst, trigger the execution damage of your second Sonic Wave cast. If she activates Blade of the Exile, immediately use Dragon's Rage to disengage and waste her ultimate's duration.

チャンピオン詳細 → Rivenのビルド →
Nidalee

Nidalee±0

mobilityskirmish This jungle matchup is a razor-thin duel of pure execution governed by who strikes from the shadows first. Everything hinges on a single skillshot interaction: if Nidalee pins you with Javelin Toss, her cougar form execution will shred your health bar before you can react. Conversely, landing your Sonic Wave first lets you dictate the engagement, bursting her down before she can shift forms to escape or heal. Nidaleeのビルド → 詳細を見る
Nidalee

理由

This jungle matchup is a razor-thin duel of pure execution governed by who strikes from the shadows first. Everything hinges on a single skillshot interaction: if Nidalee pins you with Javelin Toss, her cougar form execution will shred your health bar before you can react. Conversely, landing your Sonic Wave first lets you dictate the engagement, bursting her down before she can shift forms to escape or heal.

レーン戦への影響

Because both of you excel at high-tempo jungle clears and aggressive invades, the early game becomes a tense hunt across the camps. Missing your initial skillshot doesn't just mean a lost duel; it forces you out of her jungle, giving her free rein to steal your raptors or pressuring your laners. The map pressure shifts entirely to whichever assassin secures the first successful counter-jungle kill.

立ち回り方

When invading her territory, never throw Sonic Wave blindly into bushes. Instead, initiate with Safeguard to a ward or an allied unit to close the distance, using the physical displacement to dodge her Javelin Toss reactively. Once she misses her spear, she loses her hunt bonus, leaving her vulnerable. That is your cue to unleash Sonic Wave, follow up with Tempest to reveal her if she tries to use the brush, and secure the kill.

チャンピオン詳細 → Nidaleeのビルド →
Nunu & Willump

Nunu & Willump±0

disengageobjective control This matchup is an intense objective race decided by how you handle Nunu & Willump's ultimate tool. While Nunu relies on Consume to secure epic monsters easily, his teamfight zoning depends on Absolute Zero. As Lee Sin, your entire gameplan revolves around saving Dragon's Rage to interrupt this massive channel, kicking him far away from your allies and the objective before the ice explodes. Nunu & Willumpのビルド → 詳細を見る
Nunu & Willump

理由

This matchup is an intense objective race decided by how you handle Nunu & Willump's ultimate tool. While Nunu relies on Consume to secure epic monsters easily, his teamfight zoning depends on Absolute Zero. As Lee Sin, your entire gameplan revolves around saving Dragon's Rage to interrupt this massive channel, kicking him far away from your allies and the objective before the ice explodes.

レーン戦への影響

Because Nunu clears camps rapidly with Consume and ganks lanes with Biggest Snowball Ever!, you must match his map pressure without overcommitting. Neither of you can easily solo-kill the other. This stalemate forces a high-stakes duel around Dragons and Rift Heralds, where a single mistimed Safeguard or an interrupted channel decides which team secures the global buffs and snowball momentum.

立ち回り方

During neutral objective contests, never waste Dragon's Rage early. Wait for Nunu to start channeling Absolute Zero, then dash in with Safeguard to position yourself and kick him out of the pit. This denies his zoning shield and keeps his Consume out of Smite range. If you get caught by his Snowball Barrage first, use Tempest to reveal him in brushes and disengage until his crowd control expires.

チャンピオン詳細 → Nunu & Willumpのビルド →

その他のマッチアップ

有利なマッチアップ

20

これらのチャンピオンは、こちらの主要な強みに効果的に対応するのが難しく、より自由に対面を組み立てることができる。プレッシャーをかけて有利な交換を引き出す手段は複数あることが多い。相手が態勢を立て直す時間を与えるのではなく、この優位を活かして主導権を握ろう。

Aatrox

Aatrox−1

early pressuredisengage You hold a massive advantage in this jungle duel because your superior mobility directly neutralizes Aatrox's highly telegraphed kit. While he relies on landing the sweetspots of The Darkin Blade to sustain and deal damage, your Safeguard and Sonic Wave allow you to easily dance outside his strike zones. Most importantly, the moment he activates World Ender, your Dragon's Rage serves as the ultimate disengage, completely wasting his transformation's duration. Aatroxのビルド → 詳細を見る
Aatrox

理由

You hold a massive advantage in this jungle duel because your superior mobility directly neutralizes Aatrox's highly telegraphed kit. While he relies on landing the sweetspots of The Darkin Blade to sustain and deal damage, your Safeguard and Sonic Wave allow you to easily dance outside his strike zones. Most importantly, the moment he activates World Ender, your Dragon's Rage serves as the ultimate disengage, completely wasting his transformation's duration.

レーン戦への影響

This interaction dictates how skirmishes play out around the Rift Herald or Dragon pits. Aatrox cannot safely contest neutral objectives or invade your camps because he cannot force a straight fight. If he attempts to lock you down with Infernal Chains, you can instantly escape. Knowing his ultimate is useless as long as you hold your kick, you dictate the pace of every teamfight, forcing him to play defensively.

立ち回り方

Never initiate a fight with Dragon's Rage. Instead, bait Aatrox into activating World Ender, then immediately use your kick to blast him away, running down his ultimate's clock. During skirmishes, use Safeguard to dodge his first two The Darkin Blade strikes. Once his third strike is spent or missed, engage immediately with Sonic Wave and use Tempest to slow him down, exploiting his long cooldown window to burst him before his healing can ramp up.

チャンピオン詳細 → Aatroxのビルド →
Ekko

Ekko−1

early gamemobility Lee Sin dictates this jungle matchup by entirely shutting down Ekko's zone control. When Ekko casts Parallel Convergence, his threat relies on stepping inside to trigger the stun and shield. By using Dragon's Rage, you can kick him far away from his bubble, leaving him vulnerable and squishy. This denies his primary defense, allowing you to re-engage instantly with Sonic Wave to finish him off. Ekkoのビルド → 詳細を見る
Ekko

理由

Lee Sin dictates this jungle matchup by entirely shutting down Ekko's zone control. When Ekko casts Parallel Convergence, his threat relies on stepping inside to trigger the stun and shield. By using Dragon's Rage, you can kick him far away from his bubble, leaving him vulnerable and squishy. This denies his primary defense, allowing you to re-engage instantly with Sonic Wave to finish him off.

レーン戦への影響

This mechanical advantage translates into overwhelming early jungle pressure. Ekko is forced to play defensively, conceding scuttle crabs and risking invades because he cannot win isolated duels. When contesting objectives, your ability to deny his Parallel Convergence stun prevents his team from turning chaotic fights. He must use Chronobreak purely to survive your burst rather than to deal damage, neutralizing his map presence.

立ち回り方

Never initiate with Dragon's Rage. Keep your ultimate ready specifically for when Ekko commits with Phase Dive toward his Parallel Convergence zone. If you misplay the timing and he successfully triggers the stun, immediately use Safeguard to escape to a ward or an ally, avoiding his Z-Drive Resonance burst. Once his zone and shield dissipate, use Sonic Wave to chase him down, applying Tempest to secure the kill before he can escape.

チャンピオン詳細 → Ekkoのビルド →
Kayn

Kayn−1

early gameskirmish Lee Sin dictates this jungle duel because Kayn cannot use the terrain to escape him. When Kayn attempts to flee or path through walls using *Shadow Step*, landing *Sonic Wave* grants you absolute vision and a direct dash to follow him through the obstacle. Since Kayn's early skirmishing power with *Reaping Slash* is weak before choosing a form via *The Darkin Scythe*, your high initial damage completely dominates him. Kaynのビルド → 詳細を見る
Kayn

理由

Lee Sin dictates this jungle duel because Kayn cannot use the terrain to escape him. When Kayn attempts to flee or path through walls using *Shadow Step*, landing *Sonic Wave* grants you absolute vision and a direct dash to follow him through the obstacle. Since Kayn's early skirmishing power with *Reaping Slash* is weak before choosing a form via *The Darkin Scythe*, your high initial damage completely dominates him.

レーン戦への影響

Your early pressure forces Kayn into a defensive, predictable path. Since you can track him easily, you can aggressively invade his camps or counter-gank. Kayn needs to stack *The Darkin Scythe* on your laners, but knowing his entry points allows you to intercept him. By shutting down his early camps, you delay his transformation, rendering his mid-game transition useless while securing early drakes and heralds for your team.

立ち回り方

Never initiate a duel by blindly throwing *Sonic Wave*. Instead, walk up or use *Safeguard* to close the gap, slowing him with *Tempest* first. Force Kayn to panic and activate *Shadow Step* to cross a wall, then tag him with *Sonic Wave* to reactivate the dash and execute him. If he tries to dodge your kick using *Umbral Trespass*, wait out his emergence, then immediately use *Dragon's Rage* to boot him away from his safety net.

チャンピオン詳細 → Kaynのビルド →
Kindred

Kindred−1

displacementearly pressure Lee Sin dominates this duel because his ultimate, Dragon's Rage, completely invalidates Kindred's primary survival tool, Lamb's Respite. Once Kindred drops her protective zone to avoid death, a well-aimed kick ejects her from its boundaries, leaving her vulnerable and denying her the end-of-duration healing. This interaction turns what should be a safe haven for the marksman into a fatal trap, allowing your high-burst physical kit to secure the kill. Kindredのビルド → 詳細を見る
Kindred

理由

Lee Sin dominates this duel because his ultimate, Dragon's Rage, completely invalidates Kindred's primary survival tool, Lamb's Respite. Once Kindred drops her protective zone to avoid death, a well-aimed kick ejects her from its boundaries, leaving her vulnerable and denying her the end-of-duration healing. This interaction turns what should be a safe haven for the marksman into a fatal trap, allowing your high-burst physical kit to secure the kill.

レーン戦への影響

This interaction dictates how skirmishes unfold around neutral objectives and Mark of the Kindred camps. Knowing you can bypass her saving grace, Kindred must play incredibly passively, yielding early scuttle crabs and jungle priority. You can confidently invade her jungle or contest her marks, knowing that any direct duel post-level five is heavily weighted in your favor because she cannot rely on her ultimate to stall.

立ち回り方

To execute this flawlessly, never lead a fight with Dragon's Rage. Instead, initiate with Sonic Wave to close the gap and apply your damage, forcing Kindred to deploy Lamb's Respite when her health drops. Once her golden zone is active, use Safeguard to reposition yourself behind her or dash again to get the perfect angle, then kick her out of the circle. If she attempts to dodge with Dance of Arrows, slow her with Tempest first.

チャンピオン詳細 → Kindredのビルド →
Hecarim

Hecarim−1

early gamedisruption Lee Sin dominates this jungle matchup by entirely shutting down Hecarim's momentum. The centaur relies on ramping up speed with Devastating Charge to initiate and burst. However, your Dragon's Rage serves as the ultimate counter-button. By kicking Hecarim away mid-stride during his charge, you completely cancel his engagement, waste his movement speed bonus from Warpath, and leave him isolated without his main damage tool. Hecarimのビルド → 詳細を見る
Hecarim

理由

Lee Sin dominates this jungle matchup by entirely shutting down Hecarim's momentum. The centaur relies on ramping up speed with Devastating Charge to initiate and burst. However, your Dragon's Rage serves as the ultimate counter-button. By kicking Hecarim away mid-stride during his charge, you completely cancel his engagement, waste his movement speed bonus from Warpath, and leave him isolated without his main damage tool.

レーン戦への影響

Because you hold the dueling advantage, Hecarim cannot safely contest you in the river or deep in his own jungle. Keeping track of his camp rotations allows you to invade aggressively. If he attempts to gank your laners, your counter-gank potential is unmatched. Your ability to disrupt his entry turns what should be a deadly flank into an easy double kill for your team.

立ち回り方

When skirmishing, never waste Dragon's Rage early just for damage. Keep your eyes locked on Hecarim and wait for the horse animation of Devastating Charge to begin. Use Safeguard to position yourself between him and your vulnerable carry, then execute the kick to deny his knockback. If he tries to escape or engage with Onslaught of Shadows, follow his landing with Sonic Wave to secure the kill once his fear effect fades.

チャンピオン詳細 → Hecarimのビルド →
Shyvana

Shyvana−1

counter jungledisengage Lee Sin dominates this matchup by shutting down Shyvana's primary initiation tool. Whenever she attempts to engage by leaping forward with Dragon's Descent, you can immediately cast Dragon's Rage to kick her back mid-dash. This completely neutralizes her ultimate's impact, leaving her stranded in dragon form without her initial burst, while your Sonic Wave allows you to easily re-engage once her main threat is wasted. Shyvanaのビルド → 詳細を見る
Shyvana

理由

Lee Sin dominates this matchup by shutting down Shyvana's primary initiation tool. Whenever she attempts to engage by leaping forward with Dragon's Descent, you can immediately cast Dragon's Rage to kick her back mid-dash. This completely neutralizes her ultimate's impact, leaving her stranded in dragon form without her initial burst, while your Sonic Wave allows you to easily re-engage once her main threat is wasted.

レーン戦への影響

Shyvana relies heavily on farming camps to stack Fury of the Dragonborn and reach her scaling potential. Because you hold the early-game dueling advantage with Flurry and Tempest, you can constantly invade her camps to steal her farm. Forcing skirmishes in her jungle delays her dragon form, stripping away her teamfight presence and securing early objective control for your lanes before she can ever become a threat.

立ち回り方

Your priority is to track her jungle route and invade her early camps using Safeguard to hop over walls for surprise steals. During skirmishes, never initiate with Dragon's Rage. Instead, hold this ultimate specifically for the moment she activates Dragon's Descent. Once you kick her away, immediately follow up with Sonic Wave to close the gap, and use Tempest to reveal her if she tries to escape through the brush.

チャンピオン詳細 → Shyvanaのビルド →
Tryndamere

Tryndamere−1

disengagemobility Lee Sin naturally counters Tryndamere's primary survival tool, Undying Rage. While Tryndamere relies on building Battle Fury and sticking to targets during his ultimate, your kit completely shuts down his offensive window. A well-timed Dragon's Rage easily launches him away, while Safeguard allows you to jump out of his Spinning Slash range, forcing him to waste his entire invulnerability period running back to you. Tryndamereのビルド → 詳細を見る
Tryndamere

理由

Lee Sin naturally counters Tryndamere's primary survival tool, Undying Rage. While Tryndamere relies on building Battle Fury and sticking to targets during his ultimate, your kit completely shuts down his offensive window. A well-timed Dragon's Rage easily launches him away, while Safeguard allows you to jump out of his Spinning Slash range, forcing him to waste his entire invulnerability period running back to you.

レーン戦への影響

This dynamic strips Tryndamere of his diving threat in skirmishes and neutralizes his 1v1 counter-jungling pressure. When contesting camps, he cannot force you out because you control the engage distance. If he attempts an aggressive dive under your towers, your crowd control guarantees he cannot escape alive, transforming his usual split-pushing or objective-taking pressure into a massive liability for his team.

立ち回り方

Never initiate a duel by burning Dragon's Rage for raw damage. Instead, bait his Undying Rage using Flurry-boosted basic attacks and Sonic Wave. Once he triggers his ultimate, immediately use Dragon's Rage to peel him off, then immediately dash away using Safeguard. If he attempts to close the gap with Spinning Slash, apply the slow from Tempest to finish kiting him out until his invulnerability expires.

チャンピオン詳細 → Tryndamereのビルド →
Talon

Talon−1

vision controlburst This matchup heavily favors you because Talon relies on the stealth of Shadow Assault to reposition or escape after his burst. By hitting him with Tempest, you gain true vision of him, completely neutralizing his ultimate's defensive utility. Without his invisibility, Talon cannot easily trigger Blade's End safely, leaving him exposed to your high-damage follow-up while he tries to hop walls. Talonのビルド → 詳細を見る
Talon

理由

This matchup heavily favors you because Talon relies on the stealth of Shadow Assault to reposition or escape after his burst. By hitting him with Tempest, you gain true vision of him, completely neutralizing his ultimate's defensive utility. Without his invisibility, Talon cannot easily trigger Blade's End safely, leaving him exposed to your high-damage follow-up while he tries to hop walls.

レーン戦への影響

In the jungle, this interaction strips Talon of his safety net during early skirmishes around camps and objectives. He cannot aggressively use Assassin's Path over walls to bait you, as Tempest keeps him revealed and slowed, allowing you to follow up with Sonic Wave easily. You dictate the pace of river skirmishes, forcing him to play defensively and giving your lanes absolute security against his signature flanks.

立ち回り方

When initiating a duel, never waste Tempest early. Save this ability specifically for the moment Talon unleashes Shadow Assault to instantly deny his invisibility. If he panics and uses Assassin's Path to jump a wall, quickly react with Safeguard to a ward or an ally to maintain your distance, then secure the kill with a precise Sonic Wave reactivated for the execution damage before he can stack Blade's End on you.

チャンピオン詳細 → Talonのビルド →
Lillia

Lillia−1

burstmobility Lee Sin dominates this matchup by exploiting Lillia's early fragility. If you catch her in her jungle, your Sonic Wave combined with Flurry allows you to burst her down instantly, long before she can stack her Blooming Blows movement speed. If she marks you with Dream-Laden Bough, you can reactively cast Dragon's Rage to kick her away, completely neutralizing her sleep setup during Lilting Lullaby. Lilliaのビルド → 詳細を見る
Lillia

理由

Lee Sin dominates this matchup by exploiting Lillia's early fragility. If you catch her in her jungle, your Sonic Wave combined with Flurry allows you to burst her down instantly, long before she can stack her Blooming Blows movement speed. If she marks you with Dream-Laden Bough, you can reactively cast Dragon's Rage to kick her away, completely neutralizing her sleep setup during Lilting Lullaby.

レーン戦への影響

This creates an aggressive jungle dynamic where you must constantly invade her territory rather than passively farming. Lillia wants to safely clear camps to scale, but your early-game threat forces her to concede camps or risk dying to your counter-jungling. Securing early kills in her jungle halts her momentum, giving your lanes complete freedom as she cannot safely contest neutral objectives.

立ち回り方

When invading, hold your Safeguard to dodge her Swirlseed or to escape if her teammates collapse. Do not commit your full combo until you land Sonic Wave while her Blooming Blows stacks are at zero. If she initiates with Lilting Lullaby after hitting you with a spell, immediately use Dragon's Rage to launch her away; this prevents her from landing the center of Watch Out! Eep! while you are asleep.

チャンピオン詳細 → Lilliaのビルド →
Nilah

Nilah−1

counter jungleburst You hold a massive advantage in duels because Nilah relies heavily on Jubilant Veil to survive physical bursts. However, her shroud only evades basic attacks. Your main sources of damage, Sonic Wave and Tempest, are spells and will bypass her defensive tool entirely. This allows you to chunk her HP bar even when she thinks she is safe, making her early clear incredibly risky to execute. Nilahのビルド → 詳細を見る
Nilah

理由

You hold a massive advantage in duels because Nilah relies heavily on Jubilant Veil to survive physical bursts. However, her shroud only evades basic attacks. Your main sources of damage, Sonic Wave and Tempest, are spells and will bypass her defensive tool entirely. This allows you to chunk her HP bar even when she thinks she is safe, making her early clear incredibly risky to execute.

レーン戦への影響

This interaction turns her jungle into your playground from the very first camps. Since Nilah cannot block your spell burst, she cannot defend her territory against early invades. You can force her off her red or blue buff easily, stealing her camps and leaving her starved of gold. This constant threat forces her to play defensively, destroying her scaling velocity and protecting your lanes from her gank pressure.

立ち回り方

Start aggressively by invading her second buff. When you engage, wait for her to panic-cast Jubilant Veil. During this window, stop basic attacking to conserve your passive Flurry energy, and instead cast Sonic Wave followed by Tempest to melt her health. If she tries to escape using Slipstream, follow her immediately with Safeguard toward her landing position, then execute her with the second cast of your kick.

チャンピオン詳細 → Nilahのビルド →
Zed

Zed−1

peelmobility Lee Sin dominates this jungle duel because he possesses the ultimate tool to completely shut down Zed's assassination potential. The moment Zed commits with Death Mark, he becomes entirely predictable, reappearing directly behind Lee Sin. By buffering Dragon's Rage to trigger the instant Zed materializes, you kick him away, preventing him from landing Razor Shuriken or Shadow Slash during his crucial mark window. Zedのビルド → 詳細を見る
Zed

理由

Lee Sin dominates this jungle duel because he possesses the ultimate tool to completely shut down Zed's assassination potential. The moment Zed commits with Death Mark, he becomes entirely predictable, reappearing directly behind Lee Sin. By buffering Dragon's Rage to trigger the instant Zed materializes, you kick him away, preventing him from landing Razor Shuriken or Shadow Slash during his crucial mark window.

レーン戦への影響

This interaction strips Zed of his skirmishing pressure, rendering his counter-ganks toothless. Knowing you can deny his primary burst allows you to invade his camps aggressively and contest early Scuttle Crabs without fear. If Zed attempts to focus your allies, you can easily use Safeguard to position yourself next to his target and peel him off instantly with your kick, leaving him vulnerable with no energy.

立ち回り方

Never initiate a duel by burning Dragon's Rage early; you must hold it exclusively as a counter-reactive tool for when he presses his ultimate. While waiting for him to commit, stack your passive Flurry with Sonic Wave and Tempest to keep your energy high. If you misstime the kick and he manages to stick to his target, immediately use Safeguard to shield the damage and slide away, or use Tempest to reveal him if he tries to escape through a wall with Living Shadow.

チャンピオン詳細 → Zedのビルド →
Rengar

Rengar−1

vision controlpeel Lee Sin dominates this duel because he possesses the ultimate tool to strip away Rengar's stealth. Rengar relies entirely on Unseen Predator to leap from bushes and Thrill of the Hunt to launch his deadly ambushes. Slamming the ground with Tempest instantly reveals him, denying his leap mechanic and rendering his camouflage useless. This forces a raw melee clash where your Flurry attack speed and Sonic Wave execution simply outclass his burst. Rengarのビルド → 詳細を見る
Rengar

理由

Lee Sin dominates this duel because he possesses the ultimate tool to strip away Rengar's stealth. Rengar relies entirely on Unseen Predator to leap from bushes and Thrill of the Hunt to launch his deadly ambushes. Slamming the ground with Tempest instantly reveals him, denying his leap mechanic and rendering his camouflage useless. This forces a raw melee clash where your Flurry attack speed and Sonic Wave execution simply outclass his burst.

レーン戦への影響

This interaction completely shifts the jungle control in your favor. Rengar can no longer safely defend his own camps or sit in river bushes waiting to counter-gank. Because you can easily expose him, his pressure on your lanes is severely diminished. You can confidently contest neutral objectives and invade his territory, knowing that any ambush he tries to set up in the brush will be turned against him the moment you press Tempest.

立ち回り方

When patrolling the jungle, never wander blindly into bushes without holding Tempest. Keep this ability off cooldown whenever you suspect Rengar is lurking nearby. If he activates Thrill of the Hunt, position yourself directly on top of your vulnerable allies; as soon as the indicator appears, cast Tempest to reveal his approach. If he still attempts to leap, immediately follow up with Dragon's Rage to launch him away, then secure the kill with Sonic Wave to close the gap.

チャンピオン詳細 → Rengarのビルド →
Master Yi

Master Yi−1

counter junglepeel Lee Sin dominates this matchup by capitalizing on Master Yi's vulnerable early clearing phase. Your passive Flurry grants the sustained attack speed needed to duel him before he acquires items. Most importantly, when Master Yi activates Highlander to run you down, you possess the ultimate disengage tool. Dragon's Rage allows you to kick him away mid-sprint, completely wasting his ultimate's duration and leaving him isolated and vulnerable without his primary mobility tool. Master Yiのビルド → 詳細を見る
Master Yi

理由

Lee Sin dominates this matchup by capitalizing on Master Yi's vulnerable early clearing phase. Your passive Flurry grants the sustained attack speed needed to duel him before he acquires items. Most importantly, when Master Yi activates Highlander to run you down, you possess the ultimate disengage tool. Dragon's Rage allows you to kick him away mid-sprint, completely wasting his ultimate's duration and leaving him isolated and vulnerable without his primary mobility tool.

レーン戦への影響

This matchup pressure shifts the jungle dynamic entirely into Master Yi's territory. You can aggressively invade his camps, using Safeguard to hop over walls if his laners collapse. Since Master Yi relies on Alpha Strike to clear and dodge, catching him with it on cooldown allows you to force lethal skirmishes. By denying him camps early, you delay his scaling spikes and secure early neutral objectives with absolute river control.

立ち回り方

When skirmishing, never lead with Sonic Wave. Instead, use Tempest to slow him if he tries to run, or simply auto-attack to bait his Alpha Strike. Once he reappears from his untargetable state, land your Sonic Wave on his landing spot for a guaranteed execution. If he tries to channel Meditate to survive your burst, immediately disrupt his healing with Dragon's Rage, or hold it to peel him off your carries the moment he triggers Highlander.

チャンピオン詳細 → Master Yiのビルド →
Twitch

Twitch−2

counter junglevision control Twitch relies entirely on the stealth of Ambush to navigate the jungle safely and set up flanks. However, Lee Sin completely shuts this down because Tempest reveals invisible targets. Once you strip away his camouflage, Twitch is an incredibly fragile marksman with no mobility spells, making him a trivial target for your Sonic Wave and high early-game physical damage. Twitchのビルド → 詳細を見る
Twitch

理由

Twitch relies entirely on the stealth of Ambush to navigate the jungle safely and set up flanks. However, Lee Sin completely shuts this down because Tempest reveals invisible targets. Once you strip away his camouflage, Twitch is an incredibly fragile marksman with no mobility spells, making him a trivial target for your Sonic Wave and high early-game physical damage.

レーン戦への影響

This interaction turns Twitch's jungle into your own playground. You can aggressively invade his camps, knowing that if you encounter him, he cannot slip away using Ambush. This constant pressure delays his Deadly Venom scaling, forces him into defensive pathing, and completely neutralizes his early ganking threat, allowing your laners to play aggressively without fear of invisible setups.

立ち回り方

Hunt him at his red or blue buff right from the first rotation. When skirmishing, do not waste Tempest immediately; hold it specifically for the moment Twitch tries to activate Ambush to escape. Once he is revealed, use Safeguard to close any remaining gap or escape a bad angle, then secure the kill with Sonic Wave. If he tries to fight back with Spray and Pray, use Dragon's Rage to kick him away and cancel his ultimate's uptime.

チャンピオン詳細 → Twitchのビルド →
Fiddlesticks

Fiddlesticks−2

early gamedisplacement Lee Sin completely shut downs Fiddlesticks' damage profile because Dragon's Rage acts as the ultimate hard counter to the scarecrow's channeled threat. Whenever Fiddlesticks tries to heal and inflict damage with Bountiful Harvest, or attempts to wipe your team with a sudden Crowstorm, a well-timed kick instantly neutralizes him. Because Lee Sin can close the gap using Sonic Wave or Safeguard, Fiddlesticks can never channel safely in your presence. Fiddlesticksのビルド → 詳細を見る
Fiddlesticks

理由

Lee Sin completely shut downs Fiddlesticks' damage profile because Dragon's Rage acts as the ultimate hard counter to the scarecrow's channeled threat. Whenever Fiddlesticks tries to heal and inflict damage with Bountiful Harvest, or attempts to wipe your team with a sudden Crowstorm, a well-timed kick instantly neutralizes him. Because Lee Sin can close the gap using Sonic Wave or Safeguard, Fiddlesticks can never channel safely in your presence.

レーン戦への影響

This matchup forces Fiddlesticks to play with extreme paranoia in his own jungle. He cannot contest scuttle crabs or neutral objectives because your Sonic Wave and Tempest clear speed matches his, while you win any duel. If he attempts an ambush with Crowstorm, your ability to disengage him protects your lanes, completely neutralizing his flanking pressure and starving him of the gold he needs to scale.

立ち回り方

To execute this flawlessly, save Dragon's Rage specifically to counter his channels. When Fiddlesticks jumps in with Crowstorm, do not panic; immediately Safeguard to the affected ally and use your kick to launch him away from your team. If you catch him alone, let him activate Bountiful Harvest first, then immediately interrupt it with your ultimate to deny his healing, finishing him off with Sonic Wave and Flurry-empowered attacks.

チャンピオン詳細 → Fiddlesticksのビルド →
Evelynn

Evelynn−2

early gamevision counter Evelynn relies heavily on Demon Shade to approach unseen or escape after a skirmish, but Lee Sin completely shuts this down. Both Sonic Wave and Tempest grant true sight of any hit target. This means that even if she tries to slip back into stealth to regenerate health, you can reveal her instantly, tracking her movements and neutralizing her passive safety before she can execute a getaway. Evelynnのビルド → 詳細を見る
Evelynn

理由

Evelynn relies heavily on Demon Shade to approach unseen or escape after a skirmish, but Lee Sin completely shuts this down. Both Sonic Wave and Tempest grant true sight of any hit target. This means that even if she tries to slip back into stealth to regenerate health, you can reveal her instantly, tracking her movements and neutralizing her passive safety before she can execute a getaway.

レーン戦への影響

This scouting advantage shifts the jungle dynamic entirely in your favor. Evelynn cannot safely contest her own camps or setup counter-ganks because you can constantly invade and expose her location. Since she cannot easily activate her empowered Whiplash from stealth when you reveal her first, her early skirmishing power is crippled, forcing her to play defensively and giving your laners total freedom from early stealth pressure.

立ち回り方

Actively invade her jungle starting from your very first clear. Track her camps and wait in bushes to intercept her. When she casts Allure on you, do not panic-dash away; instead, hit her with Sonic Wave or Tempest immediately to break her stealth. If she tries to disengage using Last Caress, use Safeguard toward her position to quickly close the gap she just created and finish her off before she recovers.

チャンピオン詳細 → Evelynnのビルド →

その他のマッチアップ

Lee Sin対策アイテム

これらのアイテムを購入すると、このチャンピオンの影響力を抑えられます。

Guardian Angel
Guardian Angel
Maw of Malmortius
Maw of Malmortius
Death's Dance
Death's Dance
Black Cleaver
Black Cleaver
Serpent's Fang
Serpent's Fang

このチャンピオンへの対策

カウンターアングル

Lee Sinへの対策は、単なるステータスだけでなく、彼のテンポを崩したり、エンゲージを罰したりするような、相手のタイプを理解することが重要です。他のジャングラーとは異なり、彼は単に強いチャンピオンに負けるのではなく、機動力、バースト、イニシアチブといった彼のコアメカニクスを無効化するような相手に弱いです。これらの相互作用を理解することで、戦闘を予測し、ゲームプランを適応させることができます。

パッチの文脈

現在のメタは、序盤のプレッシャーに耐えられるチャンピオンや、エンゲージを直接罰せるチャンピオンが有利です。耐久力の高いタンクやフロント・トゥ・バックのブルーザーは、Lee Sinの影響を大幅に減らします。さらに、サステインやコントロールを持つチャンピオンは、彼のピックをより信頼性の低いものにします。これにより、Lee Sinはよりクリーンにプレイし、ターゲットをより慎重に選ぶことを余儀なくされます。

クイックリード

  • 耐久力の高いタンクに苦戦する。
  • エンゲージ中に罰せられる。
  • 孤立したターゲットがいないと効果が薄い。

カウンターの原型

耐久力の高いタンク

これらのチャンピオンは彼のバーストを吸収し、彼のエンゲージを不利なトレードに変えます。Lee Sinは素早い影響力を頼りとしていますが、耐久力の高いターゲットに対しては、価値を得ずに自身を晒してしまいます。また、彼らは彼の侵入後にコントロールしたり罰したりすることができます。

チャンピオンの適応方法. 正面からのエンゲージを避け、セカンダリターゲットを探しましょう。

フロント・トゥ・バックのブルーザー

彼らはデュエルで互角に渡り合い、ゲーム終盤でも役立ち続けることができます。Lee Sinは彼らを素早くバーストできず、彼らはダメージを与え続けたり、戦闘をコントロールしたりします。これは彼のテンポを崩し、スノーボールの可能性を制限します。

チャンピオンの適応方法. 直接的なデュエルを避け、ピックに集中しましょう。

サステインジャングラー

彼らは彼のトレードの効果を減らし、継続的に回復することができます。Lee Sinは、ダメージが持続的な差を生み出すのに十分でない場合、そのアドバンテージを失います。彼らの存在はゲームを安定させ、彼の機会を制限します。

チャンピオンの適応方法. ゲームを速攻で進め、長引く戦闘を避けましょう。

優先度の高いマッチアップ

Rammus

RammusはLee Sinにとって、典型的なフラストレーションのたまるマッチアップです。彼の持つ自然なアーマーとコントロールツールは、エンゲージを無効にします。序盤であっても、Lee Sinは本当のアドバンテージを作り出すのに苦労します。彼は直接的なデュエルを避け、レーンに集中する必要があります。

対面時のよくある間違い

対面時のよくある間違い

  • タンクとのデュエルを強要すること。
  • 敵の構成を無視すること。
  • 間違ったターゲットを選ぶこと。
  • 出口計画なしにエンゲージすること。
  • 敵のクラウドコントロールを過小評価すること。

コーチングノート

  • あなたの問題は敵チャンピオンではなく、選ぶターゲットにあります。
  • Lee Sinは不利な戦闘を避けることで勝利します。

FAQ

なぜLee Sinはタンクに苦戦するのですか?

彼のキットはターゲットを素早くバーストするように設計されているからです。タンクに対しては、彼のダメージは十分ではなく、エンゲージ後に無防備になってしまいます。これは、素早いピックに基づいた彼のプレイスタイルを崩します。

カウンターに対して勝てますか?

はい、ただし直接的なデュエルを避けることで。マップを広く使い、他の場所でピックを作り、不利な戦闘を避ける必要があります。

デュエルをいつ諦めるべきですか?

ターゲットが最初のバーストを生き延びられるようになったら、または明確なエスケープ手段が不足したらすぐに。負けそうなデュエルを続けることは、Lee Sinではしばしば致命的です。

よりタンクなジャングラーに対してどうプレイしますか?

序盤は無視してレーンを攻撃しましょう。Lee Sinは、効果のない戦闘で時間を無駄にするのではなく、他の場所で価値を創造する必要があります。