S
2026年9月 · Patch 7.2d
Bruiser · JUNGLE · TOP

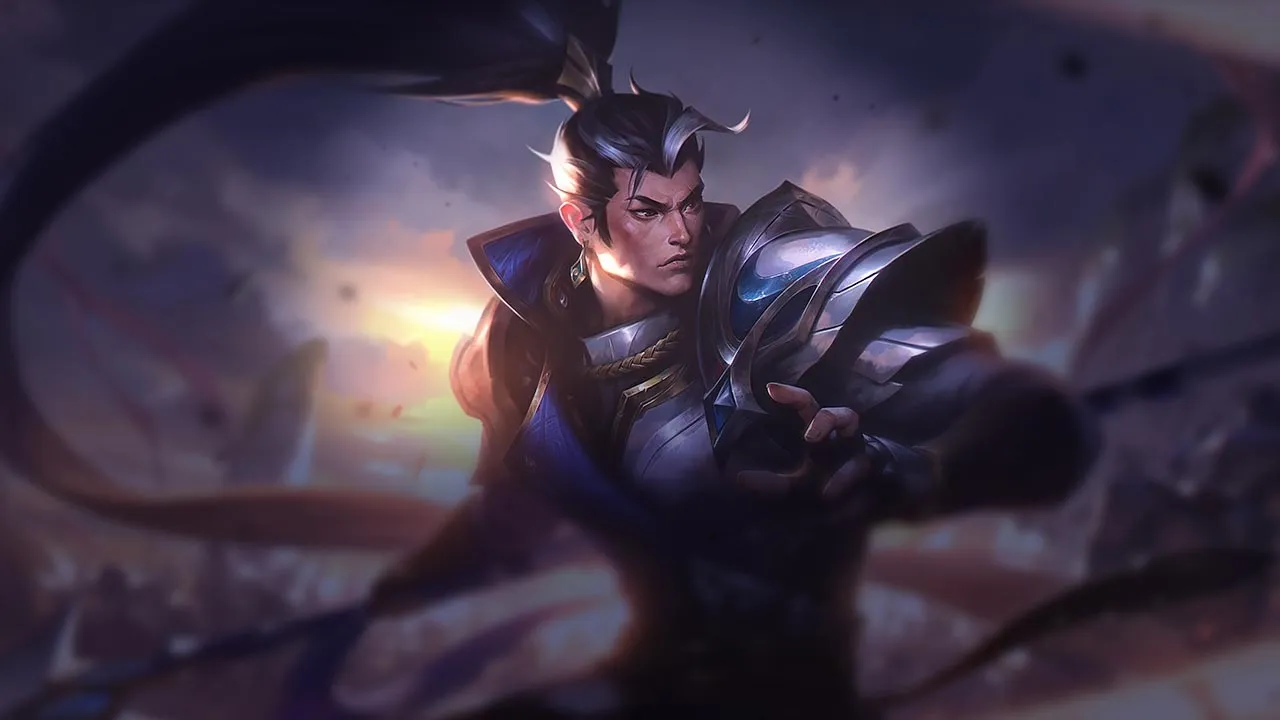
Xin Zhao Wild Rift カウンターガイド

Xin Zhaoは、彼を寄せ付けず、彼のscatter ultimateを無効化するkitedisengage構成によって強力に対策されます。彼のエリアから脱出できるinvulnerabilitydashesを持つチャンピオンは、彼を無力化します。carryへのアクセスに依存しているため、まとまった構成に対しては彼の影響力は低くなります。

★ JUNGLE · TOP Tier S
ダメージ
UTIL
TANK
DIFF
Win 50.7% #26 · ↑2pt
Pick 9.5% #2
Ban 1.7% #70

Xin Zhao Wild Rift カウンターガイド ★ Counter Sheet

マッチアップ一覧
マッチアップ 判定 有利度 勝率 ピック率
Rammus ハードカウンター +2 54.7% 4.3%
Poppy ハードカウンター +2
Warwick 不利なマッチアップ +1 52.6% 2.7%
Skarner 不利なマッチアップ +1 50.6% 1.1%
Jax 不利なマッチアップ +1 48.4% 2.1%
Gragas 不利なマッチアップ +1
Nilah 不利なマッチアップ +1
Taliyah 不利なマッチアップ +1
Olaf スキル次第のマッチアップ ±0 52.5% 2.4%
Gwen スキル次第のマッチアップ ±0 51.8% 1.9%
Pantheon スキル次第のマッチアップ ±0 51.7% 5.5%
Darius スキル次第のマッチアップ ±0 51.5% 8.1%
Tryndamere スキル次第のマッチアップ ±0 50.6% 6.8%
Wukong スキル次第のマッチアップ ±0 50.3% 3.7%
Ambessa スキル次第のマッチアップ ±0 50.3% 1.2%
Nocturne スキル次第のマッチアップ ±0 50.3% 5.5%
Dr. Mundo スキル次第のマッチアップ ±0 48.6% 1.1%
Graves スキル次第のマッチアップ ±0 48.3% 7.6%
Master Yi スキル次第のマッチアップ ±0 48.0% 9.3%
Cho'Gath スキル次第のマッチアップ ±0 47.6% 5.4%
Mordekaiser スキル次第のマッチアップ ±0
Amumu 有利なマッチアップ −1 55.1% 3.3%
Nunu & Willump 有利なマッチアップ −1 54.8% 1.9%
Jarvan IV 有利なマッチアップ −1 52.4% 8.5%
Diana 有利なマッチアップ −1 52.1% 2.9%
Lillia 有利なマッチアップ −1 51.9% 3.3%
Ekko 有利なマッチアップ −1 51.6% 4.3%
Kayn 有利なマッチアップ −1 50.6% 9.2%
Nidalee 有利なマッチアップ −1 50.2% 2.4%
Kha'Zix 有利なマッチアップ −1 50.0% 4.9%
Kindred 有利なマッチアップ −1 49.8% 2.6%
Hecarim 有利なマッチアップ −1 49.2% 2.6%
Yone 有利なマッチアップ −1 49.1% 2.0%
Talon 有利なマッチアップ −1 49.1% 2.8%
Riven 有利なマッチアップ −1 48.8% 1.2%
Rengar 有利なマッチアップ −1 47.8% 1.6%
Zed 有利なマッチアップ −1 47.6% 1.8%
Fizz 有利なマッチアップ −1 47.4% 2.1%
Lee Sin 有利なマッチアップ −1 47.3% 12.0%
Viego 有利なマッチアップ −1 46.0% 3.4%
Aatrox 有利なマッチアップ −1
Camille 有利なマッチアップ −1
Maokai 有利なマッチアップ −1
Nautilus 有利なマッチアップ −1
Shyvana 有利なマッチアップ −2 51.1% 7.0%
Fiddlesticks 有利なマッチアップ −2 50.8% 2.7%
Evelynn 有利なマッチアップ −2 48.6% 2.4%
Twitch 有利なマッチアップ −2

Edge: Wild Rift Core canonical verdict (−3 to +3), shown from the point of view of the champion named in the row. Win rate and pick rate: the opponent's own rate in this role — Wild Rift CN · Challenger, Patch 7.2d. Not a head-to-head win rate.

ハードカウンター

2

これらのチャンピオンは、こちらのビルドやプレイスタイルを真正面から上回る構成を持ち、レーン戦のコントロールとファームを極めて難しくする。彼らのスキルはこちらの主要な強みを無効化し、いつも通りのプランを実行しようとした瞬間に手痛い反撃を受けさせてくる。こうしたマッチアップでは、ミスを最小限に抑え、正面からの対決以外で解決策を探すことが重要になる。

Rammus

Rammus+2

duelingpunish auto attacks Rammus directly counters your aggressive skirmishing because of his massive armor scaling. When you engage with Audacious Charge, you are baited into using Three Talon Strike. To get the vital knock-up, you must land three consecutive strikes, which forces you to repeatedly auto-attack him. This triggers his Defensive Ball Curl, reflecting massive damage back at you while his Rolling Armordillo passive turns his armor into lethal offensive power. Rammusのビルド → 詳細を見る
Rammus

理由

Rammus directly counters your aggressive skirmishing because of his massive armor scaling. When you engage with Audacious Charge, you are baited into using Three Talon Strike. To get the vital knock-up, you must land three consecutive strikes, which forces you to repeatedly auto-attack him. This triggers his Defensive Ball Curl, reflecting massive damage back at you while his Rolling Armordillo passive turns his armor into lethal offensive power.

レーン戦への影響

In the jungle, this matchup restricts your early-game dominance. If you meet Rammus in the river, you cannot duel him safely; any 1v1 trade leaves you too low to contest Scuttle Crabs. During ganks, if he counter-ganks with Powerball and Soaring Slam, he can easily lock you down under Frenzying Taunt. You lose your natural priority, forcing your laners to play defensively as your map pressure evaporates.

立ち回り方

To survive, you must play strictly around his cooldown windows. Never initiate with Audacious Charge if his curl is ready. Instead, use the long-range sweep of Wind Becomes Lightning to slow him and keep your distance. If he rolls at you with Powerball, use Crescent Guard to knock him back before he impacts. If caught, hold your Three Talon Strike and stop auto-attacking entirely until his Defensive Ball Curl expires, even if it delays your knock-up.

チャンピオン詳細 → Rammusのビルド →
Poppy

Poppy+2

hard counterpeel threat The jungle matchup hinges entirely on how Poppy's dash-blocking barrier neutralizes your primary gap-closer. When you attempt to close the distance on an enemy marked by Wind Becomes Lightning, Poppy can activate her zone to instantly interrupt Audacious Charge. This interruption knocks you down, leaving you stranded, unable to reach your target to unleash Three Talon Strike or benefit from Determination healing. Poppyのビルド → 詳細を見る
Poppy

理由

The jungle matchup hinges entirely on how Poppy's dash-blocking barrier neutralizes your primary gap-closer. When you attempt to close the distance on an enemy marked by Wind Becomes Lightning, Poppy can activate her zone to instantly interrupt Audacious Charge. This interruption knocks you down, leaving you stranded, unable to reach your target to unleash Three Talon Strike or benefit from Determination healing.

レーン戦への影響

This interaction severely cripples your early skirmishing and ganking pressure. If Poppy counter-ganks, she renders your engage useless, leaving your targets completely safe. You lose the ability to contest Scuttle Crabs or secure early objectives because she can zone you away from the pit. This forces you into a passive farming style, giving her team free reign over the map lanes while you fall behind in pressure.

立ち回り方

To survive this matchup, you must alter your skirmish approach. Never lead with Audacious Charge. Instead, walk directly into melee range to strike with Three Talon Strike, forcing Poppy to decide whether to activate her barrier prematurely. Use Wind Becomes Lightning purely for its slow to help you close the gap on foot. If forced into a teamfight, use Crescent Guard to knock her away before attempting to charge her allies.

チャンピオン詳細 → Poppyのビルド →

不利なマッチアップ

6

これらのチャンピオンは、マッチアップ自体を絶望的にするわけではないが、対面で優位に立ちやすいツールを持っている。射程が長かったり、攻撃を受け止める力が高かったり、エンゲージへの対応手段が豊富だったりする。アプローチを調整し、戦闘を受け入れるタイミングを慎重に選ぶ必要がある。

Jax

Jax+1

duelingearly skirmish The jungle duel hinges entirely on how Jax uses Counter Strike against your primary damage source. When you activate Three Talon Strike, Jax can negate all three enhanced basic attacks, completely denying your third-strike knockup and healing from Determination. Since your physical DPS and crowd control are tied to these auto-attacks, Jax easily wins any direct face-to-face clash by simply holding his defensive stance. Jaxのビルド → 詳細を見る
Jax

理由

The jungle duel hinges entirely on how Jax uses Counter Strike against your primary damage source. When you activate Three Talon Strike, Jax can negate all three enhanced basic attacks, completely denying your third-strike knockup and healing from Determination. Since your physical DPS and crowd control are tied to these auto-attacks, Jax easily wins any direct face-to-face clash by simply holding his defensive stance.

レーン戦への影響

This interaction limits your early-game freedom, forcing you to concede contested Scuttle Crabs or direct 1v1 fights in the river. If you attempt to invade or contest neutral camps blindly, Jax can force a duel, absorb your Audacious Charge burst, and stun you. This concession slows down your early map pressure, giving Jax a safe route to scale into a split-pushing threat.

立ち回り方

To survive and win these skirmishes, you must bait out Counter Strike before committing your main cooldowns. Start the fight with Wind Becomes Lightning to slow him from a distance, forcing him to jump with Leap Strike or activate his evasion early. Walk away or use Crescent Guard to knock him back if he engages. Only trigger Audacious Charge and Three Talon Strike once his defensive spin goes on cooldown, ensuring your knockup connects.

チャンピオン詳細 → Jaxのビルド →
Warwick

Warwick+1

skirmishsustain Direct duels in the jungle favor Warwick because of how his defensive tools disrupt your main combo. When you engage, he can activate Primal Howl to absorb the damage from your Three Talon Strike. The subsequent fear effect interrupts your third strike before you can trigger the knockup, meaning you cannot stop his healing. Without your crowd control, his low-health healing from Eternal Hunger easily outlasts your own Determination healing in a prolonged fight. Warwickのビルド → 詳細を見る
Warwick

理由

Direct duels in the jungle favor Warwick because of how his defensive tools disrupt your main combo. When you engage, he can activate Primal Howl to absorb the damage from your Three Talon Strike. The subsequent fear effect interrupts your third strike before you can trigger the knockup, meaning you cannot stop his healing. Without your crowd control, his low-health healing from Eternal Hunger easily outlasts your own Determination healing in a prolonged fight.

レーン戦への影響

This dynamic strips away your usual early-game dominance, forcing you to concede contested Scuttle Crabs or direct river skirmishes. If you attempt to invade or fight him at level three, you risk giving up first blood, which accelerates his Blood Hunt map pressure. Consequently, you will find yourself unable to match his early objective pressure, forcing you to play defensively and rely on your laners to rotate during skirmishes.

立ち回り方

To survive, you must bait out Primal Howl before committing your main damage. Start trades with Wind Becomes Lightning from a distance to slow him, forcing him to walk up. If he activates his damage reduction, disengage immediately and wait for the howl to expire. Save Crescent Guard to knock him away if he locks you down with Infinite Duress or clings to you with Jaws of the Beast, allowing you to reset the fight on your own terms.

チャンピオン詳細 → Warwickのビルド →
Nilah

Nilah+1

duelinganti engage Nilah controls this jungle matchup because her Jubilant Veil directly counters your primary offensive tool. When she activates this shroud, it completely blocks the auto-attacks from your Three Talon Strike, preventing you from landing the crucial third strike that triggers your knockup. Without this crowd control, you cannot guarantee your damage output, and you lose the sustained healing provided by your Determination. Nilahのビルド → 詳細を見る
Nilah

理由

Nilah controls this jungle matchup because her Jubilant Veil directly counters your primary offensive tool. When she activates this shroud, it completely blocks the auto-attacks from your Three Talon Strike, preventing you from landing the crucial third strike that triggers your knockup. Without this crowd control, you cannot guarantee your damage output, and you lose the sustained healing provided by your Determination.

レーン戦への影響

In early river skirmishes or jungle invasions, you cannot afford to take straightforward duels. Engaging with Audacious Charge while her defensive tool is ready allows her to negate your burst, turning the fight around with Formless Blade and Slipstream. This forces you to play defensively around Scuttle Crabs, giving up early map priority and delaying your transition into successful ganks.

立ち回り方

To win these skirmishes, bait her defenses before committing your main damage. Start the encounter by slowing her with Wind Becomes Lightning from a distance. If she activates Jubilant Veil, immediately back away and wait out the duration. Only activate Three Talon Strike once her dodge zone expires. Save your Audacious Charge to follow her Slipstream dash, and use Crescent Guard to push her away if she attempts to recover health using Apotheosis.

チャンピオン詳細 → Nilahのビルド →
Skarner

Skarner+1

peel threatutility clash This matchup swings heavily in Skarner's favor due to how his ultimate nullifies your primary defense. While you rely on Crescent Guard to block incoming ranged damage during skirmishes, Skarner can bypass this entire zone by using Impale. He suppresses you, completely ignoring your displacement immunity, and drags you directly out of your protective circle. This leaves you totally exposed to his team's focus fire while disabling your damage output. Skarnerのビルド → 詳細を見る
Skarner

理由

This matchup swings heavily in Skarner's favor due to how his ultimate nullifies your primary defense. While you rely on Crescent Guard to block incoming ranged damage during skirmishes, Skarner can bypass this entire zone by using Impale. He suppresses you, completely ignoring your displacement immunity, and drags you directly out of your protective circle. This leaves you totally exposed to his team's focus fire while disabling your damage output.

レーン戦への影響

In the jungle, Skarner scales much better into teamfights, forcing you to seek early skirmishes before he gets too tanky. However, contesting neutral objectives becomes highly risky. If you initiate with Audacious Charge, he can easily counter-engage with Ixtal's Impact to pin you to a wall. This defensive pressure forces your laners to play passively, as you cannot safely guarantee front-line priority or secure easy drakes.

立ち回り方

To survive teamfights, you must change your entry angle and play defensively. Never be the primary initiator. Wait for Skarner to waste Impale on a tanky ally, or bait out his Ixtal's Impact before committing. Use Wind Becomes Lightning from a distance to poke and slow him down. If he advances to grab you, use Three Talon Strike to knock him up quickly, interrupting his positioning before he can pull you away from your team.

チャンピオン詳細 → Skarnerのビルド →
Gragas

Gragas+1

counter engageskirmish Gragas completely neutralizes your offensive pressure because his Body Slam can interrupt Audacious Charge mid-air. Since your engage is stopped cold, you cannot stick to him to land the third hit of Three Talon Strike for the knockup. This allows Gragas to disengage at will or turn the fight with Drunken Rage while you are stranded without your primary gap-closer. Gragasのビルド → 詳細を見る
Gragas

理由

Gragas completely neutralizes your offensive pressure because his Body Slam can interrupt Audacious Charge mid-air. Since your engage is stopped cold, you cannot stick to him to land the third hit of Three Talon Strike for the knockup. This allows Gragas to disengage at will or turn the fight with Drunken Rage while you are stranded without your primary gap-closer.

レーン戦への影響

In river skirmishes and jungle duels, Gragas dictates the pace. If you try to force an encounter, his Body Slam denies your burst, and he can easily zone you away from neutral monsters with Barrel Roll. This makes securing Scuttle Crabs highly risky, as he can constantly disrupt your Determination healing cycles, forcing you to concede early river priority or risk being counter-ganked while your skills are on cooldown.

立ち回り方

To win these jungle duels, never initiate with Audacious Charge. Instead, walk up to Gragas or slow him first using Wind Becomes Lightning, forcing him to make the first move. If he panics and uses Body Slam offensively or to escape, that is your cue to immediately follow up with Audacious Charge to stick to him and trigger Three Talon Strike. If he holds his displacement, use Crescent Guard to isolate him from his team before he can scatter yours with Explosive Cask.

チャンピオン詳細 → Gragasのビルド →

その他のマッチアップ

スキル次第のマッチアップ

13

このマッチアップは何よりもまず実行力の勝負であり、両者ともに優位を取れる現実的な手段を持っている。重要なスキルを一つ避けられるか、エンゲージを正しく読めるか、あるいはたった一つの位置取りのミスが、勝敗を分けることもある。マッチアップを理解し、行動すべき瞬間を見極める力がとりわけ重要になる。

Ambessa

Ambessa±0

knockup blockdueling Early jungle skirmishes between Xin Zhao and Ambessa are decided by a tight reaction-time window. Your primary crowd control and damage source, the third strike of Three Talon Strike, can be completely neutralized if Ambessa times Repudiation correctly. This block not only absorbs your knock-up but triggers her shield and counter-damage, swinging what should be a winning duel directly into her favor. Ambessaのビルド → 詳細を見る
Ambessa

理由

Early jungle skirmishes between Xin Zhao and Ambessa are decided by a tight reaction-time window. Your primary crowd control and damage source, the third strike of Three Talon Strike, can be completely neutralized if Ambessa times Repudiation correctly. This block not only absorbs your knock-up but triggers her shield and counter-damage, swinging what should be a winning duel directly into her favor.

レーン戦への影響

Because of this interaction, contesting Scuttle Crabs or invading her jungle becomes a high-stakes guessing game. If you engage blindly with Audacious Charge, she can easily kite with Drakehound's Step and wait for your third strike to deploy Repudiation. A failed duel means giving her Public Execution resets later, which completely destroys your team's skirmish pressure around the early neutral objectives.

立ち回り方

To win these duels, you must bait out her shield before committing your knock-up. Strike her twice with Three Talon Strike, then deliberately pause your basic attacks or use Wind Becomes Lightning to slow her down and force her to panic-cast Repudiation. If she holds it, use Audacious Charge to stay glued to her during Drakehound's Step dashes, saving your final knock-up punch until her glowing shield visual effect fades.

チャンピオン詳細 → Ambessaのビルド →
Darius

Darius±0

early skirmishextended fights This jungle duel is a strict race against time governed by execution. Your upfront burst from Audacious Charge paired with the rapid knock-up of Three Talon Strike can shred Darius before he reacts. However, if he survives this initial onslaught, his passive Hemorrhage begins to stack up, turning the tide as his damage escalates. You must burst him down or disable him before he reaches five stacks and gains massive power. Dariusのビルド → 詳細を見る
Darius

理由

This jungle duel is a strict race against time governed by execution. Your upfront burst from Audacious Charge paired with the rapid knock-up of Three Talon Strike can shred Darius before he reacts. However, if he survives this initial onslaught, his passive Hemorrhage begins to stack up, turning the tide as his damage escalates. You must burst him down or disable him before he reaches five stacks and gains massive power.

レーン戦への影響

In the river and jungle corridors, every encounter is highly volatile. If you meet Darius near the Scuttle Crab, the skirmish is decided instantly by who initiates. Initiating with Wind Becomes Lightning to slow him allows you to control the engagement distance, but if Darius pulls you in with Apprehend first, you are forced into an extended fight where his Noxian Guillotine will execute you easily, giving up early map priority.

立ち回り方

To win these skirmishes, you must play around his healing. When Darius winds up Decimate, use Audacious Charge immediately to dash inside the inner handle of his axe, minimizing his damage and denying his heal. If he manages to stack Hemorrhage to four, activate Crescent Guard to knock him back and disengage. Never commit to a duel if your Three Talon Strike is on cooldown, as you lack the crowd control to interrupt his stacking.

チャンピオン詳細 → Dariusのビルド →
Wukong

Wukong±0

early duelingclone decoy This jungle matchup is decided by a precise mind game during early skirmishes. While your sustained damage via Determination keeps you healthy, your primary setup relies on the third hit of Three Talon Strike. Wukong counters this directly with Warrior Trickster, using his invisibility and clone to absorb your knock-up. If he baits your crowd control into his decoy, his Stone Skin armor bonus allows him to easily turn the duel around. Wukongのビルド → 詳細を見る
Wukong

理由

This jungle matchup is decided by a precise mind game during early skirmishes. While your sustained damage via Determination keeps you healthy, your primary setup relies on the third hit of Three Talon Strike. Wukong counters this directly with Warrior Trickster, using his invisibility and clone to absorb your knock-up. If he baits your crowd control into his decoy, his Stone Skin armor bonus allows him to easily turn the duel around.

レーン戦への影響

Early scuttle crab fights and jungle invades are incredibly tense because neither of you can force an easy win. If you overcommit with Audacious Charge before he deploys his clone, you risk getting trapped in his Cyclone while your main displacement is on cooldown. This stalemate delays your early map pressure, as a single misstep in these duels hands over total river control and neutral objective priority to the surviving jungler.

立ち回り方

To win these duels, never rush your combos. Start the fight with Wind Becomes Lightning from a distance to slow him down, forcing Wukong to make the first move. When you engage with Audacious Charge, activate Three Talon Strike but delay your third auto-attack slightly. If he panics and uses Warrior Trickster, switch your target or walk away briefly to let the clone expire, then unleash your knock-up on the real, reappearing monkey.

チャンピオン詳細 → Wukongのビルド →

その他のマッチアップ

有利なマッチアップ

27

これらのチャンピオンは、こちらの主要な強みに効果的に対応するのが難しく、より自由に対面を組み立てることができる。プレッシャーをかけて有利な交換を引き出す手段は複数あることが多い。相手が態勢を立て直す時間を与えるのではなく、この優位を活かして主導権を握ろう。

Jarvan IV

Jarvan IV−1

duelingearly game This matchup swings heavily in your favor during teamfights because your Crescent Guard completely nullifies Jarvan IV's primary initiation tool. When he dives your backline with Cataclysm, he expects his ranged follow-up to burst you down. Instead, your ultimate creates an impenetrable barrier against his outside allies, isolating him within his own arena where your Three Talon Strike and Audacious Charge can quickly shred him. Jarvan IVのビルド → 詳細を見る
Jarvan IV

理由

This matchup swings heavily in your favor during teamfights because your Crescent Guard completely nullifies Jarvan IV's primary initiation tool. When he dives your backline with Cataclysm, he expects his ranged follow-up to burst you down. Instead, your ultimate creates an impenetrable barrier against his outside allies, isolating him within his own arena where your Three Talon Strike and Audacious Charge can quickly shred him.

レーン戦への影響

In the jungle, this interaction strips Jarvan IV of his early skirmishing pressure. He cannot safely contest scuttle crabs or neutral objectives because if he commits his Demacian Standard and Dragon Strike combo to engage, he is locked into a melee brawl he cannot win. Your superior sustained healing from Determination ensures you exit early skirmishes with higher health, forcing him to concede river control and play defensively.

立ち回り方

To execute this perfectly, never use Crescent Guard prematurely. Hold your ultimate specifically for the moment Jarvan IV lands his Cataclysm on your team. Once the arena forms, immediately activate your ultimate to block the incoming barrage from his backline. Focus him down with Three Talon Strike to knock him up inside his own walls, and use Audacious Charge to stick to him if he tries to escape with Golden Aegis.

チャンピオン詳細 → Jarvan IVのビルド →
Kayn

Kayn−1

early gameskirmish Xin Zhao absolutely dominates the early jungle because his Three Talon Strike knockup completely disrupts Kayn's early clear and skirmishing tools. When Kayn attempts to duel or clear camps using Reaping Slash, the third strike of Three Talon Strike cancels his animations and forces him into a defensive posture. Since Kayn cannot easily stack his passive, The Darkin Scythe, against a champion who constantly knocks him up, he is forced to concede early map pressure. Kaynのビルド → 詳細を見る
Kayn

理由

Xin Zhao absolutely dominates the early jungle because his Three Talon Strike knockup completely disrupts Kayn's early clear and skirmishing tools. When Kayn attempts to duel or clear camps using Reaping Slash, the third strike of Three Talon Strike cancels his animations and forces him into a defensive posture. Since Kayn cannot easily stack his passive, The Darkin Scythe, against a champion who constantly knocks him up, he is forced to concede early map pressure.

レーン戦への影響

This interaction completely shifts the jungle pressure in your favor during the opening minutes. Kayn cannot contest the Rift Scuttlers or fight you at your camps, often forcing him to use Shadow Step defensively to escape through walls rather than finding creative gank angles. Because he is starved of early skirmishes, his transformation via The Darkin Scythe is heavily delayed, relieving immense pressure from your laners.

立ち回り方

Actively invade Kayn's jungle during his first clear to force a fight. Do not initiate with Audacious Charge; walk up to him, trigger Three Talon Strike to interrupt his Reaping Slash, and save Audacious Charge to follow him when he tries to escape through a wall with Shadow Step. If he manages to infect you with Umbral Trespass, prepare to cast Crescent Guard immediately upon his exit to knock away his allies and secure the kill.

チャンピオン詳細 → Kaynのビルド →
Fiddlesticks

Fiddlesticks−2

early gamehard cc Fiddlesticks relies heavily on the healing and continuous damage of Bountiful Harvest to survive skirmishes. However, your early dueling power completely shuts this down. The third strike of Three Talon Strike provides a reliable knockup that immediately interrupts his channel, leaving him incredibly squishy and defenseless. Combined with the passive healing from Determination, you easily win any isolated 1v1 before he can even think about escaping. Fiddlesticksのビルド → 詳細を見る
Fiddlesticks

理由

Fiddlesticks relies heavily on the healing and continuous damage of Bountiful Harvest to survive skirmishes. However, your early dueling power completely shuts this down. The third strike of Three Talon Strike provides a reliable knockup that immediately interrupts his channel, leaving him incredibly squishy and defenseless. Combined with the passive healing from Determination, you easily win any isolated 1v1 before he can even think about escaping.

レーン戦への影響

Because you dominate the 1v1, you can aggressively invade Fiddlesticks' jungle camps starting from level two. He cannot contest the Scuttle Crabs or defend his own raptor camp if you catch him clearing. This forces him to play incredibly defensively, delaying his level five power spike and neutralizing the threat of an early game-changing Crowstorm jump from the fog of war.

立ち回り方

When invading, do not immediately blow Three Talon Strike. Instead, initiate with Audacious Charge and basic attacks, holding your knockup specifically to cancel Bountiful Harvest the moment he starts channeling it. Position yourself near bushes to drop vision of his A Harmless Scarecrow effigies, and keep your red ward active. If he manages to fear you with Terrify and runs, use Wind Becomes Lightning to slow him down and close the gap again.

チャンピオン詳細 → Fiddlesticksのビルド →
Lillia

Lillia−1

early gameskirmishing Lillia relies entirely on stacking movement speed from Blooming Blows to kite her opponents. However, Xin Zhao completely shuts down this skirmishing style. By using Audacious Charge, you can instantly close the distance, ignoring her speed. Once on top of her, the rapid knock-up from Three Talon Strike disrupts her movement pattern and cancels her escape attempts before she can build momentum or land Watch Out! Eep!. Lilliaのビルド → 詳細を見る
Lillia

理由

Lillia relies entirely on stacking movement speed from Blooming Blows to kite her opponents. However, Xin Zhao completely shuts down this skirmishing style. By using Audacious Charge, you can instantly close the distance, ignoring her speed. Once on top of her, the rapid knock-up from Three Talon Strike disrupts her movement pattern and cancels her escape attempts before she can build momentum or land Watch Out! Eep!.

レーン戦への影響

This matchup dynamic grants you massive early-game agency in the jungle. Lillia cannot safely contest scuttle crabs or defend her own camps if you decide to invade. Your threat of an all-in forces her to concede territory, meaning you can easily secure early neutral objectives. If she tries to fight for priority, a quick Audacious Charge combo will force her out of the river or secure a first blood.

立ち回り方

When hunting Lillia, position yourself in brush near her jungle camps to ambush her before she stacks her passive. Avoid engaging when she already has maximum movement speed. Hold Wind Becomes Lightning to slow her down if she tries to roll away with Swirlseed. If she attempts to cast Watch Out! Eep!, use Audacious Charge to dash behind her or reposition out of the high-damage epicenter, ensuring you win the trade cleanly.

チャンピオン詳細 → Lilliaのビルド →
Viego

Viego−1

early pressureskirmish power Xin Zhao naturally dominates Viego because his defensive ultimate completely shuts down Viego's primary engage tool. When Viego attempts to slide forward with Spectral Maw to lock you down, activating Crescent Guard immediately knocks him back. This isolates Viego outside his preferred range and invalidates his follow-up burst from Blade of the Ruined King, leaving him highly vulnerable in the jungle. Viegoのビルド → 詳細を見る
Viego

理由

Xin Zhao naturally dominates Viego because his defensive ultimate completely shuts down Viego's primary engage tool. When Viego attempts to slide forward with Spectral Maw to lock you down, activating Crescent Guard immediately knocks him back. This isolates Viego outside his preferred range and invalidates his follow-up burst from Blade of the Ruined King, leaving him highly vulnerable in the jungle.

レーン戦への影響

This interaction turns the jungle matchup into a strict race for level five. Once you unlock Crescent Guard, Viego cannot safely contest epic monsters or invade your camps. You can aggressively secure scuttle crabs and start objectives knowing his Harrowed Path flanks are easily countered, forcing Viego into a passive farming style while you dictate the map's overall speed.

立ち回り方

When contesting camps, track Viego's charge animation on Spectral Maw. Do not panic-cast your ultimate; wait for him to commit his dash, then instantly deploy Crescent Guard to push him away. Once his stun is wasted, immediately counter-engage using Audacious Charge followed by Wind Becomes Lightning to slow him, then execute your Three Talon Strike knock-up to finish him off before he can escape back into Harrowed Path.

チャンピオン詳細 → Viegoのビルド →
Shyvana

Shyvana−2

early pressuredueling You dominate this jungle duel because you can completely shut down Shyvana's primary damage source. Her entire kit revolves around marking you with Flame Breath to trigger bonus magic damage. By deploying Crescent Guard, you create a protective barrier that completely blocks her incoming fireball if she casts it from outside the ring, preventing her from ever applying that crucial mark. Shyvanaのビルド → 詳細を見る
Shyvana

理由

You dominate this jungle duel because you can completely shut down Shyvana's primary damage source. Her entire kit revolves around marking you with Flame Breath to trigger bonus magic damage. By deploying Crescent Guard, you create a protective barrier that completely blocks her incoming fireball if she casts it from outside the ring, preventing her from ever applying that crucial mark.

レーン戦への影響

This interaction completely shifts the jungle tempo in your favor. Knowing you can negate her Flame Breath poke allows you to aggressively invade her camps early. Shyvana is forced to play defensively, delaying her Fury of the Dragonborn stacking process. You will secure double Scuttle Crabs easily, establishing early vision control and forcing her to concede neutral objectives or risk dying in her own jungle.

立ち回り方

When contesting camps, do not rush your ultimate. Wait for Shyvana to activate Burnout and attempt to space you with Flame Breath. Once she starts her cast animation from a distance, immediately drop Crescent Guard to vaporize the projectile. Follow up instantly with Audacious Charge and Three Talon Strike to knock her up before she can stack her Fury of the Dragonborn on nearby monsters.

チャンピオン詳細 → Shyvanaのビルド →
Ekko

Ekko−1

early gamedueling Xin Zhao dominates this jungle matchup because Crescent Guard completely neutralizes Ekko's primary burst tool. When Ekko attempts to set up his three-hit passive, Z-Drive Resonance, he relies heavily on the return stroke of Timewinder. By activating Crescent Guard, you block all damage from the returning projectile if Ekko is outside your arena, preventing him from securing his crucial third stack and the massive movement speed burst that follows. Ekkoのビルド → 詳細を見る
Ekko

理由

Xin Zhao dominates this jungle matchup because Crescent Guard completely neutralizes Ekko's primary burst tool. When Ekko attempts to set up his three-hit passive, Z-Drive Resonance, he relies heavily on the return stroke of Timewinder. By activating Crescent Guard, you block all damage from the returning projectile if Ekko is outside your arena, preventing him from securing his crucial third stack and the massive movement speed burst that follows.

レーン戦への影響

This interaction strips Ekko of his early skirmishing power, forcing him to concede crab priority and avoid direct jungle duels. Since he cannot safely proc Z-Drive Resonance while your ultimate is ready, Ekko must rely on Phase Dive defensively rather than using it to invade. This allows you to invade his camps aggressively, secure double scuttle crabs, and apply immense pressure on his lanes while he falls behind.

立ち回り方

To execute this flawlessly, do not initiate with Crescent Guard. Instead, wait for Ekko to commit with Phase Dive and launch Timewinder. The moment he does, activate Crescent Guard and use Audacious Charge to stick to him inside your arena, forcing him to fight in close quarters where Three Talon Strike will knock him up. If he tries to escape or turn the fight with Chronobreak, track his echo to avoid his ultimate's massive burst.

チャンピオン詳細 → Ekkoのビルド →
Twitch

Twitch−2

early invaderanged block Twitch relies on Spray and Pray to shred from a safe distance, but Crescent Guard creates an impenetrable barrier that nullifies his ultimate's piercing bolts entirely. To deal any damage, Twitch is forced to break his ranged safety and step inside your defensive circle. This puts him directly in range of your Audacious Charge and Three Talon Strike knockup, completely neutralizing his ultimate's massive range advantage. Twitchのビルド → 詳細を見る
Twitch

理由

Twitch relies on Spray and Pray to shred from a safe distance, but Crescent Guard creates an impenetrable barrier that nullifies his ultimate's piercing bolts entirely. To deal any damage, Twitch is forced to break his ranged safety and step inside your defensive circle. This puts him directly in range of your Audacious Charge and Three Talon Strike knockup, completely neutralizing his ultimate's massive range advantage.

レーン戦への影響

This dynamic completely shuts down Twitch's flanking threat. Even if he uses Ambush to catch you off guard, your reactive ultimate shuts down his burst. In river skirmishes, this range denial prevents him from melting your team from the backline, severely limiting his objective pressure. He cannot contest scuttles or neutral objectives without risking a direct, lethal engage from you the moment he opens fire.

立ち回り方

Never initiate fights with Audacious Charge unless Twitch is already isolated. Instead, walk up or wait for him to reveal himself. The moment he activates Spray and Pray, immediately deploy Crescent Guard. Force him to waste his ultimate duration or walk into your melee range. Once he crosses the threshold, slow him with Wind Becomes Lightning, then execute your Audacious Charge and Three Talon Strike combo to quickly crush him before he can escape.

チャンピオン詳細 → Twitchのビルド →

その他のマッチアップ

Xin Zhao対策アイテム

これらのアイテムを購入すると、このチャンピオンの影響力を抑えられます。

Coques en acier
Coques en acier
Présage de Randuin
Présage de Randuin
Cotte épineuse
Cotte épineuse
Cœur gelé
Cœur gelé
Stase (Enchant)
Stase (Enchant)

このチャンピオンへの対策

カウンターアングル

Xin Zhaoへのカウンターは、彼の最初のgankを避けるだけではありません。真の目的は、彼のエンゲージ、Q3、そしてそれに続くコンボの連携を断ち切ることです。もし彼がEでターゲットに到達し、ノックアップするのに十分な時間留まり、その後アルティメットで孤立させたり生き残ったりできれば、彼は望むような戦闘を展開できます。良いカウンターは、以下の3つの方法で彼を罰します:延長戦を制する、ターゲットに張り付かせない、またはクールダウンが切れた後に彼のエンゲージを逆手に取る。このページは、彼に勝てるチャンピオンの単純なリストとしてではなく、彼のタイミングを阻害する方法として読むべきです。

パッチの文脈

敵がXin Zhaoの選ぶ短期決戦を拒否したとき、彼ははるかに弱くなります。彼の序盤は強力ですが、特に敵レーンが優先権を持っている場合や、より耐久力のあるジャングラーがトレードを長引かせることができる場合、すでに準備されたゾーンに入るのを嫌います。彼のDPSを低下させたり、最初のバーストを防いだり、Q3を生き延びたりできるチャンピオンは、Xin Zhaoにアルティメットを防御的に使わせます。そこから、彼のチームはしばしば、戦闘を開始するために予定されていたインパクトポイントを失います。

クイックリード

  • 最善のカウンタープレイは、彼を早すぎるタイミングで突入させることです。EとWが消費されたら、Xin Zhaoは次に何が起こるかについてのコントロールを大幅に失います。
  • 耐久力のあるデュエリストや彼のDPSを低下させるチャンピオンは、彼の計画を台無しにします。なぜなら、彼は迅速に勝つか、有用な孤立を作り出す必要があるからです。
  • 深い視界が不可欠です。Xin Zhaoがサプライズの価値を失えば、彼のギャンクは読みやすく、罰しやすくなります。

カウンターの原型

延長された接触に耐えるデュエリスト

Xin Zhaoは、最初の接触で即座に有利を作り出すことを望んでいます:速いダメージ、Q3、そしてゾーンをロックするためのアルティメット。その最初のシーケンスを吸収し、攻撃し続けるデュエリストは、トレードを完全に変えます。Jaxは彼の通常攻撃のタイミングをはるかに不快にさせることができ、Olafは簡単にコントロールされずに直接的な戦闘を受け入れ、Volibearは延長された近接戦闘を不利な消耗戦に変えます。このプロファイルは、Xin Zhaoに、本当に迅速に終えられるかどうかを問わせます。なぜなら、彼が長居しすぎると、彼のエンゲージは罠になるからです。

チャンピオンの適応方法. Xin Zhaoは、優先権のない孤立したデュエルを避け、カウンターギャンクや準備された目標の周りでより多くプレイすべきです。このタイプのチャンピオンに対しては、彼はすべての1v1に勝つことを証明するためではなく、数的有利を作り出すために序盤のゲームを使用する必要があります。

彼のエンゲージを彼自身に逆用するフロントライナー

Xin Zhaoは、最初のインパクトを決める側になることを好みます。ゾーンをロックしたり、即座に対応したりできるフロントライナーは、そのエンゲージをはるかに危険なものにします。Rammusは彼の接触し続ける必要性を罰し、Viは彼の孤立の試みの一部を無視する直接的なターゲティングで対応でき、Jarvan IVは川での小競り合いを閉鎖されたゾーンに変えることができ、そこでXin Zhaoはもはや自由に退出を選ぶことはできません。このタイプのカウンターは、Xin Zhaoの主な快適さを奪うため機能します:突入し、攻撃し、その後継続するか後退するかを決定すること。

チャンピオンの適応方法. これらのチャンピオンがクラウドコントロールやエンゲージを見せるのを待ってから、完全にコミットすべきです。彼らのクールダウンを追跡せずに最初に突入すると、敵に完璧な開始点を与えるリスクがあります。

彼のテンポやアクセスを崩すジャングラー

Xin Zhaoは、彼のjungleパスが自然に読みやすいアクションにつながるとき、非常に強力です:レベル3、オーバーエクステンドしたレーン、そして目標。テンポを変えたり、異なる方法で競合したり、彼に反応を強制したりできるジャングラーは、その計画を不安定にします。Lee Sinは彼の前に角度を作ったり、明白なエンゲージを罰したりでき、Gravesは同じ接触を受け入れずにスペースとDPSをプレイでき、WukongはXin Zhaoのアルティメットが常に全員をコントロールできるとは限らない集団戦を脅かし、RengarはXin Zhaoがまだ配置されていないサイドを攻撃できます。カウンターは単純なデュエルから来るのではなく、彼が最初の実際のプレイを決定するのを防ぐことから来ます。

チャンピオンの適応方法. 彼らのリズムに盲目的に従うのを避けるべきです。彼は明確な計画が必要です:脆弱なレーンをカバーする、カウンターgankをプレイする、またはすべての敵の動きを追いかけるのではなく、優先権を持って目標を強制する。

優先度の高いマッチアップ

Jax

Jaxは、Xin Zhaoのパターンの中核である接触し続け、通常攻撃をデュエルプレッシャーに変換するという点に攻撃するため、理解すべき優先的なマッチアップです。Xin Zhaoが明確な有利なしにエンゲージした場合、Jaxはその最初のウィンドウを吸収し、Q3の報酬を減らし、その後戦闘が長引くにつれてトレードに勝つことができます。正しいアプローチは、エゴから1v1を求めるのではなく、Jaxに数的有利、目標、または味方のクラウドコントロールで準備されたギャンクに対応させることです。

Rammus

Rammusは異なる問題を作り出します:彼は必ずしもスピードでXin Zhaoを打ち負かそうとするのではなく、彼のエンゲージの決定を罰することによってそうします。Xin ZhaoはQとConquerorから価値を得るためにターゲットに張り付く必要があるため、彼は非常に直接的な防御的対応にさらされます。このマッチアップでは、Xin Zhaoプレイヤーはエンゲージにずっと忍耐強く、最初に利用可能なターゲットを自動的に攻撃することを避ける必要があります。レーン、目標、そしてRammusのタイミングを中心にプレイする方が、正面からのデュエルを強制するよりも良いことが多いです。

対面時のよくある間違い

対面時のよくある間違い

  • レーン優先権のない川でのデュエルを与え、その後レベル3が短期接触に勝つことを遅すぎて悟る。
  • 視界を防御的すぎるように保つこと:Xin Zhaoがレーンに入るときにのみ視認される場合、彼はすでに彼の角度を見つけている。
  • 彼のアルティメットを尊重せずにチョークポイントに集まること。彼は対応を分割し、彼のチームがターゲットを仕留めるのを許すことができる。
  • Conqueror、Triumph、Death’s Danceで接触し続けることを許し、十分なアンチヒールまたはクラウドコントロールなしに彼をバーストしようとすること。
  • Xin ZhaoのEを使い切らせてから、相手に何もさせない状況を作ってからQ3を確定させる動きをよくする。

コーチングノート

  • Xin Zhaoに対しては、相手が望む最初の戦闘をさせないことが最重要。Eの使用をためらわせることができれば、脅威の大部分をすでに減らしていることになる。

  • 1v1だけでマッチアップを判断しないこと。Xin Zhaoは、一人で全員を倒すからではなく、彼のエントリーがチームに簡単なプレイを作り出すからこそ勝つことが多い。

FAQ

Xin Zhaoの序盤のガンクをどう避ける?

遅いジャングラー相手よりも早くワードを置き、相手の通りそうなルートを予測して立ち回る必要がある。Xin Zhaoはレベル3から脅威となるため、川やトライブッシュの視界がない状態でオーバーエクステンドしたレーンは、自然なターゲットとなる。最も重要なのは、すでに接触されている場合にQ3の後まで逃走スキルを温存しないこと。その時点では、すでに目的を達成していることが多い。Eを使う前やWを空振らせる前に下がる方が、遅すぎるフラッシュよりも良い。

なぜ一部のタンクチャンピオンはXin Zhaoを非常に困らせるのか?

Xin Zhaoは、彼のエントリーがすぐに大きなアドバンテージを生み出すことを望んでいるからだ。もし彼がバーストダメージを吸収したり、DPSを低下させたり、長居を強要したりするターゲットにエンゲージした場合、彼はタイミングをコントロールできなくなる。アルティメットは戦闘の一部を押し出すことができるが、メインのターゲットが倒れなければすべてを解決するわけではない。タンクや耐久力の高いチャンピオンは、しばしば彼に、戦闘に勝つはずだったチャンスを作り出す代わりに、生き残るためにクールダウンを使わせる。

Xin Zhaoに対して序盤にインベードすべきか?

優先権と情報がある場合のみ。Xin Zhaoは、特に味方レーナーが来る前に相手レーナーが到着した場合、準備不足のインベードを覆すことができるタイプのジャングラーだ。彼が見えるという理由だけでインベードするのは不十分。彼のクールダウン、どのレーンが動けるか、そして戦闘が短期か長期になるかを知る必要がある。これらの条件なしでは、彼を追跡し、彼が攻撃したいレーンを守り、そして最初のgankが何も生み出さなかった時に彼を罰する方が良いことが多い。

Xin Zhaoに対して集団戦はどう戦うべきか?

戦闘開始時に孤立したターゲットを与えないようにする必要がある。Xin ZhaoがキャリーにEで飛び込み、Q3を確定させ、アルティメットを使ってチームの残りを押し出すことができれば、彼はまさに望むシナリオを作り出す。最善の対応は、彼を重要度の低いターゲットにエンゲージさせ、最初のダッシュ後にディスエンゲージを維持し、アルティメットやQ3がゾーンをコントロールできなくなった時に再エンゲージすることだ。忍耐と距離感は、無秩序なバーストよりも価値がある。

















































