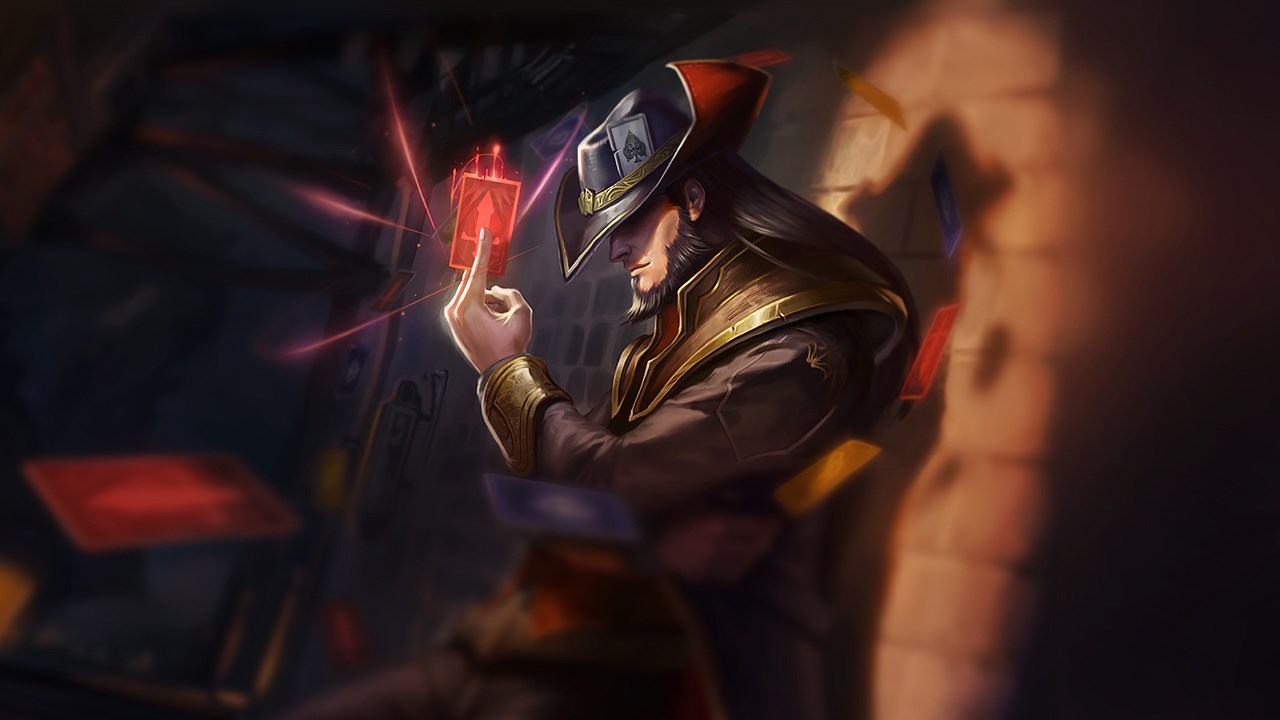
Twisted Fate Counters
Why
Zed is brutal for Twisted Fate because he targets your core weaknesses: limited mobility and a laning phase where you must step up to push. Where you want to control wave then disappear with R, Zed forces you to stay, get chipped, and live under constant all-in threat. His kit creates a lose-lose tempo loop: play too safe and you lose priority so roams become late; push too hard and you open burst windows. Even with Gold Card ready, Zed can often stall/engage on timings where you lack the right angle. This isn’t just damage — it’s tempo. If Zed breaks your tempo, TF loses a huge part of his value.
Lane impact
In lane you feel pressure early: every step for last-hits or mid-wave shove can be punished by sharp trades. Once chipped, pushing becomes risky and you can’t set up clean wave resets. From level 5, his ult changes the rules: positioning must be flawless because one mistake costs flash or life. With flash down, lane turns into a hunting ground. Midgame, he can also read your Destiny: you want to roam, he wants to follow or threaten your return. Result: you either stop roaming, or you roam and lose your turret.
How to play
Positioning: play closer to your side and avoid free shoves without vision. If you want to push, prep river wards and have a retreat line. Key timing: your level 5 isn’t an automatic roam signal. Versus Zed, roam mainly after crashing wave and when you know his position; otherwise play anti-all-in and accept slower pace. Decision-making: treat Gold Card as deterrence, not reflex. Often the best line is to deny his engage, then convert the next wave into reset + roam. Roaming without wave control gives Zed exactly what he wants: a free turret or a kill on your return.
Why
Fizz is miserable for TF because he has a direct answer to your main laning weapon: Gold Card. His dodge/stall breaks your pattern of stun → trade → reset, and then he delivers burst you struggle to survive. The core issue is distance control: TF wants mid-range zoning and wave management; Fizz wants zero range, forces your defensive tools, then finishes. So your CC doesn’t reliably secure your life, and low mobility makes every mistake instantly punishable.
Lane impact
In lane you start holding cards because using them at the wrong time wastes your tool. That leads to losing trades and often losing wave priority. At level 5, his all-in becomes lethal: even with flash you may burn it just to live. Frequent recalls destroy TF’s identity: tempo. Midgame, Fizz can punish roams: if you move without vision, he follows or kills you on rotation. He turns your strength (movement) into risk.
How to play
Positioning: keep lane shorter and avoid sitting mid-lane without jungle info. Your goal is being hard to engage, not greedily shoving. Key timing: play around his dodge window. When it’s down, you can take an honest Gold Card trade; when it’s up, prioritize farm and safety. Decision-making: if you can’t hold 1v1, shift to team play: crash wave, reset, then take fast clean roams. And never roam low HP — Fizz loves intercepts.
Why
Akali is harsh for TF because she can remove the clarity of your kit. You want to target, stun, punish oversteps. She answers with shroud: you lose target, lose trade, and back off while she keeps threat. This matchup also applies psychological pressure: TF needs calm to prep cards and wave timings. Akali brings constant chaos where any second can become an all-in. Even without dying, you can get zoned off priority — and without priority, TF stops being TF.
Lane impact
In lane, trades rarely stay clean. You can stun, but Akali can weave in/out and make your stun low value if you lack immediate follow-up. At level 5, engage threat spikes: if you’re pushed up, she can force flash or a defensive ult. Every recall breaks your roam cycle. Midgame, she’s great at punishing side/rotations: you want to R into fights; she wants to kill you during transitions or on isolated waves.
How to play
Positioning: always keep a clear retreat line. Biggest risk is sitting mid-lane without vision because you lack a reliable escape button. Key timing: don’t throw Gold Card into shroud for nothing. Best timing is often right before her commit, or after she reveals by reappearing. Decision-making: roam with discipline: crash wave, reset, then Destiny onto already-winning plays. If you Destiny into unclear fights, Akali has too many punish routes on the return.
Why
Yasuo becomes hard for TF once he understands how to deny your patterns: Wind Wall can shut down a big part of your ranged threat, and his wave-based mobility forces angles you can’t fix without flash. It’s not just dueling — Yasuo makes lane unstable. He dashes in, trades, exits, and you constantly choose between holding wave and holding your life. His skirmish scaling can also reduce roam value: if you arrive and he already controls the fight, you can get turned on.
Lane impact
In lane, clean priority is hard if Yasuo is comfortable. He threatens your space as soon as he has a workable wave. At level 5, all-ins become harder to read: he can engage on micro-windows and force early defensive responses. Lose flash and you’re under constant threat. Midgame, Yasuo punishes linear moves: you roam, he pushes, follows or takes turret. He forces disciplined wave management before every Destiny.
How to play
Positioning: respect wave state. If the wave favors Yasuo, play lower and accept losing some prio rather than getting all-ined. Key timing: Wind Wall. After he uses it, your threat becomes stable again and you can prep Gold Card without losing tempo. Decision-making: roams must be conditioned on a wave crash. Don’t leave a neutral wave mid — Yasuo converts it into immediate pressure.
Why
Kassadin is hard because he turns the game into a race. TF wants to create map advantage before midgame gets chaotic. Kassadin wants to survive and reach the point where he can gapclose at will. Your issue: your damage/control profile doesn’t always lock him once he scales. You can punish early, but if you don’t convert, he eventually takes lane and map. This matchup is hard because it’s macro, not just mechanics. A small tempo mistake can erase your win condition.
Lane impact
In lane, you may feel ahead, then watch Kassadin come back without being able to stop it. If your roams are average and you don’t take plates, you don’t have a real lead. From level 5 and beyond, his options expand: he can avoid your angles, punish positioning, and make every shove more dangerous. Mid/late, he also threatens rotations: TF moving without vision becomes a target, and Destiny becomes less comfortable if you might get one-shot after arriving.
How to play
Positioning: shove only with information. Getting caught on an advanced wave can nullify your whole tempo plan. Key timing: your early roams must convert. Choose high-probability plays (bot no flash, prepped objective), not roams just to try. Decision-making: if Kassadin scales, shift focus: not killing him, but building structural vision/tower leads so he can’t enter fights freely. TF often beats Kassadin when the map is already closed through taken turrets and objective fights.
Why
Orianna is uncomfortable because she contests wave without exposing herself. TF wants to shove or threaten Gold Card; Orianna plays at range, controls space, and makes your shoves cost HP. She doesn’t always instantly kill you, but she removes oxygen: no priority means no roams, and roaming without priority means losing turret. It’s unfavorable because she makes you pay for every tempo decision while you want free timings.
Lane impact
In lane, you can end up farming under constant pressure. Every shove attempt can become a lost trade if you’re not already ahead. At level 5, you can roam, but punishment is clear: Orianna shoves and chips your tower. Return late and you lose plates, losing value even if the roam was decent. Midgame, she also shapes objective fights by zoning entrances and making Gold Card conversions risky.
How to play
Positioning: prefer clean controlled shoves after thinning wave instead of trying to one-shot shove and expose. Less exposure means less chip. Key timing: roam only after a wave crash. That’s the guardrail vs Orianna: leave a neutral wave and she converts it into plates. Decision-making: accept that sometimes holding lane and keeping Destiny as threat is best. A TF who doesn’t die and keeps his tower can create a decisive roam later; a TF who forces too early into Orianna falls behind and loses his identity.
Why
Syndra makes your card setups dangerous because she punishes you while you telegraph intent. TF often needs a step forward to threaten Gold Card; Syndra loves that step. Her kit forces space respect: one positioning mistake can cost enough HP to make the next shove impossible. No shove means no roam. It’s unfavorable because resource trading rarely favors you: she pokes/bursts while you must survive and keep mana for wave + pressure.
Lane impact
In lane, you can get zoned off wave if you refuse a more passive posture. Get hit repeatedly and you’re stuck under tower. At level 5, Destiny exists but usage conditions tighten: you can’t leave low HP or without flash or you die on the way in/out. Midgame, she remains a pick threat: TF stepping up to ward or set a card can get caught and deleted, ruining vision plans.
How to play
Positioning: keep retreat angles that don’t allow easy stun lines. Avoid straight lanes where she can align spells. Key timing: roam after she spends resources clearing wave. Post-clear, she has less capacity to punish your departure. Decision-making: embrace utility-first TF: secure survival, crash when possible, use Destiny on safe plays. If you try to win lane through trades into Syndra, you’re playing her game.
Why
Ahri reduces your reliability because she combines mobility with pick. You step up to threaten Gold Card; she threatens charm and repositions so your stun doesn’t land as you want. This matchup demands fine reads: TF is strongest when enemies are predictable; Ahri is flexible. She can play safe or punish your overstep. The real issue is low margin for error: lose too much HP and your roams disappear.
Lane impact
In lane, you can’t ignore charm threat. It slows shoves and makes trades timid. At level 5, she can follow or punish rotations. Destiny isn’t a free move if Ahri can arrive with mobility and turn a 2v2 into a trap. Midgame, she’s still a strong side pick threat. TF warding alone or crossing fog becomes vulnerable.
How to play
Positioning: keep distance and pick careful step-up moments. If Ahri still has pick tools, don’t walk into easy lines. Key timing: roam when she’s shown on map or after she spent resources on wave. Fewer tools means safer Destiny. Decision-making: use Gold Card as anti-pick. Often the best play is deterring Ahri from stepping up rather than forcing trades. Your goal is map freedom; over-focusing 1v1 reduces that freedom.
Why
Vex is unfavorable because she converts your step-ups into clean punishment: zone control, fear, and burst force you back. TF has no dash to reset bad positioning, so every good fear costs heavily. She doesn’t counter you like a pure assassin, but she builds a barrier: if you want to play wave and step up, you pay HP. Pay too much and Destiny disappears. In practice, Vex forces a clean midlane where improvisation gets punished.
Lane impact
In lane, she contests priority and forces careful clearing. Get hit and you quickly lose the right to hold center. At level 5, roaming becomes more conditional: you can’t leave under pressure or low HP because the return becomes dangerous. Midgame, she’s great at reacting: Destiny into uncertain plays can be flipped by her control and burst.
How to play
Positioning: stay on the safe side of lane and avoid lines where fear + burst pins you. Key timing: roam after crash, especially when Vex spent resources on wave. That’s your best safe window. Decision-making: versus Vex, good TF often accepts a 0-0 lane to win map later. If you over-trade early, you drop under thresholds and self-ban your ultimate.
Why
Katarina is a skill matchup because you have the exact tool to break her plan (Gold Card), but only with correct timing. Stun too early and she waits/resets; too late and she already has space and you eat burst. It’s also about placement: daggers create forbidden zones. TF can control space, but must be disciplined not to step where she wants. So it’s playable and can even be favorable, but only with precise timing + wave management.
Lane impact
In lane, you can punish her entries if your card is ready and you’re not overextended. But if you shove without info and sit mid-lane, she can find kill windows. At level 5, resets become real skirmish danger. Your job isn’t always killing Katarina; it’s preventing her chain. Midgame, your roams can win… or lose if you arrive late and Katarina already reset on your teammates.
How to play
Positioning: treat daggers like mines. Fight around them, not inside them. Key timing: hold Gold Card for the critical moment (real entry / ult). If you spend it on small poke, you open a window. Decision-making: in fights, think anti-reset. When Katarina shows, your job is often locking her or forcing retreat even without killing. Preventing a reset is worth more than winning a lane trade.
Why
LeBlanc is a skill matchup because she tries to make you waste your tool while you try to punish her entry. She pokes, feints, retreats. If you play on instinct, you throw Gold Card into air and lose threat. If you stay patient, you can make her uncomfortable: TF doesn’t need to kill her; he needs to hold wave and keep deterrence. So it’s an information/timing duel: who forces the other to use their key tool first.
Lane impact
In lane, trades are elastic. She goes in, you answer, she exits. Priority is not losing too much HP or you lose shove rights. At level 5, Destiny is your macro weapon, but beware: LeBlanc can punish your mid return or intercept between waves. Midgame, she forces fast picks. Gold Card is valuable only if you keep it available for the right moment.
How to play
Positioning: stand where she can’t hit for free then escape without cost. Too centered hits and she tags you and disappears. Key timing: wait for real commit. Often the best Gold Card is the one used when she can’t immediately snap back. Decision-making: if you can’t kill her, don’t tilt. Keep lane stable, crash wave, and Destiny onto safe plays. TF beats LeBlanc by turning the game into a map, not by chasing her in a duel.
Why
Galio is a skill matchup because you fight the same war: the map. TF wants Destiny, Galio wants to follow/counter-roam and punish engages. He’s tanky and anti-AP so you don’t kill him easily, but you can outmaneuver him. You win through wave control and by choosing the first good action. Bad roams get punished by Galio; good roams force him to arrive late. It’s less 1v1 and more conductor vs conductor.
Lane impact
In lane, he holds wave and denies free priority. You can shove, but he doesn’t vanish. At level 5, roams are the matchup: every ultimate must be prepped by a wave crash or you pay via plates + counter-roam. Midgame, Galio thrives in grouped fights. Sloppy Destiny plays give him perfect angles to flip fights.
How to play
Positioning: don’t obsess over killing him. Use lane to set waves and timings, not to force duel. Key timing: crash wave before every move. Versus Galio it’s the golden rule — without crash, roam cost is too high. Decision-making: pick fast decisive roams. If the play is slow, Galio arrives and makes it favorable. TF wins by striking quickly, taking kill/objective, and leaving before the response.
Why
Veigar is often favorable for TF because he has an exploitable weakness: low mobility and an early game focused on stacking. You can impose pace and make him pay for waves he can’t contest. TF doesn’t need solo kills; he needs tempo. Veigar stacking under turret while you get a bot kill is exactly your game. It turns only if you let Veigar scale unpunished or you get trapped by cage at the wrong time.
Lane impact
In lane, you can often secure wave priority and force him defensive. If he burns cage early, you get a shove/reset window. At level 5, Destiny becomes threatening: Veigar struggles to follow. He must choose between holding turret and pinging or losing resources. Midgame, with good vision you can keep making him chase the map rather than the opposite.
How to play
Positioning: respect cage — don’t walk into lines where it traps you for free. That’s the main condition for staying favorable. Key timing: roam right after wave crashes. Veigar loves stable lanes; you must break stability. Decision-making: don’t tunnel on Veigar. If you can take plates or roam, do it. Your job is building global lead before he becomes a teamfight monster.
Why
Lux is often favorable because Gold Card threat gives you space control. Lux wants long-range poke, but stepping up exposes her to stun into clean trade or gank setup. The matchup becomes simple when you don’t play ego: you don’t need repeated trade wins; you need safe wave control and Destiny plays elsewhere. Lux can kill you if she lands everything, but proper positioning makes that scenario hard.
Lane impact
In lane, you can often hold wave and crash regularly. Lux loves long lanes to poke; keeping wave manageable reduces her value. At level 5, she struggles to follow. Clean roams force her into a choice: push for plates or follow late. Midgame, avoiding unwarded zones lets you keep constant side pressure, breaking Lux’s poke-mid plan.
How to play
Positioning: don’t walk in straight lines. Change angles to reduce skillshots while keeping Gold Card threat range. Key timing: roam after crash. Lux hates losing wave under turret; you exploit that to leave. Decision-making: if Lux plays very safe, accept not killing her. Take wave, place vision, turn ultimate into advantage elsewhere. TF often wins through action volume, not mid kills.
Why
Anivia is often favorable for TF because she’s slow and heavily positioning-dependent. Without perfect wave state, she struggles to punish you when you take priority and disappear. TF doesn’t win by fighting inside her zone; you win by tempo, forcing her to choose between clearing and reacting. It only becomes hard if you stay mid too long playing inside her control. If you play TF as TF, you’re advantaged.
Lane impact
In lane, she can waveclear but can’t follow easily. Every wave crash becomes a move window. At level 5, Destiny punishes her low mobility even harder: she can’t quickly answer sides. Midgame, just avoid getting caught rotating without vision. If you get trapped, she slows/control and you lose tempo.
How to play
Positioning: don’t linger in her zones. If she sets control, back off and play the next wave. Key timing: roam right after crash. The more you force her to clear under turret, the more windows you create. Decision-making: the goal is map wins, not static duels. If Anivia wants to wait mid, great: you take bot/top with Destiny while she defends nothing.
Why
Brand is favorable because he has a major flaw into TF: he can’t reposition well once you land a clean Gold Card. He has big damage, but often must stay in range to apply it. TF converts that flaw into a plan: you don’t attrition-trade, you pick-trade. One good Gold Card forces flash; without flash, Brand becomes easy prey. Danger exists if you eat full combos for free, but correct threat management controls the relationship.
Lane impact
In lane, you can often take good trades by punishing his step-ups. When he wants to shove, he exposes. At level 5, Destiny amplifies advantage: Brand doesn’t follow well and is poor at answering side waves under threat. Midgame, your plan is clear: create a pick before objectives. Brand hates fights where he must walk in without already being positioned.
How to play
Positioning: avoid free combos, especially when your card isn’t ready. If you’re in no-Gold-Card mode, play farther back. Key timing: when you see a Gold Card window, convert into resource: burned flash, forced recall, or gank setup. Decision-making: if Brand plays very far back, don’t force. Take wave, leave, and Destiny elsewhere. You win by punishing his lack of mobility, not by accepting poke duels.