
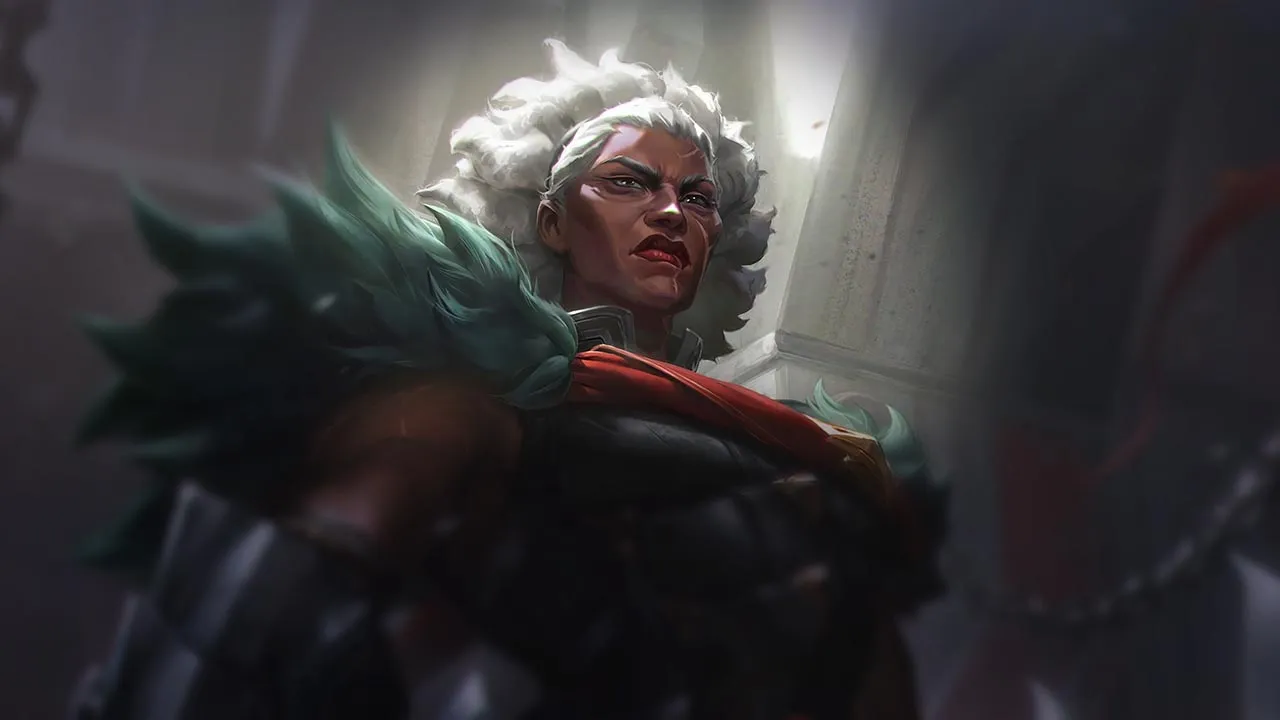
Ambessa TOP Wild Rift Guide: Mastering the Melee Beast

Ambessa's Identity and Abilities
Ambessa is a Brawler Fighter who stands out for her explosive mobility (4/5) and her ability to engage (4/5), while dealing significant damage (3/5). Her identity relies on the surgical execution of isolated targets and constant pressure, but she demands a difficulty (3/5) of execution. She is a Diver who excels at bursting (4/5) enemy carries.- Drakehound’s Step: This passive is the core of your kit. After each ability, a short dash allows you to empower your next attack with bonus damage, attack speed, and Energy regeneration. Mastering the weaving of auto-attacks between each spell is non-negotiable to maximize your DPS and mobility, allowing you to reposition and maintain aggression. Use the dash to cross small walls, creating unexpected engagement or escape angles.
 Cunning Sweep / Sundering Slam: Your main damage and control tool. The Sweep strikes in an arc, dealing more damage on the outer edge. If it hits, you can activate Slam to project a target. Always aim for the outer edge of the cone to maximize your burst and make Slam available, which is crucial for crowd control and execution.
 Repudiation: A defensive shield that blocks the next crowd control and deals damage. Activate Repudiation just before entering the fray or taking a key CC to maintain your initiative and absorb crucial damage.
 Lacerate: A whirlwind that slows enemies. If you trigger your passive after Lacerate, a second whirlwind is replayed. Combine Lacerate with your passive to stick to the target and ensure the second proc, essential for chasing and zoning.
 Public Execution: Your ultimate, a straight-line dash that suppresses the farthest target and deals massive damage. Takedowns reset your CDs. Use Public Execution to isolate and eliminate a poorly positioned carry, but make sure your team is ready to follow up so you don't find yourself alone amidst enemies.
Ambessa's Essential Combos
Mastering Ambessa's combos is key to maximizing your damage and pick-off potential. Each ability must be followed by an auto-attack to activate your Drakehound’s Step passive. The effectiveness of your engagements directly depends on your ability to weave auto-attacks between your spells, thereby maximizing damage and mobility.Main Combos
Short trade combo
Q (outer edge) → Passive AA → E (dash) → AA — hit with the outer arc of Cunning Sweep which transforms into Sundering Slam, then trigger the Drakehound's Step passive to dash and auto-attack.All-in engage combo
E → Q → Passive AA → W → R — enter with a passive dash, cast Q for poke/slam, auto-attack, then use Repudiation for the stun and finish with Public Execution on the isolated target.Backline pick combo
R (Public Execution) → Q → AA → W — use ult to blink onto an isolated enemy carry, burst with Q and stun with W.Extended trade combo
Q → AA → E (passive dash) → Q → AA → W → Q → AA — weave passive dashes between each ability to stack the passive 3x and maximize damage.
Mechanical Tips
- Drakehound's Step Passive: after each ability, input a direction or an attack to trigger a short dash. Each dash stacks up to 3 times for bonus range, attack speed, and damage on the next AA.
- Cunning Sweep outer edge: maximum damage is on the edge of the arc — aim for the extremity, not the center, and the cast transforms into Sundering Slam (follow-up).
- Public Execution: blink to the farthest enemy in a line — beware of the chosen target, the ult can jump to a tank if poorly aimed.
- Short trades: in early game, favor quick trades with empowered passive AAs between each ability — do not linger in prolonged fights before having items.
Common Mistakes
- Not using the passive dash after each ability — every skill without a dash = missed DPS.
- Poorly aiming Public Execution towards a tank instead of the targeted carry.
- Hitting the center of Q instead of the outer edge — reduced damage and no Sundering Slam transformation.
Notable Interactions
- Public Execution provides damage reduction and is unstoppable during cast — safe against CC.
- R can be comboed after other abilities for maximum damage or as an opener when a carry is isolated.
- Ambessa excels at initiating fights and disrupting enemy formations thanks to the passive's mobility.
Build and Ability Order
The Ambessa build is designed to maximize her aggressive bruiser potential, combining damage, sustain, and tankiness. Each item choice aims to reinforce your all-in and your survival in the fray, allowing you to remain a constant threat without being instantly eliminated.Ability Order
Priority:Q > E > W. Ultimate at levels 5, 9, 13.Maxing Cunning Sweep first maximizes your poke and burst damage, essential for lane trades. Lacerate comes next for the slow and increased mobility via the double passive proc, improving your chase and zoning capabilities. Repudiation is leveled last because its primary utility is the shield and CC block, which does not scale as aggressively as your other spells.
| Level | Ability |
|---|---|
| 1 | Q |
| 2 | E |
| 3 | Q |
| 4 | W |
| 5 | R |
| 6 | Q |
| 7 | Q |
| 8 | E |
| 9 | R |
| 10 | E |
| 11 | E |
| 12 | W |
| 13 | R |
| 14 | W |
| 15 | W |
Standard Build — Bruiser
This build maximizes your damage while offering good resilience for prolonged fights. It is ideal for most situations.
- Sundered Sky: An excellent first item for Ambessa, offering a good mix of damage, sustain, and a powerful proc for short trades and all-ins.
- Black Cleaver: Reduces enemy armor, increasing your and your team's damage. The bonus movement speed is also very useful for sticking to targets.
- Guardian Angel: Gives you a second chance in teamfights, crucial for a diver like Ambessa who often throws herself into the heart of the fray.
- Death's Dance: A defensive-offensive item that allows you to delay incoming damage and have monstrous sustain in combat.
- Sterak's Gage: A massive shield that makes you incredibly hard to kill in the late game, allowing you to survive enemy burst.


Build Variants
- Anti-tank — shred: , Eclipse, Divine Sunderer, , . This build is perfect when the enemy team has multiple very tanky champions. It gives you the penetration and damage needed to melt them.
- Sustain — brawler: , , Goredrinker, Maw of Malmortius, . If you find yourself in very prolonged fights where you need to survive a lot of damage while remaining threatening, this build gives you incredible sustain.



Boots and Enchantments
- Boots: Plated Steelcaps. Essential against AD-heavy teams, reducing auto-attack damage.
- Enchantments: (to delay burst or key CCs), (to break suppressions or long CCs), (for faster engages).


Situational Items
- Chempunk Chainsword: Against healing (Soraka, Aatrox, lifesteal…).
- Blade of the Ruined King: Against 2+ tanks / HP stackers.
- : Against AD burst (assassins, Zed, Rengar…).
- Wit's End: Against AP burst (Syndra, Fizz, Evelynn…) if you need magic resistance and attack speed.
- Stridebreaker: Against excessive mobility.


Runes
 Conqueror: Your primary keystone. It stacks quickly with your combos and auto-attacks, increasing your damage and sustain in prolonged combat.
 Demolish: For quickly taking down turrets and objectives.
 Second Wind: Excellent for lane sustain against poke.
 Overgrowth: Increases your max HP as you farm, making you tankier in the late game.
 Legend: Tenacity: Reduces the duration of crowd control, essential for a diver like Ambessa.
Ambessa's Power Spikes
Understanding Ambessa's power spikes is essential to dictating the pace of the game and knowing when you can force engagements. Your power peaks are not just damage increases, but critical windows where you can take the initiative and convert your advantage into map pressure.- Level 4 (W rank 1): This is your first true spike. Access to Repudiation gives you a shield and CC block, making you much more resilient and dangerous in trades. You can now engage more confidently, knowing you have a response to enemy controls. This is the time to look for short, aggressive trades.
- Level 9 ( + Ultimate rank 2): This spike is massive. Your Public Execution gains power and reliability, and gives you crucial armor penetration. You can now seriously threaten priority targets and start looking for picks on the map. This is the start of your mid-game where you can truly impact teamfights and objectives.
- Level 11 (): Acquiring transforms you into an even more persistent threat. As a diver, you often throw yourself into the heart of the fray. GA allows you to survive initial focus and re-enter combat, thus negating enemy burst attempts. This is a safety spike that allows you to be bolder in your engagements.
- Power Curve: Ambessa has a very strong mid-game phase (4/5) and an excellent late game (4/5), but her early game is more moderate (2/5). This means you must play cautiously early on, look for short trades, and avoid being punished. Once you have your first items and key levels, you become a dominant force.
Macro, Lane and Roam with Ambessa
In the toplane, your goal is to dominate your lane and then extend your influence across the map. Mastering wave management and vision is crucial to creating windows of opportunity and converting your advantage into macro pressure.Laning Phase (Early game)
- Wave Management: Start by seeking priority on the first waves to reach level 2 or 3 before your opponent. Use your Cunning Sweep to push the wave and create windows to ward the river or threaten a trade. Avoid long trades against tenacious bruisers in early game, focus on short trades where you proc your passive and retreat.
- Pressure and Dive: If you have the advantage, push the wave under the enemy tower and threaten a dive with your jungler. Your Sundering Slam and your Public Execution are excellent for this.
- Vision: Place deep wards in the river and enemy jungle to anticipate ganks and create roaming opportunities. Your all-in depends on clean angles, so vision is your best friend.
Mid-game (Rotations and Objectives)
- Side Lane: Continue to apply pressure on a side lane (usually the toplane) by pushing waves. Your goal is to force an opponent to respond to you, thereby creating a numerical advantage for your team on the rest of the map.
- TP/Roam: Use your Teleport (if you took it) or your quick rotations to join teamfights around objectives like Dragon or Rift Herald. Your Public Execution can instantly turn a 4v5 into a 5v4 if you isolate a key target.
- Objectives: Ambessa excels at securing objectives thanks to her burst. Look to flank enemies around Herald or Dragon to isolate the enemy jungler or carry.
Late game (Teamfights and Picks)
- Coordinated Engagement: In late game, do not force engagement first without vision or without your team's support. Your role is to execute a key target. Announce your engages and make sure your supports are ready to protect you or follow up.
- Picks: Favor "catching" an isolated target rather than frontal combat. Your Public Execution is perfect for this. Look for enemy carries who are poorly positioned.
- Flanks: Position yourself on the flanks of teamfights. A surprise entry with your R can break enemy formation and secure victory.
Synergies
Ambessa shines with champions who can protect her, extend her crowd control, or amplify her damage.- Jarvan IV: His
 Cataclysm traps a target, giving you a perfect window for your R.
 - Swain: His crowd control and sustain prolong fights, allowing you to maximize your damage.
- Veigar: His
 Cage is a no-go zone where you can all-in without risk.
 - Morgana: Her
 Black Shield allows you to ignore CC and dive fearlessly.
 - Shen: His
 Stand United can save you after a deep engage, allowing you to stay in the fight.
 - Lulu: Her ultimate and shields offer you survival and speed to re-engage.
- Orianna: Her ball on you guarantees a devastating
 Shockwave.
 - Leona: Her reliable chain of crowd control can set up your engages.
- Ashe: Her Ashe arrow can engage from a distance and provide an opening for Ambessa.









Counters and Counter-Items
Understanding your matchups is fundamental to avoiding surprises. Each opponent requires a specific adaptation of your game plan, turning a potential disadvantage into an opportunity if you play smartly.Hard Counters
These champions are structurally difficult for Ambessa.- Gwen: Gwen is a structural hard counter because the longer the trade lasts, the more her sustained DPS, sustain, and true damage (True Damage) take over. Your engagements that don't kill become engagements that cost you your health bar. Against Gwen, favor very short and clean trades with an immediate exit, and absolutely avoid prolonged duels where she excels.
- Fiora: She negates your engages with her
 Riposte, turning your all-in into punishment. She also outscales in the side lane. Don't give her a free Riposte: vary your timings and threaten without always triggering, forcing Fiora to spend her spell prematurely.
 - Vayne: A Vayne TOP will kite you, poke you, and deal True Damage to you, making every approach costly. Never chase her in a straight line; look for windows where her
 Condemn is on cooldown and engage from an unexpected angle.
 - Kennen: His poke and stuns prevent you from approaching and he is a huge threat in teamfights. Use the wave to reduce his poke and do not engage without a clear exit or when his stun ability is on cooldown.
- Jax: His
 Counter Strike negates your auto-attacks and he outscales in the side lane. Only trade when his Counter Strike is on cooldown, then disengage immediately to prevent him from turning the trade.





Unfavorable Matchups
These champions can cause you problems if you don't respect their windows.- Darius: He excels in prolonged trades, which is dangerous for Ambessa. Manage distance and do not enter if you do not have a clear exit; look for short trades after he misses a key spell.
- Sett: He loves close-range combat and can turn a trade with his
 Haymaker. Play very short enter-exit trades, gain a small advantage, and retreat before he can punish you with his burst.
 - Jayce: His poke and zone control make wave access difficult. Let the wave come to you and approach from angles (bush, fog) to avoid his free poke.
- Gragas: He can disengage your all-ins and control the wave. Do not engage in an area where he can cut you off from your wave or your escape; play after his disruption spells.
- Teemo: His blind and poke make farming costly. Play "clean": take safe CS, use bushes, and only all-in if you have a clear window without his
 Blind.





Skill Matchups
These matchups depend on execution and reading windows.- Camille: A duel of timings. If you read her windows well, you can punish her when she doesn't have her resources. Avoid offering her a predictable entry and look for your actions when she has consumed her mobility/engage resources.
- Irelia: The matchup is "you against the wave + her". If the wave favors her, she can stick to you. Manage the wave by thinning low-HP minions to deny her resets and do not fight in a wave that favors her.
- Riven: A micro-decision matchup. If you read her pattern, you can make her trades uncomfortable. Do not chase without certainty; trade when she has consumed her main mobility/burst tools.



Favorable Matchups
These champions can be dominated by Ambessa.- Nasus: Your aggressive early game prevents him from stacking freely. Deny him stacks by punishing him when he steps forward and maintain pressure to delay his power spikes.
- Garen: His pattern is predictable. You can out-tempo him and force him to play reactively. Manage the wave so he cannot take free trades and punish his too obvious entries.
- Sion: You can control priority and prevent him from scaling quietly. Take priority on waves and force recalls that prevent him from establishing a comfortable plan.



Items against Ambessa
If you find yourself facing Ambessa, here are the items to prioritize to reduce her impact:- : Reduces her physical damage and prolonged trades.
- Randuin's Omen: Armor + anti-crit to tank her burst then kite.
- Thornmail: Anti-healing on contact, excellent against her all-ins.
- Frozen Heart: Reduces her attack speed and provides mana/armor.
- : Second chance after her execution, negates resets.
- : Delays her R or her Slam to survive focus.
- : Breaks suppression/crowd control to escape alive.
- : Anti-healing, essential if she has sustain (via Conqueror or ).



Scenario: The Dragon Engagement
Imagine a classic mid-game scenario, around 8 minutes into the game. The first Dragon is about to appear. You already have your and your , and you've pushed your toplane wave. Your team starts to regroup towards the Dragon. You have two options: join the frontal teamfight directly or look for a flank. In this situation, your best option is to position yourself on the flank, using jungle vision to identify a poorly positioned enemy carry before engaging with yourPublic Execution. If you see the enemy ADC or midlaner momentarily move away from their team to ward or poke, that's your window. A well-placed R on this isolated target, followed by your Q and woven auto-attacks, can make them disappear instantly. This transforms a potentially balanced fight into an immediate 5v4 in your favor, securing the Dragon and paving the way for other objectives.
- Maximize your Drakehound’s Step passive by weaving auto-attacks between each spell for optimal DPS and mobility.
- Always aim for the outer edge of your Cunning Sweep to maximize damage and activate Sundering Slam.
- Use Repudiation proactively to block key crowd controls and maintain your initiative in combat.
- Identify engagement windows with your Public Execution to isolate and execute priority targets, but ensure your team is ready to follow up.
- Adapt your build and playstyle to matchups, favoring short trades against tenacious bruisers and angled engages against ranged champions.
- Convert your lane advantage into macro pressure, pushing waves and participating in objectives to extend your influence across the map.
Frequently asked questions
What is the best rune for Ambessa TOP?
The best keystone for Ambessa TOP is Conqueror. It stacks quickly with her combos and auto-attacks, significantly increasing her damage and sustain in prolonged combat, which is crucial for toplane duels.
What is Ambessa's most important power spike?
Ambessa has a major power spike at level 9, with the acquisition of and rank 2 of her Public Execution. This grants her considerable armor penetration and burst, allowing her to seriously threaten priority targets and impact teamfights.
How does Ambessa handle ranged champions in the toplane?
Against ranged champions like Vayne or Kennen, Ambessa must play cautiously in the early game. It is crucial to use bushes and angles to reduce poke and only engage when their disengage or CC tools are on cooldown. The goal is not to bleed in lane and wait for power spikes for decisive all-ins.
What are the key defensive items against Ambessa?
To counter Ambessa, essential defensive items include to reduce her physical damage, to deny her ultimate resets, and to delay her burst or her Public Execution. Anti-healing items like are also very effective.
How does Ambessa contribute to objectives in the mid-game?
In the mid-game, Ambessa contributes to objectives by using her side lane pressure to draw attention, then rotating quickly or using her Teleport to join fights around Dragon or Herald. Her Public Execution is a powerful tool to isolate an enemy carry and turn a teamfight into a numerical advantage.
Why is it important to weave auto-attacks with Ambessa?
Weaving auto-attacks between each ability is vital for Ambessa because it activates her Drakehound’s Step passive. This passive grants her bonus damage, attack speed, and Energy regeneration, multiplying her DPS and mobility. Not doing so means losing a significant portion of her combat potential.