
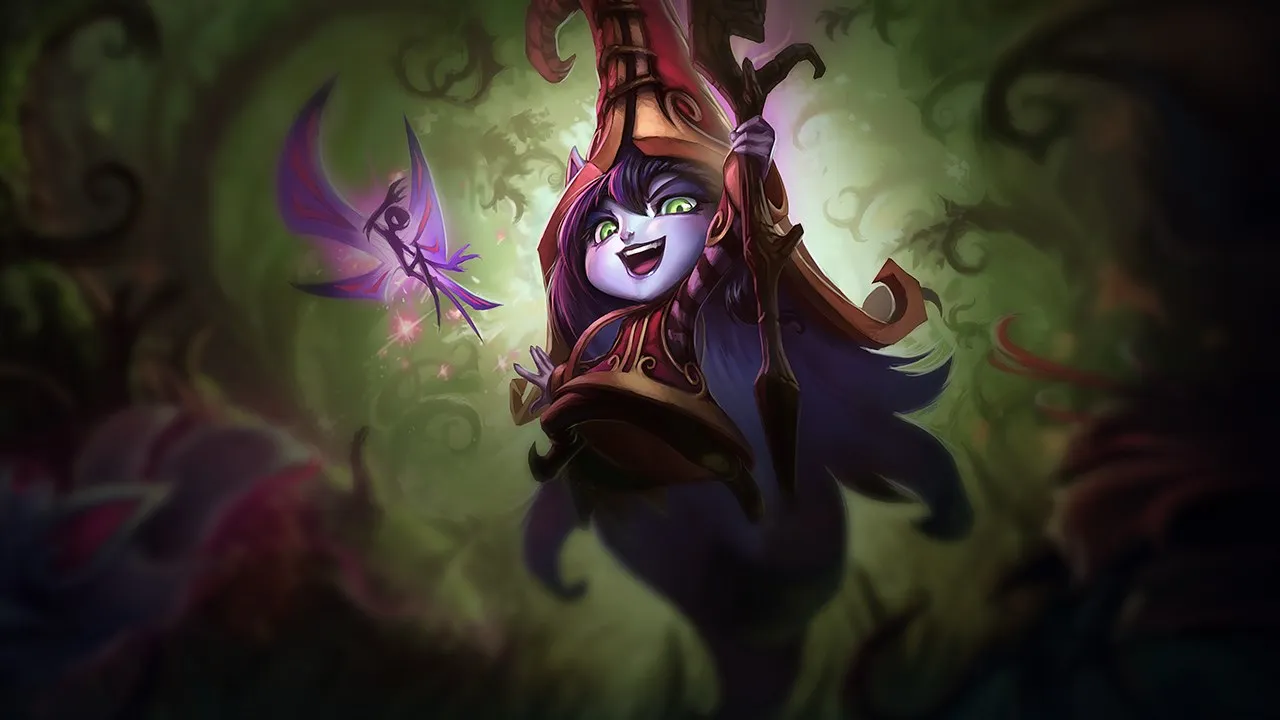
Lulu Wild Rift Guide: Mastering the Enchanter for Hypercarries

Lulu's Unique Identity: The Guardian of Hypercarries
Lulu's unique identity lies in her unparalleled ability to transform an ally into an unstoppable war machine while neutralizing enemy threats. She is the very definition of an enchanter, with maximum utility (5/5) and perfect peel (5/5), compensating for her low durability (1/5) and damage (1/5). Her kit is entirely dedicated to protecting and amplifying her carry's abilities, making her indispensable in team compositions focused on sustained DPS. She is a Ranged support with hard CC of 4/5, capable of disengaging or transforming an ally into a striking force. Her difficulty is moderate (2/5), but mastering her requires a deep understanding of timings and positioning. She scales evenly throughout the game (early 3/5, mid 3/5, late 3/5), meaning each phase is important to capitalize on her potential. Mastering Lulu means understanding that each spell is a tactical decision to optimize your team's destructive potential or cancel enemy assassination attempts.Ability Overview:
 Pix, Faerie Companion (Passive): Basic attacks from Lulu and her targeted allies are augmented by Pix's magic bolts. Good timing of
  Help, Pix! on your ADC maximizes this bonus. Pix's bolts reveal invisible targets hit, a valuable tool against stealthy assassins.
 Glitterlance: Launches two slowing rays. Use it to poke and kite, adjusting your position for a double angle with Pix. It's not a waveclear spell, but a control and harassment tool.
 Whimsy: On an ally, grants bonus attack speed and movement speed. On an enemy, transforms the target into a harmless creature (polymorph), disarming and slowing them. Polymorphing an enemy assassin is often the best use.
- Help, Pix!: Grants a shield to an ally or deals damage to an enemy via Pix. The shield should be used just before enemy burst. On an enemy, it pokes and repositions Pix for a more effective double-angle Glitterlance.
 Wild Growth: Enlarges an ally, healing them, granting temporary bonus HP, and knocking up nearby enemies. It's a rescue ultimate for a carry targeted by a dive, but it can also be used to engage if your frontline enters the fray.
Mastering the Art of Lulu's Combos
Mastering Lulu's combos is crucial to maximizing her impact, whether for aggressive poke, emergency peel, or a surprising engage. Each sequence must be executed with precision, leveraging the versatility ofWhimsy and Help, Pix! to adapt to the situation. The key to performing well with Lulu lies in anticipation and reactivity, using the right spell at the right time to turn the tide of a trade or a teamfight.Main Combos:
- Poke Combo: Whimsy (on enemy, polymorph) → Glitterlance → AA — Polymorph the enemy, Glitterlance slow, then basic attack during immobilization.
- Defensive/Peel Combo: Help, Pix! (on ally) → Whimsy (on ally, speed) → Wild Growth (on ally) — Shield the ally, speed boost, then Wild Growth to knockup nearby enemies + bonus HP.
- Support Engage Combo: Whimsy (polymorph enemy) → Glitterlance → Flash → Wild Growth (on ally, knockup) — Polymorph, Glitterlance, Flash to engage, Wild Growth for defensive knockup.
- Ally Save Combo: Wild Growth (on attacked ally) → Help, Pix! → Whimsy (speed or polymorph depending on situation) — Knockup enemies around the ally, Help, Pix! shield, Whimsy to finish.
Mechanical Tips:
- Whimsy: Two uses — on enemy = polymorph (disarms and slows); on ally = bonus attack speed and movement speed. Decide quickly based on context.
- Help, Pix!: Two uses — on ally = shield + Pix follows the ally and attacks enemies hit; on enemy = Pix follows the enemy and reveals their position + damage.
- Wild Growth: On ally = AoE knockup of nearby enemies + temporary bonus HP. Use on the engaged carry to invalidate enemy burst.
- Glitterlance: Lulu and Pix each send a projectile — double coverage. Always use after Help, Pix! to maximize Pix's hits.
- Pix (passive): 3 enchanted attacks on proc. Procs via Glitterlance, Help, Pix! and certain autos.
Common Mistakes:
- Using Whimsy on an ally when an enemy needs to be polymorphed (assassin engaging).
- Casting Wild Growth on an ally far from all enemies — wasted knockup, useless.
- Not using Help, Pix! on enemies for vision — useful for tracking stealthed assassins.
Notable Interactions:



Lulu's Optimal Build and Skill Order
Lulu's build is geared towards amplifying the effects of her spells, prioritizing shield power, attack buffs, and cooldown reduction. The skill order emphasizesHelp, Pix! to maximize lane sustain and poke, followed by Whimsy for its control and buffs. Every item and skill point is chosen to maximize Lulu's ability to protect her carry and amplify their damage potential, turning your presence into a decisive advantage.Standard Build (Enchanter Archetype – Heals/Shields):
- : Your essential starting item. It grants AP, mana regeneration, and a reliable income source, allowing you to stay in lane and accumulate gold without having to last-hit.
- : A fundamental item for Lulu. It amplifies your ADC's damage by granting them attack speed and bonus magic damage on their basic attacks whenever you heal or shield them. This is the core of the synergy with hypercarries.
- : Offers powerful area-of-effect healing and damage at range, ideal for teamfights or securing objectives. Its global range allows you to influence fights even if you are slightly out of position.
- : This item provides an additional burst of healing after casting 3 spells, significantly increasing your ability to keep your team alive during prolonged trades or intense fights.
- : If your carry is a mage or an AP ADC, this item is excellent. It grants AP and cooldown reduction to allies targeted by your shields or heals, increasing their power and ability to spam their spells.



Boots:
- : Your primary choice for boots. They provide cooldown reduction, essential for spamming your protective and buffing spells.

Runes:
 Summon Aery (Keystone): The perfect rune for Lulu. It strengthens your shields and poke, offering a small bonus damage or an additional shield each time you use a spell on an ally or enemy.
 Font of Life (Minor): Heals your allies when they attack an enemy you have immobilized or slowed, synergizing perfectly with Glitterlance and Whimsy.
 Bone Plating (Minor): Reduces damage from the next three enemy attacks, increasing your survivability against poke or all-ins.
 Revitalize (Minor): Amplifies your shields and heals, and makes them even more powerful when the target is below a certain HP threshold. Essential for an enchanter.
 Transcendence (Minor): Offers additional cooldown reduction and converts excess CDR into AP, increasing your power in the late game.
Skill Order:
Priority: Help, Pix! > Whimsy > Glitterlance
Levels: E, W, Q, E, R, E, E, W, R, W, W, Q, R, Q, Q
You max Help, Pix! first to maximize your shield and poke potential in lane, which is crucial for sustain and trades. Whimsy is maxed second to reduce its cooldown and increase the effectiveness of its buffs/polymorph. Glitterlance is maxed last because its damage is not your priority, and the slow is sufficient with just one point early in the game.
››
››
Lulu's Power Spikes: When to Strike Hard
Lulu's power spikes are mainly linked to obtaining her ultimate and key items, gradually transforming her impact from a lane support into a teamfight force. Knowing when you are strongest allows you to make aggressive or defensive decisions with confidence. Understanding these power spikes allows you to anticipate windows where you can dictate the pace of the game, either by aggressively protecting or by seeking favorable engagements.Power Curve:
Lulu has a very stable power curve, with notable spikes that make her relevant at every stage of the game. She starts with moderate power in the early game, then scales up in the mid and late game as she acquires her items and teamfights become more frequent.
Specific Power Spikes:
- Level 3: Obtaining the first rank of Glitterlance completes your basic kit (E, W, Q). This gives you enough poke and control potential for lane trades. This is the time to look for short trades and harass the enemy ADC.
- + Ultimate Rank 2 (Level 9): The acquisition of significantly amplifies your ADC's DPS, and the second rank of Wild Growth makes your ultimate much more impactful in terms of bonus HP and knock-up duration. This is a huge spike for teamfights and skirmishes around objectives.
- (Level 11): With , you gain a ranged healing and area damage ability that can turn a fight. The fact that Wild Growth reaches its third rank at this level further strengthens your ability to save allies and crowd control.
In summary, Lulu is strong early due to her poke and shield, becomes a major force in the mid-game with her first items that boost her carry, and excels in the late-game by transforming her ADC into an unstoppable threat while neutralizing enemy assassins. Your role is to recognize these windows to maximize your impact.
Macro, Lane Phase, and Roaming with Lulu
Lulu's macro play is centered on protecting her carry and controlling vision, with limited roaming impact but a decisive presence in lane and teamfights. Your role is to create a safe environment for your hypercarry to scale and dominate the game. Every decision, from lane positioning to vision placement, must be made with the goal of maximizing your team's survival and damage potential, especially your ADC's.Overall Game Plan:
- Early Game: Play defensively and poke with Help, Pix! and Glitterlance. Look for short trades and never expose yourself unnecessarily, as you are very fragile. Your priority is to protect your ADC and allow them to farm safely.
- Mid Game: Protect your hypercarry and control vision around objectives. Save your polymorph (Whimsy) for enemy assassins or initiators. Place defensive wards to anticipate ganks and enemy rotations.
- Late Game: Adopt a front-to-back strategy. Your ultimate (Wild Growth) is primarily defensive to save a targeted carry, but it can also be used to initiate a fight if your frontline engages and needs support. Always stay close to your ADC.
Specific Gameplay Tips:
- Play for your ADC: Your maximum value comes from your ability to buff and peel for your carry, not from engaging yourself.
- Polymorph Timing: Use Whimsy at the right moment: on the enemy assassin diving your carry, or on the main engage of the opposing team to neutralize them.
- Limited Roam: Your value is mostly in lane and teamfights. Lulu's roams are generally less impactful than those of other supports, so don't force rotations if it puts your ADC in danger.
- Defensive Vision: Prioritize vision in your jungle and around your lane to anticipate ganks and enemy rotations. This allows you to react before the threat becomes critical.
Key Synergies:
- Ideal: Kog'Maw and Vayne. Help, Pix! and Whimsy transform Kog'Maw into a mobile turret and Vayne into a 1v9 machine. Save Wild Growth to save them from a dive.
- Strong: Jinx and Kai'Sa. Your shields and attack speed buffs ensure Jinx's resets and perfect synergy with Kai'Sa's hybrid burst.
- Acceptable: Ezreal. Your shields and buffs help him poke and survive in lane, allowing for a safer lane phase and effective mid-game sieging.


Matchups and Counters: Knowing Who to Fear and Who to Dominate
Understanding Lulu's matchups is essential for navigating lane and teamfights, as some supports can completely nullify your ability to protect your carry or control the tempo. A good read of enemy strengths and weaknesses is your first line of defense. Your success as Lulu will depend on your ability to adapt your playstyle and build based on the specific threats the enemy team presents, whether it's aggressive engage or long-range poke.Difficult Matchups (Hard Counters):
These champions can make your life very difficult in lane and teamfights. Your goal is to survive, minimize losses, and not give them free advantages.
- Blitzcrank: He puts you in an awkward position. Your kit is designed for sustained saving, but Blitzcrank wants to win in a second with a grab. If your ADC gets caught, your shields are often band-aids on a mortal wound. Play behind the wave, treat bushes as a permanent threat, and punish his missed hooks only if he cannot immediately re-threaten.
- Pyke: Annoying because he threatens you in lane with picks, then can disappear and win the game elsewhere. Your kit shines in protection, but Pyke seeks quick executions that make your shields anecdotal. Turn every Pyke roam into punishment (push, deep ward, pings). In fights, your polymorph must target his entry timing to break his execution sequence.
- Leona: A real problem because she doesn't give you time to play. She forces immediate contact, and if she hits your ADC, you often play in panic mode. Save your spells for her entry, don't waste Whimsy for poke. Hold the wave so your ADC can retreat under tower and punish her overcommit.
- Nautilus: He forces you to respond to a binary initiation. Nautilus dictates the start of the fight. Work on lateral positions, stay out of easy hook lines. Use your ultimate to break the first burst rotation and gain seconds, then polymorph the enemy carry or Nautilus depending on the threat.




Unfavorable Matchups:
These champions can bother you and force you to play more cautiously.
- Alistar: He steals control of the tempo from you. He can push your carry away and force you to use your spells defensively. Delay your buffs so they respond to his engage, don't panic on his first step forward.
- Thresh: He can win the trade before it starts and nullify your punishment. Play behind the wave, punish missed hooks, and don't commit if you can't control the angle of his lantern. Your polymorph should often target the hook follow-up.
- Karma: She prevents you from dictating the pace with her poke and shields. Play by reading her mantra: when she has spent her big shield or poke, she has a window of weakness.
- Senna: She attacks you at a range where you can't always respond, chipping you down and stacking. Turn attrition into action: play the wave to create an aggressive trade timing and don't let her poke for free. Punish her slowness with roams or deep vision.




Skill Matchups:
These matchups depend heavily on the execution and reflexes of both players.
- Nami: A battle of timing. If she lands her bubble, your carry can explode. If she misses, you can take space. Force her to use her bubble under stress, use your speed to dodge, and your polymorph to break enemy entry.
- Rakan: A matchup of reflexes. He engages and disengages quickly, forcing you to use polymorph at a precise timing. Keep your polymorph as a trap and use your ultimate to break the first burst rotation.
- Lux: She forces you to respect skillshot lines. Advance when she has missed her bind and use your speed to make her skillshots uncomfortable. Don't let her poke for free in a corridor.



Favorable Matchups:
These champions are generally easier for Lulu to handle.
- Yuumi: She cannot contest space in the same way. You can advance, poke, and create gradual pressure. Don't let the lane become free farm, maintain pressure to force summoners and convert into objectives.
- Sona: She is immobile and likes slow lanes. You can make her pay for every step forward with a quick trade. Control distances well so she loses her freedom to poke.
- Seraphine: She needs space and time to set up her patterns. You can break this comfort by speeding up trades and making her timings less clean. Take space when her skills are down.



Items Against Lulu:
These items reduce the effectiveness of Lulu and her buffs. Your team must take them into account.
- : Reduces the impact of your shields.
- : Cuts your heals and those of your allies.
- : AD version of anti-healing.
- : Cancels your all-in and protects from bursts you set up.




Practical Example: The First Dragon and Decision Making
At the first objective, like Dragon, your timing is crucial to secure your team's advantage. Imagine the situation: your jungler pings Dragon, but the enemy team groups up and looks for an engage. This is where your presence and defensive spells become a bulwark. Your role is to transform a potentially dangerous situation into an opportunity to secure the objective or punish enemy aggression, using your kit proactively and reactively.You are with your ADC and jungler near Dragon. The enemy team advances through the red side bush. Their tank, let's say a Leona, is looking for an engage on your ADC. Your first reaction is to position yourself so that Leona cannot easily reach you, while remaining within range of your ADC. As soon as Leona dashes with her  Zenith Blade, you must be ready. If she targets your ADC, use Help, Pix! to shield them instantly, then cast Whimsy on Leona to polymorph her and cancel her control combo. If an assassin like Pyke tries to flank, your Whimsy must target him to disarm him. Your Wild Growth is your ultimate protection card: if your ADC is about to be burst, use it to save them, heal them, and knock-up nearby enemies, creating vital space. Meanwhile, your Glitterlance can slow enemies trying to flee or pursue. Ultimately, your ability to react in a split second and use the right spell on the right target will determine whether your team secures the Dragon or gets swept.
- Prioritize Peel: Always keep an eye on your carry and be ready to protect them with Help, Pix! and Wild Growth as soon as they are threatened.
- Master Whimsy Timing: Use polymorph on the most dangerous threats (assassins, initiators) at the precise moment of their engagement, or the buff on your carry just before they trade.
- Position Smartly: Stay safe behind your carry, out of range of enemy engages, but always within range of your spells to buff and protect them.
- Adapt Your Build: Don't blindly follow the standard build. If the enemy team has many shields, consider anti-shield items. If they have a lot of healing, anti-heal items.
- Control Vision: Place defensive and offensive wards to anticipate enemy movements and secure objectives. Good vision is valuable information.
- Communicate with Your Team: Indicate your ultimate timings, polymorph targets, and peel intentions so your team can play around you.
If you lose your trade, it's not bad luck.
Frequently asked questions
What is Lulu's main role in a team?
Lulu's main role is to be a protective enchanter support for hypercarries. She excels at amplifying her allies' damage with her attack and movement speed buffs (Whimsy), while offering decisive peel and crowd control with her shields (Help, Pix!), polymorph (Whimsy), and ultimate (Wild Growth). She is there to transform a carry into an unstoppable threat and neutralize enemy threats.
Which champions have good synergies with Lulu?
Lulu ideally synergizes with hypercarries who greatly benefit from her attack speed buffs and shields. Among the best synergies are Kog'Maw, Vayne, Jinx, and Kai'Sa. These champions can maximize their DPS and survival thanks to Lulu's constant assistance, allowing them to dominate late-game teamfights.
How to counter an enemy Lulu?
To counter Lulu, you need to force her to use her shields and ultimate early, then engage in an all-in before her spells are available again. Champions with strong engage like Blitzcrank, Pyke, or Leona are very effective. Additionally, buying items like to reduce the effectiveness of her shields or / to reduce her healing is crucial.
What is the best skill order for Lulu?
The priority skill order for Lulu is Help, Pix! > Whimsy > Glitterlance. You max Help, Pix! first to maximize your shield and poke potential in lane, which is crucial for sustain and trades. Whimsy is maxed second to reduce its cooldown and increase the effectiveness of its buffs/polymorph, and Glitterlance last.
What are Lulu's power spikes?
Lulu's power spikes are mainly at level 3 (with Glitterlance unlocked), at level 9 (with and Wild Growth rank 2), and at level 11 (with and Wild Growth rank 3). These moments mark significant increases in her ability to protect, buff, and control, making her more impactful in teamfights.
Is Lulu a good choice for beginner players?
With a difficulty of 2/5, Lulu is relatively accessible for beginners who want to learn the enchanter support role. However, her complete mastery requires a good understanding of positioning, spell timing, and game sense to maximize her peel and buffs, which can take time to develop. Her winrate of 49.18% in Master+ (patch 20260725) suggests she is strong but demands execution.