
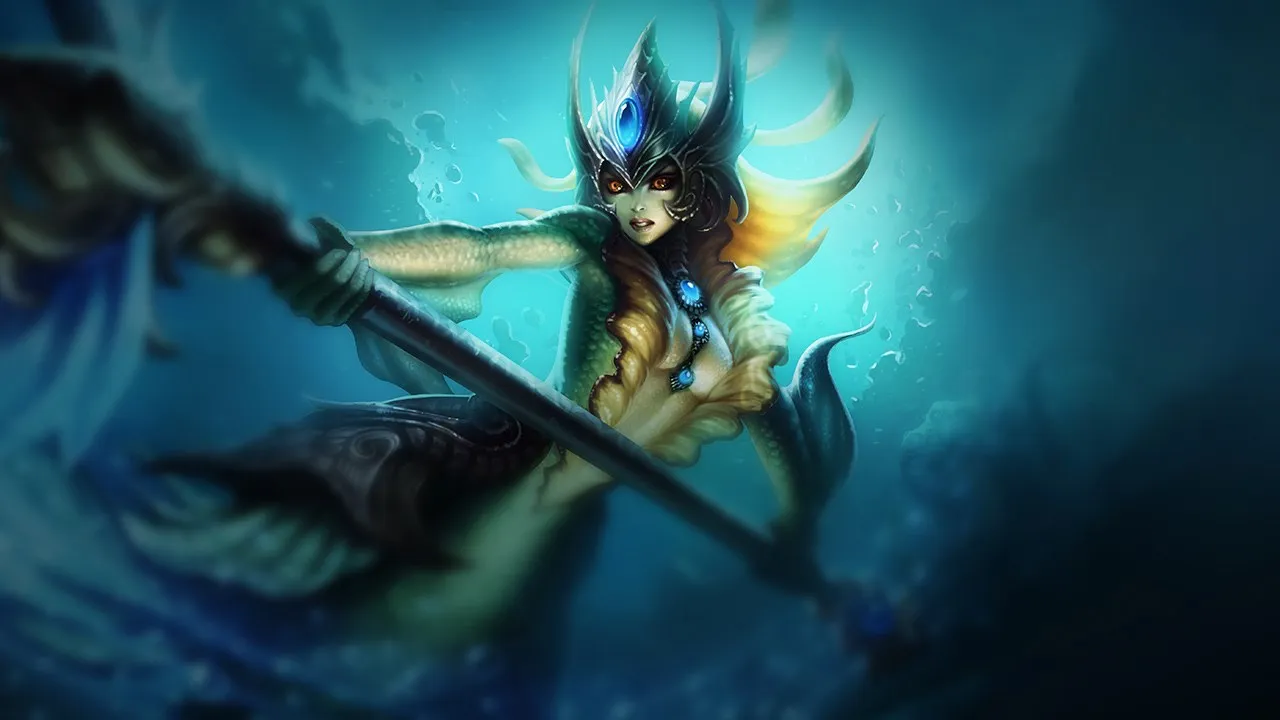
Nami, the Rising Tide: Complete Guide to Dominate the Botlane

Many fail to maximize her impact because they don't understand how to capitalize on her strengths while masking her weaknesses. Her strengths lie in her reliable lane poke and sustain, as well as her decisive control in narrow passages with her ultimate. However, she is very punishable by hard-engage and long-range hooks and heavily relies on mana and positioning. Playing Nami isn't just about spamming spells; it's about anticipating, positioning, and knowing when and how to use each tool to turn a disadvantage into an opportunity. Without this understanding, players often find themselves losing lane, unable to generate the pressure expected from a support of her caliber. Mastering Nami requires impeccable positioning discipline and constant reading of enemy threats to exploit her aggression windows without exposing herself unnecessarily.
Nami's Identity: Mastering the Ebb and Flow
Nami is an Enchanter support who stands out for her unique ability to chain crowd control, support her allies, and initiate fights from a distance. Her kit is a harmonious blend of magic damage, healing, slows, and knock-ups, giving her exceptional versatility in the botlane. She is positioned as a support of difficulty 2/5, accessible but with a high skill ceiling.Her strengths are clear: utility of 4/5, peel capability of 5/5, and hard CC of 4/5, making her a formidable guardian. However, her durability of 1/5 and damage of 2/5 make her vulnerable to all-ins if she is poorly positioned. She also scales evenly throughout the game (early 3, mid 3, late 3), meaning she doesn't experience significant power dips.
 Surging Tides (Passive): Each of Nami's spells grants a movement speed bonus to affected allies, offering crucial engage or disengage windows. Announce these windows to coordinate movements.
 Aqua Prison: A bubble that knocks up and immobilizes enemies. This is your primary pick-up and CC follow-up tool. Aim for predictable trajectories or slowed targets.
 Ebb and Flow: A wave that bounces between allies and enemies, healing the former and damaging the latter. This is your main source of poke and sustain in lane. Optimize bounces to maximize efficiency.
 Tidecaller's Blessing: Empowers allied attacks with bonus magic damage and a slow. Ideal for buffing your ADC before a trade or to facilitate landing your Aqua Prison.
 Tidal Wave: A massive wave that knocks up and slows enemies over a long distance. A fantastic tool for engaging, disengaging, or zoning in teamfights and around objectives.
Nami Combos: The Art of Timing and Precision
Mastering Nami's combos is essential to fully exploit her playmaking and control potential. Each spell has a specific synergy that, when well executed, can turn a trade or a teamfight. Timing is paramount, as a missed bubble or a misplaced buff can be costly.Here are the main combos to master:
E (Tidecaller's Blessing, on ADC) → W (Ebb and Flow) → AA (ADC empowered): This combo is your bread and butter in the lane phase. You buff the ADC withTidecaller's Blessing, then use Ebb and Flow to poke the enemy and heal yourself on the return, thus maximizing trade efficiency. The ADC benefits from the slow and bonus damage for a winning exchange.R (Tidal Wave) → Q (Aqua Prison, on knocked-up enemies) → W → E (ADC speed): The ultimate engage combo.Tidal Wave initiates combat by causing a mass knockup. Take advantage of this CC to land a nearly guaranteed Aqua Prison on a priority target, follow up with Ebb and Flow for damage/healing, and Tidecaller's Blessing on your ADC for the speed boost and additional damage.Flash → Q (Aqua Prison): A surprise combo for an unexpected pick-up. Use Flash to close the distance and land anAqua Prison on an isolated target. It's risky but very effective for forcing resources or getting a kill.E (on engaging ally) → Q (Aqua Prison) → W (Ebb and Flow) → R (Tidal Wave, if multiple enemies): This combo allows you to support an engaging ally. The speed buff fromTidecaller's Blessing facilitates the approach, followed by an Aqua Prison on the main target. Ebb and Flow for sustain and damage, and Tidal Wave to extend control if enemies are grouped.
Aqua Prison without prior setup, which makes it easy to dodge; always use a slow from Tidecaller's Blessing or a knockup from Tidal Wave to guarantee its landing. Interactions with Ardent Censer are also crucial, as it synergizes perfectly with your heals ( Ebb and Flow) and buffs (Tidecaller's Blessing) to grant attack speed to your ADC. The passive Surging Tides must be woven into all your actions to maintain your team's mobility. Avoid wasting Tidal Wave on an isolated target; its value is maximized on groups.
Build and Skill Order: Optimizing the Tide
The Nami build is designed to maximize her Enchanter role, amplifying her team's abilities through healing, shields, and buffs. The skill order is equally crucial for optimizing her lane phase and progression.The skill priority order is W > E > Q. You max
Ebb and Flow first for its poke and sustain in lane, allowing you to win trades and keep your ADC healthy. Next, Tidecaller's Blessing is upgraded to increase your carry's damage and slow, facilitating all-ins and kiting. Finally, Aqua Prison is maxed last because its difficulty to land makes additional points less of a priority than the utility of other spells.Skill order by level:
- Level 1: W
- Level 2: Q
- Level 3: E
- Level 4: W
- Level 5: R
- Level 6: W
- Level 7: E
- Level 8: W
- Level 9: R
- Level 10: E
- Level 11: E
- Level 12: Q
- Level 13: R
- Level 14: Q
- Level 15: Q
The standard Nami build is as follows:
- Black Mist Scythe: Your support starter for gold generation and mana regeneration, essential for spamming your spells in lane.
- Ionian Boots of Lucidity: For cooldown reduction, allowing you to use your poke, heal, and control spells more often.
- : A core item that synergizes perfectly with your heals and shields, providing bonus attack speed and magic damage to your ADC.
- Harmonic Echo: Enhances your area heals, offering a significant burst of healing in teamfights and stabilizing trades.
- Imperial Mandate: To amplify your team's damage on targets you control or slow, ideal for following up your Aqua Prison and Tidal Wave.
- Staff of Flowing Water: If you have an AP mage on your team, this item provides AP and ability haste bonuses on your heals and shields.


Boot enchantments are situational:
- : To absorb burst during enemy engages, protecting your team.
- : A powerful tool for objective resets and sieging, combined with Tidal Wave for zoning.
- : Against assassins or AD/AP burst, this enchantment provides a crucial window of invulnerability.
- : Against compositions with heavy crowd control, it allows you to instantly free yourself.



The main runes are
 Summon Aery (poke and shield),
  Font of Life (additional healing on your CC),
  Bone Plating (survivability against burst), and
  Revitalize (amplifies your heals and shields).
  Transcendence is also a viable option for more ability haste. Every item and rune choice must be a strategic response to the enemy composition and your own team's needs; never settle for a single build.››
››
Transcendence is also a viable option for more ability haste. Every item and rune choice must be a strategic response to the enemy composition and your own team's needs; never settle for a single build.››
››
Nami Power Spikes: When to Strike Hard
Nami's power spikes are key moments when her impact on the game drastically increases, often linked to acquiring new abilities or major items. Recognizing them allows you to dictate the pace and gain an advantage.The first power spike occurs at level 2 with the acquisition of
Aqua Prison. This is when your all-in or pick-up potential truly emerges. With Ebb and Flow for poke and sustain, and Aqua Prison for control, you can look for aggressive trades if you have wave advantage or if the enemy is poorly positioned. Exploit this early window to force enemy resources or secure a kill, as this is where Nami can establish her lane dominance.The second important spike is at level 5, with the unlocking of your ultimate,
Tidal Wave. This very long-range tool transforms your engage and disengage capabilities. It allows you to create roam opportunities to midlane or secure objectives like Dragon. The threat of Tidal Wave forces enemies to respect your range and can break sieges or dive attempts.Finally, level 9 marks a major power spike with and the second rank of
Tidal Wave. significantly amplifies your ADC's DPS, especially if they are a champion who benefits from attack speed. Rank 2 of Tidal Wave increases the duration of its knockup and slow, making your engages even more devastating. This is when Nami becomes a formidable force in teamfights, capable of turning encounters in your favor. Nami's power curve shows consistent progression, with balanced strength in early (3/5), mid (3/5), and late game (4/5), meaning every item and spell rank contributes to her scaling.
Macro, Lane, and Roam: The Tide's Strategy
Nami's strategy revolves around her ability to control the botlane early in the game, then extend that influence across the map. Your role evolves from lane bully to playmaker in the mid-game, and finally to peel or engager in the late game.In the early game, your objective is to play for soft priority with
Ebb and Flow. Use it to poke the enemy and heal yourself, alternating targets to maximize its efficiency. Secure side bushes with wards to prevent ganks and prepare trades buffed by Tidecaller's Blessing on your ADC. Don't spam Aqua Prison blindly; conserve your mana and wait for a clear window, such as a slowed enemy or a predictable dash. Your value comes from anticipation: cast Tidecaller's Blessing before an allied engage, not during, to maximize surprise and burst.In the mid-game, Nami becomes a major force around objectives. Once you've unlocked
Tidal Wave at level 5, look for synchronized roam opportunities. A well-placed Tidal Wave in midlane or around Dragon can force a Flash or secure a kill, converting that advantage into an objective. Group around objectives: Tidal Wave to open combat or zone, then Aqua Prison to lock down the priority target. In objective corridors, Tidal Wave can turn a simple vision sweep into a guaranteed catch.In the late game, adopt a disciplined front-to-back strategy. Your primary role is to peel for your carry if the enemy plays dive. Use
Aqua Prison and Tidal Wave to protect your ADC from threats. If the enemy plays more frontline, look for Tidal Wave openings in narrow corridors to split the enemy team and create pick-off opportunities. Always buff the carry who has the best impact window, whether it's attack speed or burst.Nami ideally synergizes with ADCs like Lucian and Kai'Sa. With Lucian, your

 Tidecaller's Blessing on him allows for double autos and dashes for early burst, your slows guaranteeing his winning trades. With Kai'Sa, Tidecaller's Blessing buffs her autos and the slow helps her passive resets, while her R can follow your Tidal Wave to execute slowed or knock-up targets. Other strong synergies include Miss Fortune (your
  Tidal Wave lines up enemies for Bullet Time) and Varus (reliable setup for Chain of Corruption).

Counters and Matchups: Navigating Troubled Waters
Understanding Nami's matchups is essential to adapt your playstyle and maximize your impact. Some champions can make your life difficult, while others are easy prey for your control and poke.Hard Counters
These champions directly exploit Nami's fragility and reliance on positioning:
- Blitzcrank: A structural hard counter. His Rocket Grab turns your fragility into an immediate win condition for him. Play behind the wave (wave as an anti-hook shield), ward bushes early, and don't contest dark corners if the hook is available.
- Pyke: He combines pressure from the fog of war and execution on low HP targets. Every unwared bush is a trap. Punish him as soon as he uses his dash/escape, by placing your bubble on his exit path.
- Thresh: He controls the pace of the lane with his Death Sentence and Flay. His Dark Passage can nullify your pick-ups. Save your bubble for the area where he wants to engage on your ADC, not for a random catch attempt.
- Nautilus: His engage is very reliable and forces you to pay a price (flash/position) to exist. Always keep at least one minion wave between you and him. Punish him when he misses his hook.
- Alistar: His Headbutt + Pulverize takes away your control of the fight. Never get within free range. Prepare your bubble on the path he has to walk, not directly on him.





Unfavorable Matchups
These champions can make the lane difficult if you don't play with discipline:
- Morgana: Her Black Shield nullifies your Aqua Prison. Your goal is to force the Black Shield with poke, then punish on the next window. Ne marchez pas en ligne droite face à son Dark Binding.
- Braum: His Unbreakable reduces the effectiveness of your poke and his passive punishes prolonged trades. Shorten exchanges and poke when his shield is on cooldown.
- Sona: She outscales your lane value if you don't convert your pressure into a concrete advantage. Aim for windows before she gains too many levels (before 5 if possible) and conserve your mana for objective fights.



Skill Matchups
These duels depend heavily on your execution and reading of the opponent:
- Leona: You have good answers (bubble, slow, ult), but timing is crucial. Prepare your bubble on the landing zone of her Zenith Blade, not on her cast. Your Tidal Wave at level 5 is an excellent reset tool.
- Rakan: He is elusive. Don't bubble Rakan directly, but rather his trajectory or his dash exit. Punish him after he has used both his dashes, as he is vulnerable.
- Karma: She can put you under pressure from a distance. Read her Mantra and shield timers. Your Tidal Wave at level 5 can cut her speed and secure a bubble behind.



Favorable Matchups
Nami has the advantage in these confrontations:
- Soraka: You can punish her rigidity and lack of escape. Your Tidecaller's Blessing + bubble make her forward steps dangerous. Maintain wave priority and target Soraka when she shows her intention.
- Senna: She has to step forward to stack her souls, which Nami punishes very well. Your Tidecaller's Blessing slows and facilitates the bubble. Don't look for forced all-ins, but for repeated punishment.
- Yuumi: She has less direct agency in lane and depends on her ADC. Nami can use this lack of presence to win the wave, place vision, and dictate exchanges. Don't obsess over killing Yuumi, but over killing space.



To adapt, consider situational defensive items: Morellonomicon against high-sustain compositions (applied via Ebb and Flow), for burst, and for objective control. Knowledge of these matchups allows you to adapt your play, choose your fights, and minimize risks while maximizing opportunities for victory.

Concrete Scenario: The First Dragon, a Key Moment
Imagine the situation: you are Nami, around 8:30 into the game, and the first Dragon is about to spawn. Your team has a slight gold lead, but the enemy botlane (a Blitzcrank and an aggressive ADC) has been difficult to manage. Your jungler pings Dragon, but vision is contested. This is a critical moment where your decision-making can swing the game.Your role here is to take vision of key bushes around Dragon while staying safe, then prepare a decisive engage or disengage with your
Tidal Wave. Start by placing a deep ward in the bush on the enemy side of Dragon, if possible with the help of your jungler or midlaner. If Blitzcrank tries to hook you through a wall, use your Tidecaller's Blessing on your ADC so they can kite and poke, then prepare your Aqua Prison on the area where Blitzcrank might Flash or move after a missed hook. If combat breaks out, wait for the right moment to cast your Tidal Wave: either to split the enemy team in half and isolate their carry, or to disengage if your team is in a bad position. A well-placed Tidal Wave in the Dragon pit corridor can guarantee control of the objective or create a pick-off that gives you the numerical advantage to secure it. This is the perfect example where Nami's timing and positioning are key to victory.
- Prioritize your Ebb and Flow in lane to dominate trades and maintain your ADC's sustain, while managing your mana with discipline.
- Anticipate enemy movements to land your Aqua Prison and Tidal Wave. Always use a slow from Tidecaller's Blessing or a knockup from Tidal Wave as setup to guarantee your bubble.
- Adapt your build and boot enchantments to the specific needs of the game, prioritizing items that amplify your utility or protect you against key threats.
- Roam intelligently and synchronously after level 5, using your Tidal Wave to impact other lanes or secure major objectives.
- Communicate with your team to announce your engage, disengage windows, and the speed buffs from your passive, Surging Tides.
- Respect hard counters by adjusting your positioning and playing more defensively, while looking for windows to punish their mistakes.
Frequently asked questions
What is the best build for Nami in Wild Rift?
The standard Nami build maximizes her Enchanter utility. It generally includes for gold generation, for ability haste, followed by , , , and . Boot enchantments like or are situational for protection or objective control. Don't forget the runes Summon Aery, Font of Life, Bone Plating, and Revitalize.
How to counter Nami in botlane?
To counter Nami, prioritize hard-engage and hook supports like Blitzcrank, Pyke, Thresh, Nautilus, or Alistar. These champions can exploit her fragility and lack of mobility to catch and burst her down. Morgana is also effective with her Black Shield which nullifies Nami's crowd control. Adopt an aggressive playstyle in lane and look to punish her positioning mistakes.
What are Nami's key power spikes?
Nami has three major power spikes. The first is at level 2 with the acquisition of Aqua Prison, unlocking her pick-up potential. The second is at level 5 with Tidal Wave, which offers a powerful engage/disengage and roam tool. The third and most significant is at level 9, combining (a major boost for ADCs) and rank 2 of Tidal Wave, amplifying her impact in teamfights.
Which ADCs does Nami synergize best with?
Nami ideally synergizes with ADCs with high burst potential or who benefit from attack speed and slows. Lucian and Kai'Sa are excellent choices. Tidecaller's Blessing from Nami significantly amplifies their damage and facilitates their combos. Miss Fortune and Varus are also very good partners, benefiting from Tidal Wave to line up their ultimates.
What is Nami's early game strategy?
In the early game, Nami should play for soft priority by using Ebb and Flow to poke and heal, while securing bushes with wards. The goal is to win trades through auto-attacks buffed by Tidecaller's Blessing on your ADC. Avoid spamming Aqua Prison without a clear setup, conserve your mana, and respect enemy hard-engage or hook threats.
Is Nami a good support for beginners in Wild Rift?
Nami is a support of difficulty 2/5, making her relatively accessible for beginners. Her kit is intuitive with heals, poke, and crowd control. However, to fully exploit her potential and playmaking, good mastery of positioning and spell timing is essential. Beginners can learn the basics easily, but mastery requires practice.