
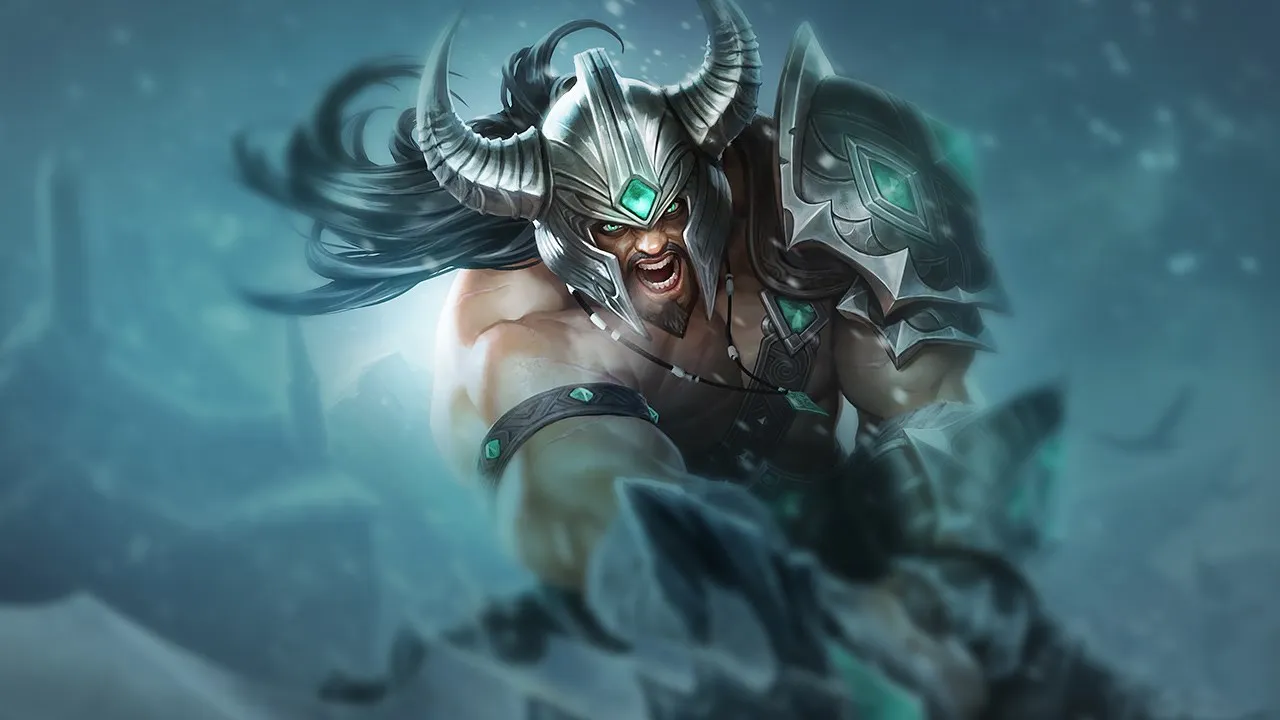
Tryndamere TOP Wild Rift Guide: The King of Splitpush

 Undying Rage, and relentless splitpush macro. Without this understanding, he becomes a predictable champion, easily countered by crowd control or tanks.
Tryndamere is a champion who may seem simple on the surface: charge in and strike. But this approach neglects the subtlety of his kit and the depth of his strategy. His identity as an elite splitpusher and oppressive duelist is often misunderstood. Players focus on raw damage without mastering the Fury management or the crucial timing of his ultimate. This leads to suicidal engagements or an inability to convert advantage into map pressure. His low utility in grouped team fights demands a macro vision of the game and an ability to create threats on the sides of the map rather than forcing frontal 5v5s.
His strengths, such as his high mobility in combat thanks to  Spinning Slash resets and his ability to win late-game duels with Undying Rage, are often wasted by poor situational awareness. Conversely, his weaknesses — his vulnerability to hard crowd control and high-armor tanks — are exposed when he doesn't play according to his game plan. The ideal gameplan for Tryndamere TOP involves meticulous wave management in the early game to establish priority, then an aggressive transition to splitpushing in the mid-game, using vision and E resets to threaten enemy towers. Not following this path dilutes his impact and leaves him at the mercy of opposing team compositions. This is why, despite his potential, he has a winrate of 48.95% globally (patch 20260910, Nexus Core data): many do not unlock his full potential.
Identity and Abilities: The Fury of the Duel
Tryndamere is the embodiment of the pure duelist and solitary splitpusher. His identity relies on his ability to survive lethal damage thanks toUndying Rage, deal massive critical damage, and move quickly in combat with Spinning Slash. He excels at isolating and defeating targets, then converting that advantage into map pressure, forcing the enemy to react to his movements.Tryndamere is a Fighter Skirmisher whose strength lies in his scaling potential (4/5) and damage (4/5). His difficulty (2/5) underestimates the complexity of his macro. His abilities are designed for prolonged combat and survival. His  Battle Fury is the key to his identity: each critical strike increases his critical strike chance and fuels his
  Bloodlust for vital healing. This mechanic makes him incredibly dangerous the longer the fight lasts.
  Mocking Shout is a subtle control tool that reduces the AD of fleeing enemies, ideal for maintaining pressure or reducing the damage of an opposing bruiser. His Spinning Slash offers exceptional mobility (3/5), allowing for engagements, disengagements, and especially resets on critical strikes, transforming the battlefield into a personal playground. Finally, Undying Rage is his signature, a temporary invulnerability that allows him to prolong his DPS and survive deadly situations, turning the tide of duels.
This combination of abilities gives him very high DPS (5/5) and sufficient sustain (2/5) to dominate the duels. His primary role is to put objective pressure (3/5) and clear waves (3/5) quickly. He has very little crowd control (2/5) or utility (1/5) for his team, which reinforces his need to play around the sides of the map rather than integrating into a traditional front-to-back. He is a champion who improves throughout the game, with balanced scaling (early 3, mid 3, late 3), but who reaches his full potential in the mid and late game when his critical items are completed.
Mastering Tryndamere's Combos
Mastering Tryndamere's combos means understanding how to maximize his critical DPS and sustain while managing his Fury and ultimate timing. Combos are not just simple button sequences, but contextual adaptations to dominate trades, dive under towers, or poke effectively.Tryndamere's combos are fluid and highly dependent on the situation, but they share a common goal: maximizing the uptime of your critical auto-attacks and the reset of your Spinning Slash.
Main Combos
- Standard all-in combo: Mocking Shout (2) → Spinning Slash (3) → AA → Undying Rage (Ult) → AA → Bloodlust (1). W slows to ensure contact, E engages, then auto-attacks do the work. Activate the ultimate at the last moment and use Q for a surprise heal during invulnerability.
- Tower dive combo: Undying Rage (Ult) → Spinning Slash (3) [into the tower] → AA → AA → AA → Spinning Slash (3 if crit reset) → Bloodlust (1). The ultimate is pre-activated to absorb tower damage, E allows for engagement or repositioning, and Q serves as a heal after the reset. Get out before the ultimate ends.
- Poke combo: Mocking Shout (2) → Spinning Slash (3) → AA. A quick poke to harass the opponent or take a short trade. E allows you to approach and retreat quickly.
Mechanical Tips
- Fury Management (Passive): Fury is your primary resource. It is generated with auto-attacks, critical strikes, and by taking damage. At 100 Fury, you have maximum critical strike chance. Use Bloodlust (1) to consume Fury and heal yourself, but don't always empty your bar: the threat of a crit is a form of pressure.
- Bloodlust (1) passive: The passive of this ability grants you bonus AD based on missing health percentage. The lower your health, the stronger you are. Don't panic and continue the fight.
- Spinning Slash (3) CD reduced on crit: The cooldown of your E is reduced if you deal a critical strike during the dash. With an adequate critical build, you can chain Es, which is essential for kiting or chasing.
- Undying Rage timing: Activate your ultimate at the precise moment you reach 1 HP. Waiting until the last second maximizes the duration of invulnerability and psychological pressure on the opponent.
- Spinning Slash over walls: E can traverse walls, offering unexpected escape or engagement options in the jungle.
Common Mistakes
- Using Spinning Slash in melee: Do not dash if you are already in melee range. Save your E for escape, repositioning, or catching a fleeing target.
- Activating Undying Rage too early: Using the ultimate at 50% HP is a waste. Wait until you are at 1-5% HP to maximize its effectiveness.
- Mocking Shout mistimed: W only reduces enemy AD if the target is facing away from you. Use it when the enemy is fleeing to maximize AD reduction and slow.
Notable Interactions
- Invulnerability to executions: Undying Rage cancels execution effects (like Pyke's or Urgot's ultimate). You cannot be executed during your ultimate.
- Tryndamere is an excellent counter to Teemo thanks to his mobility with 3 (traverses mushroom zones and escapes slow): This interaction is often cited.
- Synergy Phantom Dancer + Infinity Edge: With these two items and maximum Fury, your critical rate is almost permanent, multiplying your DPS.



Build & Skill Order: The Barbarian's Armament
The Tryndamere build focuses on critical damage and attack speed to maximize his duelist and splitpusher potential. The skill order prioritizesSpinning Slash for mobility and damage, followed by Bloodlust for sustain and AD, to optimize his lane phase and all-in potential.Tryndamere's item path is designed to amplify his ability to deal sustained critical damage and survive prolonged engagements. Your goal is to reach a high critical threshold as quickly as possible to unlock the full potential of your Battle Fury and the resets of your Spinning Slash.
Skill Order
The priority is clear: Spinning Slash > Bloodlust > Mocking Shout. Leveling Spinning Slash first reduces its cooldown and increases its damage, which is vital for mobility, waveclear, and the ability to take short, effective trades. Bloodlust comes next to improve your lane sustain and increase your AD, solidifying your duel potential. Mocking Shout is maxed last because its primary utility (slow and AD reduction) does not scale as effectively with points as your other abilities.
The detailed order is as follows: E, Q, W, E, R, E, Q, E, R, Q, Q, W, R, W, W.
Item Build (patch 20260910)
Your choice of boots, Gluttonous Greaves, is non-negotiable for sustain in lane and during splitpushing. The enchantment will be situational, but or are excellent defensive options.


Fundamental Runes
 Lethal Tempo: Essential for bonus attack speed in prolonged combat, maximizing your DPS.
 Brutal: An AD and penetration boost to dominate early trades.
 Giant Slayer: Increases your damage against high-HP targets, essential against tanks or bruisers stacking health.
 Legend: Alacrity: Additional attack speed, to better benefit from your critical strikes.
 Nimbus Cloak: Bonus movement speed after using a summoner spell, perfect for chasing or escaping.
Build Variants
- Standard — Critical DPS: , Blade of the Ruined King, Magnetic Blaster, Lord Dominik's Regards, . This build is your go-to. is your first pick for critical damage boost. adds sustain and an active slow for duels. amplifies your attack speed and range. provides essential armor penetration in the late game. Finally, gives you even more attack speed, critical chance, and a life-saving shield.
- Anti-tank — Penetration: Kraken Slayer, , , , . If the enemy team consists of multiple tanks, is excellent for raw damage against high-health targets. The synergy with is devastating.
- Safety — Kite & Survival: Bloodthirster, , , , Galeforce. For situations where you need more sustain and mobility for kiting. offers massive lifesteal, and adds an extra dash for dodging or chasing.




Situational Items
- Against enemy healing (Soraka, Aatrox, lifesteal): Mortal Reminder.
- Against 2+ tanks or HP stackers: .
- Against AD burst (assassins like Zed, Rengar): Guardian Angel.
- Against AP burst (mages like Syndra, Fizz): Maw of Malmortius.
- Against excessive mobility: Serylda's Grudge.


 ››
››
››
››
Power Spikes: When Tryndamere Becomes Unstoppable
Tryndamere's power spikes are marked by the acquisition of key items and leveling up his ultimate, gradually transforming his duel potential into an unstoppable threat. Understanding these peaks allows you to know when to aggress and when to play more passively, thus maximizing your impact on the map.Tryndamere is a champion who constantly improves, but certain moments are critical inflection points that transform his potential. Your ability to recognize and exploit these power spikes is what separates a good Tryndamere from a Tryndamere who dominates the game.
Power Curve
Your power curve is progressive, but it explodes at certain levels and with certain items. You have an early game (levels 1-7) where you aim to farm and take favorable trades. The mid game (levels 8-10) is your window to start dominating the side lane and influencing objectives. Finally, the late game (levels 11+) sees you become an unstoppable force in 1v1s and splitpushing.
Key Power Spikes
- Level 6 + : This is your first major spike. multiplies your critical damage, and access to Undying Rage makes you almost unkillable in duels for a short period. This is the time to look for all-ins and take control of your lane.
- Level 9 + + Ultimate Rank 2: adds sustain and an active slow that makes your duels even more formidable, especially against high-HP targets. Rank 2 of your ultimate increases its duration, giving you more time to finish off opponents or escape ganks. This is the time to intensify your splitpush.
- Level 13 + + Ultimate Rank 3: With , you pierce the armor of tanks and bruisers, making you dangerous to the entire enemy team. Rank 3 of your ultimate offers maximum invulnerability duration, making you an almost unstoppable threat in the late game. This is the time to force objectives and threaten the inhibitor.
Macro & Strategy: The Barbarian King's Plan
Tryndamere TOP's macro is centered on side lane pressure and objective conversion. In lane, it's about managing the wave to secure plates and avoid unfavorable 1v1s. In the mid-game, you become an aggressive splitpusher, forcing enemy rotations. In the late-game, your goal is to create asymmetrical pressure on the map.Macro is the brain behind Tryndamere's armed might. Without a deep understanding of the map and timings, your duel potential is wasted. Your main objective is to create a numerical advantage elsewhere on the map by forcing one or more enemies to respond to you in the side lane.
Lane Phase (Early Game)
Your early game is crucial. Adopt meticulous wave management, favoring slow push to accumulate a large minion wave that will allow you to dive with your jungler or secure tower plates safely. Avoid unfavorable 1v1s against champions who excel in the early game. Take short, frequent trades, using the threat of your critical strikes and E resets to wear down the opponent. Don't hesitate to push and move into the enemy jungle to place vision or take camps, rather than seeking a risky kill in your lane. Do not force fights against full armor tanks without the necessary penetration: play the map.
Mid Game
This is the phase where Tryndamere begins to shine in splitpushing. With two key items, you accelerate tower taking and side pressure. Deep warding the enemy jungle is paramount to ensure your safety and identify enemy rotations. Use E resets to reposition or escape ganks. Your goal is to force the enemy team to send multiple champions to stop you, thereby creating a numerical advantage for your team on other objectives (Dragon, Baron, mid/bot towers).
Late Game
In the late game, your splitpush becomes a constant threat to the inhibitor. Your well-used is a devastating weapon: push a side lane to the inhibitor, then teleport to join your team and force a 4v4 or 5v4 fight while the enemy has to defend the inhibitor. Do not teamfight in prolonged 5v5s if you don't have a clear advantage; prefer side pressure and isolated picks. Against heavy crowd control, save your E to dodge or flee, and not to engage.

Team Synergies
Tryndamere greatly benefits from champions who can compensate for his lack of utility or amplify his side pressure:
- Shen: The ultimate synergy. You splitpush, and Shen can cover you with his ultimate, turning a 1v2 into a 2v2 or allowing you to survive a dive.
- Twisted Fate: Converts your side priority into a 2v1 in the mid lane or jungle. A clear ping on the wave before engaging can give you a free Gold Card.
- Galio: Offers powerful counter-engage and an anti-burst shield. He can protect you while you engage, allowing you to finish the job with your
 R.
R. - Lulu: Her movement speed and attack speed steroids, as well as the bonus HP from her ultimate, make you almost unkillable in the side lane, even without .
- Nami: Her auto-attack buffs and light peel are useful if you are occasionally forced to play in teamfights.
- Orianna: A Ball on you before the all-in can secure an
 E reset after your spin thanks to her Shockwave.






Matchups & Counters: Know Your Enemies
Understanding Tryndamere's matchups is essential to adapt your playstyle and optimize your chances of victory. Some champions prevent you from playing your duelist game, while others are easy prey for your constant pressure. The key is to know when to aggress and when to respect, depending on the enemy composition.Every duel is a dance, and for Tryndamere, knowing your opponent's moves is half the battle. Knowing who you can dominate and who you must respect is fundamental to maintaining your advantage in lane and in splitpushing.
Difficult Matchups (Hard Counters)
- Malphite: He negates your critical DPS with his armor and slows your attack speed, making your duels ineffective. Your ultimate is often wasted. Avoid prolonged 1v1s; focus on wave management for resets or vision, and shift your objective to macro by forcing fights elsewhere.
- Kennen: A ranged mage who kites, pokes, and stuns you, denying you contact. Play the wave near your tower, punish his positioning mistakes and cooldowns to find all-in windows.
- Jax: His Counter Strike negates your auto-attacks, which is devastating for Tryndamere. The duel is a test of patience. Bait his E, then engage when it's on cooldown to maximize your DPS.
- Pantheon: Powerful early burst and targeted CC. He can force you to use your ultimate early, then finish you off. Respect his stun zone and avoid prolonged early game trades without a clear advantage.




Unfavorable Matchups
- Fiora: She excels in prolonged duels with her raw damage and Riposte. She can parry your ultimate or your
 W. Avoid infinite duels and instead look for short trades, then play around objective timings.
 - Darius: The longer you stay in combat, the more he stacks his passive and the more lethal his ultimate becomes. His pull can prevent you from fleeing. Maintain strict spacing and don't give him a free pull. If the lane is too difficult, switch to a 'farm + rotate' plan.
- Renekton: A very strong early game bruiser with a targeted stun. He can severely punish you before your power spikes. Play the wave defensively and wait for your first items to contest duels.
- Riven: Her mobility, shields, and crowd control can make dueling uncomfortable. She can choose the duration of the trade. Watch her cooldowns and avoid angles where she can chain CC you, focus on windows of opportunity.
- Teemo: His Blinding Dart negates your auto-attacks, and his mushrooms control the map. Invest in vision (Sweeper) and play the wave defensively to reduce the impact of his traps.




Skill Matchups
- Camille: A duel of precise timings between her burst and your ultimate. Wave management is crucial. Anticipate her engages and use your ultimate at the right moment to survive, then punish her positioning mistakes.
- Irelia: Wave control is key. She is strong when she can dash to multiple minions. Reduce low-HP minions to limit her dash options and force her to fight without springboards.
- Garen: His silence can interrupt your ultimate, and his execution is a threat. Anticipate his silence and proactively activate your ultimate to avoid execution.



Favorable Matchups
- Yasuo: Your sustain and ultimate allow you to last longer than him in duels. Control the wave to limit his dashes and punish his positioning mistakes.
- Sion: His game plan is slow and predictable. You can out-DPS him and out-pressure him in splitpush. Punish his positioning mistakes and convert your advantage into towers, avoiding prolonged 5v5s.
- Nasus: You can punish his early game weakness and prevent him from stacking. Harass him early and force him to play defensively, turning your lead into tower pressure.



Items to Counter Threats
- Against tanks/HP: and .
- To secure splitpush and dives: .
- Against AP burst: .
- Against enemy healing: .
Concrete Scenario: Asymmetrical Pressure at Herald
Imagine a key scenario at the first major objective timing, around 5-6 minutes into the game. You've just picked up your and reached level 6. The enemy Malphite, though tanky, was forced to back after a disadvantageous trade. Your jungler is about to secure the Herald. This is your window for asymmetrical pressure.You are in the top lane, around 5:30 minutes into the game. You've successfully executed a perfect slow push and a large minion wave is approaching the enemy tower. Your opponent, a Malphite, has just backed because you harassed him and he's low on health. You have your and your ultimate  Undying Rage. Your jungler, a Jax, has just secured the Herald and pings that he will place it mid. This is your moment. Instead of following your jungler mid, you must capitalize on the pressure you've created in the top lane.
Your objective is to take as many plates as possible on the top tower. Use your  Spinning Slash to speed up wave clear and start hitting the tower. Place a deep ward in the enemy jungle (for example, at the red buff) to anticipate Malphite's return or a gank. If Malphite returns, he will have to choose between defending his tower under your pressure or letting the plates fall and allowing you to take the T1. Meanwhile, the mid Herald forces the enemy team to react on two fronts. This asymmetrical pressure is the hallmark of a good Tryndamere: you force the enemy to make difficult decisions and divide their resources. If you manage to take the top T1, you open up the map for your team and can begin your aggressive mid-game splitpush phase.
Tryndamere is not a champion for indecisive souls. Every action must be calculated, every trade an opportunity. To become a true master of the Barbarian King, here are your priorities:
- Master the timing of Undying Rage: Activate it at the last moment to maximize its effectiveness and surprise your opponents.
- Manage your Fury: Use it for consistent critical strikes and timely heals, not for random damage.
- Prioritize splitpushing: Your strength lies in side lane pressure. Force the enemy to respond to you, then convert that advantage into objectives.
- Adapt your build: Don't blindly follow an item path. Respond to enemy threats with situational items.
- Control the wave: Good wave management offers you opportunities for trades, dives, and resets.
- Learn the matchups: Know who you can dominate and who you must respect to avoid pitfalls.
- Place vision: An effective splitpush is a safe splitpush. Vision is your best friend in the side lane.
If you lose your trade, it's not bad luck.
Frequently asked questions
How does Tryndamere deal with tanks like Malphite in the top lane?
Against tanks like Malphite, Tryndamere should not seek direct duels. Malphite negates your DPS with his armor and attack speed reduction. Your strategy should be to play macro: push the wave, take plates, then roam to influence other parts of the map. Invest in armor penetration items like to maximize your impact on squishier targets.
What is the best time to activate Tryndamere's ultimate, Undying Rage?
The optimal time to activate Undying Rage is at the very last moment, when your health points are extremely low ( ideally 1 HP). This maximizes the duration of your invulnerability and psychological pressure on the opponent, giving them less time to react and allowing you to deal maximum damage or reposition safely.
How should Tryndamere manage the lane phase against ranged champions like Kennen or Teemo?
Against ranged champions, Tryndamere should play a more defensive lane phase. Focus on farming and wave management near your tower to limit poke. Use Spinning Slash to engage during opportune windows (when their key abilities are on cooldown) or to escape. Vision is crucial to avoid ganks and roams.
What are the essential items for Tryndamere's splitpush?
For effective splitpushing, Tryndamere needs items that increase his DPS, sustain, and ability to take towers quickly. , , and are fundamental. The on your is also essential for global map pressure.
Why is Lethal Tempo the key rune for Tryndamere?
Lethal Tempo is the key rune because it provides a massive increase in attack speed in prolonged combat. This synergizes perfectly with Tryndamere's kit, which relies on auto-attacks and critical strikes. The faster you attack, the more Fury you generate, the higher your critical strike chance, and the more you can reset your Spinning Slash, thus maximizing your DPS.
Can Tryndamere be played in the jungle?
Yes, Tryndamere can be played in the jungle. Although this guide focuses on the top lane, he has a winrate of 51.64% in Master+ in the jungle (patch 20260730, Nexus Core data). His sustain and clear speed are decent, and his ganks can be effective with Spinning Slash and Mocking Shout. However, he remains vulnerable to aggressive counter-jungling and requires good knowledge of jungle paths.