Ağustos 2026 · Patch 7.2d
Assassin · MID

Kassadin Wild Rift Counter Rehberi

Kassadin son derece güçlü bir late game ölçeklenmesine sahiptir ancak early game aşamasında büyük zorluk çeker. Poke veya hızlı savaşlar yoluyla sürekli baskı uygulayan kompozisyonlar onun power spike anlarını geciktirebilir. Ölçeklenmek için zaman bulamadığında, potansiyelini açığa çıkarmak çok daha zor hale gelir.

★ MID Tier S
HASAR
UTIL
TANK
DIFF
Win 48.9% #74 · ↓24pt
Pick 1.8% #32
Ban 1.1% #82

Kassadin Wild Rift Counter Rehberi ★ Counter Sheet

Hard Counter

8

Bu şampiyonlar, seninkini doğrudan geride bırakan bir build ve oynanış tarzına sahip, bu da lane kontrolünü ve farmı son derece zorlaştırabilir. Yetenekleri temel güçlerini etkisiz hale getirebilir ya da her zamanki planını oynamaya çalıştığın anda seni cezalandırabilir. Bu matchuplarda amaç genellikle hataları en aza indirmek ve doğrudan çatışmanın dışında çözümler bulmaktır.

Akshan

Akshan

early_bullyscaling_threat In this lane, your usual defense is completely bypassed. The magic shield from Null Sphere cannot block Akshan's physical auto-attacks or Avengerang, rendering your primary laning tool useless. Since your Void Stone passive also provides no defense against his physical damage, Akshan can easily trigger Dirty Fighting's two-hit passive and shield. This makes every trade highly disadvantageous before you can even get close enough to retaliate. Detayları gör
Akshan

Neden

In this lane, your usual defense is completely bypassed. The magic shield from Null Sphere cannot block Akshan's physical auto-attacks or Avengerang, rendering your primary laning tool useless. Since your Void Stone passive also provides no defense against his physical damage, Akshan can easily trigger Dirty Fighting's two-hit passive and shield. This makes every trade highly disadvantageous before you can even get close enough to retaliate.

Lane etkisi

Akshan will establish a brutal early freeze or crash massive waves to chip your tower. Because you cannot trade back without losing half your health bar, you will constantly be pushed under turret, struggling to last-hit with Nether Blade. This loss of mid priority allows Akshan to easily roam with Going Rogue or secure early crabs, while your recall timings are entirely dictated by your depleted health bar.

Nasıl oynanır

Give up early gold to protect your health bar, staying well outside his basic attack range. Only step up to secure minions with Nether Blade when they are safely under your tower. Hold Force Pulse to slow his Heroic Swing if he tries to dive or chase you down the lane. If you get chunked below forty percent health, immediately retreat and use Riftwalk to escape or reposition, sacrificing a wave rather than giving him a Dirty Fighting reset.

Tam profil →
Yone

Yone

physical_damageearly_defense Your passive Void Stone is practically useless in early trades because Yone relies heavily on the physical damage of Mortal Steel. While your magic shield triggers when he casts near you, it cannot absorb his physical thrusts. Furthermore, his ability to sustain trades with Spirit Cleave grants him a shield that easily outclasses your Nether Blade or Null Sphere damage, leaving you mathematically behind from level one. Detayları gör
Yone

Neden

Your passive Void Stone is practically useless in early trades because Yone relies heavily on the physical damage of Mortal Steel. While your magic shield triggers when he casts near you, it cannot absorb his physical thrusts. Furthermore, his ability to sustain trades with Spirit Cleave grants him a shield that easily outclasses your Nether Blade or Null Sphere damage, leaving you mathematically behind from level one.

Lane etkisi

Because Mortal Steel tears through your health bar without any magic shield mitigation, you are forced off the wave immediately. Yone will use Soul Unbound to zone you past your caster minions, forcing you to farm under turret. If you try to match his push, he can easily setup a dive with Fate Sealed. This constant pressure means you will leak gold, lose lane priority, and lack the mana to roam.

Nasıl oynanır

Let the wave crash and use Nether Blade to secure last hits under your tower. Never trade when his Mortal Steel has two stacks; instead, retreat when you hear the wind cue. Hold Null Sphere solely to poke him when he returns to his physical body after Soul Unbound. Once you unlock Riftwalk, use its blink defensively to dodge Fate Sealed or his third Mortal Steel dash rather than jumping forward aggressively.

Tam profil →
Talon

Talon

physical_damageearly_defense Your passive Void Stone only shields you against magic damage, leaving you entirely unprotected against Talon's physical threat. When he hits you with Rake and dashes in with Noxian Diplomacy, he easily applies three stacks of Blade's End. The resulting physical bleed bypasses your magical defenses entirely, turning any early melee trade into a quick, lethal execution. Detayları gör
Talon

Neden

Your passive Void Stone only shields you against magic damage, leaving you entirely unprotected against Talon's physical threat. When he hits you with Rake and dashes in with Noxian Diplomacy, he easily applies three stacks of Blade's End. The resulting physical bleed bypasses your magical defenses entirely, turning any early melee trade into a quick, lethal execution.

Lane etkisi

Because you cannot contest him head-on, you will be forced under your turret from the very first waves. Talon will freely clear with Rake and use Assassin's Path to hop over walls and roam, putting immense pressure on your side lanes. If you attempt to follow him through the jungle without vision, a single ambush with Shadow Assault will result in your immediate death.

Nasıl oynanır

To survive, prioritize armor immediately over your usual mana items to blunt his physical burst. Use Null Sphere strictly to last-hit from a safe distance, never to poke. Keep Force Pulse ready to slow his approach if he tries to walk up. If Talon disappears over a wall using Assassin's Path, do not chase blindly; instead, ping your teammates missing and use Riftwalk to quickly shove the wave under his tower.

Tam profil →
Jayce

Jayce

physical_damagelane_bully Your laning phase is a nightmare because Null Sphere grants a magic shield that does absolutely nothing against Jayce's physical damage. Whether Jayce is poking you from afar with Transform Mercury Cannon and To the Skies! or jumping onto you in hammer form, your main defensive tool is completely bypassed. He can freely trade without taking any retaliatory damage while ignoring your passive Void Stone. Detayları gör
Jayce

Neden

Your laning phase is a nightmare because Null Sphere grants a magic shield that does absolutely nothing against Jayce's physical damage. Whether Jayce is poking you from afar with Transform Mercury Cannon and To the Skies! or jumping onto you in hammer form, your main defensive tool is completely bypassed. He can freely trade without taking any retaliatory damage while ignoring your passive Void Stone.

Lane etkisi

Before you unlock Riftwalk, Jayce will freeze the wave or crash massive waves to dive you. Because you cannot contest his physical trades, you will be forced to farm with Null Sphere from max range, sacrificing massive amounts of gold. If you step up to use Nether Blade, he will punish you with Thundering Blow, driving you out of lane and taking early tower plates.

Nasıl oynanır

Give up early cs and stay out of his auto-attack range. Use Null Sphere purely to secure dying minions from a distance, never to trade. Hold your Force Pulse to slow him if he leaps in with To the Skies!. Once you reach level five, use Riftwalk defensively to escape his hammer-form burst rather than jumping forward. Your only goal is to survive without dying before you can safely roam.

Tam profil →
Zed

Zed

physical_damagedodge_timing Zed's physical damage profile completely bypasses the magic shield from your Void Stone, leaving you extremely vulnerable to his poke. He can safely chip away at your health bar using Living Shadow to extend the reach of his Razor Shuriken and Shadow Slash. This physical burst pressure, combined with Contempt for the Weak at low health, makes trading directly before you have armor highly unfavorable. Detayları gör
Zed

Neden

Zed's physical damage profile completely bypasses the magic shield from your Void Stone, leaving you extremely vulnerable to his poke. He can safely chip away at your health bar using Living Shadow to extend the reach of his Razor Shuriken and Shadow Slash. This physical burst pressure, combined with Contempt for the Weak at low health, makes trading directly before you have armor highly unfavorable.

Lane etkisi

You are forced to cede wave priority early, as walking up to hit minions invites a lethal Razor Shuriken combo. Zed will easily crash waves, forcing you to farm under tower where his Contempt for the Weak makes diving you highly attractive. This constant mid-lane pressure means you cannot contest river skirmishes, giving Zed free reign to roam and snowball other lanes while you struggle to clear.

Nasıl oynanır

To survive, shift your build path toward early armor rather than rushing raw damage. During all-ins, save your Riftwalk exclusively for his ultimate. The moment Zed reappears from Death Mark, immediately use Riftwalk to blink away, breaking his line of sight to dodge the incoming Razor Shuriken and Shadow Slash follow-up. If you panic-cast Null Sphere or Force Pulse early, you will lack the mobility to escape his fatal mark explosion.

Tam profil →
Yasuo

Yasuo

physical_damageearly_defense Yasuo completely dictates this matchup because his physical damage from Steel Tempest bypasses your natural defenses, while his Wind Wall deletes your Null Sphere in mid-air. This interaction is disastrous: by blocking your projectile, Yasuo prevents you from gaining the magic shield of Void Stone, leaving you entirely exposed to his relentless Sweeping Blade onslaught and physical critical strikes. Detayları gör
Yasuo

Neden

Yasuo completely dictates this matchup because his physical damage from Steel Tempest bypasses your natural defenses, while his Wind Wall deletes your Null Sphere in mid-air. This interaction is disastrous: by blocking your projectile, Yasuo prevents you from gaining the magic shield of Void Stone, leaving you entirely exposed to his relentless Sweeping Blade onslaught and physical critical strikes.

Lane etkisi

You are forced into a defensive posture under your turret from the very first waves. Yasuo can freely stack Steel Tempest and dash through your minions with Sweeping Blade to force one-sided trades, knowing your Force Pulse takes too long to charge early on. Stepping up to contest the wave results in heavy poke, forcing premature recalls that cost major gold.

Nasıl oynanır

Prioritize survival by hugging your tower and farming safely using Nether Blade to secure last hits. Never throw Null Sphere when Yasuo has Wind Wall available; instead, bait it out by positioning aggressively before retreating. Once you unlock Riftwalk, use it defensively to escape his Steel Tempest knock-up setups rather than attempting to trade back.

Tam profil →
Irelia

Irelia

freeze_waveearly_kill Irelia completely neutralizes your early laning because Void Stone's magic shield is useless against her physical basic attacks. Furthermore, she can easily stack Ionian Fervor on the minion wave. If you step up to contest farm, she will use Bladesurge to dash through low-health minions, closing the gap instantly before hitting you with Flawless Duet. Without Riftwalk available pre-level 5, you have no escape from her relentless physical DPS. Detayları gör
Irelia

Neden

Irelia completely neutralizes your early laning because Void Stone's magic shield is useless against her physical basic attacks. Furthermore, she can easily stack Ionian Fervor on the minion wave. If you step up to contest farm, she will use Bladesurge to dash through low-health minions, closing the gap instantly before hitting you with Flawless Duet. Without Riftwalk available pre-level 5, you have no escape from her relentless physical DPS.

Lane etkisi

The lane becomes unplayable if Irelia successfully freezes the wave near her turret. Stepping up to secure last hits with Nether Blade forces you into her threat zone, where she can easily run you down using Bladesurge resets. You will be forced to give up gold, relying solely on Null Sphere to farm from deep safety. This extreme lack of priority prevents you from helping your jungler and delays your crucial level scaling.

Nasıl oynanır

To survive, never auto-attack the wave early; let it push into your tower where you can farm safely. Use Null Sphere exclusively to secure distant minions rather than poking her, as she can mitigate that damage with Defiant Dance anyway. If the wave gets stuck near her turret, do not step up. Instead, wait for her to push or call your jungler to help break the freeze, holding Force Pulse to slow her down if she tries to initiate an all-in.

Tam profil →

Diğer eşleşmeler

Dezavantajlı

10

Bu şampiyonlar, matchup'ı tamamen oynanmaz hale getirmeden genellikle çatışmada avantaj sağlayan araçlara sahiptir. Daha fazla menzilleri, senin saldırılarını daha iyi karşılama kapasiteleri veya engage'lerine karşılık verecek daha fazla yolları olabilir. Yaklaşımını buna göre uyarlaman ve dövüşü kabul edeceğin anları dikkatle seçmen gerekir.

Fizz

Fizz

melee_clashearly_pressure Fizz dominates the early levels by utilizing Rending Wave to empower his basic attacks, applying a magic bleed that easily outlasts Kassadin's temporary Void Stone shield. Whenever you attempt to trade back, Fizz can effortlessly dodge your Null Sphere or Force Pulse using Playful, while using Urchin Strike to close the distance. This leaves Kassadin with no reliable way to win early trades. Detayları gör
Fizz

Neden

Fizz dominates the early levels by utilizing Rending Wave to empower his basic attacks, applying a magic bleed that easily outlasts Kassadin's temporary Void Stone shield. Whenever you attempt to trade back, Fizz can effortlessly dodge your Null Sphere or Force Pulse using Playful, while using Urchin Strike to close the distance. This leaves Kassadin with no reliable way to win early trades.

Lane etkisi

This matchup dynamic forces you to concede wave priority from the first wave. Fizz will slow-push, threatening you with heavy Rending Wave trades if you step up to farm. Being trapped under turret chips away at your health, forcing bad recall timings that delay your level 6 power spike. This early deficit prevents you from contesting map pressure, leaving your jungler vulnerable.

Nasıl oynanır

Freeze the wave just outside your turret range, using Null Sphere to safely secure last hits from a distance. If Fizz initiates with Urchin Strike, immediately auto-attack and reset it with Nether Blade to trade back before retreating. Never use Force Pulse aggressively unless Fizz has already wasted Playful. Your sole objective is to survive and conserve mana until you unlock Riftwalk.

Tam profil →
Heimerdinger

Heimerdinger

early_leadmobility_threat Heimerdinger's H-28G Evolution Turret setup creates an oppressive early-game zone that exploits your weak waveclear. While Null Sphere provides a reliable magic shield to absorb stray Hextech Micro-Rockets or turret beam attacks, you cannot easily destroy his machinery without taking heavy damage. This allows Heimerdinger to dictate the lane's pace, forcing you to play defensively until Riftwalk unlocks your mobility and burst potential. Detayları gör
Heimerdinger

Neden

Heimerdinger's H-28G Evolution Turret setup creates an oppressive early-game zone that exploits your weak waveclear. While Null Sphere provides a reliable magic shield to absorb stray Hextech Micro-Rockets or turret beam attacks, you cannot easily destroy his machinery without taking heavy damage. This allows Heimerdinger to dictate the lane's pace, forcing you to play defensively until Riftwalk unlocks your mobility and burst potential.

Lane etkisi

Expect to spend the first five levels pinned under your turret. Heimerdinger's constant push forces you to use Nether Blade to secure last hits under heavy fire. Because H-28G Evolution Turret constantly chips at your tower, you will lose plating and find yourself completely unable to rotate to early skirmishes. Your primary goal is simply keeping your health bar high enough to avoid getting dove by UPGRADE!!! setups.

Nasıl oynanır

Let the wave crash and prioritize survival over perfect farm. Use Null Sphere specifically when Heimerdinger steps up to launch Hextech Micro-Rockets, absorbing the brunt of the trade. Keep an eye on his spell casts; his heavy spam will rapidly charge your Force Pulse, giving you a powerful tool to slow him and clear waves. Once you unlock Riftwalk, wait for him to misposition his CH-2 Electron Storm Grenade before blinking in to punish him.

Tam profil →
Taliyah

Taliyah

zone_controlmobility_lock Taliyah holds complete control over your mobility because Unraveled Earth functions as a direct counter to your ultimate. Whenever you attempt to close the gap using Riftwalk, landing on or dashing through her minefield triggers instant, massive explosive damage. Combined with her constant push via Threaded Volley, she forces you into a passive stance where jumping forward carelessly results in immediate chunking or death. Detayları gör
Taliyah

Neden

Taliyah holds complete control over your mobility because Unraveled Earth functions as a direct counter to your ultimate. Whenever you attempt to close the gap using Riftwalk, landing on or dashing through her minefield triggers instant, massive explosive damage. Combined with her constant push via Threaded Volley, she forces you into a passive stance where jumping forward carelessly results in immediate chunking or death.

Lane etkisi

You will spend the early levels trapped under tower, absorbing Threaded Volley pressure while using Null Sphere to shield against her poke. Once she gets Weaver's Wall, Taliyah will easily roam using Rock Surfing along the river walls. If you try to follow her, she can turn and use Seismic Shove to throw you into her mines, making blind river chases extremely lethal for you.

Nasıl oynanır

Never use Riftwalk offensively while Taliyah has Unraveled Earth off cooldown. Instead, position laterally to force her to throw Threaded Volley at angles that don't clear the wave. When she misses or wastes her mines, quickly activate Force Pulse to slow her, then close the distance with a physical flank to reset your auto-attack with Nether Blade. If she places the minefield defensively, immediately abort the jump and farm safely with Null Sphere.

Tam profil →
Lissandra

Lissandra

cc_chaingank_setup Lissandra acts as a natural wall to your aggressive patterns. The moment you attempt to close the distance using Riftwalk, she can instantly shut down your momentum with Frozen Tomb. This point-and-click suppression ignores the magic shield from Void Stone, keeping you pinned in place under her feet. Because Riftwalk's blink is completely negated by her instant crowd control, you cannot safely execute your burst combo without being immediately punished. Detayları gör
Lissandra

Neden

Lissandra acts as a natural wall to your aggressive patterns. The moment you attempt to close the distance using Riftwalk, she can instantly shut down your momentum with Frozen Tomb. This point-and-click suppression ignores the magic shield from Void Stone, keeping you pinned in place under her feet. Because Riftwalk's blink is completely negated by her instant crowd control, you cannot safely execute your burst combo without being immediately punished.

Lane etkisi

This shutdown threat forces you into a highly defensive posture. Lissandra easily shoves waves using Ice Shard, while you must farm under tower, conserving Nether Blade to secure last hits. If you step up too far, she can bridge the gap with Glacial Path and lock you down with Ring of Frost, setting up effortless ganks for her jungler. This limits your map pressure, leaving your sidelanes exposed.

Nasıl oynanır

To survive, maintain a safe distance behind your minions, angling away from the straight line of her Ice Shard. Never use Riftwalk offensively unless you have seen her waste Frozen Tomb on another target. Keep Null Sphere ready to disrupt her casting or absorb trade damage when she walks up. If she initiates with Glacial Path, immediately retreat toward your turret and prepare Force Pulse to slow her down if she teleports forward.

Tam profil →
Kai'Sa

Kai'Sa

physical_damagelane_bully This matchup is highly unfavorable early because Kai'Sa exploits your lack of physical defense. While your Null Sphere and Void Stone shield you against magic threats, they offer zero protection against the physical missiles of her Icathian Rain. She can freely trigger Second Skin with her ranged basic attacks, forcing trades you have no mathematical way of winning before you acquire your mobility. Detayları gör
Kai'Sa

Neden

This matchup is highly unfavorable early because Kai'Sa exploits your lack of physical defense. While your Null Sphere and Void Stone shield you against magic threats, they offer zero protection against the physical missiles of her Icathian Rain. She can freely trigger Second Skin with her ranged basic attacks, forcing trades you have no mathematical way of winning before you acquire your mobility.

Lane etkisi

Consequently, you will be systematically pushed under your turret during the first few waves. If you step up to contest the wave, her Supercharge allows her to run you down while firing Icathian Rain on an isolated target, chunking your health bar. This forced passivity means you must concede early priority, allowing her to easily secure vision or assist her jungler while you struggle to farm with Nether Blade.

Nasıl oynanır

To survive, you must play with extreme discipline until you unlock Riftwalk. Let her push the wave and use the extra range of Force Pulse and Null Sphere to secure last hits safely from a distance, even if you miss a few. If she tries to dive or trade under your tower, activate Nether Blade to reset your auto-attack and clear quickly. Never use Riftwalk aggressively unless her Void Seeker misses and her Killer Instinct shield is on cooldown.

Tam profil →
Swain

Swain

sustaindps_check Swain's Ravenous Flock constantly bolsters his maximum health, rendering him far too tanky for your burst damage. While you can effortlessly escape his deadly Demonic Ascension zone using Riftwalk, you lack the raw power to quickly execute him. This transforms the lane into a battle of attrition where his consistent healing and Death's Hand poke will slowly chip you down if you attempt prolonged skirmishes. Detayları gör
Swain

Neden

Swain's Ravenous Flock constantly bolsters his maximum health, rendering him far too tanky for your burst damage. While you can effortlessly escape his deadly Demonic Ascension zone using Riftwalk, you lack the raw power to quickly execute him. This transforms the lane into a battle of attrition where his consistent healing and Death's Hand poke will slowly chip you down if you attempt prolonged skirmishes.

Lane etkisi

During the early levels, Swain will abuse his ranged advantage to shove waves and fish for Nevermove roots to pull you in. If you get caught, his Ravenous Flock passive triggers, giving him a health lead that Null Sphere's magic shield cannot fully mitigate. You will often find yourself trapped under tower, forced to use Nether Blade to secure last hits while bleeding mana and losing map pressure.

Nasıl oynanır

Keep your distance and constantly watch the trajectory of Nevermove; only step up to farm with Nether Blade once his claw has returned safely. When he triggers Demonic Ascension, immediately use Riftwalk to blink away and deny him his vital drain targets, rather than trying to fight back. Wait out the duration of his ultimate, then look to strike with a quick Null Sphere and Force Pulse combo once his primary defensive tool is completely exhausted.

Tam profil →
Vex

Vex

cc_chainanti_mobility Vex's passive, Doom 'n Gloom, directly punishes Kassadin's identity. Every single jump you take with Riftwalk immediately applies Gloom onto you. This allows Vex to detonate the mark with Mistral Bolt or Personal Space for massive bonus magic damage, while also triggering her fear to interrupt your burst combo and leave you completely vulnerable. Detayları gör
Vex

Neden

Vex's passive, Doom 'n Gloom, directly punishes Kassadin's identity. Every single jump you take with Riftwalk immediately applies Gloom onto you. This allows Vex to detonate the mark with Mistral Bolt or Personal Space for massive bonus magic damage, while also triggering her fear to interrupt your burst combo and leave you completely vulnerable.

Lane etkisi

You cannot contest the early wave state. Vex will push you under tower with Looming Darkness and Mistral Bolt. If you try to farm with Nether Blade, she easily pokes you down. Because you cannot safely use Riftwalk to escape or trade without giving her a free fear, you are forced to bleed gold, cede mid-lane priority, and watch her roam with Shadow Surge.

Nasıl oynanır

To survive this lane, you must play around Vex's passive bar. Never initiate with Riftwalk while her red bar is full, as she will immediately fear you with Personal Space. Instead, stay back and farm safely using Null Sphere to absorb her poke with your Void Stone shield. If she wastes her fear on a wave, use Force Pulse to slow her from a distance and only commit if you can burst her before her bar refills.

Tam profil →
Rumble

Rumble

early_defensedps_check Rumble's early magic damage over time melts Kassadin's health bar before Kassadin gets access to Riftwalk. Even though Void Stone grants a magic shield when Rumble casts nearby, the continuous burn easily bypasses this brief protection. Kassadin's Null Sphere and Force Pulse lack the early punch to trade back effectively against Rumble's persistent heat, leaving you highly vulnerable in the first four levels. Detayları gör
Rumble

Neden

Rumble's early magic damage over time melts Kassadin's health bar before Kassadin gets access to Riftwalk. Even though Void Stone grants a magic shield when Rumble casts nearby, the continuous burn easily bypasses this brief protection. Kassadin's Null Sphere and Force Pulse lack the early punch to trade back effectively against Rumble's persistent heat, leaving you highly vulnerable in the first four levels.

Lane etkisi

Rumble will relentlessly shove the minion waves, forcing you under turret. Because you cannot safely contest the wave with Nether Blade or Force Pulse without taking massive damage, you will lose gold and pressure. If you get chunked too low before unlocking Riftwalk, you'll be forced into a disastrous early recall, giving Rumble a massive tempo advantage to roam or secure scuttle crabs.

Nasıl oynanır

Prioritize absolute wave defense over early trades. Use Null Sphere strictly to secure dying minions from a safe distance, and never walk up to use Nether Blade unless Rumble's flame is pointing away. Let the wave crash into your turret, using Force Pulse to thin the pack. Once you unlock Riftwalk, you can safely dodge his damage over time; until then, sacrifice some gold to keep your health high enough to avoid being dove.

Tam profil →

Diğer eşleşmeler

Skill Matchup

4

Bu eşleşmeler her şeyden önce yürütme düellosudur: her iki şampiyon da avantaj elde etmek için gerçek yollara sahiptir. Kaçırılan önemli bir yetenek, doğru öngörülen bir engage ya da tek bir pozisyon hatası düelloyu bir tarafa çevirebilir. Matchup'ı bilmek ve doğru anları tanımak burada özellikle önemlidir.

Galio

Galio

wave_clearmap_pressure This matchup centers on a race between your inevitable late-game scaling and Galio's early map pressure. Before you unlock Riftwalk, Galio easily shatters minion waves using Winds of War combined with Colossal Smash. This fast push allows him to step into the river and launch Hero's Entrance to impact other lanes, capitalizing on your inability to match his waveclear or follow his semi-global rotations during the early levels. Detayları gör
Galio

Neden

This matchup centers on a race between your inevitable late-game scaling and Galio's early map pressure. Before you unlock Riftwalk, Galio easily shatters minion waves using Winds of War combined with Colossal Smash. This fast push allows him to step into the river and launch Hero's Entrance to impact other lanes, capitalizing on your inability to match his waveclear or follow his semi-global rotations during the early levels.

Lane etkisi

You will spend the first four levels trapped under your turret, desperately farming with Nether Blade and Null Sphere while Galio dictates the map. If you try to contest the wave, he can punish you with Justice Punch and Shield of Durand. This concession of mid priority means your jungler must play defensively, as Galio's early rotations will consistently outpace yours until you reach level five.

Nasıl oynanır

Use Null Sphere to absorb damage from Winds of War while securing ranged minions. When Galio leaves vision to roam with Hero's Entrance, do not blindly follow him through unwarded rivers. Instead, ping your side lanes immediately, hard-shove the wave using Nether Blade to punish his absence, and use your Riftwalk spike to scale safely. If he holds his ultimate, conserve your mana and focus purely on matching his wave pressure.

Tam profil →
Ryze

Ryze

scalingmana_management This matchup is a true test of scaling patience. Your Null Sphere is the ultimate defensive tool against Ryze's constant Overload poke, giving you a magic shield to soak up his targeted damage. However, initiating trades remains incredibly risky. If you attempt to jump forward with Riftwalk, Ryze can instantly react with Rune Prison, root you in place, and unleash his full spell rotation before you can retreat. Detayları gör
Ryze

Neden

This matchup is a true test of scaling patience. Your Null Sphere is the ultimate defensive tool against Ryze's constant Overload poke, giving you a magic shield to soak up his targeted damage. However, initiating trades remains incredibly risky. If you attempt to jump forward with Riftwalk, Ryze can instantly react with Rune Prison, root you in place, and unleash his full spell rotation before you can retreat.

Lane etkisi

Because Ryze can push hard with Spell Flux and Overload, you will spend most of the early game under your turret. Maintaining a freeze just outside your tower range is crucial; if the wave crashes too fast, Ryze will harass you under tower or use Realm Warp to roam. This lane turns into a farm war where mistimed recalls forfeit massive plates, delay your scaling, and give Ryze free map pressure.

Nasıl oynanır

Never initiate with Riftwalk while Ryze has Rune Prison available. Instead, stand behind your minion wave to block his Overload skillshots, and use Null Sphere strictly when he steps up to mark you with Spell Flux. If he wastes his root on a minion or to disengage, that is your three-second window to blink in, strike with Nether Blade, and slow him with Force Pulse before his cooldowns return.

Tam profil →
Malphite

Malphite

magic_shieldsustain Malphite relies on spamming Seismic Shard to chip away at your health, but your Null Sphere completely nullifies this threat. Because the magic shield from your Q absorbs the magic damage of his shard perfectly, his primary tool for lane harassment becomes useless. You both end up trading shielding for shielding, preventing any real kill pressure from developing during the early laning phase. Detayları gör
Malphite

Neden

Malphite relies on spamming Seismic Shard to chip away at your health, but your Null Sphere completely nullifies this threat. Because the magic shield from your Q absorbs the magic damage of his shard perfectly, his primary tool for lane harassment becomes useless. You both end up trading shielding for shielding, preventing any real kill pressure from developing during the early laning phase.

Lane etkisi

This interaction freezes the lane's kill pressure, shifting the focus entirely to wave control. Since neither of you can poke the other out, the minion wave becomes the battleground. If you let him shove you under turret, he can set up easy ganks with Unstoppable Force. Conversely, keeping the wave neutral prevents him from roaming while ensuring you scale safely toward your late-game spikes.

Nasıl oynanır

Discipline is your best weapon here. Never use Null Sphere to last-hit; hold it strictly to react when Malphite casts Seismic Shard. Use Nether Blade to secure minions under tower and restore your mana. Once he reaches level five, maintain enough mana for Riftwalk at all times. If you anticipate his Unstoppable Force, you can blink out of his trajectory instantly, completely wasting his ultimate and turning the tempo in your favor.

Tam profil →

Diğer eşleşmeler

Avantajlı

28

Bu şampiyonlar genellikle senin temel güçlerine etkili şekilde karşılık veremez, bu da çatışmaya daha fazla özgürlükle yaklaşmanı sağlar. Onları baskı altına almak ve lehine dönen trade'ler zorlamak için genellikle birden fazla yolun vardır. Onlara rahat bir pozisyona dönme fırsatı vermek yerine, bu avantajı kendi temponu dayatmak için kullan.

Ahri

Ahri

anti_magescaling Ahri relies heavily on chipping away your health with Orb of Deception to set up a lethal charm. However, your Null Sphere creates a magic shield that directly absorbs her magical poke, while Void Stone dampens her burst. As the match progresses, her highly-coveted mobility from Spirit Rush becomes completely outmatched by the spammable nature of your Riftwalk, neutralizing her safety net. Detayları gör
Ahri

Neden

Ahri relies heavily on chipping away your health with Orb of Deception to set up a lethal charm. However, your Null Sphere creates a magic shield that directly absorbs her magical poke, while Void Stone dampens her burst. As the match progresses, her highly-coveted mobility from Spirit Rush becomes completely outmatched by the spammable nature of your Riftwalk, neutralizing her safety net.

Lane etkisi

This matchup forces Ahri to aggressively push with Orb of Deception to secure priority. By using Force Pulse to match her waveclear and Nether Blade to easily secure last hits under your turret, you keep the wave controlled. She cannot easily dive you through your magic shields, preventing her from translating her early strength into active map roams.

Nasıl oynanır

Position yourself deliberately inside your minion wave so Ahri must choose between hitting you or pushing with Orb of Deception. When trading post-five, never use Riftwalk directly forward into her face; instead, blink diagonally or sideways to bait and dodge her Charm. If she wastes that crowd control, immediately retaliate with Null Sphere, reset your auto-attack with Nether Blade, and slow her escape with Force Pulse.

Tam profil →
Akali

Akali

early_pressureroam_heavy This matchup heavily favors you because Akali cannot easily chip away at your health bar in the early game. Every time she steps up to clip you with the edge of Five Point Strike, you can counter with Null Sphere. The magic shield generated from this interaction completely absorbs her early energy-heavy poke, leaving her with depleted resources while you scale comfortably. Detayları gör
Akali

Neden

This matchup heavily favors you because Akali cannot easily chip away at your health bar in the early game. Every time she steps up to clip you with the edge of Five Point Strike, you can counter with Null Sphere. The magic shield generated from this interaction completely absorbs her early energy-heavy poke, leaving her with depleted resources while you scale comfortably.

Lane etkisi

Because Five Point Strike fails to dent your health, you command the minion waves. You can freeze the wave near your turret, forcing Akali to overextend and waste Twilight Shroud just to farm safely. Since she cannot force you out of lane, you will secure superior recall timings, building an insurmountable gold lead while preventing her from roaming to snowball.

Nasıl oynanır

Walk forward confidently whenever Null Sphere is available to deny her farm. If she attempts to engage with Shuriken Flip, immediately activate Force Pulse to slow her escape path, then reset your basic attack with Nether Blade to win the extended trade. Should she attempt to dive you using Perfect Execution, use Riftwalk defensively toward your tower to force her into a lethal turret-dive situation.

Tam profil →
Corki

Corki

scalingmobility Corki's reliance on Hextech Munitions converts his basic attacks into magic damage, which directly triggers your defensive strengths. Every time Corki steps up to poke with auto-attacks or Phosphorus Bomb, casting Null Sphere activates Void Stone, generating a magic shield that absorbs his primary damage output. Since his Gatling Gun also targets your magic resistance, your natural anti-magic kit completely nullifies his ranged poke. Detayları gör
Corki

Neden

Corki's reliance on Hextech Munitions converts his basic attacks into magic damage, which directly triggers your defensive strengths. Every time Corki steps up to poke with auto-attacks or Phosphorus Bomb, casting Null Sphere activates Void Stone, generating a magic shield that absorbs his primary damage output. Since his Gatling Gun also targets your magic resistance, your natural anti-magic kit completely nullifies his ranged poke.

Lane etkisi

This interaction completely shifts the wave dynamic. Corki cannot pressure you off the wave, meaning you can easily collect gold using Nether Blade to restore mana while keeping the wave near your turret. Since his Valkyrie is his only escape, you can safely stack Force Pulse whenever he spams rockets. You scale effortlessly into your late-game power spikes without suffering the usual early-game health deficits that plague other matchups.

Nasıl oynanır

Play passively before your ultimate, matching his harass with Null Sphere whenever he walks up to auto-attack. Once you unlock Riftwalk, look for trades when his Special Delivery is inactive, as his mobility is severely limited without it. Jump in with Riftwalk, slow him with Force Pulse, and reset your auto-attack with Nether Blade. If he tries to escape with Valkyrie, your ultimate's low cooldown allows you to easily chase him down and secure the kill.

Tam profil →
Ekko

Ekko

scalingmagic_shield This matchup swings heavily in your favor because Ekko relies on Timewinder to chip away your health from a distance. Every time he throws his projectile, you can neutralize its incoming damage instantly by targeting him with Null Sphere. The resulting magic shield completely absorbs his primary poke tool, rendering his early poke ineffective while your Void Stone passive mitigates his follow-up AP burst. Detayları gör
Ekko

Neden

This matchup swings heavily in your favor because Ekko relies on Timewinder to chip away your health from a distance. Every time he throws his projectile, you can neutralize its incoming damage instantly by targeting him with Null Sphere. The resulting magic shield completely absorbs his primary poke tool, rendering his early poke ineffective while your Void Stone passive mitigates his follow-up AP burst.

Lane etkisi

Because Ekko cannot easily whittle down your health bar, you dictate the pace of the minion waves. You can easily ignore his early push, farming safely under tower or contesting the wave. Since his Timewinder trades fail to stick, Ekko is forced to choose between wasting mana on futile poke or using it to clear waves, giving you a completely free pass to scale into your mid-game power spikes.

Nasıl oynanır

When Ekko steps up to throw Timewinder, immediately cast Null Sphere on him to activate your shield before the returning blade hits you. If he tries to commit with Phase Dive to trigger Z-Drive Resonance, reset your auto-attack with Nether Blade and retaliate with Force Pulse to slow him down. Should he drop Parallel Convergence, use Riftwalk to instantly blink out of the stun zone, turning his aggressive dive into a massive counter-offensive.

Tam profil →
Mel

Mel

magic_shieldscaling Mel relies on consistent magical poke to establish lane control, but Kassadin's kit naturally neutralizes her threat. Every time Mel attempts to harass, launching Null Sphere absorbs the brunt of her magic damage with its shield, while Void Stone dampens any residual burst. Because Mel cannot easily pierce through this dual-layer magic mitigation, Kassadin bypasses his weak early game entirely, securing a free path to his crucial level 5 power spike. Detayları gör
Mel

Neden

Mel relies on consistent magical poke to establish lane control, but Kassadin's kit naturally neutralizes her threat. Every time Mel attempts to harass, launching Null Sphere absorbs the brunt of her magic damage with its shield, while Void Stone dampens any residual burst. Because Mel cannot easily pierce through this dual-layer magic mitigation, Kassadin bypasses his weak early game entirely, securing a free path to his crucial level 5 power spike.

Lane etkisi

Because Mel’s magic poke fails to stick, the usual ranged-versus-melee pressure is virtually non-existent. You can comfortably match her wave clear using Force Pulse whenever she spams spells, and replenish your mana pool with Nether Blade under turret. Mel is forced into a frustrating dilemma: she must overextend to attempt trades, leaving her highly vulnerable to ganks, or watch helplessly as you reach your ultimate power spike without losing turret plates.

Nasıl oynanır

Prioritize using Null Sphere reactively when Mel begins her casting animations, ensuring the magic shield absorbs her main spell. Keep Force Pulse charged by capitalizing on her high spell frequency, but hold it until you reach level 5. Once you unlock Riftwalk, immediately initiate an aggressive trade by blinking over her skillshots, resetting your auto-attack with Nether Blade, and slowing her retreat. If she plays extremely safe, use your mobility to roam and pressure her side lanes.

Tam profil →
Orianna

Orianna

magic_shieldmobility Kassadin controls this matchup because his mobility directly neutralizes Orianna's ultimate threat. While she wants to zone you out with Command: Attack and Command: Dissonance, the moment she commits to her ultimate, Command: Shockwave, you can instantly react with Riftwalk. By blinking out of the pull zone, you not only negate her entire burst and crowd control but also close the gap to retaliate. Detayları gör
Orianna

Neden

Kassadin controls this matchup because his mobility directly neutralizes Orianna's ultimate threat. While she wants to zone you out with Command: Attack and Command: Dissonance, the moment she commits to her ultimate, Command: Shockwave, you can instantly react with Riftwalk. By blinking out of the pull zone, you not only negate her entire burst and crowd control but also close the gap to retaliate.

Lane etkisi

Early on, Orianna's Clockwork Windup and ranged attacks will force you to play back. However, once you unlock Riftwalk, the threat of your blink completely changes her positioning. She can no longer freely poke with Command: Attack without risking a lethal counter-engage. This shift allows you to secure wave control, contest her roaming, and safely farm up your scaling spikes while she is forced to play defensively.

Nasıl oynanır

During the early levels, absorb her harass using the magic shield from Void Stone and farm with Null Sphere from a safe distance. Do not panic-cast Riftwalk to escape basic pokes; instead, hold it specifically to react to the animation of Command: Shockwave. The instant she triggers her ultimate, blink directly onto her to unleash Nether Blade and Force Pulse for an easy kill.

Tam profil →
Syndra

Syndra

magic_shieldmobility Kassadin naturally neutralizes Syndra's ranged threat because Void Stone absorbs her Dark Sphere poke, while Null Sphere provides an instant silence that interrupts her basic burst sequence. Once both reach their ultimate abilities, Syndra loses her safety net; Kassadin can use Riftwalk to blink over her Scatter the Weak stun, turning her primary self-peel tool into a wasted cooldown that leaves her completely defenseless. Detayları gör
Syndra

Neden

Kassadin naturally neutralizes Syndra's ranged threat because Void Stone absorbs her Dark Sphere poke, while Null Sphere provides an instant silence that interrupts her basic burst sequence. Once both reach their ultimate abilities, Syndra loses her safety net; Kassadin can use Riftwalk to blink over her Scatter the Weak stun, turning her primary self-peel tool into a wasted cooldown that leaves her completely defenseless.

Lane etkisi

This dynamic forces Syndra to play defensively and limits her ability to push waves aggressively. Since she cannot safely land Scatter the Weak without risking an immediate counter-all-in, she must hold her displacement tool, giving up mid-lane priority. You can easily control the lane tempo, force her to recall under pressure, and safely scale into a massive threat without bleeding turret plating.

Nasıl oynanır

When trading before level five, throw Null Sphere to absorb Dark Sphere damage and silence her mid-cast. Once you unlock Riftwalk, bait her forward, then blink diagonally to dodge Scatter the Weak. If you misplay and get stunned, immediately activate Nether Blade and Force Pulse to slow her and trade back heavily while her spells are recharging. Never dive her when her Unleashed Power is fully stacked with spheres on the ground.

Tam profil →
Vladimir

Vladimir

scalingsustain Kassadin naturally stifles Vladimir's early poke because *Null Sphere* grants a magic shield that directly absorbs the damage from *Transfusion*. Combined with *Void Stone* providing passive magical protection, you easily neutralize his early-game harass. As the game goes on, your single-target burst from *Riftwalk* and *Nether Blade* scales much harder and faster than his sustained area damage, turning you into an inescapable threat. Detayları gör
Vladimir

Neden

Kassadin naturally stifles Vladimir's early poke because *Null Sphere* grants a magic shield that directly absorbs the damage from *Transfusion*. Combined with *Void Stone* providing passive magical protection, you easily neutralize his early-game harass. As the game goes on, your single-target burst from *Riftwalk* and *Nether Blade* scales much harder and faster than his sustained area damage, turning you into an inescapable threat.

Lane etkisi

This interaction removes Vladimir's usual lane dominance. Every time he attempts to trigger a reinforced *Transfusion*, you can trade back with *Null Sphere* to negate the health deficit. Without the ability to poke you down, his wave control weakens, allowing you to freely stack *Force Pulse* and farm safely. You will reach your item spikes without being forced into awkward, early recalls under your turret.

Nasıl oynanır

Pay close attention to his resource bar; when his *Transfusion* is fully charged, step back or prepare your *Null Sphere* to absorb it. Once you unlock *Riftwalk*, play aggressively when his *Sanguine Pool* is on cooldown. If he uses his pool defensively, wait out the invulnerability, then instantly close the gap with *Riftwalk* followed by *Nether Blade* to burst him down. Never waste your full combo while he can still liquefy.

Tam profil →
Lux

Lux

mobilitypunish_poke Lux relies entirely on landing Light Binding to keep Kassadin at bay and set up her Final Spark burst. Once Kassadin unlocks Riftwalk, this dynamic completely flips. Because Riftwalk is an instantaneous blink, Kassadin can reactively jump over the incoming projectile of Light Binding. Without her root, Lux has no way to peel Kassadin off her, as Prismatic Barrier alone cannot absorb his full magic damage combo. Detayları gör
Lux

Neden

Lux relies entirely on landing Light Binding to keep Kassadin at bay and set up her Final Spark burst. Once Kassadin unlocks Riftwalk, this dynamic completely flips. Because Riftwalk is an instantaneous blink, Kassadin can reactively jump over the incoming projectile of Light Binding. Without her root, Lux has no way to peel Kassadin off her, as Prismatic Barrier alone cannot absorb his full magic damage combo.

Lane etkisi

Before level five, Lux will try to abuse Lucent Singularity and her ranged attacks to trigger Illumination. However, the moment Kassadin gets his ultimate, Lux is forced to play extremely defensively. She cannot step past her caster minions to harass, as missing a single Light Binding invites an immediate lethal dive. This gives Kassadin complete control over the wave state and free rein to roam.

Nasıl oynanır

Walk forward aggressively to bait Lux into throwing Light Binding. The moment she casts it, use Riftwalk diagonally or forward to bypass the projectile, then immediately follow up with Force Pulse to slow her and Nether Blade to shred her mana and health. Keep Null Sphere ready to disrupt her attempts to channel Final Spark or to shield her Lucent Singularity poke. If she holds her root, simply zone her off the farm using your positioning.

Tam profil →
Karma

Karma

scaling_threatearly_pressure Karma's early pressure relies entirely on landing Inner Flame to abuse your melee range. However, her threat evaporates the moment you unlock Riftwalk. Because her damage is tied to this slow-moving projectile, your ultimate gives you the mobility to casually blink over her skillshots. Furthermore, your Void Stone shield easily absorbs her Mantra empowered bursts, turning her poke-heavy laning phase into a scaling victory for you. Detayları gör
Karma

Neden

Karma's early pressure relies entirely on landing Inner Flame to abuse your melee range. However, her threat evaporates the moment you unlock Riftwalk. Because her damage is tied to this slow-moving projectile, your ultimate gives you the mobility to casually blink over her skillshots. Furthermore, your Void Stone shield easily absorbs her Mantra empowered bursts, turning her poke-heavy laning phase into a scaling victory for you.

Lane etkisi

Before level six, Karma will shove waves with Inner Flame and try to pin you under turret. You will lose some early priority and sustain some chip damage, but her inability to execute you without landing Focused Resolve keeps you safe. Once you survive this initial siege, the lane completely flips. Karma can no longer safely step up to clear, fearing your sudden gap-close and burst.

Nasıl oynanır

Cast Null Sphere to trigger your Void Stone shield and absorb the splash damage of her Inner Flame while staying behind your minion wave to block direct hits. Do not contest early priority; let the wave crash and last-hit with Nether Blade. Once you have Riftwalk, bait her Focused Resolve tether, then blink out of its range or forward to trade. If she shields with Inspire, delay your Force Pulse until her speed boost decays.

Tam profil →
Viktor

Viktor

magic_shieldmobility Viktor relies heavily on the zoning of Gravity Field to keep melee threats at bay while poking with Hextech Ray. However, Kassadin completely invalidates this defense. The moment Viktor deploys Gravity Field to stop your approach, you can simply use Riftwalk to blink out of the zone before the stun triggers. Combined with Void Stone's magic shield to absorb Siphon Power's return trade, you effortlessly win brief skirmishes. Detayları gör
Viktor

Neden

Viktor relies heavily on the zoning of Gravity Field to keep melee threats at bay while poking with Hextech Ray. However, Kassadin completely invalidates this defense. The moment Viktor deploys Gravity Field to stop your approach, you can simply use Riftwalk to blink out of the zone before the stun triggers. Combined with Void Stone's magic shield to absorb Siphon Power's return trade, you effortlessly win brief skirmishes.

Lane etkisi

Once you unlock Riftwalk, the dynamic shifts entirely in your favor. Viktor can no longer safely use Hextech Ray to shove waves without exposing himself to a lethal dive. Since his main defensive tool is useless against your mobility, he is forced to play extremely passively under his turret, giving you total freedom to freeze the lane or roam, while delaying his Glorious Evolution stacks by denying him easy farm.

Nasıl oynanır

To execute this, do not initiate with Riftwalk randomly. Walk forward to bait his Siphon Power or Hextech Ray, and use Null Sphere to absorb his initial magic damage. The moment Viktor panics and drops Gravity Field directly on top of himself or you, immediately use Riftwalk to reposition behind him, striking with Nether Blade and Force Pulse. If he holds his stun, simply save your ultimate to disengage safely.

Tam profil →
Kayle

Kayle

scalingburst While both champions want to scale, Kassadin reaches his lethal threshold much faster. Kayle relies on Divine Ascent to become a threat, but your Riftwalk completely bypasses her spacing tools. You can force heavy trades and burst her down before she can react with Divine Judgment. Furthermore, Null Sphere disrupts her ability to trade back effectively with Radiant Blast or heal with Celestial Blessing during your fast engagements. Detayları gör
Kayle

Neden

While both champions want to scale, Kassadin reaches his lethal threshold much faster. Kayle relies on Divine Ascent to become a threat, but your Riftwalk completely bypasses her spacing tools. You can force heavy trades and burst her down before she can react with Divine Judgment. Furthermore, Null Sphere disrupts her ability to trade back effectively with Radiant Blast or heal with Celestial Blessing during your fast engagements.

Lane etkisi

Before level five, Kayle will attempt to poke you with Starfire Spellblade while securing last hits. Once you unlock Riftwalk, the lane dynamic flips entirely in your favor. You dictate when fights happen. Kayle is forced to play defensively near her turret, giving you total control over wave positioning and allowing you to roam freely to assist your jungler while she struggles to stack Divine Ascent safely.

Nasıl oynanır

Mitigate her early Starfire Spellblade harass by timing your Null Sphere to trigger Void Stone's magic shield. Once you reach level five, stack Riftwalk once or twice on your side of the lane before blinking onto her. If she activates Divine Judgment, immediately use Force Pulse to slow her down, walk back to bait out the invulnerability duration, and then execute her with a quick Nether Blade auto-attack reset.

Tam profil →
Zoe

Zoe

mobilitymagic_shield Kassadin holds a massive advantage post-5 because Riftwalk completely dismantles Zoe's offensive sequence. Zoe relies heavily on landing Sleepy Trouble Bubble to set up a long-range Paddle Star!. However, Kassadin's instant blink allows him to reactively dodge the bubble entirely, or quickly reposition behind his minion wave to block the incoming star, while his Void Stone provides a magic shield when trading. Detayları gör
Zoe

Neden

Kassadin holds a massive advantage post-5 because Riftwalk completely dismantles Zoe's offensive sequence. Zoe relies heavily on landing Sleepy Trouble Bubble to set up a long-range Paddle Star!. However, Kassadin's instant blink allows him to reactively dodge the bubble entirely, or quickly reposition behind his minion wave to block the incoming star, while his Void Stone provides a magic shield when trading.

Lane etkisi

Early on, Zoe will try to pressure you under turret with Paddle Star! and More Sparkles!. However, once you unlock Riftwalk, the lane dynamic flips. Zoe can no longer step up to poke or use Portal Jump aggressively because doing so leaves her vulnerable to a counter-all-in. She is forced to play extremely safe, losing mid priority and allowing you to roam freely.

Nasıl oynanır

During the first four levels, stay parallel to your minion wave to ensure Zoe cannot easily angle her Sleepy Trouble Bubble around them. Once you have Riftwalk, do not use it to engage blindly. Keep it ready. If you see her cast Sleepy Trouble Bubble, immediately blink diagonally forward or directly behind a fresh minion. If she uses Portal Jump, buffer Null Sphere to silence her upon her return, preventing her from redirecting Paddle Star!.

Tam profil →
Twisted Fate

Twisted Fate

silencescaling This matchup swings heavily in Kassadin's favor because you hold a direct hard-counter to Twisted Fate's global pressure. The moment Twisted Fate activates Destiny to teleport, you can immediately cancel his channel using the silence from Null Sphere. Since his ultimate relies on a long cast time, your quick reaction completely shuts down his map rotations, leaving him trapped in mid lane where your Riftwalk easily closes the gap. Detayları gör
Twisted Fate

Neden

This matchup swings heavily in Kassadin's favor because you hold a direct hard-counter to Twisted Fate's global pressure. The moment Twisted Fate activates Destiny to teleport, you can immediately cancel his channel using the silence from Null Sphere. Since his ultimate relies on a long cast time, your quick reaction completely shuts down his map rotations, leaving him trapped in mid lane where your Riftwalk easily closes the gap.

Lane etkisi

Early on, Twisted Fate pushes with Wild Cards and Pick a Card, but Void Stone absorbs his magic poke. Once ultimates are unlocked, the dynamic shifts. You do not need to out-shove him; you just need to shadow his movements. If he steps into the fog to channel Destiny, you can chase him down with Riftwalk and cancel it, turning his roam attempts into lost mid lane pressure.

Nasıl oynanır

To execute this, never use Null Sphere to last-hit or poke when Twisted Fate is posturing to roam. Always keep this ability ready. Position yourself slightly closer to his side of the lane, ready to blink forward with Riftwalk if he retreats. If he manages to activate Destiny out of your vision, immediately shove the wave using Force Pulse and Nether Blade to crash your minions and take local plating, punishing his absence on the map.

Tam profil →
Annie

Annie

anti_magescale_check Kassadin's passive Void Stone and the magic shield from Null Sphere completely nullify Annie's burst potential. While Annie relies on stacking Pyromania to stun and execute with Summon: Tibbers, your innate magical defenses absorb her main threat. She cannot burst you down early, ensuring you safely outscale her magic damage output as the game progresses. Detayları gör
Annie

Neden

Kassadin's passive Void Stone and the magic shield from Null Sphere completely nullify Annie's burst potential. While Annie relies on stacking Pyromania to stun and execute with Summon: Tibbers, your innate magical defenses absorb her main threat. She cannot burst you down early, ensuring you safely outscale her magic damage output as the game progresses.

Lane etkisi

Annie is forced to use Disintegrate to farm under tower or harass you, but she can never force you out of lane. You can easily match her wave clear using Force Pulse and Nether Blade. Because she cannot threaten a solo kill even with her stun active, you gain total lane safety, allowing you to freely choose your recall timings and scale without pressure while her tower-taking threat remains minimal.

Nasıl oynanır

Watch Annie's passive bar; when she has four stacks of Pyromania, walk back slightly or buffer her initiation with Null Sphere to absorb the incoming magic damage. Once she wastes her stun or uses Summon: Tibbers, immediately use Riftwalk to jump past the bear and retaliate. If she plays too defensively under her tower, use your superior mobility to roam to side lanes, using your ultimate to bypass wards and secure map-wide advantages while she slowly clears waves.

Tam profil →
Brand

Brand

aggressiontempo Kassadin holds a massive advantage here because Brand relies entirely on landing sequential magic damage abilities to trigger Blaze. By timing your Null Sphere to absorb the impact of Pillar of Flame, you nullify his primary poke. Once you unlock Riftwalk, Brand's highly predictable skillshots like Sear become effortless to dodge, completely stripping the fire mage of his stun potential and leaving him highly vulnerable to your burst. Detayları gör
Brand

Neden

Kassadin holds a massive advantage here because Brand relies entirely on landing sequential magic damage abilities to trigger Blaze. By timing your Null Sphere to absorb the impact of Pillar of Flame, you nullify his primary poke. Once you unlock Riftwalk, Brand's highly predictable skillshots like Sear become effortless to dodge, completely stripping the fire mage of his stun potential and leaving him highly vulnerable to your burst.

Lane etkisi

Before level 5, Brand will aggressively push the wave using Pillar of Flame and Conflagration. You must concede early priority, using Null Sphere to mitigate damage while keeping the wave frozen just outside your turret. This passive start quickly shifts once you have ultimate mobility; Brand can no longer safely step up to clear waves without risking a lethal engage, forcing him to play defensively and lose his push.

Nasıl oynanır

To execute this perfectly, stand slightly away from your own low-health minions to prevent Brand from spreading Blaze via Conflagration. Let him waste Pillar of Flame on the wave, then immediately use Riftwalk forward. Do not use Null Sphere instantly; hold it to reactively absorb his retaliation while using Force Pulse and Nether Blade to chunk his health. If he panics and throws Sear, use a short-range Riftwalk sideways to bypass the stun and secure the kill.

Tam profil →
Aurora

Aurora

scalingmagic_shield As a magic-damage assassin, Aurora relies on landing Twofold Hex and popping her Spirit Abjuration passive for her trading pattern. However, Kassadin's Void Stone provides a constant magic shield whenever she casts nearby, while a well-timed Null Sphere absorbs her burst and silences her recast. This direct mitigation neuters her early poke, rendering her ranged advantage useless. Detayları gör
Aurora

Neden

As a magic-damage assassin, Aurora relies on landing Twofold Hex and popping her Spirit Abjuration passive for her trading pattern. However, Kassadin's Void Stone provides a constant magic shield whenever she casts nearby, while a well-timed Null Sphere absorbs her burst and silences her recast. This direct mitigation neuters her early poke, rendering her ranged advantage useless.

Lane etkisi

Because Aurora cannot easily chunk your health bar, you dictate the wave's positioning. She is forced to use Twofold Hex on minions rather than on you, allowing you to slow-push and crash massive waves. This denies her the safety of Across the Veil and forces her to burn mana under tower. You secure free recall timings while keeping her pinned and unable to roam.

Nasıl oynanır

Walk up aggressively when Null Sphere is available to contest her farm. If she tries to disengage using The Weirding or hide with Across the Veil, do not chase blindly; instead, immediately direct your Force Pulse to clear the remaining minions and crash the wave. Should she trap you inside Between Worlds, use Riftwalk to blink to the edge, absorbing her desperate burst with your magic shields while keeping her cornered.

Tam profil →
Ziggs

Ziggs

mobilitypunish_poke Before unlocking Riftwalk, you must absorb Ziggs's constant Bouncing Bomb and Short Fuse poke using the shield from Void Stone. Once you reach level 5, the dynamic flips entirely. Ziggs relies on Satchel Charge to escape, but its slow deployment cannot match the instant blink of Riftwalk. Without reliable self-peel, his squishy nature makes him defenseless against your sudden burst combos. Detayları gör
Ziggs

Neden

Before unlocking Riftwalk, you must absorb Ziggs's constant Bouncing Bomb and Short Fuse poke using the shield from Void Stone. Once you reach level 5, the dynamic flips entirely. Ziggs relies on Satchel Charge to escape, but its slow deployment cannot match the instant blink of Riftwalk. Without reliable self-peel, his squishy nature makes him defenseless against your sudden burst combos.

Lane etkisi

Early on, Ziggs will push you under tower with Bouncing Bomb and Hexplosive Minefield, forcing you to farm passively with Nether Blade. However, after your ultimate spike, Ziggs can no longer safely step past the river. Any attempt by him to harass you or execute your turret with Satchel Charge exposes him to a lethal counter-engage, completely freezing his offensive pressure and locking him to his own tower.

Nasıl oynanır

Survive the early levels by shielding Bouncing Bomb with Null Sphere and matching his wave clear using Force Pulse. The moment you hit level 5, look for an immediate all-in. Bait out his Satchel Charge by walking forward, then use Riftwalk to bypass the explosion and close the gap. If he retreats under turret, stack your Riftwalk in the river before jumping in, ensuring maximum damage to burst him down before he can react.

Tam profil →
Diana

Diana

magic_shieldscaling Diana thrives on chunking opponents with Crescent Strike, but your kit completely neutralizes her AP threat. Your Void Stone passive reduces her overall magic damage, while Null Sphere grants you a magic shield that effortlessly absorbs her poke. Because Diana is forced to play in melee range to trigger Moonsilver Blade, she cannot avoid your trading tools, allowing you to easily shrug off her burst while preparing your massive mid-game scaling advantage. Detayları gör
Diana

Neden

Diana thrives on chunking opponents with Crescent Strike, but your kit completely neutralizes her AP threat. Your Void Stone passive reduces her overall magic damage, while Null Sphere grants you a magic shield that effortlessly absorbs her poke. Because Diana is forced to play in melee range to trigger Moonsilver Blade, she cannot avoid your trading tools, allowing you to easily shrug off her burst while preparing your massive mid-game scaling advantage.

Lane etkisi

This matchup shifts the early pressure away from Diana's usual aggressive lane dominance. She cannot establish a health lead because her Pale Cascade and Lunar Rush trades are soaked by your magic shields. Consequently, she cannot force you to recall early, leaving you free to gather resources. Once you reach level five, the scaling gap widens instantly, as your roam potential and skirmishing strength quickly outclass her reliance on Moonfall.

Nasıl oynanır

React immediately to her Crescent Strike by casting Null Sphere to absorb the incoming magic damage. When she attempts to dive you with Lunar Rush, activate Nether Blade to reset your auto-attacks and punish her close-range trade. Save Riftwalk as a defensive tool during all-ins; do not use it aggressively until she has wasted Moonfall, allowing you to easily blink out of her ultimate's pull radius before counter-attacking with a fully charged Force Pulse.

Tam profil →
Veigar

Veigar

mobilityburst_mitigation This matchup swings heavily in your favor once you reach level five because of how your ultimate interacts with Veigar's primary defensive tool. While Event Horizon usually halts any dash and stuns attackers, Riftwalk is an instantaneous blink. This allows you to bypass the cage's perimeter entirely without getting stunned, rendering his safety zone completely useless and leaving him exposed to your full burst. Detayları gör
Veigar

Neden

This matchup swings heavily in your favor once you reach level five because of how your ultimate interacts with Veigar's primary defensive tool. While Event Horizon usually halts any dash and stuns attackers, Riftwalk is an instantaneous blink. This allows you to bypass the cage's perimeter entirely without getting stunned, rendering his safety zone completely useless and leaving him exposed to your full burst.

Lane etkisi

Before unlocking your blink, use Null Sphere to absorb poke from Baleful Strike and mitigate trade damage with Void Stone. Once you have your ultimate, Veigar loses all lane pressure. He cannot walk up to stack Phenomenal Evil Power or clear waves safely. You can freeze the wave or shove him under tower at will, forcing him to play extremely far back or risk dying to an easy dive.

Nasıl oynanır

Position yourself aggressively just outside his auto-attack range to bait out Event Horizon. The moment he drops the cage, do not panic or try to walk out of it; instead, immediately use Riftwalk to blink directly onto him. Follow up with Force Pulse to slow his escape, then reset your auto-attack with Nether Blade to chunk his health. Keep Null Sphere to silence him if he tries to channel Primordial Burst.

Tam profil →
Aurelion Sol

Aurelion Sol

silence_interruptmobility_gap Aurelion Sol's entire game plan relies on channeling Breath of Light to farm and trade. As Kassadin, you completely shut this down because Null Sphere applies a silence that instantly interrupts his channel. Without his main source of DPS, Aurelion Sol is left entirely defenseless against your follow-up, turning his main trading tool into a massive liability whenever you are in range. Detayları gör
Aurelion Sol

Neden

Aurelion Sol's entire game plan relies on channeling Breath of Light to farm and trade. As Kassadin, you completely shut this down because Null Sphere applies a silence that instantly interrupts his channel. Without his main source of DPS, Aurelion Sol is left entirely defenseless against your follow-up, turning his main trading tool into a massive liability whenever you are in range.

Lane etkisi

This interaction gives you absolute control over the wave state. Because Aurelion Sol cannot safely channel Breath of Light without getting interrupted, he cannot match your wave clear or push you under tower. You can easily freeze the lane near your turret, forcing him to overextend into dangerous territory or lose precious Stardust stacks from Cosmic Creator while you safely scale.

Nasıl oynanır

Never throw Null Sphere purely for poke; always hold it until Aurelion Sol begins channeling Breath of Light. When he attempts to clear a wave or start a trade, immediately disrupt him with Null Sphere, then close the gap using Nether Blade and Force Pulse to punish his cooldowns. If he attempts to escape using Astral Flight while channeling his breath, your silence will immediately stop his damage, leaving him stranded and vulnerable to an all-in with Riftwalk.

Tam profil →
Vel'Koz

Vel'Koz

mobilitypunish_poke Vel'Koz's entire threat relies on hitting slow, highly predictable linear skillshots to setup his disintegrating combos. Once you unlock Riftwalk, his geometric zoning completely falls apart. You can instantly blink over or around his split-beams and knockups. Even if he tries to clip you, casting Null Sphere or Force Pulse triggers Void Stone, granting you a magic shield that nullifies his remaining poke. Detayları gör
Vel'Koz

Neden

Vel'Koz's entire threat relies on hitting slow, highly predictable linear skillshots to setup his disintegrating combos. Once you unlock Riftwalk, his geometric zoning completely falls apart. You can instantly blink over or around his split-beams and knockups. Even if he tries to clip you, casting Null Sphere or Force Pulse triggers Void Stone, granting you a magic shield that nullifies his remaining poke.

Lane etkisi

Before you get Riftwalk, Vel'Koz will use his range to shove the waves, forcing you to farm under turret using Nether Blade to secure last hits. However, the moment you unlock your ultimate, the dynamic flips entirely. Vel'Koz cannot safely step past the midway point of the lane, as any attempt to clear waves leaves him vulnerable to an immediate forward blink and a heavy slow from Force Pulse.

Nasıl oynanır

Position yourself slightly off-center from the minion wave to force Vel'Koz to choose between aiming at you or pushing. Once he commits to a straight-line spell, immediately use Riftwalk diagonally forward to bypass the projectile, then follow up with Null Sphere and Nether Blade to chunk him. If he tries to channel his ultimate, blink directly behind him; his slow turn rate cannot keep up with your mobility, turning his biggest damage tool into a free kill for you.

Tam profil →
Katarina

Katarina

silencemobility Kassadin completely shuts down Katarina's offensive pressure because Null Sphere instantly cancels the channel of her Death Lotus. Since Katarina relies on this ultimate to secure resets and blow up fights, having a targeted silence that immediately stops her damage output strips her of her primary win condition. Even in short skirmishes, Void Stone shields you from her Bouncing Blade poke, making trades mathematically lopsided in your favor. Detayları gör
Katarina

Neden

Kassadin completely shuts down Katarina's offensive pressure because Null Sphere instantly cancels the channel of her Death Lotus. Since Katarina relies on this ultimate to secure resets and blow up fights, having a targeted silence that immediately stops her damage output strips her of her primary win condition. Even in short skirmishes, Void Stone shields you from her Bouncing Blade poke, making trades mathematically lopsided in your favor.

Lane etkisi

This dynamic forces Katarina to play defensively and prevents her from raw-forcing skirmishes. She cannot use Shunpo to aggressively jump onto you without risking a devastating counter-trade. Because she cannot easily channel her ultimate in your presence, her roaming threat is heavily mitigated, allowing you to match her rotations or comfortably scale. You dictate the lane's pace, forcing her to choose between losing farm or taking bad trades.

Nasıl oynanır

Your absolute golden rule is to hold Null Sphere whenever Katarina has her ultimate available. Never use it just to poke or last-hit if she is looking to engage. Stand near your own minion wave to bait her Shunpo onto a dagger from Bouncing Blade, then immediately respond with Nether Blade and Force Pulse. If she panics and channels Death Lotus, instantly shut it down with Null Sphere to secure an easy kill.

Tam profil →

Diğer eşleşmeler

Items to Counter Kassadin

Buy these items to reduce this champion's effectiveness in your games.

Stasis Enchant
Stasis Enchant
Crown of the Shattered Queen

Bu şampiyon nasıl counterlanır

Counter açısı

Kassadin’e karşı koymak sadece şampiyonlarla değil, aynı zamanda koridor dinamikleri ve tempo ile de mümkündür. Zorlu eşleşmelerde önemli olan sadece hasar vermek değil, onun 5. seviyeye ulaşmasını engellemek ya da onu sürekli baskı altında tutmaktır. Kassadin’i alt eden şey sadece ani hasar değil, erken baskı ile iniş anında güvenilir kontrolün birleşimidir. Onun karşı önlemlerini anlamak, skalasının nasıl bozulduğunu anlamak demektir.

Patch bağlamı

Kassadin’in karşı stratejileri, erken oyundaki araç eksikliğinden ve Riftwalk’a olan bağımlılığından yararlanarak işler. O tepki veremeden önce sürekli olarak ona hasar verebilen veya ani patlama hasarı uygulayabilen şampiyonlar, onun koridoru dengelemesini engeller. Ayrıca, anında kitle kontrolü yeteneklerine sahip şampiyonlar, takım savaşlarına girişlerini doğrudan cezalandırır. Bu yamada, agresif mid seçimlerinin yaygınlaşması, onun erken dönemdeki savunmasızlığını artırmaktadır.

Hızlı okuma

  • Agresif erken oyun dönemlerine karşı mücadeleler.
  • Her Riftwalk girişinde cezalandırılır.
  • Anlam kazanması için zamana ihtiyaç var.

Counter arketipleri

Kontrollü bir başlangıç

Bu şampiyonlar, hızlı hasar ve anlık kontrolü bir araya getirerek Kassadin’in karşılıklı çatışmalardan avantaj elde etmesini veya düzgün bir şekilde sıfırlanmasını engeller. 5. seviyeye ulaşana kadar bu tehditlerden kaçınamaz; 5. seviyeden sonra bile anında kilitlenebileceği için Riftwalk ile giriş yapması riskli hale gelir. Bu baskı, seçeneklerini büyük ölçüde sınırlar ve onu uzun süreli pasifliğe zorlar.

Şampiyon nasıl uyum sağlamalı. Oyunun başlarında son derece savunmacı bir oyun sergileyin, hayatta kalmaya öncelik verin ve doğrudan çatışmalardan kaçının. Fırsat yaratmak yerine düşmanın hatalarını bekleyin.

Sürekli taciz ve koridor baskısı

Bu şampiyonlar, Kassadin’i sürekli baskı altında tutarak, onun düzgün bir şekilde kaynak toplamasına ve manasını yönetmesine engel oluyor. Her son vuruş denemesi riskli hale geliyor ve onu geri çekilmeye ya da kaynak kaybetmeye zorluyor. Bu sürekli baskı, onun güçlenmelerini geciktiriyor ve telafi edilmesi zor bir tempo farkı yaratıyor.

Şampiyon nasıl uyum sağlamalı. Sağlığı korumak için çiftliği kaybetmeyi göze alın ve sıfırlama zamanlamalarıyla biraz oynayın.

Saldırgan gezici suikastçılar

Bu şampiyonlar, Kassadin’in hareketlerine ayak uydurabilir veya bunları önceden tahmin edebilir, böylece onun hareket kabiliyeti avantajını azaltabilirler. Kassadin hazır olmadan onu all-in yapmaya zorlayabilir veya Riftwalk sonrası konumlandırma hatalarını cezalandırabilirler. Düello zamanlamaya dayalı bir hal alır, ancak oyun başlangıcında mid karşısında üstünlük onlardadır.

Şampiyon nasıl uyum sağlamalı. Teke tek çatışmalardan kaçının ve görüş alanınızı ve takım arkadaşlarınızı iyi değerlendirin.

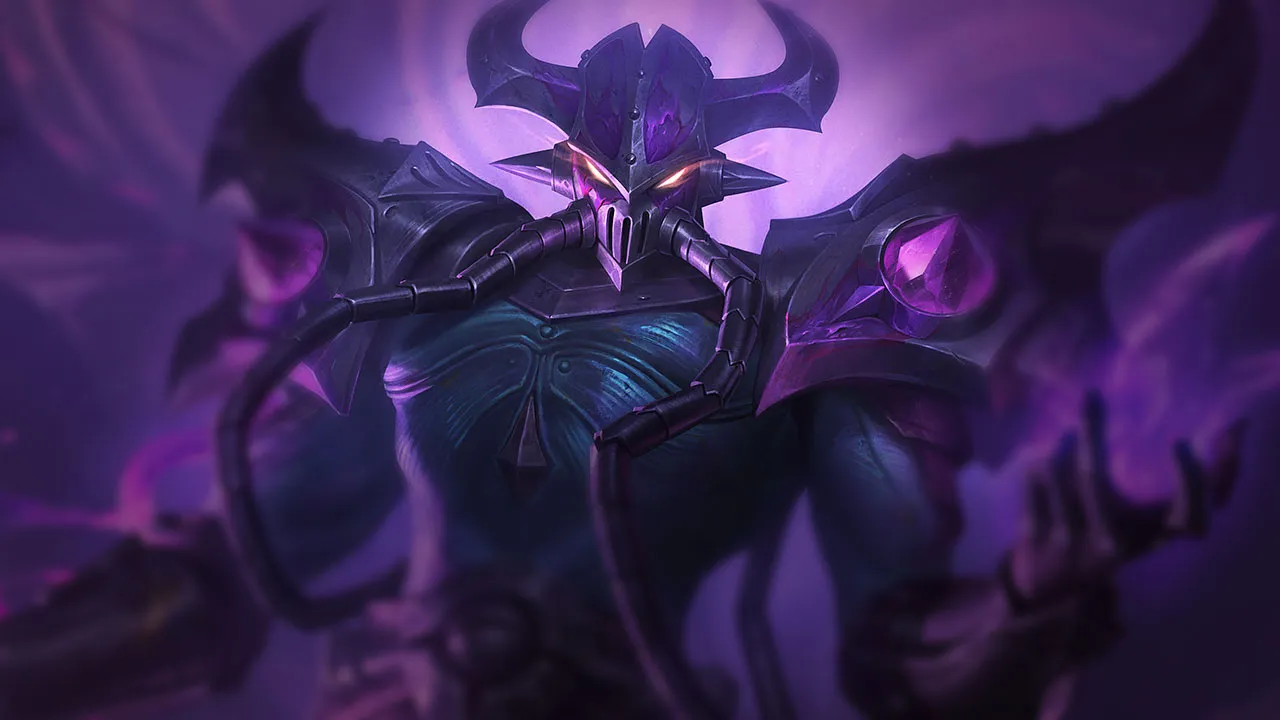
Öncelikli matchuplar

Annie

Annie, erken baskı ile anında kontrolü bir araya getirdiği için en zorlu eşleşmelerden biridir. İlk seviyelerden itibaren Kassadin’i cezalandırabilir ve mid aşamasına kadar sürekli bir tehdit olarak kalır. Sorun sadece verdiği hasar değil, aynı zamanda rakibin sorunsuz bir şekilde Riftwalk’a girmesini engelleme yeteneğidir.

Ona karşı yaygın hatalar

Ona karşı yaygın hatalar

  • Kassadin’e karşı erken dönemde uygulanan baskıyı hafife almak.
  • Giriş anında kalabalık kontrolünü saklamıyor.
  • Onun serbestçe tırmanmasına izin vermek.
  • Maçın sonlarında ona karşı uzun süren mücadelelere girmeye zorlamak.
  • Onun smaç zamanlamalarını göz ardı ederek.

Koç notları

  • 5. seviyeden önce Kassadin’i yenmek zorunludur.
  • Zamanlaması iyi ayarlanmış tek bir CC bile onu öldürmeye yetebilir.

FAQ

Kassadin neden oyunun erken aşamalarında bu kadar kolay cezalandırılabiliyor?

5. seviyeye ulaşana kadar Kassadin’in güvenilir bir hareket kabiliyeti yoktur. Farm yapmak için yeteneklerine güvenmek zorundadır ve etkili bir şekilde karşılık verebilecek kadar hasara sahip değildir. Bu da onu agresif çatışmalar ve tekrarlanan gankler için ideal bir hedef haline getirir.

Takım savaşlarında Kassadin’e nasıl karşı koyarsınız?

İşin püf noktası, kalabalık kontrol yeteneklerini onun sahneye çıkışı için saklamaktır. Kassadin, taşıyıcılara ulaşmak için Riftwalk’a güveniyor. O sahneye çıktığı anda onu sersemletir veya sabitlerseniz, savaşta yaratacağı etkiyi tamamen ortadan kaldırmış olursunuz.

Kassadin, başlangıçta zayıf olmasına rağmen neden tehlikeli hale geliyor?

Güç seviyesi, yetenek seti ve eşyalarına bağlıdır. Geride kalsa bile, güç zirvesine ulaştığında geri dönebilir. Hareket kabiliyeti sayesinde çatışmaları seçebilir ve rakiplerin hatalarını cezalandırabilir.

Öncelikle Kassadin’e odaklanmalı mısınız?

İlle de öyle değil. Önemli olan, onun girişini kontrol altına almaktır. Öncelikli hedeflere erişemezse, etkisini önemli ölçüde azalır.




















































