Ağustos 2026 · Patch 7.2d
Bruiser · TOP

Urgot Wild Rift Counter Rehberi

Urgot, zırhını bypass eden magic damage kompozisyonlarına karşı zorlanır. Uzun menzilde kite yapabilen veya zincirinden dodge atabilen şampiyonlar onun infazlarını sınırlar. Yüksek mobility sahibi kompozisyonlar, hedefleri menzilinde tutmakta zorlandığı için onun etkisini azaltır.

★ TOP Tier A
HASAR
UTIL
TANK
DIFF
Win 50.3% #55 · ↑11pt
Pick 3.6% #17
Ban 1.2% #81

Urgot Wild Rift Counter Rehberi ★ Counter Sheet

Hard Counter

7

Bu şampiyonlar, seninkini doğrudan geride bırakan bir build ve oynanış tarzına sahip, bu da lane kontrolünü ve farmı son derece zorlaştırabilir. Yetenekleri temel güçlerini etkisiz hale getirebilir ya da her zamanki planını oynamaya çalıştığın anda seni cezalandırabilir. Bu matchuplarda amaç genellikle hataları en aza indirmek ve doğrudan çatışmanın dışında çözümler bulmaktır.

Malphite

Malphite

armor_stackattack_speed_slow Malphite's innate armor scaling completely neutralizes your damage output. Purge fires rapid, low-damage ticks that are heavily mitigated by high armor values, making your primary offensive tool feel useless. To make matters worse, when you try to engage, Malphite's Ground Slam cripples your attack speed, directly disabling your DPS flow. His Granite Shield also constantly absorbs your Corrosive Charge poke, preventing you from chipping away his health pool. Detayları gör
Malphite

Neden

Malphite's innate armor scaling completely neutralizes your damage output. Purge fires rapid, low-damage ticks that are heavily mitigated by high armor values, making your primary offensive tool feel useless. To make matters worse, when you try to engage, Malphite's Ground Slam cripples your attack speed, directly disabling your DPS flow. His Granite Shield also constantly absorbs your Corrosive Charge poke, preventing you from chipping away his health pool.

Lane etkisi

You cannot realistically threaten Malphite with a solo kill, forcing you into a defensive farming role. Whenever you try to lock him down with Disdain, he can easily absorb the trade and steal your movement speed with Seismic Shard to disengage or chase you down. This means you lose control of the wave priority, leaving you vulnerable to dives when he combines Thunderclap with Unstoppable Force under your tower.

Nasıl oynanır

Shift your entire strategy toward surviving and scaling. Instead of rushing offensive raw damage, prioritize buying defensive armor-penetration or magic-resistance options to survive his poke. Keep Disdain strictly as a defensive tool to shield against Seismic Shard damage or to buffer against his Unstoppable Force knock-up. Only use Fear Beyond Death if your jungler ganks, aiming to execute him once his Granite Shield has already been broken by a physical poke.

Tam profil →
Vayne

Vayne

kite_hazardtrue_damage This matchup is a nightmare because Vayne has all the tools to deny your close-range threat. Whenever you attempt to close the gap with Disdain, she can easily reactively dodge with Tumble or push you away using Condemn. Once you are stranded without your shield and dash, her Silver Bolts will shred through your high health pool, while her passive Night Hunter ensures you can never escape her pursuit. Detayları gör
Vayne

Neden

This matchup is a nightmare because Vayne has all the tools to deny your close-range threat. Whenever you attempt to close the gap with Disdain, she can easily reactively dodge with Tumble or push you away using Condemn. Once you are stranded without your shield and dash, her Silver Bolts will shred through your high health pool, while her passive Night Hunter ensures you can never escape her pursuit.

Lane etkisi

You are forced into a defensive posture from the very first wave. Vayne will constantly poke you with Tumble-empowered basic attacks under your own tower, making it extremely risky to trigger your Echoing Flames passives on the minions. If you walk up to secure cs, you risk losing half your health to Silver Bolts procs. This constant pressure limits your recall options and bleeds your tower plating.

Nasıl oynanır

Your survival depends on extreme positioning discipline. Never initiate with Disdain unless you see her waste Tumble or Condemn first. Instead, use Corrosive Charge from maximum range to secure dying minions and slow her down to prevent aggressive chasing. If she missteps, only trade using Purge while retreating toward your bushes to break her vision and stop her basic attacks. If she freezes the wave near her tower, abandon the farm and soak experience from safety.

Tam profil →
Olaf

Olaf

anti_ccall_in The lane is fundamentally locked because Olaf has a direct, absolute counter to your ultimate. When you fire Fear Beyond Death to execute him, he can simply activate Ragnarok to completely cleanse the suppression and negate the chains. Without your execution threat, Olaf's Berserker Rage and Vicious Strikes allow him to easily out-heal and out-dps your Purge in any prolonged duel. Detayları gör
Olaf

Neden

The lane is fundamentally locked because Olaf has a direct, absolute counter to your ultimate. When you fire Fear Beyond Death to execute him, he can simply activate Ragnarok to completely cleanse the suppression and negate the chains. Without your execution threat, Olaf's Berserker Rage and Vicious Strikes allow him to easily out-heal and out-dps your Purge in any prolonged duel.

Lane etkisi

You cannot contest early waves safely. If Olaf lands Undertow, he can run you down, using Reckless Swing for true damage while bypassing your Disdain shield. Since you cannot reliably execute him post-level five, you lose all kill pressure. This forces you to play defensively under your turret, sacrificing priority and letting him roam or secure objectives freely while you struggle to clear waves with Purge.

Nasıl oynanır

Your only path to survival is to bait out Ragnarok before committing. Never fire Fear Beyond Death while his ultimate is available or active; instead, use Corrosive Charge to disengage from his Undertow chases. Hold Disdain solely as an escape tool to dash backward when he activates Ragnarok. Only attempt a trade when his ultimate is on cooldown, relying on Echoing Flames proc rotations to chip his health while avoiding extended all-ins.

Tam profil →
Teemo

Teemo

kiteblind_timing Teemo completely shuts down your offensive threat because Blinding Dart acts as a hard counter to your Purge. When you activate your rapid-fire machine gun, a single blinding dart makes every single tick of damage miss, completely neutralizing your DPS. This leaves you entirely defenseless against his Toxic Shot poke, as you cannot trade back during his blind duration. Detayları gör
Teemo

Neden

Teemo completely shuts down your offensive threat because Blinding Dart acts as a hard counter to your Purge. When you activate your rapid-fire machine gun, a single blinding dart makes every single tick of damage miss, completely neutralizing your DPS. This leaves you entirely defenseless against his Toxic Shot poke, as you cannot trade back during his blind duration.

Lane etkisi

This interaction forces you into a highly defensive posture from level one. You cannot walk up to trigger Echoing Flames on the wave without taking heavy magic damage. If you try to force an engage with Disdain, Teemo will simply use Move Quick to kite backward, blinding you mid-dash and forcing you to walk over his Noxious Trap. You will constantly be pushed under your turret, losing plating.

Nasıl oynanır

To survive, you must bait out Blinding Dart before committing to any trade. Use Corrosive Charge from a distance to slow him down and discourage his aggressive positioning. Never activate Purge while the blind icon is above your head; instead, shield his initial burst with Disdain's shield, wait out the duration of the blind, and only then unleash your rapid-fire attacks. If you get caught, retreat immediately to avoid stepping on a hidden Noxious Trap.

Tam profil →
Poppy

Poppy

anti_dashtank_matchup This matchup is dictated by how Poppy's protective barrier interacts with your primary engage. Whenever you attempt to close the distance, her barrier completely blocks Disdain, grounding you on the spot. Without the flip, you cannot maneuver around her to trigger the Echoing Flames shotgun knees on her backside, leaving your damage output heavily crippled. Detayları gör
Poppy

Neden

This matchup is dictated by how Poppy's protective barrier interacts with your primary engage. Whenever you attempt to close the distance, her barrier completely blocks Disdain, grounding you on the spot. Without the flip, you cannot maneuver around her to trigger the Echoing Flames shotgun knees on her backside, leaving your damage output heavily crippled.

Lane etkisi

Because you cannot reliably land Disdain, you lose all kill pressure and must concede wave priority. Poppy can easily zone you away from the minions, forcing you to farm from a safe distance using Corrosive Charge. Trying to force trades through her barrier will cost you massive health, leading to early recalls and lost turret plates.

Nasıl oynanır

Your survival hinges on baiting out her barrier before using your dash. Stay near the center of the lane to avoid her wall-slam, and use Corrosive Charge to poke. Never activate Purge or Disdain while her golden aura is active. If she misplays and uses it, you have a twenty-second window to fight. If she catches you, fire Fear Beyond Death to slow her and walk away.

Tam profil →
Shen

Shen

block_mechanicall_in_denial The core of this matchup lies in how Spirit's Refuge completely counters your Purge. Urgot relies on the rapid-fire basic attacks of Purge to trigger Echoing Flames and shred his target. However, Shen's Spirit's Refuge creates a protective zone that blocks all basic attacks. Since your main damage source is classified as basic attacks, Shen can reactively nullify your entire offensive window while trading back with Twilight Assault. Detayları gör
Shen

Neden

The core of this matchup lies in how Spirit's Refuge completely counters your Purge. Urgot relies on the rapid-fire basic attacks of Purge to trigger Echoing Flames and shred his target. However, Shen's Spirit's Refuge creates a protective zone that blocks all basic attacks. Since your main damage source is classified as basic attacks, Shen can reactively nullify your entire offensive window while trading back with Twilight Assault.

Lane etkisi

This interaction strips away your trading pressure and wave control. You cannot safely engage with Disdain because if you flip him, Shen simply drops Spirit's Refuge at his feet, neutralizing your follow-up Purge completely. This leaves you vulnerable to his counter-attacks and forced under tower. Once Shen reaches level five, his Stand United grants him global map presence while your slow tower-taking speed fails to punish his rotations.

Nasıl oynanır

Your survival hinges on baiting out Spirit's Refuge before committing your damage. Use Corrosive Charge from a distance to poke him down and only activate Purge once his defensive zone has expired. If Shen misses his Shadow Dash, use his temporary lack of mobility to circle him and trigger your Echoing Flames. Always hold Disdain when he has ultimate available to immediately interrupt his Stand United channel.

Tam profil →
Jax

Jax

hard_counterall_in Jax's Counter Strike completely neutralizes Urgot's primary source of damage by blocking every single rapid-fire tick of Purge. Because Purge attacks at an extremely high frequency, you end up feeding Jax's dodge mechanic instantly, maximizing the damage of his stun recast. Without your Purge DPS, you cannot trigger your Echoing Flames passive effectively, turning what should be your strongest trade tool into your own undoing. Detayları gör
Jax

Neden

Jax's Counter Strike completely neutralizes Urgot's primary source of damage by blocking every single rapid-fire tick of Purge. Because Purge attacks at an extremely high frequency, you end up feeding Jax's dodge mechanic instantly, maximizing the damage of his stun recast. Without your Purge DPS, you cannot trigger your Echoing Flames passive effectively, turning what should be your strongest trade tool into your own undoing.

Lane etkisi

Every wave becomes highly tense because Jax can use Leap Strike to jump onto you when your Disdain is on cooldown. If you fight back with Purge during his Counter Strike, you lose the trade immediately and get stunned, leaving you vulnerable to his Empower-enhanced attacks. This forces you under turret, sacrificing early wave control and letting Jax safely stack his Relentless Assault.

Nasıl oynanır

To survive, you must bait out Counter Strike without activating Purge. If Jax activates his defensive helicopter spin, immediately stop attacking and prepare to buffer his stun with Disdain. Timing Disdain right as his stun triggers throws him behind you, preventing him from following up with his Grandmaster-at-Arms passive prods. Only initiate trades with Corrosive Charge to slow him from a distance, keeping your distance until his main defensive tool is on cooldown.

Tam profil →

Dezavantajlı

15

Bu şampiyonlar, matchup'ı tamamen oynanmaz hale getirmeden genellikle çatışmada avantaj sağlayan araçlara sahiptir. Daha fazla menzilleri, senin saldırılarını daha iyi karşılama kapasiteleri veya engage'lerine karşılık verecek daha fazla yolları olabilir. Yaklaşımını buna göre uyarlaman ve dövüşü kabul edeceğin anları dikkatle seçmen gerekir.

Akali

Akali

shroud_playmobility_advantage The core of this matchup lies in how Akali's Twilight Shroud completely shuts down your primary damage. When she drops her smoke screen, the automatic targeting of Purge is broken, leaving you unable to lock onto her while she weaves in and out with Assassin's Mark. Your Disdain is also highly predictable, making it easy for her to dodge with Shuriken Flip and retaliate. Detayları gör
Akali

Neden

The core of this matchup lies in how Akali's Twilight Shroud completely shuts down your primary damage. When she drops her smoke screen, the automatic targeting of Purge is broken, leaving you unable to lock onto her while she weaves in and out with Assassin's Mark. Your Disdain is also highly predictable, making it easy for her to dodge with Shuriken Flip and retaliate.

Lane etkisi

Because you cannot consistently trade damage when her shroud is up, Akali dictates the wave's tempo. She can easily poke you down with Five Point Strike whenever you step up to trigger Echoing Flames on minions. If you lose too much health before level five, her Perfect Execution becomes an unavoidable dive threat, forcing you into early, disadvantageous recalls that cost you plate gold.

Nasıl oynanır

To survive, you must position defensively near your own tower, keeping Disdain strictly as a defensive tool to buffer her Shuriken Flip engage rather than using it to initiate. Only activate Purge after she has wasted her Twilight Shroud, or use Corrosive Charge to scout her location inside the smoke. If she commits her ultimate, Perfect Execution, wait out the first dash before attempting to land Fear Beyond Death to turn the fight.

Tam profil →
Irelia

Irelia

kite_potentialall_in Irelia's constant repositioning with Bladesurge directly counters your passive. Because she can dash through you to secure low-health minions, she constantly shifts her angle, making it incredibly difficult to trigger multiple Echoing Flames shotgun legs during trades. Additionally, her mobility makes landing Corrosive Charge or Disdain highly telegraphed, allowing her to easily dodge your setup. Detayları gör
Irelia

Neden

Irelia's constant repositioning with Bladesurge directly counters your passive. Because she can dash through you to secure low-health minions, she constantly shifts her angle, making it incredibly difficult to trigger multiple Echoing Flames shotgun legs during trades. Additionally, her mobility makes landing Corrosive Charge or Disdain highly telegraphed, allowing her to easily dodge your setup.

Lane etkisi

You cannot safely contest the wave when Irelia has minions to dash to. If you lock onto her with Purge, she can utilize Bladesurge to dance around you, baiting your shield and leaving you vulnerable under your own tower. Missing a single Disdain allows her to lock you down with Flawless Duet, forcing an unfavorable recall or yielding plates before you can build any pressure.

Nasıl oynanır

Position yourself away from low-health allied minions to deny Irelia easy Bladesurge resets right next to you. Never initiate trades with Disdain; instead, hold it as a defensive tool to disrupt her dash when she commits to an all-in. Wait for her to waste Defiant Dance before casting Fear Beyond Death, as her damage reduction can easily block your execution threshold. If she freezes, rely on Corrosive Charge to farm safely from a distance.

Tam profil →
Ambessa

Ambessa

shield_timingdodge_reliance This matchup hinges entirely on how Ambessa responds to your main engage. Whenever you attempt to dash forward with Disdain, she can easily activate Repudiation to absorb the impact, nullify your flip's crowd control, and deny your shield. Left exposed in melee range without your displacement, you become an easy target for her Cunning Sweep slash and slam, allowing her to easily out-trade you. Detayları gör
Ambessa

Neden

This matchup hinges entirely on how Ambessa responds to your main engage. Whenever you attempt to dash forward with Disdain, she can easily activate Repudiation to absorb the impact, nullify your flip's crowd control, and deny your shield. Left exposed in melee range without your displacement, you become an easy target for her Cunning Sweep slash and slam, allowing her to easily out-trade you.

Lane etkisi

Because your primary defensive tool is so easily neutralized, you cannot safely contest early waves. Your passive Echoing Flames naturally pushes the minion wave, leaving you overextended. If Ambessa freezes the wave near her turret, any attempt to break it with Purge exposes you to a deadly chase where her Drakehound's Step lets her dance around your shotgun legs, forcing early recalls or dive setups.

Nasıl oynanır

To survive, you must play defensively and strictly hold Disdain as a disengage tool rather than an offensive opener. Use Corrosive Charge from a safe distance to slow her down and farm safely, forcing her to burn her energy. If she wastes Repudiation aggressively, you have a brief window to fight back using Purge. Finally, never fire Fear Beyond Death unless her spell-blocking shield is completely on cooldown, ensuring your execution connects.

Tam profil →
Fiora

Fiora

parry_timingdodge_skillshot This lane is dictated by a dangerous psychological game around your Disdain. Since the dash has a highly visible windup, Fiora can easily react with Riposte. If she parries the flip, the resulting stun leaves you completely defenseless, giving her the perfect opportunity to activate Grand Challenge and strike all four vitals from Duelist's Dance with Lunge before you can recover. Detayları gör
Fiora

Neden

This lane is dictated by a dangerous psychological game around your Disdain. Since the dash has a highly visible windup, Fiora can easily react with Riposte. If she parries the flip, the resulting stun leaves you completely defenseless, giving her the perfect opportunity to activate Grand Challenge and strike all four vitals from Duelist's Dance with Lunge before you can recover.

Lane etkisi

Because Fiora can punish your primary engage tool so heavily, you lose the freedom to contest waves actively. Walking up to use Echoing Flames on minions exposes you to Lunge poke. Trades are heavily slanted in her favor; if you try to retaliate with Purge, she can simply slow your attack speed with Riposte. This keeps you pinned under your turret, bleeding plates while trying to farm.

Nasıl oynanır

To survive, you must play defensively near your tower and prioritize farming. Never use Disdain aggressively; hold it exclusively to escape or to flip her only after she has prematurely wasted Riposte. Position your back against walls to deny her Grand Challenge vitals when she ultimates. Use Corrosive Charge from a safe distance to slow her down, and only trigger Purge when she has committed her Lunge elsewhere.

Tam profil →
Tryndamere

Tryndamere

execute_denialall_in The dynamic of this lane hinges entirely on how their ultimates collide. While Urgot relies on Fear Beyond Death to execute low-health targets, Tryndamere can cast Undying Rage even while suppressed. This completely negates your ultimate's grinding phase, leaving you vulnerable after wasting your strongest spell. Furthermore, Tryndamere's Mocking Shout severely punishes you if you try to retreat while self-slowed by Purge. Detayları gör
Tryndamere

Neden

The dynamic of this lane hinges entirely on how their ultimates collide. While Urgot relies on Fear Beyond Death to execute low-health targets, Tryndamere can cast Undying Rage even while suppressed. This completely negates your ultimate's grinding phase, leaving you vulnerable after wasting your strongest spell. Furthermore, Tryndamere's Mocking Shout severely punishes you if you try to retreat while self-slowed by Purge.

Lane etkisi

Before level five, you can dictate trades by zoning Tryndamere with Echoing Flames and interrupting his Spinning Slash using Disdain. However, once ultimates are unlocked, the power dynamic shifts dramatically. Tryndamere can mindlessly push and take aggressive short trades under your turret, knowing he cannot be executed. This forces you into a defensive stance, bleeding wave control and limiting your ability to rotate or assist your team.

Nasıl oynanır

To survive, never initiate with Fear Beyond Death. Instead, poke him down with Corrosive Charge and trigger Echoing Flames to force him to activate Undying Rage defensively. Once his invulnerability begins, immediately cast Disdain to flip and stun him, effectively wasting precious seconds of his ultimate. Run away during the rest of his rage, and only fire Fear Beyond Death at the very end of his buff duration to secure the kill as it expires.

Tam profil →
Darius

Darius

displacementexecute_race Darius dominates this matchup because his Apprehend can cancel Urgot's Disdain mid-dash. If you try to escape or engage with your shield, a reactive pull from Darius stops you completely, leaving you without your shield or displacement. This allows him to easily stack his Hemorrhage passive using Crippling Strike, turning what should be a safe retreat into a lethal chase. Detayları gör
Darius

Neden

Darius dominates this matchup because his Apprehend can cancel Urgot's Disdain mid-dash. If you try to escape or engage with your shield, a reactive pull from Darius stops you completely, leaving you without your shield or displacement. This allows him to easily stack his Hemorrhage passive using Crippling Strike, turning what should be a safe retreat into a lethal chase.

Lane etkisi

This interaction forces you to play defensively near your turret. Initiating any trade with Disdain is extremely risky; if Darius interrupts your dash, you lose your primary defensive tool and cannot out-damage his Decimate healing. You must concede early wave control, farming safely from a distance with Corrosive Charge while preventing him from getting easy execution resets with Noxian Guillotine.

Nasıl oynanır

Never use Disdain proactively while Darius has Apprehend available. Instead, bait his pull by moving just within its edge, then immediately buffer your dash or use Corrosive Charge to slow him down. If he wastes Apprehend, you have a brief window to turn on Purge and rotate your Echoing Flames shotgun knees. If he catches you, save Fear Beyond Death for a maximum range execution only after his Decimate has missed.

Tam profil →
Gwen

Gwen

poke_negationdodge_skillshot Gwen's Hallowed Mist is a direct counter to your ranged kit. It completely negates the automatic targeting of Purge, leaving you unable to trigger Echoing Flames from a safe distance. More importantly, she can use this untargetability zone to block the projectile of Fear Beyond Death when you try to execute her from afar, forcing you to fight her on her terms where her Snip Snip! shreds your health. Detayları gör
Gwen

Neden

Gwen's Hallowed Mist is a direct counter to your ranged kit. It completely negates the automatic targeting of Purge, leaving you unable to trigger Echoing Flames from a safe distance. More importantly, she can use this untargetability zone to block the projectile of Fear Beyond Death when you try to execute her from afar, forcing you to fight her on her terms where her Snip Snip! shreds your health.

Lane etkisi

You lose the luxury of zoning Gwen with Corrosive Charge. Whenever you attempt to thin the wave or poke, she can use Skip 'n Slash to close the gap, immediately deploying Hallowed Mist to nullify your retaliatory Purge. This forces you to concede wave control, hugging your turret to avoid extended trades where her passive A Thousand Cuts out-sustains your shield from Disdain.

Nasıl oynanır

To survive, you must bait out Hallowed Mist before committing your ultimate. Never cast Fear Beyond Death from max range; instead, hold it until you land Disdain to fling her out of her protective zone or stun her inside it. When she activates her mist, step directly inside its boundary if you have the health to trade, forcing a close-quarters brawl where your Purge and Echoing Flames can actually connect.

Tam profil →

Diğer eşleşmeler

Skill Matchup

17

Bu eşleşmeler her şeyden önce yürütme düellosudur: her iki şampiyon da avantaj elde etmek için gerçek yollara sahiptir. Kaçırılan önemli bir yetenek, doğru öngörülen bir engage ya da tek bir pozisyon hatası düelloyu bir tarafa çevirebilir. Matchup'ı bilmek ve doğru anları tanımak burada özellikle önemlidir.

Ryze

Ryze

kitingdodge_dependent The lane hinges entirely on the spacing between Urgot's dash and Ryze's kiting. If you miss Disdain, Ryze activates the movement speed from Overload to easily stay out of your range while pelting you with spells. However, if you successfully buffer through his Rune Prison or catch him off-guard with your dash, Purge combined with Echoing Flames passive blasts will instantly shred his fragile mage health pool. Detayları gör
Ryze

Neden

The lane hinges entirely on the spacing between Urgot's dash and Ryze's kiting. If you miss Disdain, Ryze activates the movement speed from Overload to easily stay out of your range while pelting you with spells. However, if you successfully buffer through his Rune Prison or catch him off-guard with your dash, Purge combined with Echoing Flames passive blasts will instantly shred his fragile mage health pool.

Lane etkisi

This binary interaction dictates the entire wave dynamic. Missing your engage means Ryze secures complete control of the wave, using Spell Flux and Overload to shove you under turret and poke you down. Conversely, landing your crowd control forces him to play defensively, preventing him from utilizing Realm Warp to influence the map, and putting him within execution range of Fear Beyond Death.

Nasıl oynanır

Never launch Disdain blindly from maximum range, as Ryze will easily react and punish you. Instead, use the slow from Corrosive Charge to cripple his movement first, making your dash much easier to land. If Ryze mispositions to spread Spell Flux on your minions, that is your cue to strike. If he roots you with Rune Prison, activate Purge to mitigate his slow while preparing your counter-engage once the snare expires.

Tam profil →
Riven

Riven

bait_ccmobility This matchup is a high-stakes dance of positioning and prediction. Riven relies on the sudden dashes of Broken Wings and Valor to reposition behind you. By doing so, she can effortlessly dodge the forward charge of your Disdain while bypassing your loaded Echoing Flames shotgun knees. If she successfully maneuvers behind your back, your trading power vanishes, leaving you vulnerable to her fast Runic Blade combos. Detayları gör
Riven

Neden

This matchup is a high-stakes dance of positioning and prediction. Riven relies on the sudden dashes of Broken Wings and Valor to reposition behind you. By doing so, she can effortlessly dodge the forward charge of your Disdain while bypassing your loaded Echoing Flames shotgun knees. If she successfully maneuvers behind your back, your trading power vanishes, leaving you vulnerable to her fast Runic Blade combos.

Lane etkisi

In the lane, this interaction dictates wave control and trading zones. You cannot freely clear minions with Purge because its self-slow makes you an easy target for her Ki Burst. Missed Disdain casts result in immediate lane loss, allowing Riven to freeze the wave or execute you under tower with Blade of the Exile. Every trade is a tense standoff where the first to misstep loses all pressure.

Nasıl oynanır

To win, never initiate with Disdain. Instead, poke her down using Corrosive Charge to force her to waste Valor for the shield. Position yourself tightly against terrain walls; this physical restriction prevents her from using Broken Wings to circle behind you, keeping her trapped in front of your active Echoing Flames legs. If she commits to a full combo, wait for her third Broken Wings jump to buffer your Disdain and instantly lock her down for Fear Beyond Death.

Tam profil →
Volibear

Volibear

bruiser_duelshield_timing This is a battle of attrition where Volibear wants to heal continuously. The key lies in interrupting his rhythm. When Volibear casts Sky Splitter to shield himself and strike you, reacting instantly with Disdain changes everything. By timing your dash, you absorb his lightning damage with your shield and fling him backward, which disrupts his spacing and denies him the vital window to land a second, healing Frenzied Maul. Detayları gör
Volibear

Neden

This is a battle of attrition where Volibear wants to heal continuously. The key lies in interrupting his rhythm. When Volibear casts Sky Splitter to shield himself and strike you, reacting instantly with Disdain changes everything. By timing your dash, you absorb his lightning damage with your shield and fling him backward, which disrupts his spacing and denies him the vital window to land a second, healing Frenzied Maul.

Lane etkisi

Trade duration dictates who controls the minion waves. If you fail to interrupt his rotation, Volibear's The Relentless Storm passive will push you under tower while he heals up any damage you deal. Successfully flinging him away resets the lane dynamic, forcing him to play defensively and preventing him from easily setting up a dive with Stormbringer or freezing the lane.

Nasıl oynanır

Position yourself near your own minion wave to bait his aggression, but always keep enough distance to react. Never initiate with Disdain. Instead, walk up to trigger Echoing Flames passives using Purge and Corrosive Charge. Hold Disdain specifically for the moment you see the blue circle of Sky Splitter. If you misstime it and get hit by a second Frenzied Maul, immediately disengage using Corrosive Charge to slow his pursuit and wait for your cooldowns to return.

Tam profil →

Diğer eşleşmeler

Avantajlı

7

Bu şampiyonlar genellikle senin temel güçlerine etkili şekilde karşılık veremez, bu da çatışmaya daha fazla özgürlükle yaklaşmanı sağlar. Onları baskı altına almak ve lehine dönen trade'ler zorlamak için genellikle birden fazla yolun vardır. Onlara rahat bir pozisyona dönme fırsatı vermek yerine, bu avantajı kendi temponu dayatmak için kullan.

Yasuo

Yasuo

projectile_blocksquishy_punish This matchup revolves around Yasuo's ability to deny your ranged threat. While his Wind Wall completely nullifies your rapid fire from Purge and can block a clutch Fear Beyond Death, he cannot stop your physical advance. Your Disdain bypasses his barrier entirely, allowing you to body-slam him, ignore his wind barrier, and trigger Echoing Flames passive blasts from behind his defensive line. Detayları gör
Yasuo

Neden

This matchup revolves around Yasuo's ability to deny your ranged threat. While his Wind Wall completely nullifies your rapid fire from Purge and can block a clutch Fear Beyond Death, he cannot stop your physical advance. Your Disdain bypasses his barrier entirely, allowing you to body-slam him, ignore his wind barrier, and trigger Echoing Flames passive blasts from behind his defensive line.

Lane etkisi

Yasuo will constantly slide through the wave with Sweeping Blade to poke you with Steel Tempest and charge his tornado. However, his need to get close to farm makes him highly vulnerable. By standing near your own low-health minions, you threaten a sudden Disdain flip. This limits his freedom to dash and forces him to play defensively, giving you control over wave positioning.

Nasıl oynanır

Never activate Purge or fire Fear Beyond Death if Yasuo has his Wind Wall ready and you are at range. Instead, stand directly inside your minion wave and wait for him to dash onto you with Sweeping Blade. The moment he commits, override his defense with Disdain to toss him backward. Once he is flipped behind you, his wall becomes useless; immediately trigger Purge and slow him with Corrosive Charge to guarantee a clean kill.

Tam profil →

Diğer eşleşmeler

Items to Counter Urgot

Buy these items to reduce this champion's effectiveness in your games.

Plated Steelcaps
Plated Steelcaps
Thornmail
Thornmail
Crown of the Shattered Queen
Amaranth's Twinguard
Guardian Angel
Guardian Angel

Bu şampiyon nasıl counterlanır

Counter açısı

Urgot’e karşı koymak, sadece onu düelloda yenebilecek bir şampiyon seçmekten ibaret değildir. Asıl amaç, onun temas aralığını bozmaktır. Urgot, menzil içinde kalabildiğinde, hedefinin etrafında dolandığında, iyi bir E yeteneği sonrasında Purge’i etkinleştirdiğinde ve son darbeyi vurma tehdidinde bulunduğunda tehlikeli hale gelir. En iyi karşı stratejiler, ya bu sekansı kurmasını engellemek ya da bundan fayda sağlamasını önlemektir. Bazıları düello ve hareket kabiliyetiyle, bazıları kiting yaparak, bazıları ise ultisini kullanmasına engel olacak kadar uzun süre hayatta kalarak onu cezalandırır. Urgot’e karşı oynuyorsanız, asıl soru “ona vurabilir miyim?” değil, “tüm oyun stilini sergilemesini engelleyebilir miyim?” olmalıdır.

Patch bağlamı

Urgot, mesafeyi kontrol edebilen ya da “Purge” sırasında nispeten hareketsiz kalmasını cezalandırabilen şampiyonlara karşı savunmasızdır. İstikrarlı bir temas kurması gerekir: E yeteneği ıskalarsa, hedef W yeteneğinin menzilinden çıkarsa ya da ultisi kaçırılırsa veya çok erken kullanmaya zorlanırsa, baskısının büyük bir kısmını kaybeder. Zorlu eşleşmeler tam da bunu istismar eder. Hareketli düellocular onun hatasını bekleyip sonra durumu tersine çevirebilir, menzilli şampiyonlar asıl all-in'den önce canını yavaş yavaş azaltabilir ve bazı bruiser'lar temiz bir infazın gerçekleşmesini engelleyecek kadar uzun süre hayatta kalabilir.

Hızlı okuma

  • Urgot’e karşı en iyi strateji, onun E yeteneğini karşılıksız kullanmasını sağlamaktır: o çevirme hareketi olmazsa, yaptığı çatışmalar çok daha öngörülebilir hale gelir.
  • Uzun süreli döngüsel bir işlemde kalmayın; Urgot ne kadar çok “shotgun knees” tetiklemesi yaparsa, işlem sizin için o kadar kötü hale gelir.
  • HP’nizin yaklaşık yarısı kaldığında onun ultisini dikkate alın: Asıl hata, genellikle infaz eşiği yaklaşırken bir dalga ya da hedef için oyunda kalmaktır.

Counter arketipleri

Onun E yeteneğini cezalandıran mobil düellocular

Bu şampiyonlar, Urgot için doğrudan bir sorun teşkil eder; çünkü ona istediği istikrarlı teması kolayca sağlayamazlar. Eğer hareket kabiliyetlerini veya savunma araçlarını onun E yeteneğine karşı korurlarsa, takla atışından kaçınabilir ve ardından Purge’un tehditkarlığı azaldığında karşılıklı hasar alışverişine girebilirler. Urgot, hattında kalan ve uzun süreli çatışmaya giren hedefleri sever; bu düellocular ise açıyı değiştirir, onun shotgun knees’inden uzaklaşır ya da ana kontrol aracı zaten kullanılmışsa takası tersine çevirirler.

Şampiyon nasıl uyum sağlamalı. Urgot daha sabırlı oynamalı: İlk hamlede E yeteneğini kullanmaktan kaçınmalı, “shotgun knees” ile kısa süreli çatışmalar aramalı ve harekete geçmeden önce rakibi hareket kabiliyetini kullanmaya zorlamalı. Takım savaşlarında ise bu şampiyonlarla düello yapmaya çalışmaktan vazgeçip, bunun yerine zaten kontrol altına alınmış birini hedef alabilir.

"Purge" yeteneğini etkisiz hale getiren menzilli ve kiting karakter seçimleri

Urgot, kendi DPS’sini oluşturmadan önce hasara maruz kalmak zorunda kaldığında büyük ölçüde değer kaybeder. Menzilli şampiyonlar, onu sadece yaklaşmak için kaynak harcamaya zorlayabilir ve ardından Purge etkinleşir etmez geri çekilebilir. Bu sadece menzil meselesi değil; aynı zamanda tempo meselesidir. Urgot, E yeteneğini veya ultisini kullanmak istediği anda zaten hasar almışsa, tehdit eşiğini aşması çok daha zor hale gelir.

Şampiyon nasıl uyum sağlamalı. Urgot, şampiyonun önünden dalgayı oynamalıdır: gereksiz takasları sınırlamalı, rakibin konumunun zayıflamasını beklemeli ve çalılıkları ya da nehir açılarını kullanarak aradaki mesafeyi kısaltmalıdır. Flash ya da Protobelt, hâlâ serbestçe hareket edebilen bir hedefi kovalamak için değil, gerçek bir fırsat penceresi yaratmak amacıyla kullanılmalıdır.

Hayatta kalabilen ve onun eşiğini bozabilen sert dövüşçüler

Bu eşleşmeler her zaman hareket kabiliyetiyle Urgot’i yenemez, ancak onun saldırı fırsatlarını daha zor hale getirebilir. Urgot, bir hedefi infaz menziline çekip ultisiyle işini bitirmek ister; sağlam bruiserlar ve ön saflardaki oyuncular yeterince uzun süre hasarı emebilir, kaynak savaşına zorlayabilir ve bazen de doğru zamanda ölmeyen bir hedefe ultisini kullanmasına neden olabilir. Urgot ilk büyük temasını sonuçlandıramazsa, rakibin işini çoktan bitirdiği uzun bir çatışmanın içinde kalabilir.

Şampiyon nasıl uyum sağlamalı. Urgot, daha sonra daha uygun bir hedef bulma imkânı varsa, son yeteneğini dayanıklılığı çok yüksek bir hedefe boşa harcamamalıdır. Bu tür rakiplere karşı, genellikle hasar verip alan kontrolünü sağlamalı ve takımının rakibin canını düşürmesini beklemeli, ancak ondan sonra bitirici darbeyi aramalıdır.

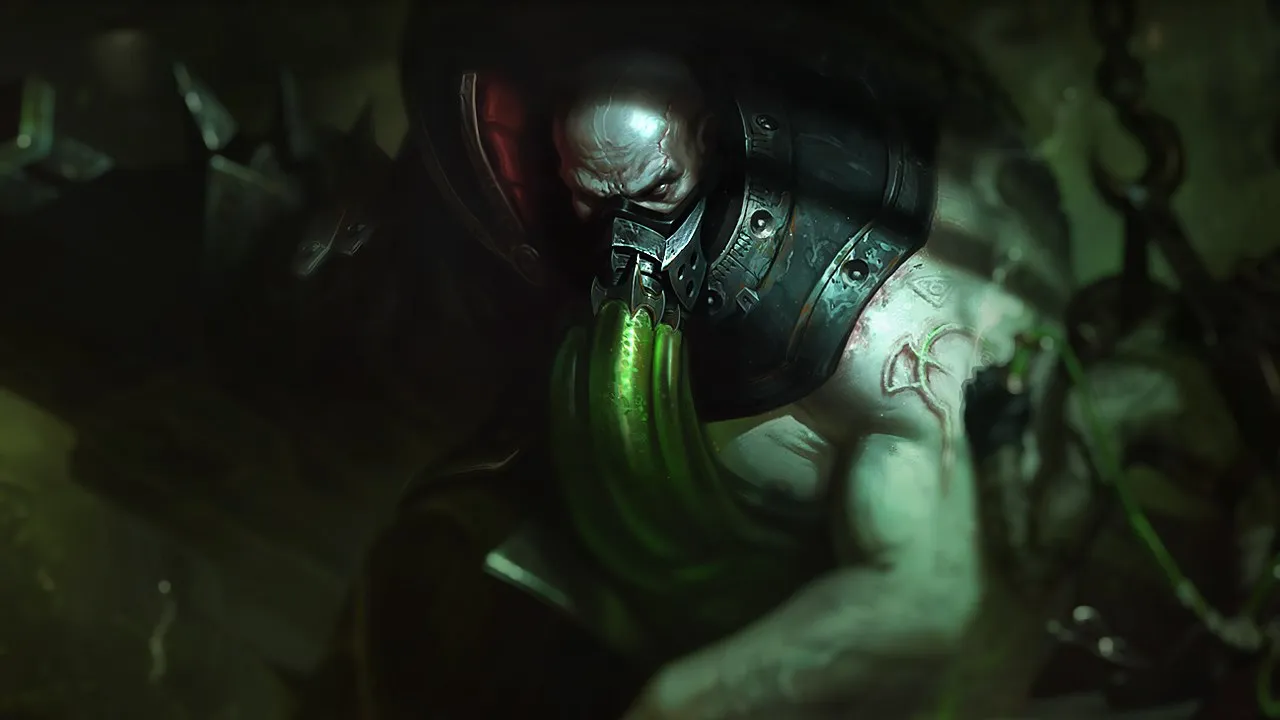
Öncelikli matchuplar

Fiora

Fiora, Urgot’in tam da zayıf noktasına, yani E yeteneğinin isabetine ve saldırılarının öngörülebilirliğine saldırdığı için öncelikli bir eşleşmedir. Urgot çok erken saldırıya geçerse, Purge henüz durumu telafi etmeye yetmediğinde o buna karşılık verebilir, kaçabilir ya da takası kendi lehine çevirebilir. Bu nedenle Urgot’in planı daha dolaylı olmalıdır: bir tepki kışkırtmalı, doğru zamanlamayı yakalamak için E’yi bekletmeli ve Fiora’in açılarını serbestçe seçebileceği uzun bir düelloya girmesini önlemelidir.

Vayne

Vayne, dikkat çekmeyi hak ediyor çünkü Urgot’i sadece menzilden yenmekle kalmıyor: onu her bir metreye yaklaşmak için çaba sarf etmeye zorluyor. Stratejisi, mesafe kontrolüyle Purge’u bozmak, düz hatlı hareketleri cezalandırmak ve rakibinin ultisini kullanmasını çok daha zor hale getirmektir. Urgot için bu eşleşme aşırı disiplin gerektirir: dalgaları kontrol etmek, çalılıkları doğru kullanmak, summoner yeteneklerini gerçek bir fırsat penceresi için saklamak ve sırf hedef görünür diye all-in'e girmemek.

Ona karşı yaygın hatalar

Ona karşı yaygın hatalar

  • Onun E yeteneğinden kaçtıktan sonra temas halinde kalmak: Birçok oyuncu ilk hamleyi kazanmasına rağmen yine de ona “shotgun knees” ve “Purge” puanı kazandırıyor.
  • Öldürüldükten sonra, özellikle dragon veya Baron civarında yaşanan çekişmeli mücadelelerde, bu bölgedeki tehlikeyi hafife almak.
  • O, Heartsteel ve Titanic Hydra’ya zaten sahipken bir koridorda onunla savaşmak; bu sayede onun yakın mesafedeki etkisini en üst düzeye çıkarmak ve kaçış imkânlarını azaltmak.
  • Ultimate'ine karşı Flash'ı çok uzun süre basılı tutmak: Eğer saldırı başlarsa ve siz geç tepki verirseniz, kaçış imkânınız çok çabuk ortadan kalkar.
  • Dayanıklılığının artmasını göz ardı edersek: Koridorda ortalama bir performans sergileyen bir Urgot, ilk iki ana eşyasını aldıktan sonra ortadan kaldırılması çok daha zor bir rakip haline gelebilir.

Koç notları

  • Urgot karşısında en iyi savunma, genellikle tam bir dövüşe girmemektir. Küçük bir çatışmayı kabul edebilirsiniz, ancak o, art arda av tüfeği diz vuruşlarını tetikleyip nihai eşiğini dayatmadan önce oradan ayrılmalısınız.
  • Eğer bir mobil karşı oyuncuysanız, dash’ınızı boşuna saldırılar için harcamayın. Onu rakibin E yeteneği için saklayın: bu, çoğu zaman kazanılan bir çatışma ile anlamsız bir ölüm arasındaki farkı belirler.

FAQ

Urgot’i koridorda nasıl yenersiniz?

Urgot’i koridorda yenmek için öncelikle karşılıklı saldırı süresini kontrol etmeniz gerekir. Onun etrafınızda dolanıp birden fazla “shotgun knee” saldırısı tetikleyebileceği uzun bir çatışmaya girmeyin. Onun E yeteneğini kışkırtmaya çalışın, Purge aktifken geri çekilin, ardından kontrol yeteneği kullanılamaz hale geldiğinde onu cezalandırın. Menzilli bir karakterle oynuyorsanız, amacınız onun all-in yapmasından önce canını yavaş yavaş azaltmak olmalı, ona Flash ve E yeteneğini kullanma fırsatı verecek kadar yakın kalmamalısınız. Yakın dövüş karakteriyle oynuyorsanız, canınız yaklaşık yarıya düştüğünde onun ulti eşiğine dikkat edin.

Fiora ve Vayne, Urgot karşısında neden bu kadar tehlikelidir?

Fiora ve Vayne, Urgot’in ihtiyaç duyduğu iki şeyi engellediği için tehlikelidir: öngörülebilir temas ve Purge’ın içinde kalan bir hedef. Fiora, rakibin E yeteneğini cezalandırabilir ve düelloyu bir isabet testine dönüştürebilir; Vayne ise ona istikrarlı bir fırsat penceresi sunmadan hasara maruz kalmaya zorlayabilir. Her iki durumda da Urgot sadece can kaybetmekle kalmaz; takas temposunun kontrolünü de yitirir ve bu da ultisini kullanmasını çok daha zor hale getirir.

Takım savaşlarında Urgot’e odaklanmalı mısınız?

Urgot’e yalnızca takımınız onun bölgesine girmeden onu gerçekten alt edebilecekse odaklanın. En kötü senaryo, tüm dikkatinizi ona verip önünde toplanmak ve ardından onun düşük canlı bir hedefe karşı ultisini tetiklemesine izin vermektir. Eğer kiting, kitle kontrolü ve yeterli hasar gücünüz varsa, arka hatta ulaşmadan onu ortadan kaldırmak doğru bir stratejidir. Aksi takdirde, bazen geri çekilip açısını bozmak, daha savunmasız müttefiklerini öldürmek ve onun çok geç gelmesini sağlamak daha iyi olabilir.

Urgot’e karşı hedefleri nasıl oynamalısınız?

Urgot’e karşı, herkesi aynı koridordan göndererek hedefler için rekabet etmekten kaçının. Bu, tam da onun fiziksel gücü, Purge, Titanic Hydra ve ultisinin en fazla değer kazandığı türden bir alandır. Bunun yerine, farklı açılardan girmeye çalışın, asıl çatışma başlamadan önce onun E yeteneğini kullanmaya zorlayın ya da hedef mücadelesi başlamadan önce ona hasar vermeye çalışın. Eğer nehre HP’nizin yarısı kalmış halde girerseniz, onun infaz planına tam olarak uymuş olursunuz.