Eylül 2026 · Patch 7.2d
Mage · MID · SUPPORT

Orianna Wild Rift Counter Rehberi

Orianna, ball yeteneğinden kaçabilen ve o yeniden pozisyon almadan engage yapabilen mobil kompozisyonlara karşı zayıftır. Uzun menzilli poke profilleri mana kaynaklarını tüketir. Anlık CC kompozisyonları, ultimate yeteneğini kullanamadan onu etkisiz hale getirir.

★ MID · SUPPORT Tier S
HASAR
UTIL
TANK
DIFF
Win 51.0% #39 · ↓8pt
Pick 4.8% #15
Ban 0.4% #117

Orianna Wild Rift Counter Rehberi ★ Counter Sheet

Hard Counter

1

Bu şampiyonlar, seninkini doğrudan geride bırakan bir build ve oynanış tarzına sahip, bu da lane kontrolünü ve farmı son derece zorlaştırabilir. Yetenekleri temel güçlerini etkisiz hale getirebilir ya da her zamanki planını oynamaya çalıştığın anda seni cezalandırabilir. Bu matchuplarda amaç genellikle hataları en aza indirmek ve doğrudan çatışmanın dışında çözümler bulmaktır.

Irelia

Irelia

gap_closepunish_misposition This matchup is heavily dictated by the positioning of your ball. The moment you cast Command: Attack to poke or farm, you detach the ball from yourself, temporarily losing the passive resistances and immediate shielding from Command: Protect. Irelia looks specifically for this window; without your defensive shield readily available, she can instantly close the distance with Bladesurge, trigger Ionian Fervor, and run you down before you can recall the ball. Detayları gör
Irelia

Neden

This matchup is heavily dictated by the positioning of your ball. The moment you cast Command: Attack to poke or farm, you detach the ball from yourself, temporarily losing the passive resistances and immediate shielding from Command: Protect. Irelia looks specifically for this window; without your defensive shield readily available, she can instantly close the distance with Bladesurge, trigger Ionian Fervor, and run you down before you can recall the ball.

Lane etkisi

You are forced into a defensive posture where stepping up to utilize Clockwork Windup is suicidal. Irelia will manipulate the wave, prepping low-health minions to reset Bladesurge and close the gap. This constant threat denies you control of the wave, forcing you to farm from extreme range. If she lands Flawless Duet or traps you with Vanguard's Edge when your ball is extended, you will lose most of your health or die.

Nasıl oynanır

To survive, you must prioritize self-defense over poke. Keep the ball attached to you or extremely close by holding Command: Protect. Only use Command: Attack when Irelia has already wasted her Bladesurge reset or missed Flawless Duet. When she does engage, immediately trigger Command: Dissonance on yourself for the movement speed boost to escape her auto-attacks. Never stand near your own low-health minions, as they serve as direct stepping stones for her engage.

Tam profil →

Dezavantajlı

13

Bu şampiyonlar, matchup'ı tamamen oynanmaz hale getirmeden genellikle çatışmada avantaj sağlayan araçlara sahiptir. Daha fazla menzilleri, senin saldırılarını daha iyi karşılama kapasiteleri veya engage'lerine karşılık verecek daha fazla yolları olabilir. Yaklaşımını buna göre uyarlaman ve dövüşü kabul edeceğin anları dikkatle seçmen gerekir.

Katarina

Katarina

dodge_skillshotsall_in While your range should theoretically keep you safe, Katarina excels at exploiting your Ball's travel time. Whenever you cast Command: Attack forward, she can instantly bypass your threat zone by using Shunpo onto a dague from Bouncing Blade or Preparation. This blink allows her to completely dodge Command: Shockwave while gap-closing directly onto you, rendering your zoning tools useless if timed reactively. Detayları gör
Katarina

Neden

While your range should theoretically keep you safe, Katarina excels at exploiting your Ball's travel time. Whenever you cast Command: Attack forward, she can instantly bypass your threat zone by using Shunpo onto a dague from Bouncing Blade or Preparation. This blink allows her to completely dodge Command: Shockwave while gap-closing directly onto you, rendering your zoning tools useless if timed reactively.

Lane etkisi

This interaction severely limits your ability to harass her under her tower. If you overextend to poke her with Command: Dissonance, a quick Shunpo behind you allows her to execute a lethal Death Lotus trade. You are forced to play defensively near your turret, conceding mid priority. Consequently, she can easily secure roams to side lanes while you are stuck safely clearing waves.

Nasıl oynanır

To survive, you must anchor your Ball close to your own hitbox. Never lead a trade with Command: Attack; instead, keep the Ball on yourself using Command: Protect to absorb her initial burst. Only cast Command: Shockwave immediately after she commits her Shunpo and channels Death Lotus, as she is temporarily locked in place. If she roams, do not blindly follow her into the river; ping your side lanes and use your superior wave clear to chip her turret plates.

Tam profil →
Diana

Diana

divespacing While you can poke Diana early with Clockwork Windup and Command: Attack, she holds the ultimate trump card once both of you reach level five. The danger lies in how easily she can dodge your Command: Shockwave. By timing Lunar Rush onto a nearby minion or directly onto you, Diana can completely slip out of your ultimate's pull radius while simultaneously closing the gap to unleash Moonfall and her high burst. Detayları gör
Diana

Neden

While you can poke Diana early with Clockwork Windup and Command: Attack, she holds the ultimate trump card once both of you reach level five. The danger lies in how easily she can dodge your Command: Shockwave. By timing Lunar Rush onto a nearby minion or directly onto you, Diana can completely slip out of your ultimate's pull radius while simultaneously closing the gap to unleash Moonfall and her high burst.

Lane etkisi

This dynamic forces you into a defensive stance, stripping away your ability to freely contest the wave. If Diana lands Crescent Strike, you must immediately retreat, as the threat of her Lunar Rush reset prevents you from stepping up to use Command: Dissonance for wave clear. You are often pushed under tower, sacrificing priority and allowing her to roam while you struggle to safely farm.

Nasıl oynanır

To survive, you must never throw Command: Shockwave proactively while Diana has Lunar Rush available. Keep the ball close to you with Command: Protect to gain defensive stats, and only trigger your ultimate after she has already committed her dash and cannot redirect her movement. If she misses Crescent Strike, use that brief window to aggressively zone her with Command: Attack. Always position yourself away from low health minions to deny easy dash targets.

Tam profil →
Kassadin

Kassadin

magic_shieldmobility Kassadin's ultimate mobility dictates this matchup. While you can harass him early, once he unlocks Riftwalk, your primary threat, Command: Shockwave, becomes incredibly difficult to land. A reactive Riftwalk lets him blink out of your ultimate's pull radius entirely. This ability to instantly relocate turns your high-impact teamfight tool into a wasted cooldown, leaving you vulnerable to his burst without your main self-peel. Detayları gör
Kassadin

Neden

Kassadin's ultimate mobility dictates this matchup. While you can harass him early, once he unlocks Riftwalk, your primary threat, Command: Shockwave, becomes incredibly difficult to land. A reactive Riftwalk lets him blink out of your ultimate's pull radius entirely. This ability to instantly relocate turns your high-impact teamfight tool into a wasted cooldown, leaving you vulnerable to his burst without your main self-peel.

Lane etkisi

Before he reaches level five, you must establish a health lead by punishing his melee range. However, Kassadin uses Void Stone's magic shield to absorb your Command: Attack poke, while Null Sphere silences you to disrupt your Command: Dissonance trade. Once he has Riftwalk, the lane's pressure flips; you can no longer push safely, as his mobility threatens a sudden engage, forcing you to play defensively under your tower.

Nasıl oynanır

To survive, always keep your ball close using Command: Protect to buffer his jump with a shield. Never initiate trades with Command: Shockwave; instead, hold this ultimate as a disengage tool. Force him to use Riftwalk offensively first before you attempt to place your ball. If he blinks onto you, instantly drop Command: Dissonance at your feet to slow him, then aim your ultimate only after his blink is on its brief cooldown.

Tam profil →
Yasuo

Yasuo

spacingshield_management Yasuo holds a massive advantage because his Wind Wall completely deletes Command: Attack mid-flight. Since your entire kit relies on the ball's position, having it blocked means you cannot use Command: Dissonance to slow him down or Command: Shockwave to peel him off. Without the ball's zoning presence, you are left completely defenseless against his Sweeping Blade dashes. Detayları gör
Yasuo

Neden

Yasuo holds a massive advantage because his Wind Wall completely deletes Command: Attack mid-flight. Since your entire kit relies on the ball's position, having it blocked means you cannot use Command: Dissonance to slow him down or Command: Shockwave to peel him off. Without the ball's zoning presence, you are left completely defenseless against his Sweeping Blade dashes.

Lane etkisi

This interaction forces you into a defensive posture where you cannot safely poke to break his Way of the Wanderer shield. If you carelessly throw Command: Attack, he will block it, use Sweeping Blade through your minion wave, and strike you with Steel Tempest. You are constantly forced under your tower, conceding mid priority and leaving your jungler without backup.

Nasıl oynanır

To survive, you must play around his massive Wind Wall cooldown. Pop his Way of the Wanderer shield using basic attacks empowered by Clockwork Windup before committing any mana. Walk forward to bait his wall, but do not cast Command: Attack. Once his wall is down, you have a long window to harass him safely. If he dashes in with Sweeping Blade anyway, immediately self-cast Command: Protect to absorb the Steel Tempest damage.

Tam profil →
Akshan

Akshan

ball_trackingearly_pressure Akshan thrives on punishing your cooldowns with sudden, high-mobility angles. When you send your ball forward using Command: Attack to poke or clear, you temporarily strip yourself of your primary defensive tool. Akshan can instantly exploit this window of vulnerability by launching a Heroic Swing from an angle opposite your ball, bypassing Command: Protect's immediate shield and shredding your health bar before the ball can return to you. Detayları gör
Akshan

Neden

Akshan thrives on punishing your cooldowns with sudden, high-mobility angles. When you send your ball forward using Command: Attack to poke or clear, you temporarily strip yourself of your primary defensive tool. Akshan can instantly exploit this window of vulnerability by launching a Heroic Swing from an angle opposite your ball, bypassing Command: Protect's immediate shield and shredding your health bar before the ball can return to you.

Lane etkisi

This threat forces a highly passive laning phase where you cannot safely contest the wave. Akshan easily secures push priority with Avengerang and can roam unseen using Going Rogue. If you misposition your ball even once, his Heroic Swing trade will force an early recall, bleeding your gold and letting him pressure your side lanes without any response, turning the map into a dangerous zone.

Nasıl oynanır

To survive, prioritize keeping your ball close to your own hitbox rather than chasing far-reaching pokes. Only cast Command: Attack when Akshan has already wasted Heroic Swing, or when you are standing directly inside your own minion wave to block his pathing. If he does swing in, immediately self-cast Command: Protect to absorb Dirty Fighting's initial burst, and use Command: Shockwave to interrupt his flight mid-air, resetting the spacing.

Tam profil →
Swain

Swain

spacinganti_heal Swain turns this lane into a grueling battle of attrition where his Ravenous Flock passive constantly restores his health off your mistakes. While your Command: Attack can chip away at him from afar, his Death's Hand matches your wave clear, and any successful Nevermove pull completely negates your poke. Once he accesses Demonic Ascension, his massive ultimate healing easily outpaces your spell rotation's damage. Detayları gör
Swain

Neden

Swain turns this lane into a grueling battle of attrition where his Ravenous Flock passive constantly restores his health off your mistakes. While your Command: Attack can chip away at him from afar, his Death's Hand matches your wave clear, and any successful Nevermove pull completely negates your poke. Once he accesses Demonic Ascension, his massive ultimate healing easily outpaces your spell rotation's damage.

Lane etkisi

You cannot reliably force Swain out of lane due to his passive health sustain. This forces you into a defensive posturing where pushing too aggressively invites a Nevermove snare, setting up an easy Vision of Empire slow. If you get caught, he will force a recall or dive you with Demonic Ascension, robbing you of priority and letting him secure mid-game skirmishes while you are stuck farming under tower.

Nasıl oynanır

To survive, you must keep your distance and constantly watch the return trajectory of Nevermove. The moment Swain activates Demonic Ascension, do not attempt to trade back or use Command: Shockwave aggressively; instead, immediately place your ball on yourself and trigger Command: Dissonance for the movement speed boost to escape his drain radius. Utilize Command: Protect to absorb any residual damage from Death's Hand while you safely retreat.

Tam profil →
Fizz

Fizz

dodge_ultall_in The lane hinges on a high-stakes reaction game. While Orianna can harass the melee Fizz with Clockwork Windup and Command: Attack, Fizz holds all the cards once both reach level five. If Fizz saves Playful, he can entirely bypass Command: Shockwave while gap-closing. This invulnerability frame completely neutralizes your ultimate's defensive and offensive value, converting your setups into lethal counter-engages for him. Detayları gör
Fizz

Neden

The lane hinges on a high-stakes reaction game. While Orianna can harass the melee Fizz with Clockwork Windup and Command: Attack, Fizz holds all the cards once both reach level five. If Fizz saves Playful, he can entirely bypass Command: Shockwave while gap-closing. This invulnerability frame completely neutralizes your ultimate's defensive and offensive value, converting your setups into lethal counter-engages for him.

Lane etkisi

This interaction forces you into a defensive wave state. You cannot safely push past the river because a sudden Chum the Waters will force your Command: Protect defensively, leaving you vulnerable to an all-in. Slow-pushing and keeping the wave frozen just outside your turret range is mandatory. If you let him crash the wave easily, he will roam to slaughter your sidelanes.

Nasıl oynanır

Never cast Command: Shockwave while Fizz has Playful available. Instead, abuse your range advantage early with Command: Attack and Command: Dissonance to chip his health down while he tries to farm. Force him to use Playful defensively to escape your poke or to clear minions under his tower. Only when his trident hop is on cooldown can you safely drop the ball and unleash your ultimate to secure a kill.

Tam profil →
Yone

Yone

spacingdisengage Yone dominates this matchup because Soul Unbound allows him to bypass your zoning completely. He can easily close the distance with Mortal Steel's third cast, ignoring the threat of Command: Attack and Command: Dissonance. If he catches you without a defensive response, his combined burst from Way of the Hunter and Fate Sealed will melt your health bar before you can retreat to your tower. Detayları gör
Yone

Neden

Yone dominates this matchup because Soul Unbound allows him to bypass your zoning completely. He can easily close the distance with Mortal Steel's third cast, ignoring the threat of Command: Attack and Command: Dissonance. If he catches you without a defensive response, his combined burst from Way of the Hunter and Fate Sealed will melt your health bar before you can retreat to your tower.

Lane etkisi

You are forced into a reactive stance, constantly respecting the threat of his loaded Mortal Steel tornado. Pushing the wave with Command: Attack and Command: Dissonance becomes extremely risky, as Yone can engage from deep screen. If he chunks you during a Soul Unbound trade, his Spirit Cleave shield allows him to ignore your counter-harass, forcing you to recall early and giving up crucial mid-lane priority.

Nasıl oynanır

To survive, you must hold Command: Shockwave as your ultimate insurance policy. Never launch it aggressively. Instead, wait for Yone to commit with Fate Sealed to interrupt his follow-up, or cast it directly on his tethered clone to pull him back the moment he attempts to escape with Soul Unbound. Keep your ball close using Command: Protect for the passive resistances, and only poke with Clockwork Windup enhanced basic attacks when his dash is down.

Tam profil →
Talon

Talon

wave_clearroaming Talon thrives on leaving the lane using Assassin's Path to terrorize your side lanes, a map-wide mobility that Orianna simply cannot match. If you attempt to follow him blindly through the river, he can easily turn from the fog of war to burst you down with Shadow Assault and Noxian Diplomacy. Your only real leverage is your superior waveclear, forcing him to choose between losing gold or roaming. Detayları gör
Talon

Neden

Talon thrives on leaving the lane using Assassin's Path to terrorize your side lanes, a map-wide mobility that Orianna simply cannot match. If you attempt to follow him blindly through the river, he can easily turn from the fog of war to burst you down with Shadow Assault and Noxian Diplomacy. Your only real leverage is your superior waveclear, forcing him to choose between losing gold or roaming.

Lane etkisi

This dynamic turns the laning phase into a race against the clock. Every time Talon uses Rake to contest the wave, you must respond by instantly shoving. Failing to keep him pinned under his turret gives him free windows to roam, putting immense pressure on your side lanes. Conversely, keeping him trapped under tower allows you to chip away at his plates using your ranged advantage.

Nasıl oynanır

To execute this, continuously apply pressure by positioning your ball with Command: Attack and clearing waves with Command: Dissonance. Always hold Command: Protect to absorb his Rake poke or to negate his sudden Noxian Diplomacy leaps. If you see him jump a wall with Assassin's Path, immediately ping your teammates, stay in your lane, and aggressively hit his tower instead of chasing him into dangerous unwarded areas.

Tam profil →
Zed

Zed

spacingarmor_rush Zed's explosive burst from Death Mark combined with Living Shadow shadows threatens to bypass your zoning. Because his Contempt for the Weak punishes low health, trading recklessly against his Razor Shuriken and Shadow Slash puts you in execution range. However, the matchup pivots around his ultimate's predictable exit: when Zed lands from Death Mark, he always appears behind you, making him highly vulnerable to a perfectly timed self-cast of Command: Shockwave. Detayları gör
Zed

Neden

Zed's explosive burst from Death Mark combined with Living Shadow shadows threatens to bypass your zoning. Because his Contempt for the Weak punishes low health, trading recklessly against his Razor Shuriken and Shadow Slash puts you in execution range. However, the matchup pivots around his ultimate's predictable exit: when Zed lands from Death Mark, he always appears behind you, making him highly vulnerable to a perfectly timed self-cast of Command: Shockwave.

Lane etkisi

This pressure forces you to play defensively with Command: Attack and Command: Dissonance to secure minions from a distance. You cannot afford to walk up and use Clockwork Windup enhanced basic attacks once Zed has Living Shadow available, as a single clone swap can lead to a lethal chunk of your health. Your passive lane state limits your early rotation potential, meaning you will often yield mid priority to protect your own life.

Nasıl oynanır

To survive this lane, you must hold Command: Protect defensively rather than using it to poke. When Zed commits with Death Mark, instantly cast Command: Protect on yourself to bring the ball back. The exact millisecond his untargetable state ends, activate Command: Shockwave directly on top of yourself. This guarantees a knockup, disrupting his combo and letting you escape with Command: Dissonance. If he baits this out with a fake Living Shadow swap, retreat immediately under your tower.

Tam profil →

Diğer eşleşmeler

Skill Matchup

13

Bu eşleşmeler her şeyden önce yürütme düellosudur: her iki şampiyon da avantaj elde etmek için gerçek yollara sahiptir. Kaçırılan önemli bir yetenek, doğru öngörülen bir engage ya da tek bir pozisyon hatası düelloyu bir tarafa çevirebilir. Matchup'ı bilmek ve doğru anları tanımak burada özellikle önemlidir.

Aurora

Aurora

spacingpoke Orianna's zoning depends on placing her ball with Command: Attack, but Aurora's Across the Veil gives her a burst of movement speed and brief invisibility, allowing her to easily sidestep the incoming ball and counter with Twofold Hex to trigger Spirit Abjuration. This turns every ball movement into a high-stakes guessing game where Aurora's mobility clashes with Orianna's skillshot precision. Detayları gör
Aurora

Neden

Orianna's zoning depends on placing her ball with Command: Attack, but Aurora's Across the Veil gives her a burst of movement speed and brief invisibility, allowing her to easily sidestep the incoming ball and counter with Twofold Hex to trigger Spirit Abjuration. This turns every ball movement into a high-stakes guessing game where Aurora's mobility clashes with Orianna's skillshot precision.

Lane etkisi

Because Aurora can bypass the ball's threat using Across the Veil, Orianna cannot simply poke her out of lane. This forces a contest over wave control. If Orianna uses Command: Attack and Command: Dissonance to clear the wave, she becomes vulnerable to Aurora's forward leaps. Conversely, letting Aurora push allows her to roam or set up Between Worlds dives, meaning the lane is decided by who manipulates the minion waves.

Nasıl oynanır

To win this, you must hold Command: Attack instead of throwing it at maximum range. Keep the ball sitting on your own melee minions. If Aurora uses Across the Veil to initiate, immediately cast Command: Protect on yourself to absorb Twofold Hex and use Clockwork Windup enhanced auto-attacks while she is close. Only release Command: Shockwave after she has committed her Across the Veil dash, or use the slow from Command: Dissonance to lock her down when she tries to retreat with The Weirding.

Tam profil →
Galio

Galio

poke_mitigationwave_clear Orianna can constantly harass the melee Colossus from afar using Command: Attack, keeping him under pressure. However, Galio neutralizes this poke easily because Shield of Durand naturally absorbs magic damage, keeping his health pool stable. To prevent Orianna from freezing the lane or gaining a massive lead, Galio relies on Winds of War to clear the minions from a safe distance, making it a pure battle of attrition. Detayları gör
Galio

Neden

Orianna can constantly harass the melee Colossus from afar using Command: Attack, keeping him under pressure. However, Galio neutralizes this poke easily because Shield of Durand naturally absorbs magic damage, keeping his health pool stable. To prevent Orianna from freezing the lane or gaining a massive lead, Galio relies on Winds of War to clear the minions from a safe distance, making it a pure battle of attrition.

Lane etkisi

The lane turns into a push-and-pull rhythm where neither champion can easily force the other out. Orianna cannot easily crash waves for heavy tower pressure due to Galio's rapid waveclear, but Galio cannot step up to roam without taking severe poke. Health bars remain relatively high on both sides, leading to delayed recall timings and a stagnant mid lane that limits early map rotations.

Nasıl oynanır

To break this stalemate, keep the Ball positioned slightly behind his minion line using Command: Attack to threaten him whenever he steps up. Always hold Command: Protect to shield yourself if he attempts to engage with Justice Punch. If he manages to land a full combo with Shield of Durand, don't panic; use Command: Dissonance to speed yourself up and kite back, landing basic attacks to trigger Clockwork Windup while his cooldowns are offline.

Tam profil →
Lux

Lux

pokeshield_timingspacing This matchup is a pure duel of spell-shielding and positioning. Your primary poke tool, Command: Attack, is constantly contested by Lux deploying Prismatic Barrier to absorb the impact. Crucially, the moment you order the ball forward, you are momentarily vulnerable; Lux will actively fish for a game-changing Light Binding during this brief displacement window when you cannot easily protect yourself. Detayları gör
Lux

Neden

This matchup is a pure duel of spell-shielding and positioning. Your primary poke tool, Command: Attack, is constantly contested by Lux deploying Prismatic Barrier to absorb the impact. Crucially, the moment you order the ball forward, you are momentarily vulnerable; Lux will actively fish for a game-changing Light Binding during this brief displacement window when you cannot easily protect yourself.

Lane etkisi

Wave priority swings wildly based on who lands their primary zone tool first. If you miss Command: Attack or misposition the ball, Lux instantly clears the wave with Lucent Singularity, forcing you under turret. Trading health becomes a high-stakes guessing game; a single mistimed Command: Protect when caught by Light Binding results in a devastating Final Spark combo, costing you your lane pressure and forcing an early recall.

Nasıl oynanır

To win this, never walk in a straight line when casting Command: Attack. Always hold Command: Protect ready to self-cast the instant you see her wind up Light Binding. If she misses her binding, immediately punish her with Command: Dissonance and aggressive Clockwork Windup auto-attacks while her crowd control is on cooldown. Should you get shoved in, focus on farming safely rather than chasing trades through her Lucent Singularity slow.

Tam profil →
Corki

Corki

pokespacing This matchup is a pure duel of range and accuracy. Corki relies on Phosphorus Bomb and his frequent Missile Barrage rockets to wear you down from afar. However, Orianna matches this pressure perfectly using Command: Attack. Because both of you can farm and harass simultaneously without committing to close-range fights, the lane becomes a test of who can land their skillshots while dodging the opponent's incoming projectiles. Detayları gör
Corki

Neden

This matchup is a pure duel of range and accuracy. Corki relies on Phosphorus Bomb and his frequent Missile Barrage rockets to wear you down from afar. However, Orianna matches this pressure perfectly using Command: Attack. Because both of you can farm and harass simultaneously without committing to close-range fights, the lane becomes a test of who can land their skillshots while dodging the opponent's incoming projectiles.

Lane etkisi

Every exchange dictates your wave control. If you fail to dodge Phosphorus Bomb, Corki gains the health advantage needed to safely collect his Hextech Munitions package and roam. Conversely, keeping Corki low with constant Command: Attack and Command: Dissonance zones forces him to use Valkyrie defensively rather than seeking aggressive plays, neutralizing his package's impact on the side lanes.

Nasıl oynanır

Stand to the side of your minion wave. This forces Corki to choose between using Phosphorus Bomb to push or to target you. When he approaches with Gatling Gun to shred your resistances, immediately self-cast Command: Protect to absorb the physical and magical ticks while backing away. If he flies in with his upgraded package, use Command: Shockwave to interrupt his path or pull him out of the burning trail.

Tam profil →
Karma

Karma

wave_clearspacing This matchup is a pure tug-of-war between poke and mitigation. When you send your ball forward with Command: Attack and trigger Command: Dissonance, Karma can quickly nullify the incoming burst using her Inspire shield. However, Karma's defensive tools are largely single-target or limited unless enhanced by Mantra, whereas your Command: Shockwave offers game-changing, wide-area disruption that easily outclasses her utility in clustered teamfights. Detayları gör
Karma

Neden

This matchup is a pure tug-of-war between poke and mitigation. When you send your ball forward with Command: Attack and trigger Command: Dissonance, Karma can quickly nullify the incoming burst using her Inspire shield. However, Karma's defensive tools are largely single-target or limited unless enhanced by Mantra, whereas your Command: Shockwave offers game-changing, wide-area disruption that easily outclasses her utility in clustered teamfights.

Lane etkisi

Laning phase revolves around pushing and neutralizing waves. Karma will try to shove the lane with Inner Flame while shielding herself with Inspire to ignore your harass. If you waste your mana trying to poke through her shields, she will gain priority to roam. You must match her pushing power to keep her locked in lane, preventing her from translating her early utility into map pressure.

Nasıl oynanır

Focus on clearing minions rather than forcing trades against her shield. Use Command: Attack to reposition the ball directly inside the minion wave, and only activate Command: Dissonance when she has already wasted her Inspire or to secure the ranged minions. If she steps up to tether you with Focused Resolve, use Command: Protect on yourself to absorb her damage while retreating. Once teamfights break out, wait for the enemy team to clump up and unleash Command: Shockwave.

Tam profil →
Morgana

Morgana

poke_defensefarm_lane This matchup is a pure battle of ranges and reactive timing. Since Morgana relies on Dark Binding to lock you down for Tormented Shadow pools, your spacing determines the lane's pace. The critical pivot is how she uses Black Shield. If you cast Command: Shockwave, a reactive Black Shield completely negates both the magic damage and the crucial knock-up, neutralizing your primary ultimate threat. Detayları gör
Morgana

Neden

This matchup is a pure battle of ranges and reactive timing. Since Morgana relies on Dark Binding to lock you down for Tormented Shadow pools, your spacing determines the lane's pace. The critical pivot is how she uses Black Shield. If you cast Command: Shockwave, a reactive Black Shield completely negates both the magic damage and the crucial knock-up, neutralizing your primary ultimate threat.

Lane etkisi

Laning quickly turns into a battle of wave control and safety. Morgana can safely push with Tormented Shadow, using her passive Soul Siphon to sustain any chip damage you land. If you step up too aggressively to trade with Command: Attack and Command: Dissonance, you expose yourself to a deadly Dark Binding or a flash Soul Shackles engage, forcing you to play defensively behind your own minion wave.

Nasıl oynanır

To win this, position your ball with Command: Attack slightly to the side of the wave to threaten her without standing where she wants to drop Tormented Shadow. Never initiate with Command: Shockwave if her Black Shield is available. Instead, bait her shield using the slow from Command: Dissonance or shield yourself with Command: Protect to absorb her poke. If she wastes her spell shield, immediately pull the trigger on your ultimate before her cooldown recovers.

Tam profil →
Ryze

Ryze

scalingwave_clear This matchup is a battle of spacing and scaling. Orianna holds a distinct range advantage, allowing her to poke Ryze down using Command: Attack while staying safely outside the bouncing threat of his Spell Flux. However, Ryze scales exceptionally well into a high-DPS threat and can bypass Orianna's lane dominance entirely by using Realm Warp to impact the map, turning his scaling power into global pressure. Detayları gör
Ryze

Neden

This matchup is a battle of spacing and scaling. Orianna holds a distinct range advantage, allowing her to poke Ryze down using Command: Attack while staying safely outside the bouncing threat of his Spell Flux. However, Ryze scales exceptionally well into a high-DPS threat and can bypass Orianna's lane dominance entirely by using Realm Warp to impact the map, turning his scaling power into global pressure.

Lane etkisi

Control of the minion waves dictates this lane. By keeping the wave neutral or slightly pushed, Orianna prevents Ryze from easily spreading Spell Flux to her through the wave, forcing him to use mana defensively. If Orianna fails to secure mid priority, Ryze will quickly shove the wave with his high-DPS spell rotations and disappear into the fog of war with Realm Warp, leaving her team vulnerable to sudden sidelane collapses.

Nasıl oynanır

Position your ball with Command: Attack slightly behind Ryze's caster minions to zone him out of Spell Flux range. Never stand directly next to your own dying minions to avoid the propagation of his marks. If Ryze starts channel-casting Realm Warp to roam, do not blindly follow into the river; instead, immediately punish his absence by shoving the wave to his tower, or use Command: Dissonance and Command: Protect to quickly reposition and support your teammates.

Tam profil →
Viktor

Viktor

wave_clearscaling This matchup is a pure battle of scaling mages where both of you want to farm safely from a distance. Viktor relies heavily on his Hextech Ray to chip away at your health while clearing minions. However, Orianna holds a unique defensive advantage: by reacting quickly with Command: Protect, you can absorb the laser's burn entirely, turning his primary poke tool into wasted mana while keeping your health bar intact. Detayları gör
Viktor

Neden

This matchup is a pure battle of scaling mages where both of you want to farm safely from a distance. Viktor relies heavily on his Hextech Ray to chip away at your health while clearing minions. However, Orianna holds a unique defensive advantage: by reacting quickly with Command: Protect, you can absorb the laser's burn entirely, turning his primary poke tool into wasted mana while keeping your health bar intact.

Lane etkisi

Because Command: Protect negates Viktor's main harass, neither mage can easily force the other out of lane. This turns the mid lane into a strict test of wave control. If you let Viktor freely use Siphon Power to shield himself while securing last hits, he will slowly push you under tower. Maintaining an even minion count prevents him from getting free resets to fuel his Glorious Evolution.

Nasıl oynanır

To win this war of attrition, position your ball with Command: Attack slightly to the side of the minion wave. This forces Viktor to choose between aiming Hextech Ray at you or the wave. The moment he sweeps his laser towards you, immediately self-cast Command: Protect to nullify the damage. If you fail to shield the poke and fall low, use Command: Dissonance on the incoming wave to quickly shove and secure a safe recall rather than risking a dive from his Arcane Storm.

Tam profil →
Syndra

Syndra

spacingcooldown_windows This matchup is a pure test of micro-spacing between two sphere-manipulating mages. Syndra relies on Dark Sphere combined with Scatter the Weak to stun you from afar, setting up a devastating Unleashed Power burst. Since your defensive tool, Command: Protect, cannot mitigate her massive single-target magic damage once you are stunned, dodging that initial knockback and stun trajectory is the sole factor determining who controls the lane. Detayları gör
Syndra

Neden

This matchup is a pure test of micro-spacing between two sphere-manipulating mages. Syndra relies on Dark Sphere combined with Scatter the Weak to stun you from afar, setting up a devastating Unleashed Power burst. Since your defensive tool, Command: Protect, cannot mitigate her massive single-target magic damage once you are stunned, dodging that initial knockback and stun trajectory is the sole factor determining who controls the lane.

Lane etkisi

During the laning phase, both of you can clear waves quickly using Command: Attack and Force of Will. However, the threat of Syndra's stun forces you into a defensive posture. Getting hit by Scatter the Weak immediately concedes lane priority, forces an early recall, or results in a direct death. This limits your ability to safely secure priority for neutral skirmishes with Command: Dissonance.

Nasıl oynanır

Never stand in a direct line behind Syndra's Dark Sphere spawns. Keep moving laterally to make her angle for Scatter the Weak awkward. The moment she wastes this knockback, you have a massive window to play aggressively. Step forward immediately to trade with Command: Attack and Command: Dissonance, or use Command: Shockwave if she is within range, as she cannot reliably peel you off or execute her full burst without that crucial setup.

Tam profil →
Zoe

Zoe

spacingcleanse_timing This skill matchup revolves around denial of Zoe's long-range burst. While Zoe relies on Sleepy Trouble Bubble to set up a lethal Paddle Star!, Orianna has the perfect counter-tool. If you get drowsy, you must quickly recall the ball to yourself using Command: Protect. This shield mitigates the incoming redirected star's damage, neutralizing her main trading pattern while keeping the lane perfectly even. Detayları gör
Zoe

Neden

This skill matchup revolves around denial of Zoe's long-range burst. While Zoe relies on Sleepy Trouble Bubble to set up a lethal Paddle Star!, Orianna has the perfect counter-tool. If you get drowsy, you must quickly recall the ball to yourself using Command: Protect. This shield mitigates the incoming redirected star's damage, neutralizing her main trading pattern while keeping the lane perfectly even.

Lane etkisi

Because you can nullify her burst, Zoe cannot easily force you out of lane or secure easy solo kills. This turns the lane into a battle of wave control and safety. If you block her damage, she wastes mana and loses pressure, allowing you to shove with Command: Attack and Command: Dissonance. Missing your shield, however, means taking massive damage, forcing an early recall and losing mid priority.

Nasıl oynanır

To survive this lane, always keep your ball active in the wave or near Zoe using Command: Attack, but never let it wander too far. The moment you see Sleepy Trouble Bubble flying toward you and realize you cannot dodge it, instantly press Command: Protect to bring the ball back to you before the sleep kicks in. If you miss this timing, use Command: Shockwave immediately as she uses Portal Jump to disrupt her return position.

Tam profil →
Taliyah

Taliyah

wave_clearroaming This matchup is a pure tempo race where Taliyah tries to shove with Threaded Volley and exit the lane using Rock Surfing. Orianna matches this pressure using Command: Attack and Command: Dissonance to clear waves from safety. The critical point of contention revolves around Weaver's Wall; if Orianna maintains deep river vision, she can launch her Ball and use Command: Shockwave to cancel Taliyah’s ultimate channel before she can surf away. Detayları gör
Taliyah

Neden

This matchup is a pure tempo race where Taliyah tries to shove with Threaded Volley and exit the lane using Rock Surfing. Orianna matches this pressure using Command: Attack and Command: Dissonance to clear waves from safety. The critical point of contention revolves around Weaver's Wall; if Orianna maintains deep river vision, she can launch her Ball and use Command: Shockwave to cancel Taliyah’s ultimate channel before she can surf away.

Lane etkisi

Both mid laners possess immense wave clear, meaning the lane often devolves into a non-interactive pushing war. Taliyah threatens deadly zone control with Unraveled Earth and Seismic Shove, preventing Orianna from stepping up too aggressively. If you fail to match her push, she gains free roam timings to impact side lanes. A single unchecked Weaver's Wall rotation can snowball the map, making lane priority and vision control paramount.

Nasıl oynanır

To neutralize Taliyah, prioritize placing deep river wards to track her movement. Never blindly waste Command: Shockwave in lane trades; preserve this ultimate specifically to interrupt her Weaver's Wall channel when she attempts to roam. If she positions near a wall to activate Rock Surfing, position your Ball proactively with Command: Attack. Use Command: Protect to absorb stray Threaded Volley rocks while matching her shove, forcing her to stay in lane rather than impacting the map.

Tam profil →

Diğer eşleşmeler

Avantajlı

23

Bu şampiyonlar genellikle senin temel güçlerine etkili şekilde karşılık veremez, bu da çatışmaya daha fazla özgürlükle yaklaşmanı sağlar. Onları baskı altına almak ve lehine dönen trade'ler zorlamak için genellikle birden fazla yolun vardır. Onlara rahat bir pozisyona dönme fırsatı vermek yerine, bu avantajı kendi temponu dayatmak için kullan.

Akali

Akali

spacingall_in_burst Orianna dominates early because her ranged kit naturally punishes Akali's melee range. Specifically, Orianna can spam Command: Attack and Command: Dissonance from absolute safety, chunking Akali's health bar whenever she tries to farm. Akali cannot trade back effectively without Perfect Execution, forcing her to cower behind Twilight Shroud or forfeit minion gold entirely while absorbing constant poke. Detayları gör
Akali

Neden

Orianna dominates early because her ranged kit naturally punishes Akali's melee range. Specifically, Orianna can spam Command: Attack and Command: Dissonance from absolute safety, chunking Akali's health bar whenever she tries to farm. Akali cannot trade back effectively without Perfect Execution, forcing her to cower behind Twilight Shroud or forfeit minion gold entirely while absorbing constant poke.

Lane etkisi

This oppressive range advantage lets you dictate the wave's positioning from the very first minute. By keeping Akali low, you deny her the ability to contest the crash, giving you free recalls and uncontested roam timers. Akali is forced to use Five Point Strike just to secure last hits under her tower, bleeding resources and losing all mid-lane priority while you safely scale and pressure her plates.

Nasıl oynanır

To execute this, position your ball constantly between Akali and her minion wave. Use Command: Attack to poke whenever she approaches, immediately following up with Command: Dissonance if she lingers. Keep your distance to avoid her Shuriken Flip. Once she reaches level five and unlocks Perfect Execution, play more defensively. Hold Command: Protect to absorb her sudden burst, and drop Command: Shockwave directly on yourself if she attempts to dash in for an all-in kill.

Tam profil →
Brand

Brand

spacingpoke Brand relies heavily on landing Sear after applying Blaze with Pillar of Flame or Conflagration. Orianna completely outranges this threat zone. By manipulating your ball with Command: Attack, you chip away at his health bar from absolute safety. If Brand attempts to step up to return fire, Command: Protect instantly mitigates his burn damage, nullifying his trade potential. Detayları gör
Brand

Neden

Brand relies heavily on landing Sear after applying Blaze with Pillar of Flame or Conflagration. Orianna completely outranges this threat zone. By manipulating your ball with Command: Attack, you chip away at his health bar from absolute safety. If Brand attempts to step up to return fire, Command: Protect instantly mitigates his burn damage, nullifying his trade potential.

Lane etkisi

Brand is forced to use Pillar of Flame to clear minions rather than poke you, bleeding his mana pool rapidly. This allows you to constantly shove him under his turret, securing early priority. He cannot comfortably secure last hits without taking heavy damage, giving you a massive gold lead and free roam timings while he is trapped clearing waves.

Nasıl oynanır

Position your ball constantly behind Brand's caster minions using Command: Attack. When he steps forward to cast, immediately trigger Command: Dissonance to slow him and chunk his health, then pull the ball back with Command: Protect to absorb his inevitable Conflagration spread. If you get caught by Blaze, immediately walk away from your minion wave to deny him a bounce chain from Pyroclasm.

Tam profil →
Ahri

Ahri

spacingtethering Orianna dictates this matchup by abusing her superior zone control. You can safely poke Ahri down with Command: Attack whenever she tries to farm, capitalizing on her lack of early mobility. However, the balance shifts if you misplace your Ball. Moving it too far forward leaves you without the immediate shield of Command: Protect, creating a dangerous window for Ahri to execute a sudden Spirit Rush forward and land a lethal Charm. Detayları gör
Ahri

Neden

Orianna dictates this matchup by abusing her superior zone control. You can safely poke Ahri down with Command: Attack whenever she tries to farm, capitalizing on her lack of early mobility. However, the balance shifts if you misplace your Ball. Moving it too far forward leaves you without the immediate shield of Command: Protect, creating a dangerous window for Ahri to execute a sudden Spirit Rush forward and land a lethal Charm.

Lane etkisi

This dynamic allows you to force Ahri under her turret early, neutralizing the healing from Essence Theft by keeping her health too low to contest the wave. You easily secure a gold lead. Yet, once Ahri unlocks Spirit Rush, the lane dynamic pivots. A single misstep that allows her to bypass Command: Attack with her ultimate will instantly turn your lane dominance into a deadly chase under your own tower.

Nasıl oynanır

To secure your advantage, keep your Ball positioned slightly ahead of your own caster minions, rather than pushing it deep into her territory. This spacing allows you to poke with Command: Attack while ensuring Command: Protect is instantly available if she activates Spirit Rush. If she dashes aggressively, immediately trigger Command: Dissonance on yourself for the movement speed boost, weave sideways to dodge her Charm, and only unleash Command: Shockwave once her initial dash is spent.

Tam profil →
Ekko

Ekko

pokeall_in Orianna dominates this matchup by utilizing her massive range advantage to bully Ekko whenever he attempts to farm. By constantly repositioning the ball with Command: Attack, you can chip away at his health bar from a safe distance. However, this safety is immediately compromised if Ekko bypasses your ball with Phase Dive, allowing him to close the gap, trigger Z-Drive Resonance, and turn the trade in his favor. Detayları gör
Ekko

Neden

Orianna dominates this matchup by utilizing her massive range advantage to bully Ekko whenever he attempts to farm. By constantly repositioning the ball with Command: Attack, you can chip away at his health bar from a safe distance. However, this safety is immediately compromised if Ekko bypasses your ball with Phase Dive, allowing him to close the gap, trigger Z-Drive Resonance, and turn the trade in his favor.

Lane etkisi

This dynamic forces Ekko to bleed gold, as he must choose between taking heavy damage from Command: Attack or giving up minions. By maintaining a slow push near your turret, you deny him the space to safely initiate with Phase Dive. This zoning pressure severely delays his ability to shove lanes with Timewinder, keeping him trapped under his own tower while you control the map's mid priority.

Nasıl oynanır

To secure this advantage, never throw Command: Attack directly behind Ekko, as this leaves you defenseless. Instead, keep the ball positioned slightly ahead of your own caster minions. If he attempts to jump forward using Phase Dive, immediately self-cast Command: Protect to absorb his initial burst, then activate Command: Dissonance to slow his retreat. This allows you to safely chase him down with basic attacks while his cooldowns are offline.

Tam profil →
Aurelion Sol

Aurelion Sol

poke_pressurespacing Aurelion Sol relies heavily on channeling Breath of Light while stationary to stack Cosmic Creator and clear waves. As Orianna, you completely dominate this dynamic because your Ball can be placed ahead of his reach. The moment he plants himself to channel, you can instantly disrupt him from extreme safety using Command: Shockwave, cutting his main damage source entirely while keeping yourself out of his Singularity pull. Detayları gör
Aurelion Sol

Neden

Aurelion Sol relies heavily on channeling Breath of Light while stationary to stack Cosmic Creator and clear waves. As Orianna, you completely dominate this dynamic because your Ball can be placed ahead of his reach. The moment he plants himself to channel, you can instantly disrupt him from extreme safety using Command: Shockwave, cutting his main damage source entirely while keeping yourself out of his Singularity pull.

Lane etkisi

This interaction strips Aurelion Sol of his early push power. Whenever he tries to clear with Breath of Light, your Command: Attack and Command: Dissonance combo forces him to cancel his channel or take heavy, unretaliated damage. By denying his farm and forcing early recalls, you can easily secure mid priority, keep his tower under constant pressure, and delay his scaling without letting him roam with Astral Flight.

Nasıl oynanır

Position your Ball constantly inside his caster minions using Command: Attack. Hold your Command: Shockwave specifically for the moment he commits to his Astral Flight or stands still to channel. If he plays excessively safe and refuses to trade, shift your focus to shielding yourself with Command: Protect to ignore his passive poke, while continuously shoving him under turret to make him lose stacks under fire.

Tam profil →
Kayle

Kayle

pokespacing As a ranged bully, you hold complete sway over Kayle's weak early game. By placing your ball aggressively with Command: Attack and detonating Command: Dissonance whenever she steps up to last-hit, you constantly threaten her health bar. This oppressive range denial forces her into a defensive loop, burning through her mana pool to cast Celestial Blessing just to heal your poke and scrape by. Detayları gör
Kayle

Neden

As a ranged bully, you hold complete sway over Kayle's weak early game. By placing your ball aggressively with Command: Attack and detonating Command: Dissonance whenever she steps up to last-hit, you constantly threaten her health bar. This oppressive range denial forces her into a defensive loop, burning through her mana pool to cast Celestial Blessing just to heal your poke and scrape by.

Lane etkisi

This matchup quickly turns into a one-sided siege. Because Kayle must retreat from your ball, you easily secure wave priority and can shove her under turret. She will be forced to use Radiant Blast or Starfire Spellblade just to secure ranged farm under pressure, leaving her unable to contest your recalls or match your rotations. You will build a massive gold lead from turret plates while she struggles to scale.

Nasıl oynanır

Keep your ball positioned permanently between her and the melee minions, utilizing Command: Attack to block her path. Do not blindly spam your skills; instead, wait for her to activate Starfire Spellblade to farm, then immediately punish her with Command: Dissonance. If she manages to activate Divine Judgment during a dive, use Command: Protect on yourself to absorb the damage, then chase her down with Clockwork Windup attacks once her invulnerability fades.

Tam profil →
Jayce

Jayce

poketethering Orianna dictates the pace because her Command: Attack lets her manipulate the ball and harass from deep behind her minion wave. Since Jayce relies on firing To the Skies! through his Thundering Blow gate, your constant positioning behind minions completely blocks his linear poke. He cannot easily walk up to trade with Lightning Field without taking heavy damage from your superior, long-range zone control. Detayları gör
Jayce

Neden

Orianna dictates the pace because her Command: Attack lets her manipulate the ball and harass from deep behind her minion wave. Since Jayce relies on firing To the Skies! through his Thundering Blow gate, your constant positioning behind minions completely blocks his linear poke. He cannot easily walk up to trade with Lightning Field without taking heavy damage from your superior, long-range zone control.

Lane etkisi

This dynamic forces Jayce into a defensive posture, preventing him from securing early priority or roaming. You can comfortably slow-push waves, using Command: Dissonance to punish him whenever he steps up to auto-attack minions. Because he is constantly chipped down and unable to thin the wave safely, his recall timings are ruined, locking him under turret while you secure vision in the river.

Nasıl oynanır

To execute this cleanly, keep the ball positioned slightly ahead of your melee minions using Command: Attack. Stand directly behind your caster minions so Jayce's To the Skies! always collides with them. If he attempts to jump on you with Transform Mercury Cannon, immediately self-cast Command: Protect to absorb the burst, then trigger Command: Dissonance to slow his retreat while hitting him with Clockwork Windup empowered basic attacks as he runs back.

Tam profil →
Kennen

Kennen

poke_damagespacing Orianna's range completely dominates Kennen's threat zone. By deploying the Ball with Command: Attack and triggering Command: Dissonance, you create a zone of constant danger that Kennen cannot easily bypass. Because his primary engage relies on running forward with Lightning Rush, he is forced to walk through your slow and damage before he can even think about landing Thundering Shuriken or stacking Mark of the Storm. Detayları gör
Kennen

Neden

Orianna's range completely dominates Kennen's threat zone. By deploying the Ball with Command: Attack and triggering Command: Dissonance, you create a zone of constant danger that Kennen cannot easily bypass. Because his primary engage relies on running forward with Lightning Rush, he is forced to walk through your slow and damage before he can even think about landing Thundering Shuriken or stacking Mark of the Storm.

Lane etkisi

This range disparity forces Kennen to use Thundering Shuriken just to secure last hits rather than poking you. You can easily park the Ball near his caster minions, denying him gold and pressure. Since he cannot safely walk up to auto-attack for his passive Electrical Surge stacks, you will constantly hold mid priority, keeping him trapped under turret and unable to roam with Lightning Rush to help his jungler.

Nasıl oynanır

Keep the Ball positioned aggressively ahead of your own melee minions. Whenever Kennen activates Lightning Rush to rush forward or clear, immediately drop Command: Attack and Command: Dissonance directly in his path to stop his momentum. If he attempts a desperate flash engage with Slicing Maelstrom, quickly cast Command: Protect on yourself for the shield and defensive stats, then trigger Command: Shockwave directly on top of your own character to fling him away and cancel his ultimate's threat.

Tam profil →
Kai'Sa

Kai'Sa

pokespacing As a short-ranged marksman in the mid lane, Kai'Sa cannot match your safety. By constantly repositioning your ball with Command: Attack, you create an impassable zone that denies her access to the minion wave. This forces her to hemorrhage mana by using Void Seeker just to secure individual last hits from afar, completely neutralizing her early wave clear and preventing her from stacking Second Skin on you. Detayları gör
Kai'Sa

Neden

As a short-ranged marksman in the mid lane, Kai'Sa cannot match your safety. By constantly repositioning your ball with Command: Attack, you create an impassable zone that denies her access to the minion wave. This forces her to hemorrhage mana by using Void Seeker just to secure individual last hits from afar, completely neutralizing her early wave clear and preventing her from stacking Second Skin on you.

Lane etkisi

This range disparity ensures you dictate the wave's tempo from the first minute. Since Kai'Sa is forced to farm with Void Seeker, she cannot contest your push. You will easily secure a health advantage through passive poke while keeping her trapped under her turret. This constant pressure limits her ability to roam, minimizes her passive income, and allows you to chip away at her tower plates completely uncontested.

Nasıl oynanır

Keep your ball parked aggressively past her melee minions using Command: Attack to block her approach. Always hold Command: Protect to absorb the damage if she tries to engage with Killer Instinct or poke you with Void Seeker. If she attempts to force a trade using Supercharge, immediately cast Command: Dissonance on yourself to speed away, keeping her at your maximum range while your basic attacks from Clockwork Windup punish her retreat.

Tam profil →
Lissandra

Lissandra

poke_damagespacing Orianna completely dictates the distance in this matchup. By parking your ball deep with Command: Attack and threatening with Command: Dissonance, you create an impassable zone. Lissandra's short-ranged Ice Shard cannot match this reach. To interact with you or even touch the wave safely, she is forced to burn her only mobility tool, Glacial Path, just to get into spell range, which immediately telegraphs her aggression. Detayları gör
Lissandra

Neden

Orianna completely dictates the distance in this matchup. By parking your ball deep with Command: Attack and threatening with Command: Dissonance, you create an impassable zone. Lissandra's short-ranged Ice Shard cannot match this reach. To interact with you or even touch the wave safely, she is forced to burn her only mobility tool, Glacial Path, just to get into spell range, which immediately telegraphs her aggression.

Lane etkisi

This range disparity translates to absolute wave control. You can slow-push or freeze at will because Lissandra cannot contest the push without taking heavy poke. She must bleed health to farm, delaying her item spikes. Furthermore, because she has to use Glacial Path forward to trade, she becomes extremely vulnerable to ganks, neutralizing her safety and pinning her under tower while you roam freely.

Nasıl oynanır

Keep your ball positioned constantly between Lissandra and her caster minions. When she casts Glacial Path towards you, do not panic. Immediately place Command: Attack on her destination point and shield yourself with Command: Protect to absorb Ring of Frost. As she arrives, trigger Command: Shockwave to disrupt her engage before she can cast Frozen Tomb on you, turning her desperate engage into an easy kill.

Tam profil →
Mel

Mel

tetheringpoke Orianna dominates this matchup because her sphere allows her to completely outrange Mel's spell rotations. Whenever Mel tries to step up to land her poke, you can instantly nullify her magic damage with Command: Protect. Because your ball travels further, you can immediately transition into a counter-offensive with Command: Attack, hitting Mel from a distance where she cannot safely trade back, effectively neutralizing her lane pressure. Detayları gör
Mel

Neden

Orianna dominates this matchup because her sphere allows her to completely outrange Mel's spell rotations. Whenever Mel tries to step up to land her poke, you can instantly nullify her magic damage with Command: Protect. Because your ball travels further, you can immediately transition into a counter-offensive with Command: Attack, hitting Mel from a distance where she cannot safely trade back, effectively neutralizing her lane pressure.

Lane etkisi

This interaction forces Mel into a defensive posture, preventing her from establishing lane priority. You can easily park your ball in the caster minion line, denying her the ability to step up and clear waves. As Mel drops low on health from your constant, shielded trades, she is forced to take unfavorable recall timings, allowing you to secure plates and create a massive gold lead while keeping her locked under turret.

Nasıl oynanır

To convert this lead, keep your sphere positioned aggressively ahead of your own minion wave. Never leave the ball sitting on Orianna herself; instead, use Command: Attack to constantly threaten Mel's standing zone. If she attempts to trade, quickly self-cast Command: Protect to absorb the blow, then trigger Clockwork Windup with basic attacks if she missteps too close. If you get ganked and lose your health lead, play defensively behind your sphere and wait for Command: Shockwave to punish her under your own tower.

Tam profil →
Malphite

Malphite

poke_heavyzone_control Orianna dictates this matchup entirely through her superior range and defensive answers. Whenever Malphite steps up to roll his Seismic Shard at you, you can instantly mitigate the targeted damage using Command: Protect. Meanwhile, his lack of gap-closers before unlocking Unstoppable Force means you can endlessly chip away at his Granite Shield and health bar with Command: Attack from complete safety, rendering his passive shield useless. Detayları gör
Malphite

Neden

Orianna dictates this matchup entirely through her superior range and defensive answers. Whenever Malphite steps up to roll his Seismic Shard at you, you can instantly mitigate the targeted damage using Command: Protect. Meanwhile, his lack of gap-closers before unlocking Unstoppable Force means you can endlessly chip away at his Granite Shield and health bar with Command: Attack from complete safety, rendering his passive shield useless.

Lane etkisi

This interaction forces Malphite to bleed gold under his turret, as he cannot contest the minion waves without taking heavy poke. By keeping his Granite Shield permanently broken, you prevent him from finding comfortable recall timings. You will easily secure mid-lane priority, forcing Malphite to waste his mana pool farming with Ground Slam or Seismic Shard, leaving him too weak to assist his jungler.

Nasıl oynanır

Keep your Ball positioned constantly ahead of your own melee minions using Command: Attack. This zone prevents Malphite from walking up to last-hit without taking a trade. Never throw your Ball deep behind him if he has mana; keep it close enough so Command: Protect can shield you the millisecond you see his Seismic Shard animation. Once he reaches level five, maintain maximum tether range so you can reactively disrupt his follow-up with Command: Shockwave.

Tam profil →
Ziggs

Ziggs

wave_clearpoke Orianna naturally neutralizes Ziggs's primary poke tool, Bouncing Bomb, by using Command: Protect to absorb the damage. Because your shield negates his main source of lane pressure, Ziggs cannot easily force you out of lane or easily trigger his Short Fuse passive on your tower. As the game goes on, your Command: Shockwave provides far more reliable and game-changing teamfight disruption compared to his highly avoidable Mega Inferno Bomb. Detayları gör
Ziggs

Neden

Orianna naturally neutralizes Ziggs's primary poke tool, Bouncing Bomb, by using Command: Protect to absorb the damage. Because your shield negates his main source of lane pressure, Ziggs cannot easily force you out of lane or easily trigger his Short Fuse passive on your tower. As the game goes on, your Command: Shockwave provides far more reliable and game-changing teamfight disruption compared to his highly avoidable Mega Inferno Bomb.

Lane etkisi

Since Bouncing Bomb can be consistently shielded, you dictate the minion waves. By using Command: Attack and Command: Dissonance, you can match his waveclear or freeze the wave near your turret, forcing Ziggs to overextend. He cannot safely use Satchel Charge to execute your tower because you keep him pushed back, preventing him from roaming or helping his jungler while you scale comfortably into your massive teamfight spikes.

Nasıl oynanır

Position the Ball defensively with Command: Protect ready whenever Ziggs steps forward to throw Bouncing Bomb. Avoid standing directly inside your own minion wave so he cannot hit both you and the wave with a single explosion. If he tries to escape an engage using Satchel Charge, immediately deploy Command: Shockwave to interrupt his self-knockback or pull him back. Should you fall behind, focus purely on safe farming with Command: Attack from maximum range.

Tam profil →
Veigar

Veigar

spacingscaling Orianna completely neutralizes Veigar's primary defensive tool because her ball doesn't care about cages. When Veigar drops Event Horizon to zone you out or protect himself, he expects safety. Instead, you can command your sphere directly through the boundary using Command: Attack. Since your damage source is detached from your body, you can safely chunk his health bar from outside his reach while he stands trapped behind his own walls. Detayları gör
Veigar

Neden

Orianna completely neutralizes Veigar's primary defensive tool because her ball doesn't care about cages. When Veigar drops Event Horizon to zone you out or protect himself, he expects safety. Instead, you can command your sphere directly through the boundary using Command: Attack. Since your damage source is detached from your body, you can safely chunk his health bar from outside his reach while he stands trapped behind his own walls.

Lane etkisi

This interaction destroys Veigar’s ability to safely farm and stack Phenomenal Evil Power. Because his Event Horizon fails to halt your harass, he is forced to drop Dark Matter defensively to clear waves rather than trading. You constantly dictate the wave's position, pushing him under tower where he must burn mana on Baleful Strike. This relentless health attrition prevents him from ever finding the threat threshold for Primordial Burst.

Nasıl oynanır

When laning, keep your ball positioned aggressively past his melee minions. If Veigar steps up to cast Baleful Strike, immediately clip him with Command: Attack followed by Command: Dissonance. If he reacts by placing Event Horizon around you, do not panic or try to walk through the stun boundary; instead, stand still, shield yourself with Command: Protect if needed, and steer the ball straight onto him to punish his locked animation.

Tam profil →
Vladimir

Vladimir

spacingsustain Orianna completely dictates this matchup because Vladimir's early game is too weak to contest her range. By constantly repositioning the Ball with Command: Attack, you can chip away at his health bar before he can safely stack Crimson Pact or heal with Transfusion. However, Vladimir's safety hinges entirely on Sanguine Pool, which can effortlessly nullify your ultimate, Command: Shockwave, if you use it too predictably. Detayları gör
Vladimir

Neden

Orianna completely dictates this matchup because Vladimir's early game is too weak to contest her range. By constantly repositioning the Ball with Command: Attack, you can chip away at his health bar before he can safely stack Crimson Pact or heal with Transfusion. However, Vladimir's safety hinges entirely on Sanguine Pool, which can effortlessly nullify your ultimate, Command: Shockwave, if you use it too predictably.

Lane etkisi

Because Vladimir lacks early waveclear and relies on charging Tides of Blood at the cost of his own health, you can easily establish permanent wave priority. Keep the minions frozen near your tower to force him to overextend for Transfusion Qs, or slow push to crash massive waves, forcing him under tower where your Command: Attack and Command: Dissonance poke can deny him farm while chipping his tower's plates.

Nasıl oynanır

Never initiate a fight with Command: Shockwave unless you have already forced Vladimir to use Sanguine Pool. Instead, harass him with basic attacks amplified by Clockwork Windup when his Transfusion is on cooldown. If he rushes forward with a crimson bar, shield yourself using Command: Protect and walk back. Once his pool is down, immediately position the Ball behind him with Command: Attack and pull the trigger on your ultimate to secure the kill.

Tam profil →
Vex

Vex

spacingpoke Vex relies on enemies dashing to apply Gloom marks for extra damage. Because Orianna's entire kit is completely dash-free, Vex's Doom 'n Gloom passive remains mostly inactive. This allows you to position safely beyond the reach of Personal Space, utilizing Command: Attack and Command: Dissonance to constantly chip away at Vex's health without ever fearing a sudden burst or an easy Doom fear setup. Detayları gör
Vex

Neden

Vex relies on enemies dashing to apply Gloom marks for extra damage. Because Orianna's entire kit is completely dash-free, Vex's Doom 'n Gloom passive remains mostly inactive. This allows you to position safely beyond the reach of Personal Space, utilizing Command: Attack and Command: Dissonance to constantly chip away at Vex's health without ever fearing a sudden burst or an easy Doom fear setup.

Lane etkisi

This lack of threat lets you dominate the wave. You can park the Ball deep in Vex's minion wave, forcing her to choose between using Mistral Bolt to farm or trying to return fire. Since she cannot easily trade back without her passive value, Vex is forced into a defensive posture, losing mid-lane priority. You can easily shield her Looming Darkness poke with Command: Protect, slowly driving her to recall.

Nasıl oynanır

Keep your Ball positioned aggressively forward. Stand behind your own minions to make dodging Mistral Bolt easier, and use Command: Attack to harass her whenever she approaches to last-hit. If Vex reaches level five and tries to turn the lane with Shadow Surge, immediately pull the Ball back with Command: Protect to absorb the initial impact, then cast Command: Shockwave under your own feet to disrupt her incoming dash and completely turn the trade.

Tam profil →
Heimerdinger

Heimerdinger

range_disadvantagepoke Orianna completely hospitalizes Heimerdinger's zone control because her ball-anchored spells outrange his setups. By sending her ball forward with Command: Attack and detonating it with Command: Dissonance, she can safely dismantle H-28G Evolution Turret placements from outside their auto-attack radius. This prevents Heimerdinger from establishing his protective nest, rendering his passive Hextech Affinity useless and leaving him vulnerable to direct poke. Detayları gör
Heimerdinger

Neden

Orianna completely hospitalizes Heimerdinger's zone control because her ball-anchored spells outrange his setups. By sending her ball forward with Command: Attack and detonating it with Command: Dissonance, she can safely dismantle H-28G Evolution Turret placements from outside their auto-attack radius. This prevents Heimerdinger from establishing his protective nest, rendering his passive Hextech Affinity useless and leaving him vulnerable to direct poke.

Lane etkisi

Without his H-28G Evolution Turret setups, Heimerdinger loses his natural wave-shoving speed and tower pressure. You dictate the wave's state, forcing him to farm under tower where his Hextech Micro-Rockets are inefficient. Since he cannot safely walk up to land CH-2 Electron Storm Grenade without turret cover, you secure free recall timings, permanent mid priority, and easy roams while he remains glued to his lane.

Nasıl oynanır

Position yourself laterally, away from your own minion wave. This forces Heimerdinger to choose between aiming Hextech Micro-Rockets at you or the wave. Keep your ball stationed near his spawn points; the moment he drops an H-28G Evolution Turret, instantly destroy it using a Command: Attack and Command: Dissonance combo. Always hold Command: Protect to absorb rogue rocket damage, and save Command: Shockwave to interrupt him if he uses UPGRADE!!! to summon a giant turret.

Tam profil →
Annie

Annie

spacing_testsurvive_lane Orianna completely dictates this matchup because of her superior threat range. By constantly placing her ball with Command: Attack near Annie's caster minions, she threatens immediate poke. Annie’s short-ranged Disintegrate and Incinerate require her to step directly into your zone of control. Without Flash, Annie cannot bypass your ball to discharge a stunned Pyromania combo, rendering her offensive threat neutralised during neutral play. Detayları gör
Annie

Neden

Orianna completely dictates this matchup because of her superior threat range. By constantly placing her ball with Command: Attack near Annie's caster minions, she threatens immediate poke. Annie’s short-ranged Disintegrate and Incinerate require her to step directly into your zone of control. Without Flash, Annie cannot bypass your ball to discharge a stunned Pyromania combo, rendering her offensive threat neutralised during neutral play.

Lane etkisi

This range gap forces Annie into a miserable laning phase where she must bleed health for CS. You can safely freeze the wave or slow-push it, forcing her to burn mana using Disintegrate under her own turret. Since she cannot contest the wave without taking massive damage, she loses all mid-lane priority, preventing her from rotating to help her jungler or securing early scuttle crabs.

Nasıl oynanır

Always position yourself well behind your ball, keeping it parked aggressively forward with Command: Attack. If Annie activates Molten Shield to gain speed and close the gap, immediately trigger Command: Dissonance to slow her advance and step backward. Never walk within range of her Flash-stun when her Pyromania is fully charged; instead, force her to waste it defensively or use Command: Protect to absorb any sudden, desperate Summon: Tibbers bursts.

Tam profil →
Twisted Fate

Twisted Fate

wave_clearpoke Orianna dominates this matchup because her constant poke with Command: Attack outranges Twisted Fate's basic trading patterns. By repeatedly positioning the ball aggressively, you chip his health down, forcing him to expend his mana on waveclear. This pressure systematically deprives him of offensive options, compelling him to constantly lock in blue cards with Pick a Card for mana sustain rather than threatening you with gold card stuns. Detayları gör
Twisted Fate

Neden

Orianna dominates this matchup because her constant poke with Command: Attack outranges Twisted Fate's basic trading patterns. By repeatedly positioning the ball aggressively, you chip his health down, forcing him to expend his mana on waveclear. This pressure systematically deprives him of offensive options, compelling him to constantly lock in blue cards with Pick a Card for mana sustain rather than threatening you with gold card stuns.

Lane etkisi

This relentless harassment dictates the tempo of the entire map. Because Twisted Fate is constantly low on health and forced to choose blue cards, he lacks the pressure to push the wave. You easily secure early priority, making it extremely risky for him to channel Destiny. If he attempts a global roam, he either does so with critically low health or pays a massive price in tower plates and lost minions.

Nasıl oynanır

Keep Command: Attack positioned constantly ahead of his caster minions to zone him out. If he locks a gold card with Pick a Card, immediately step back and shield yourself with Command: Protect to absorb potential Wild Cards damage. Should he attempt to channel Destiny within your sight, immediately pull him back and disrupt the teleportation using Command: Shockwave. If you lose track of him, punish his absence by shoving hard with Command: Dissonance to maximize tower damage.

Tam profil →

Diğer eşleşmeler

Items to Counter Orianna

Buy these items to reduce this champion's effectiveness in your games.

Mercury's Treads
Mercury's Treads
Stasis Enchant
Stasis Enchant
Null-Magic Mantle →
Null-Magic Mantle →

Bu şampiyon nasıl counterlanır

Counter açısı

Orianna sayaçlarını anlamak, onun, topu ve kontrol etmek istediği alan arasındaki ilişkinin neyin bozduğunu anlamak demektir. O sadece doğrudan hasara karşı savunmasız değildir: esas olarak, düşmanlar o açısını ayarlamadan önce tepki vermeye zorladığında zarar görür. Mesafeyi aşan suikastçılar, onu dalgadan uzaklaştırmaya zorlayan şampiyonlar veya yığın oluşturmadan menzilini tehdit eden büyücüler, Şok Dalgası fırsat penceresini daraltır. Orianna, Barrier, Flash ve temiz bir dalga tutarsa birçok koridorda hayatta kalabilir, ancak sürekli baskı altında, yan görüşsüz ve topu her zaman savunma amaçlı kullanarak oynarsa etkisini hızla yitirir.

Patch bağlamı

Orianna’e karşı en etkili stratejiler, hepsi de ona aynı şekilde saldırmaz. Bazıları, Fizz veya Zed gibi, asıl hedeften önce savunma araçlarını zorlayarak onun hareket kabiliyet eksikliğini doğrudan ortadan kaldırmaya çalışır. Diğerleri ise, Yasuo, Diana veya Akali gibi, topun hazır olmadığı anlarda sahaya girebildikleri için onun pozisyonunu zayıflatır. Brand, Lux veya Aurelion Sol gibi uzun menzilli büyücüler de ona farklı bir şekilde baskı uygulayabilir: açık bir Shockwave oluşturmak zorunda kalmadan alanı paylaşırlar. Orianna için uyum sağlamak, her koridorda bir poke düellosu oynamak değil, mesafeyi, dalga durumunu ve savunma yeteneklerinin bekleme sürelerini yönetmektir.

Hızlı okuma

  • Suikastçılar, Orianna’i, topu etrafındaki alanı korumak yerine itmek için kullandığında cezalandırırlar.
  • Mobil şampiyonlar, taşıyıcıları gerçekten savunmasız kalmadan önce Shockwave’i R yeteneğini kullanmaya zorlarlarsa, onun değerini düşürürler.
  • Uzun menzilli büyücüler, onu dalgayla mücadele etmekle hedefler önünde güvenli bir konumda kalmak arasında seçim yapmaya zorluyor.

Counter arketipleri

Doğrudan saldırı suikastçıları

Bu eşleşmeler tehlikelidir çünkü Orianna’in en maliyetli gerekliliğine saldırırlar: Hedef mücadelesine kadar Flash, Barrier ve istikrarlı mesafeyi korumak. Fizz ve Zed sadece öldürme tehdidi oluşturmakla kalmaz; aynı zamanda Orianna’i topu savunma amaçlı kullanmaya zorlayabilir, bu da dalga ve nehir üzerindeki baskısını ortadan kaldırır. Eğer Q’yu ıskalarsa ya da yanlış bir anda öne çıkıp saldırırsa, Shockwave işe yaramaya başlamadan kontrol penceresini kaybedebilir.

Şampiyon nasıl uyum sağlamalı. Orianna, seviye geçiş zamanlamalarına dikkat etmeli, dalgayı geri çekilebileceği bir konumda tutmalı ve düşmanın giriş araçları hazır olduğunda topu çok uzağa göndermekten kaçınmalıdır. Amacı her takası kazanmak değil, Flash, Barrier ve R yeteneklerini hazır haldeyken ilk hedefe ulaşmaktır.

Mesafeyi bozan hareketli yakın dövüş şampiyonları

Bu şampiyonlar, Orianna’i rahatsız ediyor çünkü sadece düz bir çizgide ilerlemiyorlar. Yasuo, dalga etrafında manevra yaparak onun Q kalıplarını bozabilir; Diana, aşırı ilerlemiş bir topu hızlı bir hamle ile cezalandırabilir; Akali ise Shockwave’in hazırlık yapmasını zorlaştıran açılardan tehdit oluşturur. Orianna’in sorunu sadece düello değil: Topun dürtme, kalkan, yavaşlatma ya da karşı saldırıya hazırlık yapması gerektiğine sürekli karar vermesi gerekiyor.

Şampiyon nasıl uyum sağlamalı. Gereksiz Q atışlarını azaltmalı, W'yi rakibin yaklaşmasını engellemek ya da kaçışını hızlandırmak için saklamalı ve salt uzak mesafeden saldırıdan ziyade dalga hareketlerine daha fazla odaklanmalıdır. Eğer hareket kabiliyeti yüksek yakın dövüş şampiyonunun hâlâ bir atılma yeteneği varsa, Orianna her aşırı ilerlemiş rakibi bir fırsat olarak değerlendirmelidir.

Menzil ve kontrol büyücüleri

Bu eşleşmeler her zaman Orianna’i doğrudan ortadan kaldırmaz, ancak onun en iyi performansını sergilemesini engelleyebilir. Orianna koridora fazla odaklanırsa, Aurelion Sol ve Twisted Fate baskıyı başka bir yere kaydırabilir. Brand ve Lux, menzilden alan mücadelesi vererek Orianna’i topu yerleştirmek için öne çıkmakla güvenli kalmak arasında seçim yapmaya zorlar. Hedefe geç kalırsa, kitinin en büyük avantajını, yani düşmanlar gelmeden önce korku yaratmayı, kaybeder.

Şampiyon nasıl uyum sağlamalı. Orianna, sürekli düello yapmaya çalışmak yerine, temiz dalgalara ve ormancısıyla senkronize hareketlere öncelik vermelidir. Bu tür rakiplere karşı en iyi Q, her zaman koridorda isabet eden Q değil, kendisini tehlikeye atmadan nehre girişi hazırlayan Q’dur.

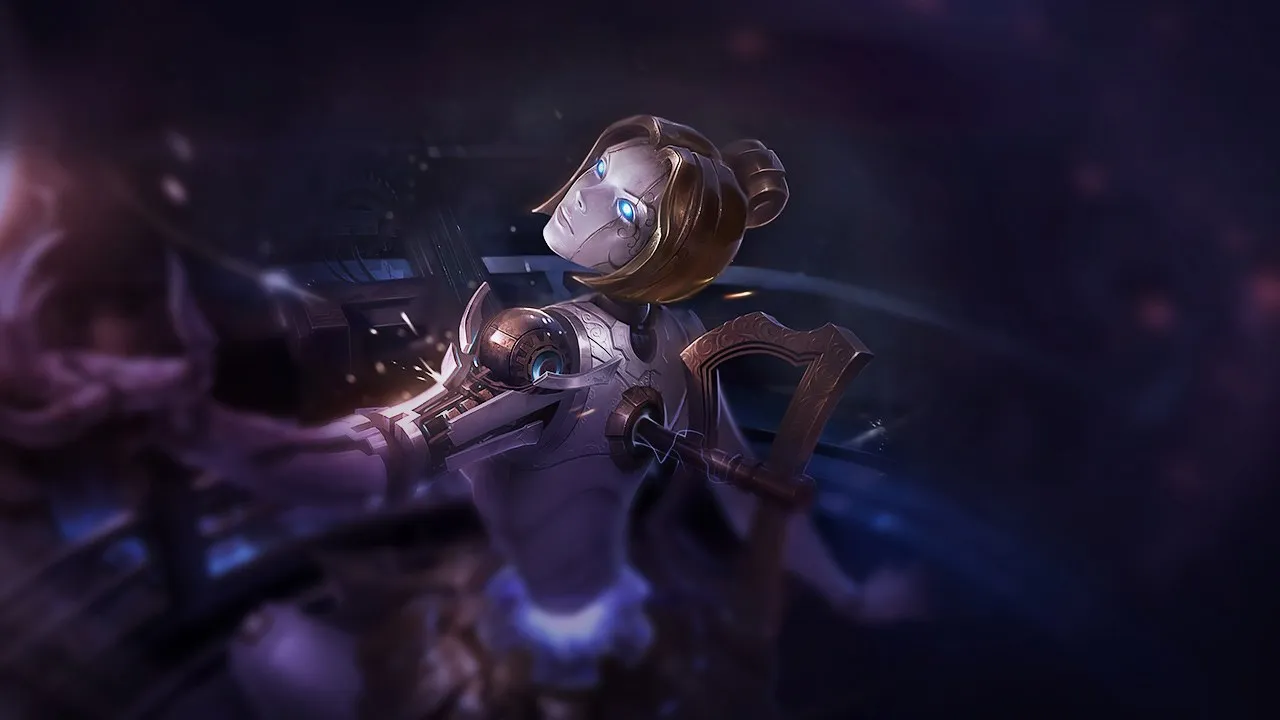
Öncelikli matchuplar

Fizz

Fizz öncelikli olarak ele alınmalıdır, çünkü en yaygın kötü Orianna alışkanlığını cezalandırır: kendi çevresinde bir savunma bölgesi oluşturmadan Q ve W tuşlarını kullanarak rakibi itmek veya dürtmek. Top uzaktayken all-in tehdidinde bulunabiliyorsa, Orianna ya koridor baskısını kaybetmeyi ya da Flash ve Barrier’ı riske atmayı seçmek zorundadır. Bu nedenle bu eşleşmede asıl önemli olan, salt poke yapmak değil, her büyü kullanıldıktan sonra mesafeyi doğru yönetmektir.

Zed

Zed, Orianna’in savunma araçlarını çok daha hassas bir şekilde yönetmesini zorunlu kılar. Top, Shockwave’i yavaşlatabilir, koruyabilir ve tehdit edebilir; ancak bu, Shockwave harekete geçtiğinde topun hâlâ doğru bölgeye bağlı olması durumunda mümkündür. Orianna, dalgayı kontrol etmek için Q'yu çok erken kullanırsa, Zed, onun anında tepki veremediği bir boşluk yaratabilir. Asıl amaç, her mid takasını kazanmak değil, Stasis veya Barrier hazır haldeyken çatışmalara girmektir.

Ona karşı yaygın hatalar

Ona karşı yaygın hatalar

  • Orianna’e karşı, topun konumunu kontrol etmeden bir choke’da gruplandırmak, ona genellikle serbest bir Shockwave fırsatı verir.
  • R yeteneğinin bekleme süresi dolduğunda sanki zayıfmış gibi oynamak bir hatadır: Kalkanı, yavaşlatma etkisi ve dalga kontrolü hâlâ önemlidir.
  • Onun hedefe ilk ulaşmasına izin vermek, topu yerleştirmek için mümkün olan en iyi araziyi ona sağlar.
  • Her çizgiyi giriş için kullanıp çıkış bırakmamak, Orianna’in Shockwave’i çatışma yerine bir ceza haline getirmesine neden olur.

  • Onun peel yeteneğini hafife almak sık rastlanan bir durumdur: Öldürmese bile, carry’yi kurtarabilir ve bir dalışın zamanlamasını bozabilir.

Koç notları

  • Orianna’i yenmenin en iyi yolu her zaman onu koridorda öldürmek değildir; çoğu zaman onu, hedef öncesinde panik içinde topu kullanmaya zorlamaktır.

  • Orianna ile karşılaşırsanız, şampiyondan çok topa dikkat edin. Topun konumu kötü olduğunda, onun asıl tehdidi olan yeteneğinin bekleme süresi başlar.

FAQ

Orianna’i koridorda nasıl cezalandırırsınız?

Topu kendisinden çok uzaklaştığında ya da itmek için kullanılmış olduğunda bu anları cezalandırmalısınız. Top dalgayı kontrol ederken çatışmaya girerseniz, Orianna genellikle çok geç kalkan açmak, baskı yapmadan geri çekilmek ya da bir savunma büyüsü harcamak arasında seçim yapmak zorunda kalır. Cezalandırma, anında bir öldürme olmak zorunda değildir: Barrier, Flash veya kötü bir geri dönüşe zorlamak, onun ilk dragon darbesini azaltmak için yeterlidir. Önemli olan, topun sizi yavaşlatmak veya Shockwave'i hazırlamak için zaten yerleştirilmiş olduğu anda saldırıya geçmemektir.

Suikastçılar, Orianna’e karşı en etkili karşı önlemler mi?

Suikastçılar genellikle Orianna’de oldukça etkilidir, ancak bu yalnızca onun savunma fırsatlarını dikkate aldıkları takdirde geçerlidir. Fizz veya Zed, onun Flash’ını kullanmaya zorlayabilir ve koridorda rahatsız edici bir ortam yaratabilir; ancak hazırlıklı bir rakibe zamanlaması kötü bir all-in hamlesi, ters tepebilir. Asıl karşı strateji sadece ani hasar değil; onun, savaş düzeni kurmak yerine hayatta kalmak için büyülerini kullanmaya zorlayabilmektir. Suikastçı bu baskıyı objektif tempoya dönüştüremezse, Orianna, mid oyununda yeniden tehlikeli hale gelebilir.

Orianna’e karşı hedefleri nasıl oynamalısınız?

Ona ilk fırsatı vermemelisiniz. Eğer Orianna, dragon’e sizden önce ulaşırsa, top girişi çoktan kontrol altına almış olabilir ve takımınız ya ikiye ayrılmak ya da tehlikeli bir bölgeye girmek zorunda kalır. En iyi tepki, yan görüş alanını erkenden kontrol altına almak, Orianna'i topunu hareket ettirmeye zorlamak ve ardından bir grup halinde ilerlemek yerine farklı açılardan girmektir. Shockwave'i önceliği düşük bir hedefe yönlendirirseniz, çatışma çok daha oynanabilir hale gelir.

Orianna, gerideyken neden hâlâ tehlikeli?

Çünkü ultisi, büyük bir altın farkı olmasa bile yapısal değerini korur. Geride kalan bir Orianna, E ve W yetenekleriyle bir carry’yi kurtarabilir, düşmanın ilerleyişini yavaşlatabilir ya da Shockwave ile sıkışık bir grupa hasar verebilir. Tek başına öldürmek için yeterli hasarı olmayabilir, ancak yine de çatışmanın gidişatını değiştirebilir. Sık yapılan hata, R yeteneğini hesaba katmadan ona dalmaktır: arkadan bile olsa, sizin saldırınızı kendi takımının başlangıç noktasına dönüştürebilir.