agosto de 2026 · Patch 7.2d
Mage · MID · SUPPORT

Guia de counters de Orianna Wild Rift

Orianna é vulnerável contra composições móveis que conseguem desviar de sua esfera e dar engage antes que ela se reposicione. Perfis de poke de longo alcance esgotam seus recursos de mana. Composições de CC instantâneo a neutralizam antes que ela conjure sua ultimate.

★ MID · SUPPORT Tier S
DANO
UTIL
TANK
DIFF
Win 51.0% #35 · ↑4pt
Pick 4.9% #15
Ban 0.4% #113

Guia de counters de Orianna Wild Rift ★ Counter Sheet

Hard Counters

1

Esses campeões têm uma build e um estilo de jogo que superam diretamente o seu, o que pode tornar o controle da lane e o farm extremamente difíceis. As habilidades deles podem neutralizar seus principais pontos fortes ou te punir assim que você tenta jogar do seu jeito de sempre. Nesses matchups, o objetivo costuma ser reduzir os erros e buscar soluções fora do confronto direto.

Irelia

Irelia

gap_closepunish_misposition This matchup is heavily dictated by the positioning of your ball. The moment you cast Command: Attack to poke or farm, you detach the ball from yourself, temporarily losing the passive resistances and immediate shielding from Command: Protect. Irelia looks specifically for this window; without your defensive shield readily available, she can instantly close the distance with Bladesurge, trigger Ionian Fervor, and run you down before you can recall the ball. Ver detalhes
Irelia

Por quê

This matchup is heavily dictated by the positioning of your ball. The moment you cast Command: Attack to poke or farm, you detach the ball from yourself, temporarily losing the passive resistances and immediate shielding from Command: Protect. Irelia looks specifically for this window; without your defensive shield readily available, she can instantly close the distance with Bladesurge, trigger Ionian Fervor, and run you down before you can recall the ball.

Impacto na lane

You are forced into a defensive posture where stepping up to utilize Clockwork Windup is suicidal. Irelia will manipulate the wave, prepping low-health minions to reset Bladesurge and close the gap. This constant threat denies you control of the wave, forcing you to farm from extreme range. If she lands Flawless Duet or traps you with Vanguard's Edge when your ball is extended, you will lose most of your health or die.

Como jogar

To survive, you must prioritize self-defense over poke. Keep the ball attached to you or extremely close by holding Command: Protect. Only use Command: Attack when Irelia has already wasted her Bladesurge reset or missed Flawless Duet. When she does engage, immediately trigger Command: Dissonance on yourself for the movement speed boost to escape her auto-attacks. Never stand near your own low-health minions, as they serve as direct stepping stones for her engage.

Ficha completa →

Desfavoráveis

13

Esses campeões têm ferramentas que geralmente dão a eles vantagem no confronto, sem tornar o matchup impossível de jogar. Eles podem ter mais alcance, mais capacidade de aguentar sua ofensiva ou mais formas de responder aos seus engajamentos. Você vai precisar adaptar sua abordagem e escolher com cuidado os momentos em que aceita a luta.

Katarina

Katarina

dodge_skillshotsall_in While your range should theoretically keep you safe, Katarina excels at exploiting your Ball's travel time. Whenever you cast Command: Attack forward, she can instantly bypass your threat zone by using Shunpo onto a dague from Bouncing Blade or Preparation. This blink allows her to completely dodge Command: Shockwave while gap-closing directly onto you, rendering your zoning tools useless if timed reactively. Ver detalhes
Katarina

Por quê

While your range should theoretically keep you safe, Katarina excels at exploiting your Ball's travel time. Whenever you cast Command: Attack forward, she can instantly bypass your threat zone by using Shunpo onto a dague from Bouncing Blade or Preparation. This blink allows her to completely dodge Command: Shockwave while gap-closing directly onto you, rendering your zoning tools useless if timed reactively.

Impacto na lane

This interaction severely limits your ability to harass her under her tower. If you overextend to poke her with Command: Dissonance, a quick Shunpo behind you allows her to execute a lethal Death Lotus trade. You are forced to play defensively near your turret, conceding mid priority. Consequently, she can easily secure roams to side lanes while you are stuck safely clearing waves.

Como jogar

To survive, you must anchor your Ball close to your own hitbox. Never lead a trade with Command: Attack; instead, keep the Ball on yourself using Command: Protect to absorb her initial burst. Only cast Command: Shockwave immediately after she commits her Shunpo and channels Death Lotus, as she is temporarily locked in place. If she roams, do not blindly follow her into the river; ping your side lanes and use your superior wave clear to chip her turret plates.

Ficha completa →
Diana

Diana

divespacing While you can poke Diana early with Clockwork Windup and Command: Attack, she holds the ultimate trump card once both of you reach level five. The danger lies in how easily she can dodge your Command: Shockwave. By timing Lunar Rush onto a nearby minion or directly onto you, Diana can completely slip out of your ultimate's pull radius while simultaneously closing the gap to unleash Moonfall and her high burst. Ver detalhes
Diana

Por quê

While you can poke Diana early with Clockwork Windup and Command: Attack, she holds the ultimate trump card once both of you reach level five. The danger lies in how easily she can dodge your Command: Shockwave. By timing Lunar Rush onto a nearby minion or directly onto you, Diana can completely slip out of your ultimate's pull radius while simultaneously closing the gap to unleash Moonfall and her high burst.

Impacto na lane

This dynamic forces you into a defensive stance, stripping away your ability to freely contest the wave. If Diana lands Crescent Strike, you must immediately retreat, as the threat of her Lunar Rush reset prevents you from stepping up to use Command: Dissonance for wave clear. You are often pushed under tower, sacrificing priority and allowing her to roam while you struggle to safely farm.

Como jogar

To survive, you must never throw Command: Shockwave proactively while Diana has Lunar Rush available. Keep the ball close to you with Command: Protect to gain defensive stats, and only trigger your ultimate after she has already committed her dash and cannot redirect her movement. If she misses Crescent Strike, use that brief window to aggressively zone her with Command: Attack. Always position yourself away from low health minions to deny easy dash targets.

Ficha completa →
Kassadin

Kassadin

magic_shieldmobility Kassadin's ultimate mobility dictates this matchup. While you can harass him early, once he unlocks Riftwalk, your primary threat, Command: Shockwave, becomes incredibly difficult to land. A reactive Riftwalk lets him blink out of your ultimate's pull radius entirely. This ability to instantly relocate turns your high-impact teamfight tool into a wasted cooldown, leaving you vulnerable to his burst without your main self-peel. Ver detalhes
Kassadin

Por quê

Kassadin's ultimate mobility dictates this matchup. While you can harass him early, once he unlocks Riftwalk, your primary threat, Command: Shockwave, becomes incredibly difficult to land. A reactive Riftwalk lets him blink out of your ultimate's pull radius entirely. This ability to instantly relocate turns your high-impact teamfight tool into a wasted cooldown, leaving you vulnerable to his burst without your main self-peel.

Impacto na lane

Before he reaches level five, you must establish a health lead by punishing his melee range. However, Kassadin uses Void Stone's magic shield to absorb your Command: Attack poke, while Null Sphere silences you to disrupt your Command: Dissonance trade. Once he has Riftwalk, the lane's pressure flips; you can no longer push safely, as his mobility threatens a sudden engage, forcing you to play defensively under your tower.

Como jogar

To survive, always keep your ball close using Command: Protect to buffer his jump with a shield. Never initiate trades with Command: Shockwave; instead, hold this ultimate as a disengage tool. Force him to use Riftwalk offensively first before you attempt to place your ball. If he blinks onto you, instantly drop Command: Dissonance at your feet to slow him, then aim your ultimate only after his blink is on its brief cooldown.

Ficha completa →
Yasuo

Yasuo

spacingshield_management Yasuo holds a massive advantage because his Wind Wall completely deletes Command: Attack mid-flight. Since your entire kit relies on the ball's position, having it blocked means you cannot use Command: Dissonance to slow him down or Command: Shockwave to peel him off. Without the ball's zoning presence, you are left completely defenseless against his Sweeping Blade dashes. Ver detalhes
Yasuo

Por quê

Yasuo holds a massive advantage because his Wind Wall completely deletes Command: Attack mid-flight. Since your entire kit relies on the ball's position, having it blocked means you cannot use Command: Dissonance to slow him down or Command: Shockwave to peel him off. Without the ball's zoning presence, you are left completely defenseless against his Sweeping Blade dashes.

Impacto na lane

This interaction forces you into a defensive posture where you cannot safely poke to break his Way of the Wanderer shield. If you carelessly throw Command: Attack, he will block it, use Sweeping Blade through your minion wave, and strike you with Steel Tempest. You are constantly forced under your tower, conceding mid priority and leaving your jungler without backup.

Como jogar

To survive, you must play around his massive Wind Wall cooldown. Pop his Way of the Wanderer shield using basic attacks empowered by Clockwork Windup before committing any mana. Walk forward to bait his wall, but do not cast Command: Attack. Once his wall is down, you have a long window to harass him safely. If he dashes in with Sweeping Blade anyway, immediately self-cast Command: Protect to absorb the Steel Tempest damage.

Ficha completa →
Akshan

Akshan

ball_trackingearly_pressure Akshan thrives on punishing your cooldowns with sudden, high-mobility angles. When you send your ball forward using Command: Attack to poke or clear, you temporarily strip yourself of your primary defensive tool. Akshan can instantly exploit this window of vulnerability by launching a Heroic Swing from an angle opposite your ball, bypassing Command: Protect's immediate shield and shredding your health bar before the ball can return to you. Ver detalhes
Akshan

Por quê

Akshan thrives on punishing your cooldowns with sudden, high-mobility angles. When you send your ball forward using Command: Attack to poke or clear, you temporarily strip yourself of your primary defensive tool. Akshan can instantly exploit this window of vulnerability by launching a Heroic Swing from an angle opposite your ball, bypassing Command: Protect's immediate shield and shredding your health bar before the ball can return to you.

Impacto na lane

This threat forces a highly passive laning phase where you cannot safely contest the wave. Akshan easily secures push priority with Avengerang and can roam unseen using Going Rogue. If you misposition your ball even once, his Heroic Swing trade will force an early recall, bleeding your gold and letting him pressure your side lanes without any response, turning the map into a dangerous zone.

Como jogar

To survive, prioritize keeping your ball close to your own hitbox rather than chasing far-reaching pokes. Only cast Command: Attack when Akshan has already wasted Heroic Swing, or when you are standing directly inside your own minion wave to block his pathing. If he does swing in, immediately self-cast Command: Protect to absorb Dirty Fighting's initial burst, and use Command: Shockwave to interrupt his flight mid-air, resetting the spacing.

Ficha completa →
Swain

Swain

spacinganti_heal Swain turns this lane into a grueling battle of attrition where his Ravenous Flock passive constantly restores his health off your mistakes. While your Command: Attack can chip away at him from afar, his Death's Hand matches your wave clear, and any successful Nevermove pull completely negates your poke. Once he accesses Demonic Ascension, his massive ultimate healing easily outpaces your spell rotation's damage. Ver detalhes
Swain

Por quê

Swain turns this lane into a grueling battle of attrition where his Ravenous Flock passive constantly restores his health off your mistakes. While your Command: Attack can chip away at him from afar, his Death's Hand matches your wave clear, and any successful Nevermove pull completely negates your poke. Once he accesses Demonic Ascension, his massive ultimate healing easily outpaces your spell rotation's damage.

Impacto na lane

You cannot reliably force Swain out of lane due to his passive health sustain. This forces you into a defensive posturing where pushing too aggressively invites a Nevermove snare, setting up an easy Vision of Empire slow. If you get caught, he will force a recall or dive you with Demonic Ascension, robbing you of priority and letting him secure mid-game skirmishes while you are stuck farming under tower.

Como jogar

To survive, you must keep your distance and constantly watch the return trajectory of Nevermove. The moment Swain activates Demonic Ascension, do not attempt to trade back or use Command: Shockwave aggressively; instead, immediately place your ball on yourself and trigger Command: Dissonance for the movement speed boost to escape his drain radius. Utilize Command: Protect to absorb any residual damage from Death's Hand while you safely retreat.

Ficha completa →
Fizz

Fizz

dodge_ultall_in The lane hinges on a high-stakes reaction game. While Orianna can harass the melee Fizz with Clockwork Windup and Command: Attack, Fizz holds all the cards once both reach level five. If Fizz saves Playful, he can entirely bypass Command: Shockwave while gap-closing. This invulnerability frame completely neutralizes your ultimate's defensive and offensive value, converting your setups into lethal counter-engages for him. Ver detalhes
Fizz

Por quê

The lane hinges on a high-stakes reaction game. While Orianna can harass the melee Fizz with Clockwork Windup and Command: Attack, Fizz holds all the cards once both reach level five. If Fizz saves Playful, he can entirely bypass Command: Shockwave while gap-closing. This invulnerability frame completely neutralizes your ultimate's defensive and offensive value, converting your setups into lethal counter-engages for him.

Impacto na lane

This interaction forces you into a defensive wave state. You cannot safely push past the river because a sudden Chum the Waters will force your Command: Protect defensively, leaving you vulnerable to an all-in. Slow-pushing and keeping the wave frozen just outside your turret range is mandatory. If you let him crash the wave easily, he will roam to slaughter your sidelanes.

Como jogar

Never cast Command: Shockwave while Fizz has Playful available. Instead, abuse your range advantage early with Command: Attack and Command: Dissonance to chip his health down while he tries to farm. Force him to use Playful defensively to escape your poke or to clear minions under his tower. Only when his trident hop is on cooldown can you safely drop the ball and unleash your ultimate to secure a kill.

Ficha completa →
Yone

Yone

spacingdisengage Yone dominates this matchup because Soul Unbound allows him to bypass your zoning completely. He can easily close the distance with Mortal Steel's third cast, ignoring the threat of Command: Attack and Command: Dissonance. If he catches you without a defensive response, his combined burst from Way of the Hunter and Fate Sealed will melt your health bar before you can retreat to your tower. Ver detalhes
Yone

Por quê

Yone dominates this matchup because Soul Unbound allows him to bypass your zoning completely. He can easily close the distance with Mortal Steel's third cast, ignoring the threat of Command: Attack and Command: Dissonance. If he catches you without a defensive response, his combined burst from Way of the Hunter and Fate Sealed will melt your health bar before you can retreat to your tower.

Impacto na lane

You are forced into a reactive stance, constantly respecting the threat of his loaded Mortal Steel tornado. Pushing the wave with Command: Attack and Command: Dissonance becomes extremely risky, as Yone can engage from deep screen. If he chunks you during a Soul Unbound trade, his Spirit Cleave shield allows him to ignore your counter-harass, forcing you to recall early and giving up crucial mid-lane priority.

Como jogar

To survive, you must hold Command: Shockwave as your ultimate insurance policy. Never launch it aggressively. Instead, wait for Yone to commit with Fate Sealed to interrupt his follow-up, or cast it directly on his tethered clone to pull him back the moment he attempts to escape with Soul Unbound. Keep your ball close using Command: Protect for the passive resistances, and only poke with Clockwork Windup enhanced basic attacks when his dash is down.

Ficha completa →
Talon

Talon

wave_clearroaming Talon thrives on leaving the lane using Assassin's Path to terrorize your side lanes, a map-wide mobility that Orianna simply cannot match. If you attempt to follow him blindly through the river, he can easily turn from the fog of war to burst you down with Shadow Assault and Noxian Diplomacy. Your only real leverage is your superior waveclear, forcing him to choose between losing gold or roaming. Ver detalhes
Talon

Por quê

Talon thrives on leaving the lane using Assassin's Path to terrorize your side lanes, a map-wide mobility that Orianna simply cannot match. If you attempt to follow him blindly through the river, he can easily turn from the fog of war to burst you down with Shadow Assault and Noxian Diplomacy. Your only real leverage is your superior waveclear, forcing him to choose between losing gold or roaming.

Impacto na lane

This dynamic turns the laning phase into a race against the clock. Every time Talon uses Rake to contest the wave, you must respond by instantly shoving. Failing to keep him pinned under his turret gives him free windows to roam, putting immense pressure on your side lanes. Conversely, keeping him trapped under tower allows you to chip away at his plates using your ranged advantage.

Como jogar

To execute this, continuously apply pressure by positioning your ball with Command: Attack and clearing waves with Command: Dissonance. Always hold Command: Protect to absorb his Rake poke or to negate his sudden Noxian Diplomacy leaps. If you see him jump a wall with Assassin's Path, immediately ping your teammates, stay in your lane, and aggressively hit his tower instead of chasing him into dangerous unwarded areas.

Ficha completa →
Zed

Zed

spacingarmor_rush Zed's explosive burst from Death Mark combined with Living Shadow shadows threatens to bypass your zoning. Because his Contempt for the Weak punishes low health, trading recklessly against his Razor Shuriken and Shadow Slash puts you in execution range. However, the matchup pivots around his ultimate's predictable exit: when Zed lands from Death Mark, he always appears behind you, making him highly vulnerable to a perfectly timed self-cast of Command: Shockwave. Ver detalhes
Zed

Por quê

Zed's explosive burst from Death Mark combined with Living Shadow shadows threatens to bypass your zoning. Because his Contempt for the Weak punishes low health, trading recklessly against his Razor Shuriken and Shadow Slash puts you in execution range. However, the matchup pivots around his ultimate's predictable exit: when Zed lands from Death Mark, he always appears behind you, making him highly vulnerable to a perfectly timed self-cast of Command: Shockwave.

Impacto na lane

This pressure forces you to play defensively with Command: Attack and Command: Dissonance to secure minions from a distance. You cannot afford to walk up and use Clockwork Windup enhanced basic attacks once Zed has Living Shadow available, as a single clone swap can lead to a lethal chunk of your health. Your passive lane state limits your early rotation potential, meaning you will often yield mid priority to protect your own life.

Como jogar

To survive this lane, you must hold Command: Protect defensively rather than using it to poke. When Zed commits with Death Mark, instantly cast Command: Protect on yourself to bring the ball back. The exact millisecond his untargetable state ends, activate Command: Shockwave directly on top of yourself. This guarantees a knockup, disrupting his combo and letting you escape with Command: Dissonance. If he baits this out with a fake Living Shadow swap, retreat immediately under your tower.

Ficha completa →

Outros matchups

Skill Matchups

13

Esses confrontos são, acima de tudo, duelos de execução: os dois campeões têm formas reais de levar vantagem. Uma habilidade importante esquivada, um engajamento bem antecipado ou um erro de posicionamento podem ser suficientes para decidir o duelo. Conhecer o matchup e reconhecer as janelas de ação certas faz toda a diferença.

Aurora

Aurora

spacingpoke Orianna's zoning depends on placing her ball with Command: Attack, but Aurora's Across the Veil gives her a burst of movement speed and brief invisibility, allowing her to easily sidestep the incoming ball and counter with Twofold Hex to trigger Spirit Abjuration. This turns every ball movement into a high-stakes guessing game where Aurora's mobility clashes with Orianna's skillshot precision. Ver detalhes
Aurora

Por quê

Orianna's zoning depends on placing her ball with Command: Attack, but Aurora's Across the Veil gives her a burst of movement speed and brief invisibility, allowing her to easily sidestep the incoming ball and counter with Twofold Hex to trigger Spirit Abjuration. This turns every ball movement into a high-stakes guessing game where Aurora's mobility clashes with Orianna's skillshot precision.

Impacto na lane

Because Aurora can bypass the ball's threat using Across the Veil, Orianna cannot simply poke her out of lane. This forces a contest over wave control. If Orianna uses Command: Attack and Command: Dissonance to clear the wave, she becomes vulnerable to Aurora's forward leaps. Conversely, letting Aurora push allows her to roam or set up Between Worlds dives, meaning the lane is decided by who manipulates the minion waves.

Como jogar

To win this, you must hold Command: Attack instead of throwing it at maximum range. Keep the ball sitting on your own melee minions. If Aurora uses Across the Veil to initiate, immediately cast Command: Protect on yourself to absorb Twofold Hex and use Clockwork Windup enhanced auto-attacks while she is close. Only release Command: Shockwave after she has committed her Across the Veil dash, or use the slow from Command: Dissonance to lock her down when she tries to retreat with The Weirding.

Ficha completa →
Galio

Galio

poke_mitigationwave_clear Orianna can constantly harass the melee Colossus from afar using Command: Attack, keeping him under pressure. However, Galio neutralizes this poke easily because Shield of Durand naturally absorbs magic damage, keeping his health pool stable. To prevent Orianna from freezing the lane or gaining a massive lead, Galio relies on Winds of War to clear the minions from a safe distance, making it a pure battle of attrition. Ver detalhes
Galio

Por quê

Orianna can constantly harass the melee Colossus from afar using Command: Attack, keeping him under pressure. However, Galio neutralizes this poke easily because Shield of Durand naturally absorbs magic damage, keeping his health pool stable. To prevent Orianna from freezing the lane or gaining a massive lead, Galio relies on Winds of War to clear the minions from a safe distance, making it a pure battle of attrition.

Impacto na lane

The lane turns into a push-and-pull rhythm where neither champion can easily force the other out. Orianna cannot easily crash waves for heavy tower pressure due to Galio's rapid waveclear, but Galio cannot step up to roam without taking severe poke. Health bars remain relatively high on both sides, leading to delayed recall timings and a stagnant mid lane that limits early map rotations.

Como jogar

To break this stalemate, keep the Ball positioned slightly behind his minion line using Command: Attack to threaten him whenever he steps up. Always hold Command: Protect to shield yourself if he attempts to engage with Justice Punch. If he manages to land a full combo with Shield of Durand, don't panic; use Command: Dissonance to speed yourself up and kite back, landing basic attacks to trigger Clockwork Windup while his cooldowns are offline.

Ficha completa →
Lux

Lux

pokeshield_timingspacing This matchup is a pure duel of spell-shielding and positioning. Your primary poke tool, Command: Attack, is constantly contested by Lux deploying Prismatic Barrier to absorb the impact. Crucially, the moment you order the ball forward, you are momentarily vulnerable; Lux will actively fish for a game-changing Light Binding during this brief displacement window when you cannot easily protect yourself. Ver detalhes
Lux

Por quê

This matchup is a pure duel of spell-shielding and positioning. Your primary poke tool, Command: Attack, is constantly contested by Lux deploying Prismatic Barrier to absorb the impact. Crucially, the moment you order the ball forward, you are momentarily vulnerable; Lux will actively fish for a game-changing Light Binding during this brief displacement window when you cannot easily protect yourself.

Impacto na lane

Wave priority swings wildly based on who lands their primary zone tool first. If you miss Command: Attack or misposition the ball, Lux instantly clears the wave with Lucent Singularity, forcing you under turret. Trading health becomes a high-stakes guessing game; a single mistimed Command: Protect when caught by Light Binding results in a devastating Final Spark combo, costing you your lane pressure and forcing an early recall.

Como jogar

To win this, never walk in a straight line when casting Command: Attack. Always hold Command: Protect ready to self-cast the instant you see her wind up Light Binding. If she misses her binding, immediately punish her with Command: Dissonance and aggressive Clockwork Windup auto-attacks while her crowd control is on cooldown. Should you get shoved in, focus on farming safely rather than chasing trades through her Lucent Singularity slow.

Ficha completa →
Corki

Corki

pokespacing This matchup is a pure duel of range and accuracy. Corki relies on Phosphorus Bomb and his frequent Missile Barrage rockets to wear you down from afar. However, Orianna matches this pressure perfectly using Command: Attack. Because both of you can farm and harass simultaneously without committing to close-range fights, the lane becomes a test of who can land their skillshots while dodging the opponent's incoming projectiles. Ver detalhes
Corki

Por quê

This matchup is a pure duel of range and accuracy. Corki relies on Phosphorus Bomb and his frequent Missile Barrage rockets to wear you down from afar. However, Orianna matches this pressure perfectly using Command: Attack. Because both of you can farm and harass simultaneously without committing to close-range fights, the lane becomes a test of who can land their skillshots while dodging the opponent's incoming projectiles.

Impacto na lane

Every exchange dictates your wave control. If you fail to dodge Phosphorus Bomb, Corki gains the health advantage needed to safely collect his Hextech Munitions package and roam. Conversely, keeping Corki low with constant Command: Attack and Command: Dissonance zones forces him to use Valkyrie defensively rather than seeking aggressive plays, neutralizing his package's impact on the side lanes.

Como jogar

Stand to the side of your minion wave. This forces Corki to choose between using Phosphorus Bomb to push or to target you. When he approaches with Gatling Gun to shred your resistances, immediately self-cast Command: Protect to absorb the physical and magical ticks while backing away. If he flies in with his upgraded package, use Command: Shockwave to interrupt his path or pull him out of the burning trail.

Ficha completa →
Karma

Karma

wave_clearspacing This matchup is a pure tug-of-war between poke and mitigation. When you send your ball forward with Command: Attack and trigger Command: Dissonance, Karma can quickly nullify the incoming burst using her Inspire shield. However, Karma's defensive tools are largely single-target or limited unless enhanced by Mantra, whereas your Command: Shockwave offers game-changing, wide-area disruption that easily outclasses her utility in clustered teamfights. Ver detalhes
Karma

Por quê

This matchup is a pure tug-of-war between poke and mitigation. When you send your ball forward with Command: Attack and trigger Command: Dissonance, Karma can quickly nullify the incoming burst using her Inspire shield. However, Karma's defensive tools are largely single-target or limited unless enhanced by Mantra, whereas your Command: Shockwave offers game-changing, wide-area disruption that easily outclasses her utility in clustered teamfights.

Impacto na lane

Laning phase revolves around pushing and neutralizing waves. Karma will try to shove the lane with Inner Flame while shielding herself with Inspire to ignore your harass. If you waste your mana trying to poke through her shields, she will gain priority to roam. You must match her pushing power to keep her locked in lane, preventing her from translating her early utility into map pressure.

Como jogar

Focus on clearing minions rather than forcing trades against her shield. Use Command: Attack to reposition the ball directly inside the minion wave, and only activate Command: Dissonance when she has already wasted her Inspire or to secure the ranged minions. If she steps up to tether you with Focused Resolve, use Command: Protect on yourself to absorb her damage while retreating. Once teamfights break out, wait for the enemy team to clump up and unleash Command: Shockwave.

Ficha completa →
Morgana

Morgana

poke_defensefarm_lane This matchup is a pure battle of ranges and reactive timing. Since Morgana relies on Dark Binding to lock you down for Tormented Shadow pools, your spacing determines the lane's pace. The critical pivot is how she uses Black Shield. If you cast Command: Shockwave, a reactive Black Shield completely negates both the magic damage and the crucial knock-up, neutralizing your primary ultimate threat. Ver detalhes
Morgana

Por quê

This matchup is a pure battle of ranges and reactive timing. Since Morgana relies on Dark Binding to lock you down for Tormented Shadow pools, your spacing determines the lane's pace. The critical pivot is how she uses Black Shield. If you cast Command: Shockwave, a reactive Black Shield completely negates both the magic damage and the crucial knock-up, neutralizing your primary ultimate threat.

Impacto na lane

Laning quickly turns into a battle of wave control and safety. Morgana can safely push with Tormented Shadow, using her passive Soul Siphon to sustain any chip damage you land. If you step up too aggressively to trade with Command: Attack and Command: Dissonance, you expose yourself to a deadly Dark Binding or a flash Soul Shackles engage, forcing you to play defensively behind your own minion wave.

Como jogar

To win this, position your ball with Command: Attack slightly to the side of the wave to threaten her without standing where she wants to drop Tormented Shadow. Never initiate with Command: Shockwave if her Black Shield is available. Instead, bait her shield using the slow from Command: Dissonance or shield yourself with Command: Protect to absorb her poke. If she wastes her spell shield, immediately pull the trigger on your ultimate before her cooldown recovers.

Ficha completa →
Ryze

Ryze

scalingwave_clear This matchup is a battle of spacing and scaling. Orianna holds a distinct range advantage, allowing her to poke Ryze down using Command: Attack while staying safely outside the bouncing threat of his Spell Flux. However, Ryze scales exceptionally well into a high-DPS threat and can bypass Orianna's lane dominance entirely by using Realm Warp to impact the map, turning his scaling power into global pressure. Ver detalhes
Ryze

Por quê

This matchup is a battle of spacing and scaling. Orianna holds a distinct range advantage, allowing her to poke Ryze down using Command: Attack while staying safely outside the bouncing threat of his Spell Flux. However, Ryze scales exceptionally well into a high-DPS threat and can bypass Orianna's lane dominance entirely by using Realm Warp to impact the map, turning his scaling power into global pressure.

Impacto na lane

Control of the minion waves dictates this lane. By keeping the wave neutral or slightly pushed, Orianna prevents Ryze from easily spreading Spell Flux to her through the wave, forcing him to use mana defensively. If Orianna fails to secure mid priority, Ryze will quickly shove the wave with his high-DPS spell rotations and disappear into the fog of war with Realm Warp, leaving her team vulnerable to sudden sidelane collapses.

Como jogar

Position your ball with Command: Attack slightly behind Ryze's caster minions to zone him out of Spell Flux range. Never stand directly next to your own dying minions to avoid the propagation of his marks. If Ryze starts channel-casting Realm Warp to roam, do not blindly follow into the river; instead, immediately punish his absence by shoving the wave to his tower, or use Command: Dissonance and Command: Protect to quickly reposition and support your teammates.

Ficha completa →
Viktor

Viktor

wave_clearscaling This matchup is a pure battle of scaling mages where both of you want to farm safely from a distance. Viktor relies heavily on his Hextech Ray to chip away at your health while clearing minions. However, Orianna holds a unique defensive advantage: by reacting quickly with Command: Protect, you can absorb the laser's burn entirely, turning his primary poke tool into wasted mana while keeping your health bar intact. Ver detalhes
Viktor

Por quê

This matchup is a pure battle of scaling mages where both of you want to farm safely from a distance. Viktor relies heavily on his Hextech Ray to chip away at your health while clearing minions. However, Orianna holds a unique defensive advantage: by reacting quickly with Command: Protect, you can absorb the laser's burn entirely, turning his primary poke tool into wasted mana while keeping your health bar intact.

Impacto na lane

Because Command: Protect negates Viktor's main harass, neither mage can easily force the other out of lane. This turns the mid lane into a strict test of wave control. If you let Viktor freely use Siphon Power to shield himself while securing last hits, he will slowly push you under tower. Maintaining an even minion count prevents him from getting free resets to fuel his Glorious Evolution.

Como jogar

To win this war of attrition, position your ball with Command: Attack slightly to the side of the minion wave. This forces Viktor to choose between aiming Hextech Ray at you or the wave. The moment he sweeps his laser towards you, immediately self-cast Command: Protect to nullify the damage. If you fail to shield the poke and fall low, use Command: Dissonance on the incoming wave to quickly shove and secure a safe recall rather than risking a dive from his Arcane Storm.

Ficha completa →
Syndra

Syndra

spacingcooldown_windows This matchup is a pure test of micro-spacing between two sphere-manipulating mages. Syndra relies on Dark Sphere combined with Scatter the Weak to stun you from afar, setting up a devastating Unleashed Power burst. Since your defensive tool, Command: Protect, cannot mitigate her massive single-target magic damage once you are stunned, dodging that initial knockback and stun trajectory is the sole factor determining who controls the lane. Ver detalhes
Syndra

Por quê

This matchup is a pure test of micro-spacing between two sphere-manipulating mages. Syndra relies on Dark Sphere combined with Scatter the Weak to stun you from afar, setting up a devastating Unleashed Power burst. Since your defensive tool, Command: Protect, cannot mitigate her massive single-target magic damage once you are stunned, dodging that initial knockback and stun trajectory is the sole factor determining who controls the lane.

Impacto na lane

During the laning phase, both of you can clear waves quickly using Command: Attack and Force of Will. However, the threat of Syndra's stun forces you into a defensive posture. Getting hit by Scatter the Weak immediately concedes lane priority, forces an early recall, or results in a direct death. This limits your ability to safely secure priority for neutral skirmishes with Command: Dissonance.

Como jogar

Never stand in a direct line behind Syndra's Dark Sphere spawns. Keep moving laterally to make her angle for Scatter the Weak awkward. The moment she wastes this knockback, you have a massive window to play aggressively. Step forward immediately to trade with Command: Attack and Command: Dissonance, or use Command: Shockwave if she is within range, as she cannot reliably peel you off or execute her full burst without that crucial setup.

Ficha completa →
Zoe

Zoe

spacingcleanse_timing This skill matchup revolves around denial of Zoe's long-range burst. While Zoe relies on Sleepy Trouble Bubble to set up a lethal Paddle Star!, Orianna has the perfect counter-tool. If you get drowsy, you must quickly recall the ball to yourself using Command: Protect. This shield mitigates the incoming redirected star's damage, neutralizing her main trading pattern while keeping the lane perfectly even. Ver detalhes
Zoe

Por quê

This skill matchup revolves around denial of Zoe's long-range burst. While Zoe relies on Sleepy Trouble Bubble to set up a lethal Paddle Star!, Orianna has the perfect counter-tool. If you get drowsy, you must quickly recall the ball to yourself using Command: Protect. This shield mitigates the incoming redirected star's damage, neutralizing her main trading pattern while keeping the lane perfectly even.

Impacto na lane

Because you can nullify her burst, Zoe cannot easily force you out of lane or secure easy solo kills. This turns the lane into a battle of wave control and safety. If you block her damage, she wastes mana and loses pressure, allowing you to shove with Command: Attack and Command: Dissonance. Missing your shield, however, means taking massive damage, forcing an early recall and losing mid priority.

Como jogar

To survive this lane, always keep your ball active in the wave or near Zoe using Command: Attack, but never let it wander too far. The moment you see Sleepy Trouble Bubble flying toward you and realize you cannot dodge it, instantly press Command: Protect to bring the ball back to you before the sleep kicks in. If you miss this timing, use Command: Shockwave immediately as she uses Portal Jump to disrupt her return position.

Ficha completa →
Taliyah

Taliyah

wave_clearroaming This matchup is a pure tempo race where Taliyah tries to shove with Threaded Volley and exit the lane using Rock Surfing. Orianna matches this pressure using Command: Attack and Command: Dissonance to clear waves from safety. The critical point of contention revolves around Weaver's Wall; if Orianna maintains deep river vision, she can launch her Ball and use Command: Shockwave to cancel Taliyah’s ultimate channel before she can surf away. Ver detalhes
Taliyah

Por quê

This matchup is a pure tempo race where Taliyah tries to shove with Threaded Volley and exit the lane using Rock Surfing. Orianna matches this pressure using Command: Attack and Command: Dissonance to clear waves from safety. The critical point of contention revolves around Weaver's Wall; if Orianna maintains deep river vision, she can launch her Ball and use Command: Shockwave to cancel Taliyah’s ultimate channel before she can surf away.

Impacto na lane

Both mid laners possess immense wave clear, meaning the lane often devolves into a non-interactive pushing war. Taliyah threatens deadly zone control with Unraveled Earth and Seismic Shove, preventing Orianna from stepping up too aggressively. If you fail to match her push, she gains free roam timings to impact side lanes. A single unchecked Weaver's Wall rotation can snowball the map, making lane priority and vision control paramount.

Como jogar

To neutralize Taliyah, prioritize placing deep river wards to track her movement. Never blindly waste Command: Shockwave in lane trades; preserve this ultimate specifically to interrupt her Weaver's Wall channel when she attempts to roam. If she positions near a wall to activate Rock Surfing, position your Ball proactively with Command: Attack. Use Command: Protect to absorb stray Threaded Volley rocks while matching her shove, forcing her to stay in lane rather than impacting the map.

Ficha completa →

Outros matchups

Favoráveis

23

Esses campeões geralmente têm dificuldade para responder às suas principais forças, o que te dá mais liberdade para abordar o confronto. Você costuma ter várias formas de pressioná-los e forçar trocas a seu favor. Aproveite essa vantagem para impor seu ritmo, em vez de dar tempo para eles se estabilizarem.

Akali

Akali

spacingall_in_burst Orianna dominates early because her ranged kit naturally punishes Akali's melee range. Specifically, Orianna can spam Command: Attack and Command: Dissonance from absolute safety, chunking Akali's health bar whenever she tries to farm. Akali cannot trade back effectively without Perfect Execution, forcing her to cower behind Twilight Shroud or forfeit minion gold entirely while absorbing constant poke. Ver detalhes
Akali

Por quê

Orianna dominates early because her ranged kit naturally punishes Akali's melee range. Specifically, Orianna can spam Command: Attack and Command: Dissonance from absolute safety, chunking Akali's health bar whenever she tries to farm. Akali cannot trade back effectively without Perfect Execution, forcing her to cower behind Twilight Shroud or forfeit minion gold entirely while absorbing constant poke.

Impacto na lane

This oppressive range advantage lets you dictate the wave's positioning from the very first minute. By keeping Akali low, you deny her the ability to contest the crash, giving you free recalls and uncontested roam timers. Akali is forced to use Five Point Strike just to secure last hits under her tower, bleeding resources and losing all mid-lane priority while you safely scale and pressure her plates.

Como jogar

To execute this, position your ball constantly between Akali and her minion wave. Use Command: Attack to poke whenever she approaches, immediately following up with Command: Dissonance if she lingers. Keep your distance to avoid her Shuriken Flip. Once she reaches level five and unlocks Perfect Execution, play more defensively. Hold Command: Protect to absorb her sudden burst, and drop Command: Shockwave directly on yourself if she attempts to dash in for an all-in kill.

Ficha completa →
Brand

Brand

spacingpoke Brand relies heavily on landing Sear after applying Blaze with Pillar of Flame or Conflagration. Orianna completely outranges this threat zone. By manipulating your ball with Command: Attack, you chip away at his health bar from absolute safety. If Brand attempts to step up to return fire, Command: Protect instantly mitigates his burn damage, nullifying his trade potential. Ver detalhes
Brand

Por quê

Brand relies heavily on landing Sear after applying Blaze with Pillar of Flame or Conflagration. Orianna completely outranges this threat zone. By manipulating your ball with Command: Attack, you chip away at his health bar from absolute safety. If Brand attempts to step up to return fire, Command: Protect instantly mitigates his burn damage, nullifying his trade potential.

Impacto na lane

Brand is forced to use Pillar of Flame to clear minions rather than poke you, bleeding his mana pool rapidly. This allows you to constantly shove him under his turret, securing early priority. He cannot comfortably secure last hits without taking heavy damage, giving you a massive gold lead and free roam timings while he is trapped clearing waves.

Como jogar

Position your ball constantly behind Brand's caster minions using Command: Attack. When he steps forward to cast, immediately trigger Command: Dissonance to slow him and chunk his health, then pull the ball back with Command: Protect to absorb his inevitable Conflagration spread. If you get caught by Blaze, immediately walk away from your minion wave to deny him a bounce chain from Pyroclasm.

Ficha completa →
Ahri

Ahri

spacingtethering Orianna dictates this matchup by abusing her superior zone control. You can safely poke Ahri down with Command: Attack whenever she tries to farm, capitalizing on her lack of early mobility. However, the balance shifts if you misplace your Ball. Moving it too far forward leaves you without the immediate shield of Command: Protect, creating a dangerous window for Ahri to execute a sudden Spirit Rush forward and land a lethal Charm. Ver detalhes
Ahri

Por quê

Orianna dictates this matchup by abusing her superior zone control. You can safely poke Ahri down with Command: Attack whenever she tries to farm, capitalizing on her lack of early mobility. However, the balance shifts if you misplace your Ball. Moving it too far forward leaves you without the immediate shield of Command: Protect, creating a dangerous window for Ahri to execute a sudden Spirit Rush forward and land a lethal Charm.

Impacto na lane

This dynamic allows you to force Ahri under her turret early, neutralizing the healing from Essence Theft by keeping her health too low to contest the wave. You easily secure a gold lead. Yet, once Ahri unlocks Spirit Rush, the lane dynamic pivots. A single misstep that allows her to bypass Command: Attack with her ultimate will instantly turn your lane dominance into a deadly chase under your own tower.

Como jogar

To secure your advantage, keep your Ball positioned slightly ahead of your own caster minions, rather than pushing it deep into her territory. This spacing allows you to poke with Command: Attack while ensuring Command: Protect is instantly available if she activates Spirit Rush. If she dashes aggressively, immediately trigger Command: Dissonance on yourself for the movement speed boost, weave sideways to dodge her Charm, and only unleash Command: Shockwave once her initial dash is spent.

Ficha completa →
Ekko

Ekko

pokeall_in Orianna dominates this matchup by utilizing her massive range advantage to bully Ekko whenever he attempts to farm. By constantly repositioning the ball with Command: Attack, you can chip away at his health bar from a safe distance. However, this safety is immediately compromised if Ekko bypasses your ball with Phase Dive, allowing him to close the gap, trigger Z-Drive Resonance, and turn the trade in his favor. Ver detalhes
Ekko

Por quê

Orianna dominates this matchup by utilizing her massive range advantage to bully Ekko whenever he attempts to farm. By constantly repositioning the ball with Command: Attack, you can chip away at his health bar from a safe distance. However, this safety is immediately compromised if Ekko bypasses your ball with Phase Dive, allowing him to close the gap, trigger Z-Drive Resonance, and turn the trade in his favor.

Impacto na lane

This dynamic forces Ekko to bleed gold, as he must choose between taking heavy damage from Command: Attack or giving up minions. By maintaining a slow push near your turret, you deny him the space to safely initiate with Phase Dive. This zoning pressure severely delays his ability to shove lanes with Timewinder, keeping him trapped under his own tower while you control the map's mid priority.

Como jogar

To secure this advantage, never throw Command: Attack directly behind Ekko, as this leaves you defenseless. Instead, keep the ball positioned slightly ahead of your own caster minions. If he attempts to jump forward using Phase Dive, immediately self-cast Command: Protect to absorb his initial burst, then activate Command: Dissonance to slow his retreat. This allows you to safely chase him down with basic attacks while his cooldowns are offline.

Ficha completa →
Aurelion Sol

Aurelion Sol

poke_pressurespacing Aurelion Sol relies heavily on channeling Breath of Light while stationary to stack Cosmic Creator and clear waves. As Orianna, you completely dominate this dynamic because your Ball can be placed ahead of his reach. The moment he plants himself to channel, you can instantly disrupt him from extreme safety using Command: Shockwave, cutting his main damage source entirely while keeping yourself out of his Singularity pull. Ver detalhes
Aurelion Sol

Por quê

Aurelion Sol relies heavily on channeling Breath of Light while stationary to stack Cosmic Creator and clear waves. As Orianna, you completely dominate this dynamic because your Ball can be placed ahead of his reach. The moment he plants himself to channel, you can instantly disrupt him from extreme safety using Command: Shockwave, cutting his main damage source entirely while keeping yourself out of his Singularity pull.

Impacto na lane

This interaction strips Aurelion Sol of his early push power. Whenever he tries to clear with Breath of Light, your Command: Attack and Command: Dissonance combo forces him to cancel his channel or take heavy, unretaliated damage. By denying his farm and forcing early recalls, you can easily secure mid priority, keep his tower under constant pressure, and delay his scaling without letting him roam with Astral Flight.

Como jogar

Position your Ball constantly inside his caster minions using Command: Attack. Hold your Command: Shockwave specifically for the moment he commits to his Astral Flight or stands still to channel. If he plays excessively safe and refuses to trade, shift your focus to shielding yourself with Command: Protect to ignore his passive poke, while continuously shoving him under turret to make him lose stacks under fire.

Ficha completa →
Kayle

Kayle

pokespacing As a ranged bully, you hold complete sway over Kayle's weak early game. By placing your ball aggressively with Command: Attack and detonating Command: Dissonance whenever she steps up to last-hit, you constantly threaten her health bar. This oppressive range denial forces her into a defensive loop, burning through her mana pool to cast Celestial Blessing just to heal your poke and scrape by. Ver detalhes
Kayle

Por quê

As a ranged bully, you hold complete sway over Kayle's weak early game. By placing your ball aggressively with Command: Attack and detonating Command: Dissonance whenever she steps up to last-hit, you constantly threaten her health bar. This oppressive range denial forces her into a defensive loop, burning through her mana pool to cast Celestial Blessing just to heal your poke and scrape by.

Impacto na lane

This matchup quickly turns into a one-sided siege. Because Kayle must retreat from your ball, you easily secure wave priority and can shove her under turret. She will be forced to use Radiant Blast or Starfire Spellblade just to secure ranged farm under pressure, leaving her unable to contest your recalls or match your rotations. You will build a massive gold lead from turret plates while she struggles to scale.

Como jogar

Keep your ball positioned permanently between her and the melee minions, utilizing Command: Attack to block her path. Do not blindly spam your skills; instead, wait for her to activate Starfire Spellblade to farm, then immediately punish her with Command: Dissonance. If she manages to activate Divine Judgment during a dive, use Command: Protect on yourself to absorb the damage, then chase her down with Clockwork Windup attacks once her invulnerability fades.

Ficha completa →
Jayce

Jayce

poketethering Orianna dictates the pace because her Command: Attack lets her manipulate the ball and harass from deep behind her minion wave. Since Jayce relies on firing To the Skies! through his Thundering Blow gate, your constant positioning behind minions completely blocks his linear poke. He cannot easily walk up to trade with Lightning Field without taking heavy damage from your superior, long-range zone control. Ver detalhes
Jayce

Por quê

Orianna dictates the pace because her Command: Attack lets her manipulate the ball and harass from deep behind her minion wave. Since Jayce relies on firing To the Skies! through his Thundering Blow gate, your constant positioning behind minions completely blocks his linear poke. He cannot easily walk up to trade with Lightning Field without taking heavy damage from your superior, long-range zone control.

Impacto na lane

This dynamic forces Jayce into a defensive posture, preventing him from securing early priority or roaming. You can comfortably slow-push waves, using Command: Dissonance to punish him whenever he steps up to auto-attack minions. Because he is constantly chipped down and unable to thin the wave safely, his recall timings are ruined, locking him under turret while you secure vision in the river.

Como jogar

To execute this cleanly, keep the ball positioned slightly ahead of your melee minions using Command: Attack. Stand directly behind your caster minions so Jayce's To the Skies! always collides with them. If he attempts to jump on you with Transform Mercury Cannon, immediately self-cast Command: Protect to absorb the burst, then trigger Command: Dissonance to slow his retreat while hitting him with Clockwork Windup empowered basic attacks as he runs back.

Ficha completa →
Kennen

Kennen

poke_damagespacing Orianna's range completely dominates Kennen's threat zone. By deploying the Ball with Command: Attack and triggering Command: Dissonance, you create a zone of constant danger that Kennen cannot easily bypass. Because his primary engage relies on running forward with Lightning Rush, he is forced to walk through your slow and damage before he can even think about landing Thundering Shuriken or stacking Mark of the Storm. Ver detalhes
Kennen

Por quê

Orianna's range completely dominates Kennen's threat zone. By deploying the Ball with Command: Attack and triggering Command: Dissonance, you create a zone of constant danger that Kennen cannot easily bypass. Because his primary engage relies on running forward with Lightning Rush, he is forced to walk through your slow and damage before he can even think about landing Thundering Shuriken or stacking Mark of the Storm.

Impacto na lane

This range disparity forces Kennen to use Thundering Shuriken just to secure last hits rather than poking you. You can easily park the Ball near his caster minions, denying him gold and pressure. Since he cannot safely walk up to auto-attack for his passive Electrical Surge stacks, you will constantly hold mid priority, keeping him trapped under turret and unable to roam with Lightning Rush to help his jungler.

Como jogar

Keep the Ball positioned aggressively ahead of your own melee minions. Whenever Kennen activates Lightning Rush to rush forward or clear, immediately drop Command: Attack and Command: Dissonance directly in his path to stop his momentum. If he attempts a desperate flash engage with Slicing Maelstrom, quickly cast Command: Protect on yourself for the shield and defensive stats, then trigger Command: Shockwave directly on top of your own character to fling him away and cancel his ultimate's threat.

Ficha completa →
Kai'Sa

Kai'Sa

pokespacing As a short-ranged marksman in the mid lane, Kai'Sa cannot match your safety. By constantly repositioning your ball with Command: Attack, you create an impassable zone that denies her access to the minion wave. This forces her to hemorrhage mana by using Void Seeker just to secure individual last hits from afar, completely neutralizing her early wave clear and preventing her from stacking Second Skin on you. Ver detalhes
Kai'Sa

Por quê

As a short-ranged marksman in the mid lane, Kai'Sa cannot match your safety. By constantly repositioning your ball with Command: Attack, you create an impassable zone that denies her access to the minion wave. This forces her to hemorrhage mana by using Void Seeker just to secure individual last hits from afar, completely neutralizing her early wave clear and preventing her from stacking Second Skin on you.

Impacto na lane

This range disparity ensures you dictate the wave's tempo from the first minute. Since Kai'Sa is forced to farm with Void Seeker, she cannot contest your push. You will easily secure a health advantage through passive poke while keeping her trapped under her turret. This constant pressure limits her ability to roam, minimizes her passive income, and allows you to chip away at her tower plates completely uncontested.

Como jogar

Keep your ball parked aggressively past her melee minions using Command: Attack to block her approach. Always hold Command: Protect to absorb the damage if she tries to engage with Killer Instinct or poke you with Void Seeker. If she attempts to force a trade using Supercharge, immediately cast Command: Dissonance on yourself to speed away, keeping her at your maximum range while your basic attacks from Clockwork Windup punish her retreat.

Ficha completa →
Lissandra

Lissandra

poke_damagespacing Orianna completely dictates the distance in this matchup. By parking your ball deep with Command: Attack and threatening with Command: Dissonance, you create an impassable zone. Lissandra's short-ranged Ice Shard cannot match this reach. To interact with you or even touch the wave safely, she is forced to burn her only mobility tool, Glacial Path, just to get into spell range, which immediately telegraphs her aggression. Ver detalhes
Lissandra

Por quê

Orianna completely dictates the distance in this matchup. By parking your ball deep with Command: Attack and threatening with Command: Dissonance, you create an impassable zone. Lissandra's short-ranged Ice Shard cannot match this reach. To interact with you or even touch the wave safely, she is forced to burn her only mobility tool, Glacial Path, just to get into spell range, which immediately telegraphs her aggression.

Impacto na lane

This range disparity translates to absolute wave control. You can slow-push or freeze at will because Lissandra cannot contest the push without taking heavy poke. She must bleed health to farm, delaying her item spikes. Furthermore, because she has to use Glacial Path forward to trade, she becomes extremely vulnerable to ganks, neutralizing her safety and pinning her under tower while you roam freely.

Como jogar

Keep your ball positioned constantly between Lissandra and her caster minions. When she casts Glacial Path towards you, do not panic. Immediately place Command: Attack on her destination point and shield yourself with Command: Protect to absorb Ring of Frost. As she arrives, trigger Command: Shockwave to disrupt her engage before she can cast Frozen Tomb on you, turning her desperate engage into an easy kill.

Ficha completa →
Mel

Mel

tetheringpoke Orianna dominates this matchup because her sphere allows her to completely outrange Mel's spell rotations. Whenever Mel tries to step up to land her poke, you can instantly nullify her magic damage with Command: Protect. Because your ball travels further, you can immediately transition into a counter-offensive with Command: Attack, hitting Mel from a distance where she cannot safely trade back, effectively neutralizing her lane pressure. Ver detalhes
Mel

Por quê

Orianna dominates this matchup because her sphere allows her to completely outrange Mel's spell rotations. Whenever Mel tries to step up to land her poke, you can instantly nullify her magic damage with Command: Protect. Because your ball travels further, you can immediately transition into a counter-offensive with Command: Attack, hitting Mel from a distance where she cannot safely trade back, effectively neutralizing her lane pressure.

Impacto na lane

This interaction forces Mel into a defensive posture, preventing her from establishing lane priority. You can easily park your ball in the caster minion line, denying her the ability to step up and clear waves. As Mel drops low on health from your constant, shielded trades, she is forced to take unfavorable recall timings, allowing you to secure plates and create a massive gold lead while keeping her locked under turret.

Como jogar

To convert this lead, keep your sphere positioned aggressively ahead of your own minion wave. Never leave the ball sitting on Orianna herself; instead, use Command: Attack to constantly threaten Mel's standing zone. If she attempts to trade, quickly self-cast Command: Protect to absorb the blow, then trigger Clockwork Windup with basic attacks if she missteps too close. If you get ganked and lose your health lead, play defensively behind your sphere and wait for Command: Shockwave to punish her under your own tower.

Ficha completa →
Malphite

Malphite

poke_heavyzone_control Orianna dictates this matchup entirely through her superior range and defensive answers. Whenever Malphite steps up to roll his Seismic Shard at you, you can instantly mitigate the targeted damage using Command: Protect. Meanwhile, his lack of gap-closers before unlocking Unstoppable Force means you can endlessly chip away at his Granite Shield and health bar with Command: Attack from complete safety, rendering his passive shield useless. Ver detalhes
Malphite

Por quê

Orianna dictates this matchup entirely through her superior range and defensive answers. Whenever Malphite steps up to roll his Seismic Shard at you, you can instantly mitigate the targeted damage using Command: Protect. Meanwhile, his lack of gap-closers before unlocking Unstoppable Force means you can endlessly chip away at his Granite Shield and health bar with Command: Attack from complete safety, rendering his passive shield useless.

Impacto na lane

This interaction forces Malphite to bleed gold under his turret, as he cannot contest the minion waves without taking heavy poke. By keeping his Granite Shield permanently broken, you prevent him from finding comfortable recall timings. You will easily secure mid-lane priority, forcing Malphite to waste his mana pool farming with Ground Slam or Seismic Shard, leaving him too weak to assist his jungler.

Como jogar

Keep your Ball positioned constantly ahead of your own melee minions using Command: Attack. This zone prevents Malphite from walking up to last-hit without taking a trade. Never throw your Ball deep behind him if he has mana; keep it close enough so Command: Protect can shield you the millisecond you see his Seismic Shard animation. Once he reaches level five, maintain maximum tether range so you can reactively disrupt his follow-up with Command: Shockwave.

Ficha completa →
Ziggs

Ziggs

wave_clearpoke Orianna naturally neutralizes Ziggs's primary poke tool, Bouncing Bomb, by using Command: Protect to absorb the damage. Because your shield negates his main source of lane pressure, Ziggs cannot easily force you out of lane or easily trigger his Short Fuse passive on your tower. As the game goes on, your Command: Shockwave provides far more reliable and game-changing teamfight disruption compared to his highly avoidable Mega Inferno Bomb. Ver detalhes
Ziggs

Por quê

Orianna naturally neutralizes Ziggs's primary poke tool, Bouncing Bomb, by using Command: Protect to absorb the damage. Because your shield negates his main source of lane pressure, Ziggs cannot easily force you out of lane or easily trigger his Short Fuse passive on your tower. As the game goes on, your Command: Shockwave provides far more reliable and game-changing teamfight disruption compared to his highly avoidable Mega Inferno Bomb.

Impacto na lane

Since Bouncing Bomb can be consistently shielded, you dictate the minion waves. By using Command: Attack and Command: Dissonance, you can match his waveclear or freeze the wave near your turret, forcing Ziggs to overextend. He cannot safely use Satchel Charge to execute your tower because you keep him pushed back, preventing him from roaming or helping his jungler while you scale comfortably into your massive teamfight spikes.

Como jogar

Position the Ball defensively with Command: Protect ready whenever Ziggs steps forward to throw Bouncing Bomb. Avoid standing directly inside your own minion wave so he cannot hit both you and the wave with a single explosion. If he tries to escape an engage using Satchel Charge, immediately deploy Command: Shockwave to interrupt his self-knockback or pull him back. Should you fall behind, focus purely on safe farming with Command: Attack from maximum range.

Ficha completa →
Veigar

Veigar

spacingscaling Orianna completely neutralizes Veigar's primary defensive tool because her ball doesn't care about cages. When Veigar drops Event Horizon to zone you out or protect himself, he expects safety. Instead, you can command your sphere directly through the boundary using Command: Attack. Since your damage source is detached from your body, you can safely chunk his health bar from outside his reach while he stands trapped behind his own walls. Ver detalhes
Veigar

Por quê

Orianna completely neutralizes Veigar's primary defensive tool because her ball doesn't care about cages. When Veigar drops Event Horizon to zone you out or protect himself, he expects safety. Instead, you can command your sphere directly through the boundary using Command: Attack. Since your damage source is detached from your body, you can safely chunk his health bar from outside his reach while he stands trapped behind his own walls.

Impacto na lane

This interaction destroys Veigar’s ability to safely farm and stack Phenomenal Evil Power. Because his Event Horizon fails to halt your harass, he is forced to drop Dark Matter defensively to clear waves rather than trading. You constantly dictate the wave's position, pushing him under tower where he must burn mana on Baleful Strike. This relentless health attrition prevents him from ever finding the threat threshold for Primordial Burst.

Como jogar

When laning, keep your ball positioned aggressively past his melee minions. If Veigar steps up to cast Baleful Strike, immediately clip him with Command: Attack followed by Command: Dissonance. If he reacts by placing Event Horizon around you, do not panic or try to walk through the stun boundary; instead, stand still, shield yourself with Command: Protect if needed, and steer the ball straight onto him to punish his locked animation.

Ficha completa →
Vladimir

Vladimir

spacingsustain Orianna completely dictates this matchup because Vladimir's early game is too weak to contest her range. By constantly repositioning the Ball with Command: Attack, you can chip away at his health bar before he can safely stack Crimson Pact or heal with Transfusion. However, Vladimir's safety hinges entirely on Sanguine Pool, which can effortlessly nullify your ultimate, Command: Shockwave, if you use it too predictably. Ver detalhes
Vladimir

Por quê

Orianna completely dictates this matchup because Vladimir's early game is too weak to contest her range. By constantly repositioning the Ball with Command: Attack, you can chip away at his health bar before he can safely stack Crimson Pact or heal with Transfusion. However, Vladimir's safety hinges entirely on Sanguine Pool, which can effortlessly nullify your ultimate, Command: Shockwave, if you use it too predictably.

Impacto na lane

Because Vladimir lacks early waveclear and relies on charging Tides of Blood at the cost of his own health, you can easily establish permanent wave priority. Keep the minions frozen near your tower to force him to overextend for Transfusion Qs, or slow push to crash massive waves, forcing him under tower where your Command: Attack and Command: Dissonance poke can deny him farm while chipping his tower's plates.

Como jogar

Never initiate a fight with Command: Shockwave unless you have already forced Vladimir to use Sanguine Pool. Instead, harass him with basic attacks amplified by Clockwork Windup when his Transfusion is on cooldown. If he rushes forward with a crimson bar, shield yourself using Command: Protect and walk back. Once his pool is down, immediately position the Ball behind him with Command: Attack and pull the trigger on your ultimate to secure the kill.

Ficha completa →
Vex

Vex

spacingpoke Vex relies on enemies dashing to apply Gloom marks for extra damage. Because Orianna's entire kit is completely dash-free, Vex's Doom 'n Gloom passive remains mostly inactive. This allows you to position safely beyond the reach of Personal Space, utilizing Command: Attack and Command: Dissonance to constantly chip away at Vex's health without ever fearing a sudden burst or an easy Doom fear setup. Ver detalhes
Vex

Por quê

Vex relies on enemies dashing to apply Gloom marks for extra damage. Because Orianna's entire kit is completely dash-free, Vex's Doom 'n Gloom passive remains mostly inactive. This allows you to position safely beyond the reach of Personal Space, utilizing Command: Attack and Command: Dissonance to constantly chip away at Vex's health without ever fearing a sudden burst or an easy Doom fear setup.

Impacto na lane

This lack of threat lets you dominate the wave. You can park the Ball deep in Vex's minion wave, forcing her to choose between using Mistral Bolt to farm or trying to return fire. Since she cannot easily trade back without her passive value, Vex is forced into a defensive posture, losing mid-lane priority. You can easily shield her Looming Darkness poke with Command: Protect, slowly driving her to recall.

Como jogar

Keep your Ball positioned aggressively forward. Stand behind your own minions to make dodging Mistral Bolt easier, and use Command: Attack to harass her whenever she approaches to last-hit. If Vex reaches level five and tries to turn the lane with Shadow Surge, immediately pull the Ball back with Command: Protect to absorb the initial impact, then cast Command: Shockwave under your own feet to disrupt her incoming dash and completely turn the trade.

Ficha completa →
Heimerdinger

Heimerdinger

range_disadvantagepoke Orianna completely hospitalizes Heimerdinger's zone control because her ball-anchored spells outrange his setups. By sending her ball forward with Command: Attack and detonating it with Command: Dissonance, she can safely dismantle H-28G Evolution Turret placements from outside their auto-attack radius. This prevents Heimerdinger from establishing his protective nest, rendering his passive Hextech Affinity useless and leaving him vulnerable to direct poke. Ver detalhes
Heimerdinger

Por quê

Orianna completely hospitalizes Heimerdinger's zone control because her ball-anchored spells outrange his setups. By sending her ball forward with Command: Attack and detonating it with Command: Dissonance, she can safely dismantle H-28G Evolution Turret placements from outside their auto-attack radius. This prevents Heimerdinger from establishing his protective nest, rendering his passive Hextech Affinity useless and leaving him vulnerable to direct poke.

Impacto na lane

Without his H-28G Evolution Turret setups, Heimerdinger loses his natural wave-shoving speed and tower pressure. You dictate the wave's state, forcing him to farm under tower where his Hextech Micro-Rockets are inefficient. Since he cannot safely walk up to land CH-2 Electron Storm Grenade without turret cover, you secure free recall timings, permanent mid priority, and easy roams while he remains glued to his lane.

Como jogar

Position yourself laterally, away from your own minion wave. This forces Heimerdinger to choose between aiming Hextech Micro-Rockets at you or the wave. Keep your ball stationed near his spawn points; the moment he drops an H-28G Evolution Turret, instantly destroy it using a Command: Attack and Command: Dissonance combo. Always hold Command: Protect to absorb rogue rocket damage, and save Command: Shockwave to interrupt him if he uses UPGRADE!!! to summon a giant turret.

Ficha completa →
Annie

Annie

spacing_testsurvive_lane Orianna completely dictates this matchup because of her superior threat range. By constantly placing her ball with Command: Attack near Annie's caster minions, she threatens immediate poke. Annie’s short-ranged Disintegrate and Incinerate require her to step directly into your zone of control. Without Flash, Annie cannot bypass your ball to discharge a stunned Pyromania combo, rendering her offensive threat neutralised during neutral play. Ver detalhes
Annie

Por quê

Orianna completely dictates this matchup because of her superior threat range. By constantly placing her ball with Command: Attack near Annie's caster minions, she threatens immediate poke. Annie’s short-ranged Disintegrate and Incinerate require her to step directly into your zone of control. Without Flash, Annie cannot bypass your ball to discharge a stunned Pyromania combo, rendering her offensive threat neutralised during neutral play.

Impacto na lane

This range gap forces Annie into a miserable laning phase where she must bleed health for CS. You can safely freeze the wave or slow-push it, forcing her to burn mana using Disintegrate under her own turret. Since she cannot contest the wave without taking massive damage, she loses all mid-lane priority, preventing her from rotating to help her jungler or securing early scuttle crabs.

Como jogar

Always position yourself well behind your ball, keeping it parked aggressively forward with Command: Attack. If Annie activates Molten Shield to gain speed and close the gap, immediately trigger Command: Dissonance to slow her advance and step backward. Never walk within range of her Flash-stun when her Pyromania is fully charged; instead, force her to waste it defensively or use Command: Protect to absorb any sudden, desperate Summon: Tibbers bursts.

Ficha completa →
Twisted Fate

Twisted Fate

wave_clearpoke Orianna dominates this matchup because her constant poke with Command: Attack outranges Twisted Fate's basic trading patterns. By repeatedly positioning the ball aggressively, you chip his health down, forcing him to expend his mana on waveclear. This pressure systematically deprives him of offensive options, compelling him to constantly lock in blue cards with Pick a Card for mana sustain rather than threatening you with gold card stuns. Ver detalhes
Twisted Fate

Por quê

Orianna dominates this matchup because her constant poke with Command: Attack outranges Twisted Fate's basic trading patterns. By repeatedly positioning the ball aggressively, you chip his health down, forcing him to expend his mana on waveclear. This pressure systematically deprives him of offensive options, compelling him to constantly lock in blue cards with Pick a Card for mana sustain rather than threatening you with gold card stuns.

Impacto na lane

This relentless harassment dictates the tempo of the entire map. Because Twisted Fate is constantly low on health and forced to choose blue cards, he lacks the pressure to push the wave. You easily secure early priority, making it extremely risky for him to channel Destiny. If he attempts a global roam, he either does so with critically low health or pays a massive price in tower plates and lost minions.

Como jogar

Keep Command: Attack positioned constantly ahead of his caster minions to zone him out. If he locks a gold card with Pick a Card, immediately step back and shield yourself with Command: Protect to absorb potential Wild Cards damage. Should he attempt to channel Destiny within your sight, immediately pull him back and disrupt the teleportation using Command: Shockwave. If you lose track of him, punish his absence by shoving hard with Command: Dissonance to maximize tower damage.

Ficha completa →

Outros matchups

Items to Counter Orianna

Buy these items to reduce this champion's effectiveness in your games.

Mercury's Treads
Mercury's Treads
Stasis Enchant
Stasis Enchant
Null-Magic Mantle →
Null-Magic Mantle →

Como counterar este campeão

Ângulo de counter

Entender os contadores do Orianna significa compreender o que rompe a relação entre ela, sua bola e o espaço que ela deseja controlar. Ela não é vulnerável apenas a danos diretos: ela sofre principalmente quando os inimigos a forçam a reagir antes que ela tenha definido seu ângulo. Assassinos que encurtam a distância, campeões que a afastam da onda ou magos que disputam o alcance sem acumular efeitos reduzem sua janela de ação da Onda de Choque. Orianna pode sobreviver em muitas rotas se mantiver a Barreira, o Flash e uma onda limpa, mas perde rapidamente seu impacto se jogar sob pressão constante, sem visão lateral e com a bola sempre usada defensivamente.

Contexto do patch

As melhores estratégias contra a Orianna não atacam todos da mesma maneira. Alguns tentam explorar diretamente sua falta de mobilidade, como o Fizz ou o Zed, forçando-a a usar ferramentas defensivas antes mesmo do objetivo real. Outros, como o Yasuo, o Diana ou o Akali, tornam seu posicionamento vulnerável, pois conseguem entrar em momentos em que a bola ainda não está pronta. Magos de longo alcance, como Brand, Lux ou Aurelion Sol, também podem pressioná-la de maneira diferente: eles disputam o espaço sem necessariamente se agruparem em um Shockwave óbvio. Para a Orianna, a adaptação não consiste em jogar todas as rotas como um duelo de ataques à distância, mas sim em gerenciar a distância, o estado das ondas de minions e os tempos de recarga defensivos.

Leitura rápida

  • Os assassinos penalizam a Orianna quando a bola é usada para empurrar, em vez de proteger o espaço ao redor dela.
  • Os campeões móveis reduzem o valor da Shockwave se a forçarem a usar o R antes que o carry deles fique realmente exposto.
  • Os magos de longo alcance a obrigam a escolher entre disputar a onda ou manter uma posição segura antes dos objetivos.

Arquétipos de counter

Assassinos de dano direto em rajada

Esses confrontos são perigosos porque atacam o requisito mais exigente da Orianna: manter o Flash, a Barreira e um espaçamento estável até a luta pelo objetivo. Fizz e Zed não são apenas ameaças letais; elas podem forçar a Orianna a usar a bola defensivamente, o que elimina a pressão dela sobre a onda e o rio. Se ela errar o Q ou avançar para atacar no momento errado, pode perder sua janela de controle antes mesmo que o Shockwave se torne útil.

Como o campeão deve se adaptar. Orianna deve se movimentar de acordo com os tempos de nível, manter a onda em uma posição que permita recuar e evitar lançar a bola muito longe quando os inimigos tiverem ferramentas de penetração disponíveis. Seu objetivo não é vencer todas as trocas, mas chegar ao primeiro objetivo com Flash, Barreira e R prontos.

Campeões de combate corpo a corpo com boa mobilidade que quebram o espaçamento

Esses campeões incomodam a Orianna porque não se limitam a avançar em linha reta. A Yasuo consegue contornar a onda e atrapalhar os padrões do Q dela, a Diana pode punir uma bola que se estendeu demais com um ataque rápido, e a Akali ameaça por ângulos que tornam mais difícil para a Shockwave se preparar. O problema da Orianna não é apenas o duelo: ela precisa decidir constantemente se deve dar um poke, usar o escudo, desacelerar ou se preparar para um contra-ataque.

Como o campeão deve se adaptar. Ela precisa reduzir o uso desnecessário do Q, reservar o W para bloquear a entrada do inimigo ou acelerar sua fuga, e se concentrar mais em jogar em torno da onda do que em ataques diretos. Se a campeã corpo a corpo com mobilidade ainda tiver um dash, o Orianna deve tratar cada avanço excessivo como uma abertura desperdiçada.

Magos de longo alcance e de controle

Esses confrontos nem sempre eliminam a Orianna diretamente, mas podem impedi-la de jogar em seu melhor nível. A Aurelion Sol e a Twisted Fate podem desviar a pressão para outros pontos se a Orianna ficar muito concentrada na linha. Brand e Lux disputam o espaço à distância, forçando Orianna a escolher entre avançar para posicionar a bola ou permanecer em segurança. Se ela chegar atrasada ao objetivo, perde a principal vantagem de seu kit: causar medo antes que os inimigos entrem.

Como o campeão deve se adaptar. Orianna deveria priorizar limpar as ondas e manter a sincronização com seu jungler, em vez de forçar duelos constantes. Contra esses tipos de adversários, o melhor Q nem sempre é aquele que acerta na rota, mas aquele que prepara a entrada no rio sem expô-la.

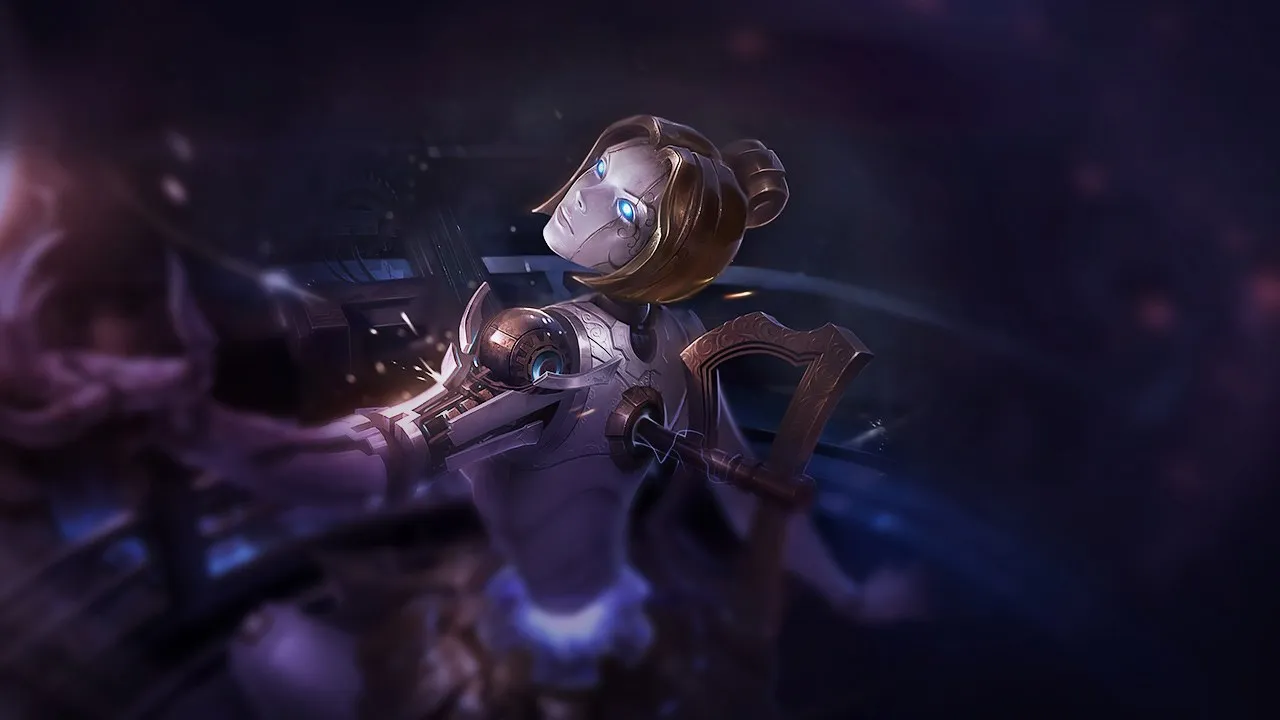
Matchups prioritários

Fizz

Fizz merece prioridade porque castiga o hábito ruim mais comum de Orianna: usar Q e W para avançar ou atacar à distância sem manter uma zona defensiva ao seu redor. Se ele conseguir ameaçar um all-in enquanto a bola estiver longe, Orianna terá que escolher entre perder a pressão na rota ou arriscar usar Flash e Barreira. O confronto, portanto, tem menos a ver com ataques diretos e mais com o gerenciamento da distância após cada feitiço lançado.

Zed

Zed obriga Orianna a gerenciar suas ferramentas defensivas com muito mais precisão. A bola pode desacelerar, proteger e ameaçar o Shockwave, mas somente se ainda estiver conectada à zona correta no momento em que ele atacar. Se a Orianna gastar Q muito cedo para controlar a onda, a Zed pode criar uma brecha em que ela fique sem resposta imediata. O verdadeiro objetivo é chegar às lutas com Stasis ou Barrier disponíveis, não vencer todas as trocas contra a mid.

Erros comuns contra ele

Erros comuns contra ele

  • Contra a Orianna, agrupar-se em um choke sem verificar a posição da bola muitas vezes permite que ela consiga um Shockwave sem resistência.
  • Jogar como se ela fosse fraca sempre que R estiver em recarga é um erro: seu escudo, o efeito de desaceleração e o controle de ondas continuam sendo importantes.
  • Deixá-la chegar primeiro ao objetivo proporciona a ela o melhor terreno possível para posicionar a bola.

  • Usar todos os dashes para entrar sem manter uma saída faz com que o Orianna transforme o Shockwave em um golpe de punição, em vez de um golpe de ataque.
  • É comum subestimar a habilidade “peel” dela: mesmo quando ela não mata, ela pode salvar o carry e atrapalhar o momento certo de um dive.

Notas do coach

  • A melhor maneira de derrotar a Orianna nem sempre é matá-la na rota; muitas vezes, é forçá-la a usar a bola em pânico antes de chegar ao objetivo.
  • Se você se deparar com a Orianna, preste mais atenção na bola do que na campeã. O tempo de recarga do ataque mais perigoso dela começa quando a bola está mal posicionada.

FAQ

Como se lida com o Orianna na rota?

Você deve punir os momentos em que a bola dela estiver muito distante dela ou tiver acabado de ser usada para empurrar. Se você atacar enquanto a bola estiver controlando a onda, a Orianna muitas vezes terá que escolher entre se proteger tarde demais, recuar sem pressão ou gastar um feitiço defensivo. A punição não precisa ser uma morte imediata: forçá-la a usar Barreira, Flash ou uma volta à base mal planejada já é suficiente para reduzir o impacto inicial dela com o dragon. O segredo é não entrar quando a bola já estiver posicionada para te desacelerar ou preparar a Onda de Choque.

Os assassinos são a melhor forma de combater o Orianna?

Os assassinos costumam ser muito eficazes contra a Orianna, mas somente se respeitarem suas janelas defensivas. A Fizz ou a Zed podem forçá-la a usar o Flash e tornar a rota desconfortável, mas um all-in mal sincronizado contra uma formação preparada pode sair pela culatra. O verdadeiro contra-ataque não é apenas o dano explosivo: é a capacidade de forçá-la a usar suas habilidades para se defender, em vez de para preparar o combate. Se o assassino não transformar essa pressão em ritmo de objetivos, a Orianna pode se tornar perigosa novamente em partidas da fase mid.

Como você deve jogar os objetivos contra o Orianna?

Você deve evitar dar a ela a primeira oportunidade. Se a Orianna chegar antes de você ao dragon, a bola já poderá controlar a entrada, e sua equipe terá que se dividir ou entrar em uma zona perigosa. A melhor resposta é disputar a visão lateral logo no início, forçar a Orianna a mover a bola e, então, entrar por vários ângulos, em vez de avançar em grupo. Se você forçar a Shockwave a atacar um alvo de baixa prioridade, a luta se torna muito mais fácil de jogar.

Por que o Orianna ainda é perigoso quando está em desvantagem?

Porque a habilidade definitiva dela mantém seu valor estratégico mesmo sem uma grande vantagem em ouro. Mesmo estando em desvantagem, a Orianna ainda pode salvar um carry com E e W, retardar a entrada de um inimigo ou punir um grupo compacto com Shockwave. Ela terá menos dano para matar sozinha, mas ainda assim pode mudar o rumo da luta. O erro comum é atacá-la de frente sem levar em conta o R: mesmo vinda de trás, ela pode transformar seu ataque inicial no ponto de partida da equipe dela.