August 2026 · Patch 7.2d
Support · SUPPORT

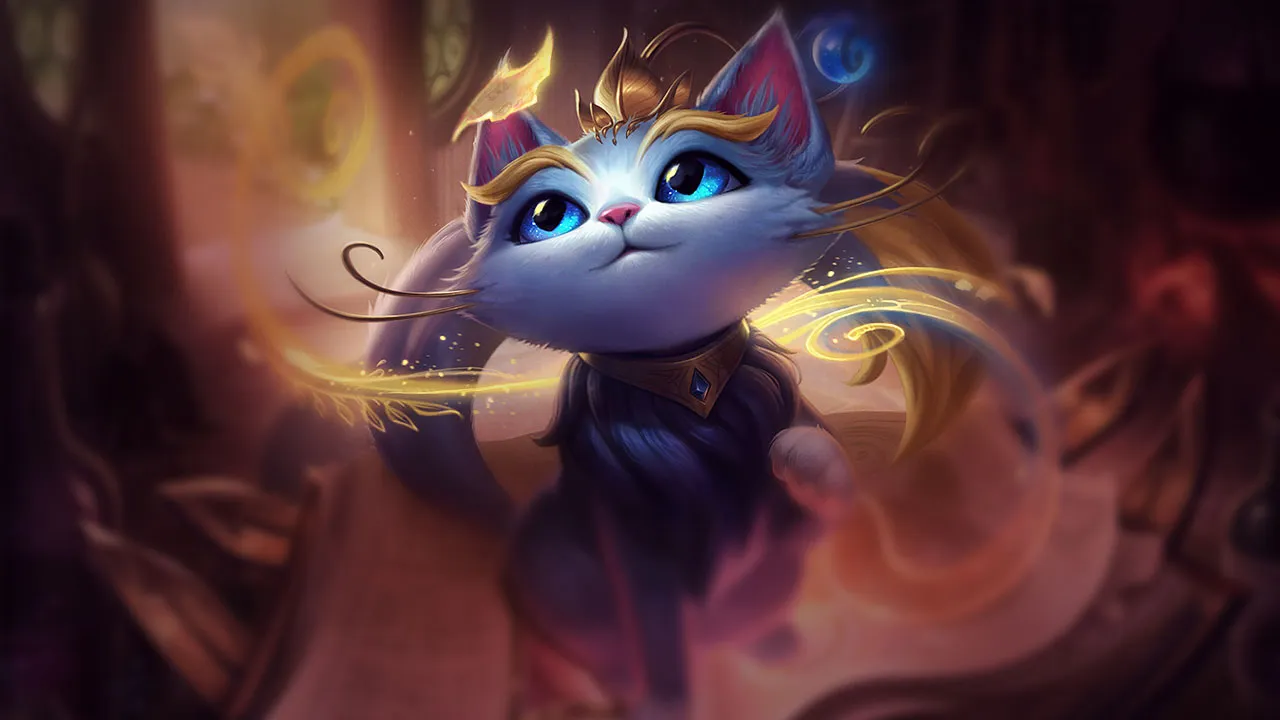
Yuumi Wild Rift Counter-Guide

Yuumi wird von Kompositionen gekontert, die ihren Host trennen oder ihre Schilde und Heillungen durch Anti-Heal ignorieren können. Die Carries, an die sie sich bindet, werden zu Prioritätszielen — wird der Host getötet, ist sie schutzlos. Gleichzeitiger Burst auf mehrere Ziele zehrt ihre Ressourcen auf.

★ SUPPORT Tier A
SCHADEN
UTIL
TANK
DIFF
Win 46.0% #80 · ↓0pt
Pick 11.3% #3
Ban 45.3% #4

Yuumi Wild Rift Counter-Guide ★ Counter Sheet

Hard Counters

25

Diese Champions haben ein Build und einen Spielstil, der deinen direkt überlegen ist, was die Kontrolle der Lane und das Farmen extrem schwierig machen kann. Ihr Kit kann deine Kernstärken neutralisieren oder dich bestrafen, sobald du versuchst, deinen gewohnten Spielplan umzusetzen. In diesen Matchups geht es oft darum, Fehler zu minimieren und nach Wegen zu suchen, außerhalb der direkten Konfrontation zu gewinnen.

Braum

Braum

projectile_blockscaling_gap This lane is exceptionally difficult because Braum's Unbreakable completely invalidates your offensive kit. Whenever you attempt to poke with Prowling Projectile, his directional shield absorbs it entirely, denying your mana-free pressure. Worse, when you launch Final Chapter to turn a fight, he can raise his shield to swallow every single wave, preventing the root from marking his allies and turning your primary teamfight tool into a useless light show. Details ansehen
Braum

Warum

This lane is exceptionally difficult because Braum's Unbreakable completely invalidates your offensive kit. Whenever you attempt to poke with Prowling Projectile, his directional shield absorbs it entirely, denying your mana-free pressure. Worse, when you launch Final Chapter to turn a fight, he can raise his shield to swallow every single wave, preventing the root from marking his allies and turning your primary teamfight tool into a useless light show.

Lane-Einfluss

Since your poke is neutralized, the opposing duo easily controls the wave. Your marksman is forced under tower, constantly dodging Winter's Bite while Braum freely zones you. Because your Prowling Projectile cannot land to help secure space, you are bled out of mana using Zoomies to sustain through passive damage. This lack of priority prevents early deep vision and leaves your jungler vulnerable to invades without any lane backup.

Wie man spielt

To survive, you must bait out Unbreakable before committing any resources. Watch for Braum to waste his shield protecting his marksman during a minor trade, then immediately launch Prowling Projectile during that brief downtime. Never cast Final Chapter unless his shield is on cooldown or he is facing away from your carry. If the lane is lost, attach to a mobile ally with You and Me! to safely proc Bop 'n' Block when Braum's crowd control is down.

Vollständiges Profil →
Blitzcrank

Blitzcrank

easy_targetlane_pressure This matchup is brutally lopsided because You and Me! forces your marksman into an isolated two-versus-one. Since you are attached, Blitzcrank can ignore your presence and focus his entire zone of threat, driven by Rocket Grab, on your lone partner. Furthermore, detaching to retrieve mana and a shield with Bop 'n' Block is suicidal, as any hook or Power Fist knock-up will instantly kill you. Details ansehen
Blitzcrank

Warum

This matchup is brutally lopsided because You and Me! forces your marksman into an isolated two-versus-one. Since you are attached, Blitzcrank can ignore your presence and focus his entire zone of threat, driven by Rocket Grab, on your lone partner. Furthermore, detaching to retrieve mana and a shield with Bop 'n' Block is suicidal, as any hook or Power Fist knock-up will instantly kill you.

Lane-Einfluss

You will permanently lose control of the minion waves from level one. Your partner must constantly hide behind minions to avoid Rocket Grab, allowing Blitzcrank to dictate the wave's position. If the wave crashes under your turret, the threat of an under-tower hook or a sudden Overdrive rush makes farming incredibly stressful, while Prowling Projectile poke does too little to deter their aggressive positioning.

Wie man spielt

To survive, your primary goal is assisting your partner's movement. Do not detach to trigger Bop 'n' Block unless you have absolute confirmation that Rocket Grab is on cooldown. Instead, hoard your mana and prepare to cast Zoomies the very instant Blitzcrank activates Overdrive or begins his hook animation, giving your ally the vital movement speed needed to dodge. If a hook lands, immediately trigger Final Chapter to root them and prevent their follow-up.

Vollständiges Profil →
Karma

Karma

pokelane_bully Karma dominates this matchup because her Inner Flame, especially when empowered by Mantra or Transcendent Embrace, deals massive area-of-effect damage that Yuumi cannot intercept while attached via You and Me!. Since your host carries the brunt of these explosive projectiles, your Zoomies healing and Bop 'n' Block shields are quickly overwhelmed. You cannot bodyblock the poke, leaving your ADC completely exposed to Karma's relentless ranged harassment. Details ansehen
Karma

Warum

Karma dominates this matchup because her Inner Flame, especially when empowered by Mantra or Transcendent Embrace, deals massive area-of-effect damage that Yuumi cannot intercept while attached via You and Me!. Since your host carries the brunt of these explosive projectiles, your Zoomies healing and Bop 'n' Block shields are quickly overwhelmed. You cannot bodyblock the poke, leaving your ADC completely exposed to Karma's relentless ranged harassment.

Lane-Einfluss

This constant splash damage forces your ADC off the minion wave, destroying your wave control. Karma and her partner will easily shove you under turret, chipping away at its plating. Your ADC will constantly sit at low health, forcing early, disadvantageous recalls that bleed gold and experience. Consequently, you will have zero priority to help secure river vision, leaving your jungler vulnerable to invades without any support.

Wie man spielt

To survive, prioritize survival over poke. Save Zoomies exclusively to mitigate Inner Flame blast damage, rather than using it for aggressive movement speed. You must detaching with You and Me! to trigger Bop 'n' Block only when Karma's Focused Resolve is on cooldown, otherwise she will easily root and kill you. If the wave crashes, hold Final Chapter to disengage her dives rather than trying to start fights you cannot win.

Vollständiges Profil →
Janna

Janna

roamingmap_pressurepoke_war Janna dominates this matchup because Tailwind and Zephyr grant her unparalleled passive movement speed for roaming. Since you are attached to your ally with You and Me!, you cannot match her rotations. While Janna freely roams to create numerical advantages across the map, you are forced to remain passive, unable to match her swift movements or help your allies in time. Details ansehen
Janna

Warum

Janna dominates this matchup because Tailwind and Zephyr grant her unparalleled passive movement speed for roaming. Since you are attached to your ally with You and Me!, you cannot match her rotations. While Janna freely roams to create numerical advantages across the map, you are forced to remain passive, unable to match her swift movements or help your allies in time.

Lane-Einfluss

When Janna clears waves with Howling Gale and shields her marksman with Eye of the Storm, she easily secures lane priority. She then vanishes into the fog of war, leaving you trapped under your turret. This absence of pressure allows Janna to assist her jungler in the river and secure objectives, while your team suffers from her constant map-wide presence.

Wie man spielt

Cast Prowling Projectile to slow Janna down and disrupt her roaming attempts. If she leaves the lane to rotate, immediately detach from You and Me! to help your marksman shove the wave and pressure her turret. Hold onto Final Chapter to lock down her isolated partner while she is away, or to interrupt her team if she attempts a defensive Monsoon.

Vollständiges Profil →
Alistar

Alistar

kill_laneroaming Alistar completely neutralizes Yuumi's utility because his *Headbutt* combined with *Pulverize* bypasses any protection she offers her host. Since Yuumi must remain attached via *You and Me!* to be effective, she cannot bodyblock this displacement combo. Furthermore, Alistar can shrug off the root from *Final Chapter* instantly using *Unbreakable Will*, making him impossible to peel once he engages. Details ansehen
Alistar

Warum

Alistar completely neutralizes Yuumi's utility because his *Headbutt* combined with *Pulverize* bypasses any protection she offers her host. Since Yuumi must remain attached via *You and Me!* to be effective, she cannot bodyblock this displacement combo. Furthermore, Alistar can shrug off the root from *Final Chapter* instantly using *Unbreakable Will*, making him impossible to peel once he engages.

Lane-Einfluss

The threat of a dive under your tower using *Unbreakable Will* forces your host to play extremely defensively, conceding wave control. This absolute lane priority allows Alistar to roam freely to secure river objectives or mid-lane ganks. Because you are tethered with *You and Me!*, you cannot match his rotations alone without dying to *Trample*, leaving your team at a map deficit.

Wie man spielt

Never follow Alistar into the river; instead, ping your jungler back and focus on securing tower plates. Maximize your *Prowling Projectile* to chip away at Alistar's health, making his engages risky. Only detach to trigger *Bop 'n' Block* when you see him use *Pulverize* on the wave, ensuring you are never caught in mid-air during *You and Me!*. Save your *Zoomies* charges to survive the post-engage burst.

Vollständiges Profil →
Bard

Bard

roaminglane_pressure Bard completely neutralizes Yuumi's utility because her attachment via You and Me! leaves her ADC in a virtual one-on-two that cannot punish anyone. Since Yuumi cannot mount a hard engage, Bard safely abandons his marksman to collect chimes with Traveler’s Call. While he gains permanent scaling and map-wide pressure, Yuumi is stuck poking with Prowling Projectile, unable to threaten the lone enemy under tower. Details ansehen
Bard

Warum

Bard completely neutralizes Yuumi's utility because her attachment via You and Me! leaves her ADC in a virtual one-on-two that cannot punish anyone. Since Yuumi cannot mount a hard engage, Bard safely abandons his marksman to collect chimes with Traveler’s Call. While he gains permanent scaling and map-wide pressure, Yuumi is stuck poking with Prowling Projectile, unable to threaten the lone enemy under tower.

Lane-Einfluss

This dynamic turns the lane into a passive farm simulator where your ADC is slowly choked out. Bard places Caretaker’s Shrine to keep his partner healthy during his absences, rendering your trade attempts useless. When Bard returns via Magical Journey, he brings his jungler along, setting up easy dives. Your lane loses all priority, forcing your jungler to play without bot-lane support during early skirmishes.

Wie man spielt

To survive, you must actively exploit the brief windows when Bard is away. Detach immediately to trigger Bop 'n' Block on the lone enemy ADC, granting your partner a crucial shield and restoring your mana. Do not waste Zoomies on frivolous trades; conserve your mana specifically to match Bard's return. Finally, hold Final Chapter to disrupt enemies emerging from Magical Journey or to peel if Bard drops Tempered Fate on your tower.

Vollständiges Profil →
Galio

Galio

kill_lanehard_engage Because you are permanently attached with You and Me!, your ADC has no frontline to block Galio's path. This allows him to freely aim and land Justice Punch without any physical obstruction. When you try to retaliate or disengage using Final Chapter, Galio can simply channel Shield of Durand, absorbing your magical waves with his spell's damage reduction before locking your partner down with a massive taunt. Details ansehen
Galio

Warum

Because you are permanently attached with You and Me!, your ADC has no frontline to block Galio's path. This allows him to freely aim and land Justice Punch without any physical obstruction. When you try to retaliate or disengage using Final Chapter, Galio can simply channel Shield of Durand, absorbing your magical waves with his spell's damage reduction before locking your partner down with a massive taunt.

Lane-Einfluss

This structural vulnerability forces your duo to play incredibly far back, conceding wave control completely. Any attempt to step up to trigger Bop 'n' Block invites an immediate Justice Punch into Winds of War combo, leading to massive health deficits. You will find yourselves trapped under tower, losing gold to dive setups, and unable to prevent Galio from utilizing Hero's Entrance to impact mid-lane skirmishes.

Wie man spielt

Do not detach to trigger your shield unless Justice Punch is strictly on cooldown; getting caught out of You and Me! by his crowd control means instant death. Maximize the slow on Prowling Projectile to disrupt his charge-up run. If Galio roams with Hero's Entrance, do not follow him through the river; instead, stay attached, push the wave hard to force him to lose tower plating, and prepare to transition to a bruiser teammate once the laning phase collapses.

Vollständiges Profil →
Leona

Leona

kill_pressurepassive_punish Leona completely counters your attachment mechanic by focusing all her crowd control on your anchor. When she initiates with Zenith Blade followed by Shield of Daybreak, your host is locked in place and exposed to massive burst. Furthermore, if you attempt to detach to trigger Bop 'n' Block for mana, Leona's instant stun from Shield of Daybreak will interrupt your reattachment via You and Me!, leading to your immediate death. Details ansehen
Leona

Warum

Leona completely counters your attachment mechanic by focusing all her crowd control on your anchor. When she initiates with Zenith Blade followed by Shield of Daybreak, your host is locked in place and exposed to massive burst. Furthermore, if you attempt to detach to trigger Bop 'n' Block for mana, Leona's instant stun from Shield of Daybreak will interrupt your reattachment via You and Me!, leading to your immediate death.

Lane-Einfluss

This heavy threat forces you and your partner to play extremely defensively under your turret, conceding lane control entirely. Any attempt to step forward to poke with Prowling Projectile risks putting your host in range of Leona's engage. You will constantly struggle to maintain healthy life totals, forcing early recalls that cost your team dragon priority once Leona unlocks Solar Flare to dive you.

Wie man spielt

Never detach to activate Bop 'n' Block unless Leona has just wasted both Zenith Blade and Shield of Daybreak. Sit safely inside your host using You and Me! and max Zoomies first to sustain through her burst. Save your Final Chapter exclusively to disengage when she commits with Solar Flare. If she catches your host, use Zoomies immediately for the movement speed to help them dodge the follow-up explosion of Eclipse.

Vollständiges Profil →
Milio

Milio

sustain_warrange_advantage Milio completely shuts down your poke potential. Because of Cozy Campfire, his marksman gains extra attack range, allowing them to safely harass your attached host from a distance where your Prowling Projectile cannot reliably retaliate. Furthermore, any attempts to poke are mitigated by Warm Hugs, while his passive Fired Up! ensures their counter-poke deals devastating burn damage that outpaces your early healing. Details ansehen
Milio

Warum

Milio completely shuts down your poke potential. Because of Cozy Campfire, his marksman gains extra attack range, allowing them to safely harass your attached host from a distance where your Prowling Projectile cannot reliably retaliate. Furthermore, any attempts to poke are mitigated by Warm Hugs, while his passive Fired Up! ensures their counter-poke deals devastating burn damage that outpaces your early healing.

Lane-Einfluss

This range disadvantage forces your host to play defensively under your own turret, conceding early wave control. Since you cannot safely detach to trigger Bop 'n' Block without risking a knockback from Ultra Mega Fire Kick, your mana pool quickly drains from relying solely on Zoomies. Your lane gets slowly chipped down, leaving you unable to assist your jungler in nearby river skirmishes.

Wie man spielt

You must position defensively and conserve your mana. Never detach for Bop 'n' Block unless you see Milio waste Ultra Mega Fire Kick, as the displacement will leave you incredibly vulnerable. Hold your Final Chapter for defensive disengages rather than aggressive plays, as his Breath of Life can instantly cleanse the root. If your host is forced to recall, focus on scaling safely to attach to a stronger ally later.

Vollständiges Profil →
Lulu

Lulu

sustain_warharass Lulu completely neutralizes your early scaling by deploying Help, Pix! directly onto your host, immediately following it up with an angled, unavoidable Glitterlance. Since you remain attached via You and Me!, you cannot bodyblock these projectiles for your carry. The sheer damage outpacing your early Zoomies means Lulu establishes uncontested lane control, exploiting your inability to retaliate through her shields. Details ansehen
Lulu

Warum

Lulu completely neutralizes your early scaling by deploying Help, Pix! directly onto your host, immediately following it up with an angled, unavoidable Glitterlance. Since you remain attached via You and Me!, you cannot bodyblock these projectiles for your carry. The sheer damage outpacing your early Zoomies means Lulu establishes uncontested lane control, exploiting your inability to retaliate through her shields.

Lane-Einfluss

This constant pressure forces your carry to yield wave control, pushing you under tower where Lulu can safely harass with Glitterlance as you try to last-hit. You are forced into early, unfavorable recalls, draining your mana pools trying to spam Zoomies. This loss of priority prevents you from securing the lane, allowing Lulu's team to safely lock down early dragons while your tower slowly crumbles.

Wie man spielt

To survive, instruct your carry to let the minion waves crash, freezing them just outside your turret range to deny Lulu easy Help, Pix! angles. Only detach to trigger Bop 'n' Block when Lulu's Whimsy is on cooldown to avoid being polymorphed and killed instantly. Save Final Chapter strictly as a disengage tool when they dive, rather than trying to initiate trades you cannot win.

Vollständiges Profil →
Lux

Lux

lane_pressureharass Because You and Me! keeps you untargetable, Lux can completely ignore you and focus her entire zone control on your host. She will easily predict your partner's movement to land Lucent Singularity and Light Binding. Since your host cannot dodge these dual-threat spells easily without your movement assistance, you are forced to constantly spam Zoomies to keep them healthy, rapidly draining your mana pool while Lux shields any counter-harass with Prismatic Barrier. Details ansehen
Lux

Warum

Because You and Me! keeps you untargetable, Lux can completely ignore you and focus her entire zone control on your host. She will easily predict your partner's movement to land Lucent Singularity and Light Binding. Since your host cannot dodge these dual-threat spells easily without your movement assistance, you are forced to constantly spam Zoomies to keep them healthy, rapidly draining your mana pool while Lux shields any counter-harass with Prismatic Barrier.

Lane-Einfluss

This constant poke completely ruins your lane control. Your carry is forced to yield minion waves and retreat under tower, where Lux's Lucent Singularity becomes even harder to avoid. Every wave pushed to your turret chips away at your tower's health, and if your host gets rooted by Light Binding, Lux's Final Spark combo will force an early recall or secure a kill, completely locking you out of the lane.

Wie man spielt

To survive, you must bait Lux's Light Binding before trying to regenerate mana. Watch her cooldowns; the moment she misses her root, detach to trigger Bop 'n' Block on a minion or Lux herself to gain a shield and mana, then immediately re-attach with You and Me!. Save Zoomies strictly for when your host is about to take lethal damage or needs the movement speed to dodge Lucent Singularity. If she holds her root, play safe and wait for Final Chapter to disengage.

Vollständiges Profil →
Nautilus

Nautilus

hard_engagekill_lane Nautilus completely neutralizes your defensive utility once he hits level five. Because *You and Me!* keeps you attached to your marksman, you are forced to ride out his point-and-click *Depth Charge*. This unstoppable knock-up guarantees that both you and your host are locked down simultaneously, allowing Nautilus to easily chain *Dredge Line* and *Staggering Blow* onto your partner without any room for you to escape or react. Details ansehen
Nautilus

Warum

Nautilus completely neutralizes your defensive utility once he hits level five. Because *You and Me!* keeps you attached to your marksman, you are forced to ride out his point-and-click *Depth Charge*. This unstoppable knock-up guarantees that both you and your host are locked down simultaneously, allowing Nautilus to easily chain *Dredge Line* and *Staggering Blow* onto your partner without any room for you to escape or react.

Lane-Einfluss

This threat completely paralyzes your laning after the first few waves. You cannot step out to trigger *Bop 'n' Block* for mana and shields because a single *Dredge Line* means instant death. Once Nautilus unlocks his ultimate, your carry will be forced to play extremely far behind the caster minions, conceding wave control and plate gold, while you are forced to burn massive mana on *Zoomies* just to survive basic trades.

Wie man spielt

To survive this lane, you must hold *Final Chapter* strictly as a disengage tool to zone Nautilus after he launches *Depth Charge*. Never detach to use *Bop 'n' Block* if his hook is off cooldown; stay safely attached. If your host gets dragged in under tower, use *Zoomies* immediately for the movement speed burst to help them retreat rather than trying to turn the fight. Accept losing your outer turret early to safely farm near the inner tier.

Vollständiges Profil →
Pyke

Pyke

squishy_targetroaming_advantage When you attach to your ADC using You and Me!, you simplify Pyke's targeting. He can easily land Bone Skewer on your host without worrying about your own body block. Once he hooks your ally, his lethal burst easily overwhelms the weak healing and high mana cost of Zoomies, as you lack any hard crowd control to stop his follow-up. Details ansehen
Pyke

Warum

When you attach to your ADC using You and Me!, you simplify Pyke's targeting. He can easily land Bone Skewer on your host without worrying about your own body block. Once he hooks your ally, his lethal burst easily overwhelms the weak healing and high mana cost of Zoomies, as you lack any hard crowd control to stop his follow-up.

Lane-Einfluss

This constant threat forces your carry to play extremely defensively, conceding the minion waves. Pyke will quickly crash the wave under your tower, then use Ghostwater Dive to roam toward mid or assist his jungler. Because you cannot match his map movement without risking getting caught alone in the river, your midlaner suffers immense pressure while you remain glued to a struggling marksman under tower.

Wie man spielt

To survive, never detach to trigger Bop 'n' Block if Pyke has Bone Skewer or Phantom Undertow ready, as any crowd control will lock your You and Me! on a five-second cooldown. Use Prowling Projectile to scout bushes where he might hide using Ghostwater Dive. If Pyke roams, do not follow him through the dark river; instead, help your marksman push the wave hard to punish his absence.

Vollständiges Profil →
Rakan

Rakan

roamingengage_advantage Rakan completely neutralizes your defensive loop because detaching to trigger Bop 'n' Block is an open invitation for him to pop The Quickness and instantly charm you before you can cast You and Me!. Even if you remain attached to your host, Rakan's Grand Entrance is too fast and wide to regularly dodge, forcing you to burn Zoomies prematurely just to survive the knock-up follow-up. Details ansehen
Rakan

Warum

Rakan completely neutralizes your defensive loop because detaching to trigger Bop 'n' Block is an open invitation for him to pop The Quickness and instantly charm you before you can cast You and Me!. Even if you remain attached to your host, Rakan's Grand Entrance is too fast and wide to regularly dodge, forcing you to burn Zoomies prematurely just to survive the knock-up follow-up.

Lane-Einfluss

This threat strips away your lane control, forcing your host to play far behind the minion wave. If Rakan lands Grand Entrance, your health bar is instantly chunked, ruinously inflating your mana costs via emergency Zoomies casts. Once Rakan realizes you cannot contest the brush, he will crash the wave and use Battle Dance to quickly escape into the river, starting roams that you simply cannot follow on foot.

Wie man spielt

Never detach for Bop 'n' Block while Rakan has The Quickness active, as the lock-out on You and Me! means certain death. Instead, max Prowling Projectile to poke him down and chip away at Fey Feathers from safety. When Rakan inevitably roams, do not try to chase him through the river; instead, stay attached, help your host shove the wave under tower, and prepare Final Chapter to deter any dive attempts when he returns.

Vollständiges Profil →
Nami

Nami

sustainharass Nami completely shuts down your main utility engine because her Aqua Prison is a death sentence whenever you detach. To regain mana and shield with Bop 'n' Block, you must leave your host, but Nami can easily predict this movement. Landing her bubble instantly locks you down, and because hard crowd control triggers a devastating five-second lockout on You and Me!, you will be left completely vulnerable. Details ansehen
Nami

Warum

Nami completely shuts down your main utility engine because her Aqua Prison is a death sentence whenever you detach. To regain mana and shield with Bop 'n' Block, you must leave your host, but Nami can easily predict this movement. Landing her bubble instantly locks you down, and because hard crowd control triggers a devastating five-second lockout on You and Me!, you will be left completely vulnerable.

Lane-Einfluss

This risk forces you to stay attached, starving your carry of Bop 'n' Block shields while your mana bar is quickly depleted by Zoomies. Nami leverages this by using Ebb and Flow and Tidecaller's Blessing to constantly harass your partner. Unable to trade back safely with Prowling Projectile, your lane is pushed under tower, forcing early recalls and leaving your jungler completely without priority.

Wie man spielt

You must strictly track Nami's Aqua Prison cooldown. Never detach to activate Bop 'n' Block while her bubble is available. If she misses Aqua Prison, you have a brief window to hop off, secure your shield, and immediately use You and Me! to reattach. When she holds her bubble indefinitely, accept that you must play purely as a heal-bot with Zoomies, conserving mana by only firing Prowling Projectile when absolutely necessary to slow her down.

Vollständiges Profil →
Maokai

Maokai

hard_ccbush_control Maokai completely shuts down your laning dynamic due to the guaranteed nature of Twisted Advance. The moment he locks onto your anchor, detaching to proc Bop 'n' Block becomes a death sentence. You cannot safely step off to restore mana or shield, as Bramble Smash instantly interrupts you. This forces you to remain passively fused via You and Me!, turning every engage into a deadly double-kill opportunity. Details ansehen
Maokai

Warum

Maokai completely shuts down your laning dynamic due to the guaranteed nature of Twisted Advance. The moment he locks onto your anchor, detaching to proc Bop 'n' Block becomes a death sentence. You cannot safely step off to restore mana or shield, as Bramble Smash instantly interrupts you. This forces you to remain passively fused via You and Me!, turning every engage into a deadly double-kill opportunity.

Lane-Einfluss

Constantly zoned by Sapling Toss in the lane brushes, your marksman is forced into a defensive posture. Maokai easily orchestrates tower dives using Twisted Advance, meaning your turret offers little safety. Trades are inherently losing battles; you will burn through your mana pool casting Zoomies to survive, without any opportunity to safely recall. This pressure leaks into the river, giving the enemy free rein over neutral objectives.

Wie man spielt

To survive this lane, adopt a strict discipline: remain permanently attached with You and Me! as long as Maokai holds Twisted Advance. Use your Prowling Projectile to poke him from maximum range, punishing his attempts to walk up. If your partner gets caught, do not detach under any circumstance. Cast Zoomies instantly and prepare Final Chapter to disengage their follow-up. If the outer turret falls, migrate early to attach to your jungler for safety.

Vollständiges Profil →
Seraphine

Seraphine

poke_advantageeasy_ccscaling_matchup When you attach with You and Me!, your ADC becomes a massive target. Since you cannot block skillshots, Seraphine easily directs her High Note and Beat Drop directly onto your partner. Worse, because you are physically sharing the same space, her Encore is guaranteed to charm you both instantly, turning your primary defensive mechanic into a grouping tool that maximizes her area-of-effect crowd control. Details ansehen
Seraphine

Warum

When you attach with You and Me!, your ADC becomes a massive target. Since you cannot block skillshots, Seraphine easily directs her High Note and Beat Drop directly onto your partner. Worse, because you are physically sharing the same space, her Encore is guaranteed to charm you both instantly, turning your primary defensive mechanic into a grouping tool that maximizes her area-of-effect crowd control.

Lane-Einfluss

Seraphine constantly shoves the wave while whittling down your ADC's health. You are forced to burn through your mana pool spamming Zoomies just to keep your partner alive, leaving you with little resources to trade back with Prowling Projectile. Under tower, the pressure intensifies as High Note's damage amplifies against low-health targets, forcing premature recalls and conceding early plates to her team.

Wie man spielt

To survive, you must regularly detach to trigger Bop 'n' Block, but only immediately after Seraphine wastes Beat Drop. When she casts Encore, you must instantly unattach with You and Me! to avoid both of you being charmed simultaneously, allowing you to cast Final Chapter from a safer angle to halt her follow-up. If your ADC falls behind, prepare to abandon them to attach to a tankier jungler who can absorb her poke.

Vollständiges Profil →
Senna

Senna

free_scalingharass Because you spend most of your time attached via You and Me!, your ADC is left alone to face Senna's harass. This complete lack of early lane presence allows Senna to constantly target your partner with Piercing Darkness and basic attacks, harvesting Mist stacks effortlessly. Without a physical threat to zone her, Senna accelerates her infinite scaling from the very first waves, out-ranging you both before the mid-game even begins. Details ansehen
Senna

Warum

Because you spend most of your time attached via You and Me!, your ADC is left alone to face Senna's harass. This complete lack of early lane presence allows Senna to constantly target your partner with Piercing Darkness and basic attacks, harvesting Mist stacks effortlessly. Without a physical threat to zone her, Senna accelerates her infinite scaling from the very first waves, out-ranging you both before the mid-game even begins.

Lane-Einfluss

Under constant pressure, your ADC is forced under turret while Senna neutralizes your Prowling Projectile poke using the heal from Piercing Darkness. You are forced to deplete your mana pool spamming Zoomies just to keep your partner alive, preventing any active map rotations. By the time outer turrets fall, Senna has acquired enough bonus range to safely siege your lanes while shielding her team globally with Dawning Shadow.

Wie man spielt

To slow down her scaling, you must actively bait and track Last Embrace. Once that root is on cooldown, temporarily detach to trigger Bop 'n' Block, providing your ADC with a shield to absorb her basic attacks. Never use Zoomies reactively for minor poke; save your mana for when Senna commits to an aggressive trade. If she overextends to harvest a soul, immediately cast Final Chapter to lock her down and force a defensive Curse of the Black Mist.

Vollständiges Profil →

Andere Matchups

Ungünstig

2

Diese Champions haben Werkzeuge, die ihnen im Kampf meist einen Vorteil verschaffen, ohne das Matchup unspielbar zu machen. Sie haben vielleicht mehr Reichweite, können deine Offensive besser abfangen oder haben mehr Möglichkeiten, auf deine Engages zu reagieren. Du musst deine Herangehensweise anpassen und sorgfältig die Momente wählen, in denen du den Kampf annimmst.

Andere Matchups

Items to Counter Yuumi

Buy these items to reduce this champion's effectiveness in your games.

Mikael's Blessing
Mikael's Blessing
Harmonic Echo
Harmonic Echo
Ardent Censer
Ardent Censer
Staff of Flowing Water
Morellonomicon
Morellonomicon

Wie man diesen Champion kontert

Konter-Winkel

Gegen Yuumi zu spielen, bedeutet nicht nur, Anti-Heal zu kaufen oder darauf zu warten, dass ihr das Mana ausgeht. Der eigentliche Plan ist, die Verbindung zwischen Yuumi und ihrem Wirt zu unterbrechen: Entweder, indem man die wenigen Momente bestraft, in denen sie sich löst, den Carry tötet, bevor ihre wiederholten Buffs wertvoll werden, oder indem man Objectives erzwingt, bevor ihr Team Zeit hat, den richtigen Wirt zu wählen. Die besten Konter gegen Yuumi teilen oft eine Eigenschaft: Sie schaffen eine unmittelbare Bedrohung, die Yuumi nicht mit einem einfachen E abbrechen kann. Hooks, gezielte Engages, Flächenschaden oder anhaltender Lane-Druck zwingen Yuumi, weiter hinten zu spielen, Mana defensiv auszugeben und geschwächt zu Drachen zu erscheinen.

Patch-Kontext

Yuumi hat Schwierigkeiten gegen Champions, die den Kampf verkürzen. Sie will lange Trades, einen lebenden Wirt und genug Zeit, um E, Aery, Exhaust, Items und Ultimate zu verketten. Wenn Blitzcrank, Leona, Pyke, Nautilus oder Thresh eine sofortige Entscheidung erzwingen, verliert Yuumi einen Teil ihrer Identität: Sie kann sich nicht immer lösen, kann nicht als Bodyblock dienen und ihr ADC stirbt möglicherweise, bevor Sustain wichtig wird. Druck-Magier wie Brand, Seraphine, Sona oder Nami schaffen ein anderes Problem: Sie belasten ihr Mana, kontrollieren die Lane und zwingen sie, zu heilen, bevor die eigentlichen Objectives kommen.

Schnell gelesen

  • Der beste Weg, Yuumi zu bestrafen, ist, eine schnelle Entscheidung zu erzwingen, bevor ihre Heilung, Buffs und Items in einem langen Kampf Wert ansammeln können.
  • Hooks und harte Engages sind gefährlich für sie, da sie entweder ihr Lösungs-Timing oder den Wirt bestrafen, der den Großteil ihres Wertes trägt.
  • Poke und Lane-Druck können sie ebenfalls besiegen: Wenn Yuumi ihr Mana vor dragon verbraucht, verliert sie einen großen Teil ihres tatsächlichen Impacts.

Konter-Archetypen

Hooks, die Lösungsfenster bestrafen

Yuumi ist untargetbar, solange sie angehängt ist, aber sie ist während der Übergänge nicht unverwundbar. Hook-Champions machen jedes Lösen gefährlich: Eine Ressource auffrischen, Vision setzen oder den Wirt wechseln kann zu einem Todesfenster werden. Selbst wenn der Hook auf ADC statt auf Yuumi landet, ist das Ergebnis immer noch günstig, da der Großteil ihres Wertes auf diesem Wirt konzentriert ist. Blitzcrank, Pyke und Thresh zwingen Yuumi daher, weniger aktiv zu spielen, etwas passiven Wert aufzugeben und Mana defensiv auszugeben.

Wie sich der Champion anpasst. Yuumi sollte sich erst lösen, nachdem sie den Hook hat kommen sehen oder wenn die Lane den Winkel eindeutig blockiert. Sie muss auch Locket, Exhaust oder Mikael vor Objectives vorbereiten, anstatt zu warten, bis ihr Wirt bereits gefangen ist.

Gezielter harter Engage

Gezielter harter Engage schafft ein anderes Problem als Hooks: Er erfordert nicht immer, dass Yuumi sich löst, um einen Kill zu erzielen. Leona und Nautilus können den Wirt direkt fixieren, Crowd Control stapeln und Yuumi zwingen, E, Exhaust und defensive Verzauberungen reaktiv einzusetzen. Wenn der Engage vor ihren Schlüssel-Items oder bei niedrigem Mana erfolgt, kann sie den Kampf nicht in einen ausgedehnten Trade verwandeln. Dieser Konter-Typ ist sehr stark, da er Yuumi Tempo aufzwingt, anstatt ihr ihr Timing wählen zu lassen.

Wie sich der Champion anpasst. Yuumi muss All-In-Level respektieren und E für den eigentlichen Impact aufsparen, nicht für geringen Poke. Im mid-Spiel sollte sie sich an den Wirt hängen, der die erste Crowd-Control-Kette überleben kann, nicht nur an den, der den meisten Schaden verursacht.

Poke und Mana-Druck

Yuumi möchte wählen, wann sie heilt und wann sie ihren Wirt beschleunigt. Poke-Champions nehmen ihr diese Wahl: Jede umkämpfte Lane, jeder Flächenzauber und jeder wiederholte Trade zwingt sie, Mana auszugeben, bevor der eigentliche Kampf beginnt. Brand droht mit Flächenschaden, der mehrere Ziele treffen kann, trotz ihrer Anhaftung, während Seraphine, Sona und Nami konstanten Lane-Druck aufrechterhalten können. Das Ziel ist nicht immer, Yuumi sofort zu töten, sondern sie mit weniger Mana, weniger Tempo und weniger Lane-Kontrolle bei dragon ankommen zu lassen.

Wie sich der Champion anpasst. Yuumi muss einige kleine Schäden akzeptieren, anstatt alles zu heilen, und dann vor wichtigen Objectives zurücksetzen. Wenn sie Mana verschwendet, um jeden Poke-Moment auszugleichen, verliert sie das Timing, in dem ihr Kit den Kampf hätte wenden sollen.

Prioritäts-Matchups

Blitzcrank

Blitzcrank ist ein prioritärer Matchup, der erklärt werden muss, weil er Yuumis empfindlichste Mechanik direkt angreift: den Übergang. Solange sie angehängt bleibt, kann er ihren ADC bedrohen; sobald sie sich löst, kann er Yuumi selbst bestrafen. Der Matchup dreht sich daher weniger um rohe Heilung als vielmehr um Lane-Disziplin, Vision und Hook-Winkel. Yuumi muss automatische Lösungs-Gewohnheiten vermeiden, hinter Minions spielen und defensive Werkzeuge vorbereiten, bevor Blitzcrank den entscheidenden Griff landet.

Leona

Leona zwingt Yuumi, eine andere Art von Gefahr zu respektieren: direkten Engage auf den Wirt. Selbst ohne Yuumi gelöst zu erwischen, kann sie den Carry lange genug fixieren, um die Heilung zu spät kommen zu lassen. Der Schlüssel zum Matchup ist, All-In-Level vorauszusehen, Exhaust oder E für den eigentlichen Engage aufzusparen und nicht unnötig Mana für kleinere Trades zu verschwenden. Wenn Yuumi das mid-Spiel mit vorbereiteten Werkzeugen erreicht, kann sie einige Engages abwehren; wenn sie zu früh die Lane verliert, diktiert Leona den Rhythmus.

Häufige Fehler gegen ihn

Häufige Fehler gegen ihn

  • Gegen Yuumi ist passives Abwarten bis zum späten Spiel ein Fehler: Je mehr ihre Enchanter-Items stapeln, desto teurer wird es, ihren Wirt zu töten.
  • Die gesamte Crowd Control auf einen Tank zu verwenden, während Yuumi am eigentlichen Carry hängt, lässt ihr Team den Kampf oft nach deinem ersten Burst wiederholen.

  • Ein Objective zu erzwingen, ohne Hook- oder Engage-Winkel vorzubereiten, gibt Yuumi genau das, was sie will: einen Korridor, in dem ihr Ultimate und ihre Buffs einen Vorwärtsdrang support können.

  • Ihr Mana zu ignorieren ist ein Fehler. Eine Yuumi mit vollem Mana und eine Yuumi mit fast leerem Mana haben nicht die gleiche Fähigkeit, einen Kampf aufrechtzuerhalten.

  • Sie nach einem gewonnenen Kampf zu verfolgen, kann gefährlich werden, wenn sie einen mobilen Verbündeten erreicht, der noch am Leben ist. Es ist oft besser, das Ziel zu konvertieren, anstatt ihr ein weiteres Sustain-Fenster zu geben.
Coach-Notizen

  • Um Yuumi zu schlagen, spiele die dreißig Sekunden vor dem Ziel, nicht nur den Kampf selbst. Wenn du sie zum Heilen, Zurücksetzen oder Ankommen ohne Mana zwingst, hast du ihren Einfluss bereits reduziert.
  • Miss Yuumi nicht nur anhand ihrer Lebensleiste. Ihre wahre Bedrohung zeigt sich durch den Zustand ihres Verbündeten, ihr Mana, die Verfügbarkeit ihrer Ultimate und den defensiven Verzauber, den sie noch einsetzen kann.

FAQ

Wie schlägst du Yuumi auf der Lane?

Um Yuumi auf der Lane zu schlagen, vermeide es, dich nur auf kleine Trades zu verlassen, die sie nach und nach heilen kann. Der beste Plan ist, die Wave zu kontrollieren, Abspaltungsfenster zu bedrohen und All-Ins zu erzwingen, wenn ihr E, Mana oder Exhaust die gesamte Sequenz nicht abdecken kann. Haken und harte Engagements sollten ebenfalls mit Vision und Brush Control vorbereitet werden, nicht zufällig durch die Wave geworfen werden. Wenn Yuumi zu viel Mana ausgibt, bevor dragon es tut, ist die Lane bereits taktisch gewonnen.

Reicht Anti-Heal gegen Yuumi aus?

Anti-Heal hilft, ist aber allein nicht genug. Yuumi gewinnt nicht nur durch Heilung: Sie bringt auch Geschwindigkeit, Item-Buffs, Aery, Exhaust, Ultimate und Neupositionierung um einen starken Verbündeten. Wenn du Anti-Heal kaufst, aber zu spät eingreifst, den falschen Champion anvisierst oder sie mit vollem Mana bei Zielen ankommen lässt, kann sie den Kampf immer noch gewinnen. Anti-Heal muss support einen Tempo-Plan geben: vor ihren Spikes erzwingen, den Verbündeten bestrafen und ihre Sustain-Fenster reduzieren.

Warum sind Hooks so stark gegen Yuumi?

Hooks sind stark, weil sie beide wichtigen Zustände von Yuumi bestrafen. Wenn sie angehängt ist, konzentriert das Landen eines Hooks auf ihren Verbündeten sofort den gesamten Druck auf das Ziel, das sie schützt. Wenn sie sich löst, wird Yuumi selbst verwundbar und kann sterben, bevor sie in Sicherheit zurückkehrt. Dies reduziert ihre Freiheit, die Lane aktiv zu spielen: weniger Abspaltungsfenster, weniger passiver Wert, weniger Vision und oft mehr Mana unter Druck verbraucht. Dieser Freiheitsverlust ist es, was Hooks so effektiv macht.

Solltest du Yuumi oder ihren Verbündeten zuerst töten?

In den meisten Kämpfen solltest du den Verbündeten töten, der Yuumis Wert trägt, anstatt zu versuchen, Yuumi direkt anzuvisieren. Sie wird nur während Abspaltungsfenstern, Wechseln oder wenn ihr Verbündeter stirbt, bestrafbar. Die richtige Entscheidung hängt vom Timing ab: Wenn sie gelöst und exponiert ist, wird sie zu einem freien Ziel; andernfalls ist es besser, Burst, Crowd Control und Anti-Heal auf den Champion zu koordinieren, den sie stärkt. Wenn der Verbündete schnell stirbt, verliert Yuumi ihren Anker und ihr Wert sinkt rapide.