2026年8月 · Patch 7.2d
Support · SUPPORT

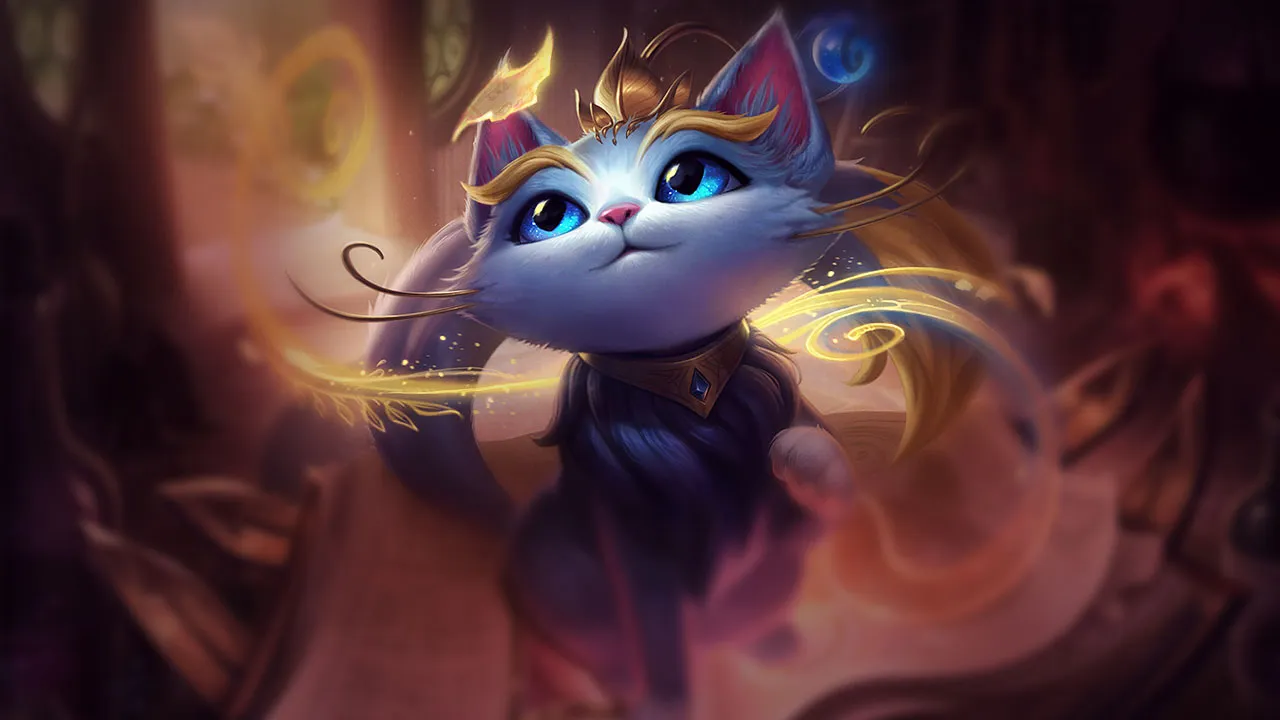
Yuumi Wild Rift カウンターガイド

Yuumiは、密着しているホストを引き剥がすことができる構成や、anti-healによって彼女のシールドや回復をignore(無視)できる構成に対して脆弱です。彼女が密着しているcarryは優先ターゲットとなり、ホストが倒されれば彼女は無防備になります。複数のターゲットに対するSimultaneous burstは、彼女のリソースを枯渇させます。

★ SUPPORT Tier A
ダメージ
UTIL
TANK
DIFF
Win 46.0% #80 · ↓0pt
Pick 11.3% #3
Ban 45.3% #4

Yuumi Wild Rift カウンターガイド ★ Counter Sheet

ハードカウンター

25

これらのチャンピオンは、こちらのビルドやプレイスタイルを真正面から上回る構成を持ち、レーン戦のコントロールとファームを極めて難しくする。彼らのスキルはこちらの主要な強みを無効化し、いつも通りのプランを実行しようとした瞬間に手痛い反撃を受けさせてくる。こうしたマッチアップでは、ミスを最小限に抑え、正面からの対決以外で解決策を探すことが重要になる。

Braum

Braum

projectile_blockscaling_gap This lane is exceptionally difficult because Braum's Unbreakable completely invalidates your offensive kit. Whenever you attempt to poke with Prowling Projectile, his directional shield absorbs it entirely, denying your mana-free pressure. Worse, when you launch Final Chapter to turn a fight, he can raise his shield to swallow every single wave, preventing the root from marking his allies and turning your primary teamfight tool into a useless light show. 詳細を見る
Braum

理由

This lane is exceptionally difficult because Braum's Unbreakable completely invalidates your offensive kit. Whenever you attempt to poke with Prowling Projectile, his directional shield absorbs it entirely, denying your mana-free pressure. Worse, when you launch Final Chapter to turn a fight, he can raise his shield to swallow every single wave, preventing the root from marking his allies and turning your primary teamfight tool into a useless light show.

レーン戦への影響

Since your poke is neutralized, the opposing duo easily controls the wave. Your marksman is forced under tower, constantly dodging Winter's Bite while Braum freely zones you. Because your Prowling Projectile cannot land to help secure space, you are bled out of mana using Zoomies to sustain through passive damage. This lack of priority prevents early deep vision and leaves your jungler vulnerable to invades without any lane backup.

立ち回り方

To survive, you must bait out Unbreakable before committing any resources. Watch for Braum to waste his shield protecting his marksman during a minor trade, then immediately launch Prowling Projectile during that brief downtime. Never cast Final Chapter unless his shield is on cooldown or he is facing away from your carry. If the lane is lost, attach to a mobile ally with You and Me! to safely proc Bop 'n' Block when Braum's crowd control is down.

詳細プロフィール →
Blitzcrank

Blitzcrank

easy_targetlane_pressure This matchup is brutally lopsided because You and Me! forces your marksman into an isolated two-versus-one. Since you are attached, Blitzcrank can ignore your presence and focus his entire zone of threat, driven by Rocket Grab, on your lone partner. Furthermore, detaching to retrieve mana and a shield with Bop 'n' Block is suicidal, as any hook or Power Fist knock-up will instantly kill you. 詳細を見る
Blitzcrank

理由

This matchup is brutally lopsided because You and Me! forces your marksman into an isolated two-versus-one. Since you are attached, Blitzcrank can ignore your presence and focus his entire zone of threat, driven by Rocket Grab, on your lone partner. Furthermore, detaching to retrieve mana and a shield with Bop 'n' Block is suicidal, as any hook or Power Fist knock-up will instantly kill you.

レーン戦への影響

You will permanently lose control of the minion waves from level one. Your partner must constantly hide behind minions to avoid Rocket Grab, allowing Blitzcrank to dictate the wave's position. If the wave crashes under your turret, the threat of an under-tower hook or a sudden Overdrive rush makes farming incredibly stressful, while Prowling Projectile poke does too little to deter their aggressive positioning.

立ち回り方

To survive, your primary goal is assisting your partner's movement. Do not detach to trigger Bop 'n' Block unless you have absolute confirmation that Rocket Grab is on cooldown. Instead, hoard your mana and prepare to cast Zoomies the very instant Blitzcrank activates Overdrive or begins his hook animation, giving your ally the vital movement speed needed to dodge. If a hook lands, immediately trigger Final Chapter to root them and prevent their follow-up.

詳細プロフィール →
Karma

Karma

pokelane_bully Karma dominates this matchup because her Inner Flame, especially when empowered by Mantra or Transcendent Embrace, deals massive area-of-effect damage that Yuumi cannot intercept while attached via You and Me!. Since your host carries the brunt of these explosive projectiles, your Zoomies healing and Bop 'n' Block shields are quickly overwhelmed. You cannot bodyblock the poke, leaving your ADC completely exposed to Karma's relentless ranged harassment. 詳細を見る
Karma

理由

Karma dominates this matchup because her Inner Flame, especially when empowered by Mantra or Transcendent Embrace, deals massive area-of-effect damage that Yuumi cannot intercept while attached via You and Me!. Since your host carries the brunt of these explosive projectiles, your Zoomies healing and Bop 'n' Block shields are quickly overwhelmed. You cannot bodyblock the poke, leaving your ADC completely exposed to Karma's relentless ranged harassment.

レーン戦への影響

This constant splash damage forces your ADC off the minion wave, destroying your wave control. Karma and her partner will easily shove you under turret, chipping away at its plating. Your ADC will constantly sit at low health, forcing early, disadvantageous recalls that bleed gold and experience. Consequently, you will have zero priority to help secure river vision, leaving your jungler vulnerable to invades without any support.

立ち回り方

To survive, prioritize survival over poke. Save Zoomies exclusively to mitigate Inner Flame blast damage, rather than using it for aggressive movement speed. You must detaching with You and Me! to trigger Bop 'n' Block only when Karma's Focused Resolve is on cooldown, otherwise she will easily root and kill you. If the wave crashes, hold Final Chapter to disengage her dives rather than trying to start fights you cannot win.

詳細プロフィール →
Janna

Janna

roamingmap_pressurepoke_war Janna dominates this matchup because Tailwind and Zephyr grant her unparalleled passive movement speed for roaming. Since you are attached to your ally with You and Me!, you cannot match her rotations. While Janna freely roams to create numerical advantages across the map, you are forced to remain passive, unable to match her swift movements or help your allies in time. 詳細を見る
Janna

理由

Janna dominates this matchup because Tailwind and Zephyr grant her unparalleled passive movement speed for roaming. Since you are attached to your ally with You and Me!, you cannot match her rotations. While Janna freely roams to create numerical advantages across the map, you are forced to remain passive, unable to match her swift movements or help your allies in time.

レーン戦への影響

When Janna clears waves with Howling Gale and shields her marksman with Eye of the Storm, she easily secures lane priority. She then vanishes into the fog of war, leaving you trapped under your turret. This absence of pressure allows Janna to assist her jungler in the river and secure objectives, while your team suffers from her constant map-wide presence.

立ち回り方

Cast Prowling Projectile to slow Janna down and disrupt her roaming attempts. If she leaves the lane to rotate, immediately detach from You and Me! to help your marksman shove the wave and pressure her turret. Hold onto Final Chapter to lock down her isolated partner while she is away, or to interrupt her team if she attempts a defensive Monsoon.

詳細プロフィール →
Alistar

Alistar

kill_laneroaming Alistar completely neutralizes Yuumi's utility because his *Headbutt* combined with *Pulverize* bypasses any protection she offers her host. Since Yuumi must remain attached via *You and Me!* to be effective, she cannot bodyblock this displacement combo. Furthermore, Alistar can shrug off the root from *Final Chapter* instantly using *Unbreakable Will*, making him impossible to peel once he engages. 詳細を見る
Alistar

理由

Alistar completely neutralizes Yuumi's utility because his *Headbutt* combined with *Pulverize* bypasses any protection she offers her host. Since Yuumi must remain attached via *You and Me!* to be effective, she cannot bodyblock this displacement combo. Furthermore, Alistar can shrug off the root from *Final Chapter* instantly using *Unbreakable Will*, making him impossible to peel once he engages.

レーン戦への影響

The threat of a dive under your tower using *Unbreakable Will* forces your host to play extremely defensively, conceding wave control. This absolute lane priority allows Alistar to roam freely to secure river objectives or mid-lane ganks. Because you are tethered with *You and Me!*, you cannot match his rotations alone without dying to *Trample*, leaving your team at a map deficit.

立ち回り方

Never follow Alistar into the river; instead, ping your jungler back and focus on securing tower plates. Maximize your *Prowling Projectile* to chip away at Alistar's health, making his engages risky. Only detach to trigger *Bop 'n' Block* when you see him use *Pulverize* on the wave, ensuring you are never caught in mid-air during *You and Me!*. Save your *Zoomies* charges to survive the post-engage burst.

詳細プロフィール →
Bard

Bard

roaminglane_pressure Bard completely neutralizes Yuumi's utility because her attachment via You and Me! leaves her ADC in a virtual one-on-two that cannot punish anyone. Since Yuumi cannot mount a hard engage, Bard safely abandons his marksman to collect chimes with Traveler’s Call. While he gains permanent scaling and map-wide pressure, Yuumi is stuck poking with Prowling Projectile, unable to threaten the lone enemy under tower. 詳細を見る
Bard

理由

Bard completely neutralizes Yuumi's utility because her attachment via You and Me! leaves her ADC in a virtual one-on-two that cannot punish anyone. Since Yuumi cannot mount a hard engage, Bard safely abandons his marksman to collect chimes with Traveler’s Call. While he gains permanent scaling and map-wide pressure, Yuumi is stuck poking with Prowling Projectile, unable to threaten the lone enemy under tower.

レーン戦への影響

This dynamic turns the lane into a passive farm simulator where your ADC is slowly choked out. Bard places Caretaker’s Shrine to keep his partner healthy during his absences, rendering your trade attempts useless. When Bard returns via Magical Journey, he brings his jungler along, setting up easy dives. Your lane loses all priority, forcing your jungler to play without bot-lane support during early skirmishes.

立ち回り方

To survive, you must actively exploit the brief windows when Bard is away. Detach immediately to trigger Bop 'n' Block on the lone enemy ADC, granting your partner a crucial shield and restoring your mana. Do not waste Zoomies on frivolous trades; conserve your mana specifically to match Bard's return. Finally, hold Final Chapter to disrupt enemies emerging from Magical Journey or to peel if Bard drops Tempered Fate on your tower.

詳細プロフィール →
Galio

Galio

kill_lanehard_engage Because you are permanently attached with You and Me!, your ADC has no frontline to block Galio's path. This allows him to freely aim and land Justice Punch without any physical obstruction. When you try to retaliate or disengage using Final Chapter, Galio can simply channel Shield of Durand, absorbing your magical waves with his spell's damage reduction before locking your partner down with a massive taunt. 詳細を見る
Galio

理由

Because you are permanently attached with You and Me!, your ADC has no frontline to block Galio's path. This allows him to freely aim and land Justice Punch without any physical obstruction. When you try to retaliate or disengage using Final Chapter, Galio can simply channel Shield of Durand, absorbing your magical waves with his spell's damage reduction before locking your partner down with a massive taunt.

レーン戦への影響

This structural vulnerability forces your duo to play incredibly far back, conceding wave control completely. Any attempt to step up to trigger Bop 'n' Block invites an immediate Justice Punch into Winds of War combo, leading to massive health deficits. You will find yourselves trapped under tower, losing gold to dive setups, and unable to prevent Galio from utilizing Hero's Entrance to impact mid-lane skirmishes.

立ち回り方

Do not detach to trigger your shield unless Justice Punch is strictly on cooldown; getting caught out of You and Me! by his crowd control means instant death. Maximize the slow on Prowling Projectile to disrupt his charge-up run. If Galio roams with Hero's Entrance, do not follow him through the river; instead, stay attached, push the wave hard to force him to lose tower plating, and prepare to transition to a bruiser teammate once the laning phase collapses.

詳細プロフィール →
Leona

Leona

kill_pressurepassive_punish Leona completely counters your attachment mechanic by focusing all her crowd control on your anchor. When she initiates with Zenith Blade followed by Shield of Daybreak, your host is locked in place and exposed to massive burst. Furthermore, if you attempt to detach to trigger Bop 'n' Block for mana, Leona's instant stun from Shield of Daybreak will interrupt your reattachment via You and Me!, leading to your immediate death. 詳細を見る
Leona

理由

Leona completely counters your attachment mechanic by focusing all her crowd control on your anchor. When she initiates with Zenith Blade followed by Shield of Daybreak, your host is locked in place and exposed to massive burst. Furthermore, if you attempt to detach to trigger Bop 'n' Block for mana, Leona's instant stun from Shield of Daybreak will interrupt your reattachment via You and Me!, leading to your immediate death.

レーン戦への影響

This heavy threat forces you and your partner to play extremely defensively under your turret, conceding lane control entirely. Any attempt to step forward to poke with Prowling Projectile risks putting your host in range of Leona's engage. You will constantly struggle to maintain healthy life totals, forcing early recalls that cost your team dragon priority once Leona unlocks Solar Flare to dive you.

立ち回り方

Never detach to activate Bop 'n' Block unless Leona has just wasted both Zenith Blade and Shield of Daybreak. Sit safely inside your host using You and Me! and max Zoomies first to sustain through her burst. Save your Final Chapter exclusively to disengage when she commits with Solar Flare. If she catches your host, use Zoomies immediately for the movement speed to help them dodge the follow-up explosion of Eclipse.

詳細プロフィール →
Milio

Milio

sustain_warrange_advantage Milio completely shuts down your poke potential. Because of Cozy Campfire, his marksman gains extra attack range, allowing them to safely harass your attached host from a distance where your Prowling Projectile cannot reliably retaliate. Furthermore, any attempts to poke are mitigated by Warm Hugs, while his passive Fired Up! ensures their counter-poke deals devastating burn damage that outpaces your early healing. 詳細を見る
Milio

理由

Milio completely shuts down your poke potential. Because of Cozy Campfire, his marksman gains extra attack range, allowing them to safely harass your attached host from a distance where your Prowling Projectile cannot reliably retaliate. Furthermore, any attempts to poke are mitigated by Warm Hugs, while his passive Fired Up! ensures their counter-poke deals devastating burn damage that outpaces your early healing.

レーン戦への影響

This range disadvantage forces your host to play defensively under your own turret, conceding early wave control. Since you cannot safely detach to trigger Bop 'n' Block without risking a knockback from Ultra Mega Fire Kick, your mana pool quickly drains from relying solely on Zoomies. Your lane gets slowly chipped down, leaving you unable to assist your jungler in nearby river skirmishes.

立ち回り方

You must position defensively and conserve your mana. Never detach for Bop 'n' Block unless you see Milio waste Ultra Mega Fire Kick, as the displacement will leave you incredibly vulnerable. Hold your Final Chapter for defensive disengages rather than aggressive plays, as his Breath of Life can instantly cleanse the root. If your host is forced to recall, focus on scaling safely to attach to a stronger ally later.

詳細プロフィール →
Lulu

Lulu

sustain_warharass Lulu completely neutralizes your early scaling by deploying Help, Pix! directly onto your host, immediately following it up with an angled, unavoidable Glitterlance. Since you remain attached via You and Me!, you cannot bodyblock these projectiles for your carry. The sheer damage outpacing your early Zoomies means Lulu establishes uncontested lane control, exploiting your inability to retaliate through her shields. 詳細を見る
Lulu

理由

Lulu completely neutralizes your early scaling by deploying Help, Pix! directly onto your host, immediately following it up with an angled, unavoidable Glitterlance. Since you remain attached via You and Me!, you cannot bodyblock these projectiles for your carry. The sheer damage outpacing your early Zoomies means Lulu establishes uncontested lane control, exploiting your inability to retaliate through her shields.

レーン戦への影響

This constant pressure forces your carry to yield wave control, pushing you under tower where Lulu can safely harass with Glitterlance as you try to last-hit. You are forced into early, unfavorable recalls, draining your mana pools trying to spam Zoomies. This loss of priority prevents you from securing the lane, allowing Lulu's team to safely lock down early dragons while your tower slowly crumbles.

立ち回り方

To survive, instruct your carry to let the minion waves crash, freezing them just outside your turret range to deny Lulu easy Help, Pix! angles. Only detach to trigger Bop 'n' Block when Lulu's Whimsy is on cooldown to avoid being polymorphed and killed instantly. Save Final Chapter strictly as a disengage tool when they dive, rather than trying to initiate trades you cannot win.

詳細プロフィール →
Lux

Lux

lane_pressureharass Because You and Me! keeps you untargetable, Lux can completely ignore you and focus her entire zone control on your host. She will easily predict your partner's movement to land Lucent Singularity and Light Binding. Since your host cannot dodge these dual-threat spells easily without your movement assistance, you are forced to constantly spam Zoomies to keep them healthy, rapidly draining your mana pool while Lux shields any counter-harass with Prismatic Barrier. 詳細を見る
Lux

理由

Because You and Me! keeps you untargetable, Lux can completely ignore you and focus her entire zone control on your host. She will easily predict your partner's movement to land Lucent Singularity and Light Binding. Since your host cannot dodge these dual-threat spells easily without your movement assistance, you are forced to constantly spam Zoomies to keep them healthy, rapidly draining your mana pool while Lux shields any counter-harass with Prismatic Barrier.

レーン戦への影響

This constant poke completely ruins your lane control. Your carry is forced to yield minion waves and retreat under tower, where Lux's Lucent Singularity becomes even harder to avoid. Every wave pushed to your turret chips away at your tower's health, and if your host gets rooted by Light Binding, Lux's Final Spark combo will force an early recall or secure a kill, completely locking you out of the lane.

立ち回り方

To survive, you must bait Lux's Light Binding before trying to regenerate mana. Watch her cooldowns; the moment she misses her root, detach to trigger Bop 'n' Block on a minion or Lux herself to gain a shield and mana, then immediately re-attach with You and Me!. Save Zoomies strictly for when your host is about to take lethal damage or needs the movement speed to dodge Lucent Singularity. If she holds her root, play safe and wait for Final Chapter to disengage.

詳細プロフィール →
Nautilus

Nautilus

hard_engagekill_lane Nautilus completely neutralizes your defensive utility once he hits level five. Because *You and Me!* keeps you attached to your marksman, you are forced to ride out his point-and-click *Depth Charge*. This unstoppable knock-up guarantees that both you and your host are locked down simultaneously, allowing Nautilus to easily chain *Dredge Line* and *Staggering Blow* onto your partner without any room for you to escape or react. 詳細を見る
Nautilus

理由

Nautilus completely neutralizes your defensive utility once he hits level five. Because *You and Me!* keeps you attached to your marksman, you are forced to ride out his point-and-click *Depth Charge*. This unstoppable knock-up guarantees that both you and your host are locked down simultaneously, allowing Nautilus to easily chain *Dredge Line* and *Staggering Blow* onto your partner without any room for you to escape or react.

レーン戦への影響

This threat completely paralyzes your laning after the first few waves. You cannot step out to trigger *Bop 'n' Block* for mana and shields because a single *Dredge Line* means instant death. Once Nautilus unlocks his ultimate, your carry will be forced to play extremely far behind the caster minions, conceding wave control and plate gold, while you are forced to burn massive mana on *Zoomies* just to survive basic trades.

立ち回り方

To survive this lane, you must hold *Final Chapter* strictly as a disengage tool to zone Nautilus after he launches *Depth Charge*. Never detach to use *Bop 'n' Block* if his hook is off cooldown; stay safely attached. If your host gets dragged in under tower, use *Zoomies* immediately for the movement speed burst to help them retreat rather than trying to turn the fight. Accept losing your outer turret early to safely farm near the inner tier.

詳細プロフィール →
Pyke

Pyke

squishy_targetroaming_advantage When you attach to your ADC using You and Me!, you simplify Pyke's targeting. He can easily land Bone Skewer on your host without worrying about your own body block. Once he hooks your ally, his lethal burst easily overwhelms the weak healing and high mana cost of Zoomies, as you lack any hard crowd control to stop his follow-up. 詳細を見る
Pyke

理由

When you attach to your ADC using You and Me!, you simplify Pyke's targeting. He can easily land Bone Skewer on your host without worrying about your own body block. Once he hooks your ally, his lethal burst easily overwhelms the weak healing and high mana cost of Zoomies, as you lack any hard crowd control to stop his follow-up.

レーン戦への影響

This constant threat forces your carry to play extremely defensively, conceding the minion waves. Pyke will quickly crash the wave under your tower, then use Ghostwater Dive to roam toward mid or assist his jungler. Because you cannot match his map movement without risking getting caught alone in the river, your midlaner suffers immense pressure while you remain glued to a struggling marksman under tower.

立ち回り方

To survive, never detach to trigger Bop 'n' Block if Pyke has Bone Skewer or Phantom Undertow ready, as any crowd control will lock your You and Me! on a five-second cooldown. Use Prowling Projectile to scout bushes where he might hide using Ghostwater Dive. If Pyke roams, do not follow him through the dark river; instead, help your marksman push the wave hard to punish his absence.

詳細プロフィール →
Rakan

Rakan

roamingengage_advantage Rakan completely neutralizes your defensive loop because detaching to trigger Bop 'n' Block is an open invitation for him to pop The Quickness and instantly charm you before you can cast You and Me!. Even if you remain attached to your host, Rakan's Grand Entrance is too fast and wide to regularly dodge, forcing you to burn Zoomies prematurely just to survive the knock-up follow-up. 詳細を見る
Rakan

理由

Rakan completely neutralizes your defensive loop because detaching to trigger Bop 'n' Block is an open invitation for him to pop The Quickness and instantly charm you before you can cast You and Me!. Even if you remain attached to your host, Rakan's Grand Entrance is too fast and wide to regularly dodge, forcing you to burn Zoomies prematurely just to survive the knock-up follow-up.

レーン戦への影響

This threat strips away your lane control, forcing your host to play far behind the minion wave. If Rakan lands Grand Entrance, your health bar is instantly chunked, ruinously inflating your mana costs via emergency Zoomies casts. Once Rakan realizes you cannot contest the brush, he will crash the wave and use Battle Dance to quickly escape into the river, starting roams that you simply cannot follow on foot.

立ち回り方

Never detach for Bop 'n' Block while Rakan has The Quickness active, as the lock-out on You and Me! means certain death. Instead, max Prowling Projectile to poke him down and chip away at Fey Feathers from safety. When Rakan inevitably roams, do not try to chase him through the river; instead, stay attached, help your host shove the wave under tower, and prepare Final Chapter to deter any dive attempts when he returns.

詳細プロフィール →
Nami

Nami

sustainharass Nami completely shuts down your main utility engine because her Aqua Prison is a death sentence whenever you detach. To regain mana and shield with Bop 'n' Block, you must leave your host, but Nami can easily predict this movement. Landing her bubble instantly locks you down, and because hard crowd control triggers a devastating five-second lockout on You and Me!, you will be left completely vulnerable. 詳細を見る
Nami

理由

Nami completely shuts down your main utility engine because her Aqua Prison is a death sentence whenever you detach. To regain mana and shield with Bop 'n' Block, you must leave your host, but Nami can easily predict this movement. Landing her bubble instantly locks you down, and because hard crowd control triggers a devastating five-second lockout on You and Me!, you will be left completely vulnerable.

レーン戦への影響

This risk forces you to stay attached, starving your carry of Bop 'n' Block shields while your mana bar is quickly depleted by Zoomies. Nami leverages this by using Ebb and Flow and Tidecaller's Blessing to constantly harass your partner. Unable to trade back safely with Prowling Projectile, your lane is pushed under tower, forcing early recalls and leaving your jungler completely without priority.

立ち回り方

You must strictly track Nami's Aqua Prison cooldown. Never detach to activate Bop 'n' Block while her bubble is available. If she misses Aqua Prison, you have a brief window to hop off, secure your shield, and immediately use You and Me! to reattach. When she holds her bubble indefinitely, accept that you must play purely as a heal-bot with Zoomies, conserving mana by only firing Prowling Projectile when absolutely necessary to slow her down.

詳細プロフィール →
Maokai

Maokai

hard_ccbush_control Maokai completely shuts down your laning dynamic due to the guaranteed nature of Twisted Advance. The moment he locks onto your anchor, detaching to proc Bop 'n' Block becomes a death sentence. You cannot safely step off to restore mana or shield, as Bramble Smash instantly interrupts you. This forces you to remain passively fused via You and Me!, turning every engage into a deadly double-kill opportunity. 詳細を見る
Maokai

理由

Maokai completely shuts down your laning dynamic due to the guaranteed nature of Twisted Advance. The moment he locks onto your anchor, detaching to proc Bop 'n' Block becomes a death sentence. You cannot safely step off to restore mana or shield, as Bramble Smash instantly interrupts you. This forces you to remain passively fused via You and Me!, turning every engage into a deadly double-kill opportunity.

レーン戦への影響

Constantly zoned by Sapling Toss in the lane brushes, your marksman is forced into a defensive posture. Maokai easily orchestrates tower dives using Twisted Advance, meaning your turret offers little safety. Trades are inherently losing battles; you will burn through your mana pool casting Zoomies to survive, without any opportunity to safely recall. This pressure leaks into the river, giving the enemy free rein over neutral objectives.

立ち回り方

To survive this lane, adopt a strict discipline: remain permanently attached with You and Me! as long as Maokai holds Twisted Advance. Use your Prowling Projectile to poke him from maximum range, punishing his attempts to walk up. If your partner gets caught, do not detach under any circumstance. Cast Zoomies instantly and prepare Final Chapter to disengage their follow-up. If the outer turret falls, migrate early to attach to your jungler for safety.

詳細プロフィール →
Seraphine

Seraphine

poke_advantageeasy_ccscaling_matchup When you attach with You and Me!, your ADC becomes a massive target. Since you cannot block skillshots, Seraphine easily directs her High Note and Beat Drop directly onto your partner. Worse, because you are physically sharing the same space, her Encore is guaranteed to charm you both instantly, turning your primary defensive mechanic into a grouping tool that maximizes her area-of-effect crowd control. 詳細を見る
Seraphine

理由

When you attach with You and Me!, your ADC becomes a massive target. Since you cannot block skillshots, Seraphine easily directs her High Note and Beat Drop directly onto your partner. Worse, because you are physically sharing the same space, her Encore is guaranteed to charm you both instantly, turning your primary defensive mechanic into a grouping tool that maximizes her area-of-effect crowd control.

レーン戦への影響

Seraphine constantly shoves the wave while whittling down your ADC's health. You are forced to burn through your mana pool spamming Zoomies just to keep your partner alive, leaving you with little resources to trade back with Prowling Projectile. Under tower, the pressure intensifies as High Note's damage amplifies against low-health targets, forcing premature recalls and conceding early plates to her team.

立ち回り方

To survive, you must regularly detach to trigger Bop 'n' Block, but only immediately after Seraphine wastes Beat Drop. When she casts Encore, you must instantly unattach with You and Me! to avoid both of you being charmed simultaneously, allowing you to cast Final Chapter from a safer angle to halt her follow-up. If your ADC falls behind, prepare to abandon them to attach to a tankier jungler who can absorb her poke.

詳細プロフィール →
Senna

Senna

free_scalingharass Because you spend most of your time attached via You and Me!, your ADC is left alone to face Senna's harass. This complete lack of early lane presence allows Senna to constantly target your partner with Piercing Darkness and basic attacks, harvesting Mist stacks effortlessly. Without a physical threat to zone her, Senna accelerates her infinite scaling from the very first waves, out-ranging you both before the mid-game even begins. 詳細を見る
Senna

理由

Because you spend most of your time attached via You and Me!, your ADC is left alone to face Senna's harass. This complete lack of early lane presence allows Senna to constantly target your partner with Piercing Darkness and basic attacks, harvesting Mist stacks effortlessly. Without a physical threat to zone her, Senna accelerates her infinite scaling from the very first waves, out-ranging you both before the mid-game even begins.

レーン戦への影響

Under constant pressure, your ADC is forced under turret while Senna neutralizes your Prowling Projectile poke using the heal from Piercing Darkness. You are forced to deplete your mana pool spamming Zoomies just to keep your partner alive, preventing any active map rotations. By the time outer turrets fall, Senna has acquired enough bonus range to safely siege your lanes while shielding her team globally with Dawning Shadow.

立ち回り方

To slow down her scaling, you must actively bait and track Last Embrace. Once that root is on cooldown, temporarily detach to trigger Bop 'n' Block, providing your ADC with a shield to absorb her basic attacks. Never use Zoomies reactively for minor poke; save your mana for when Senna commits to an aggressive trade. If she overextends to harvest a soul, immediately cast Final Chapter to lock her down and force a defensive Curse of the Black Mist.

詳細プロフィール →

その他のマッチアップ

不利なマッチアップ

2

これらのチャンピオンは、マッチアップ自体を絶望的にするわけではないが、対面で優位に立ちやすいツールを持っている。射程が長かったり、攻撃を受け止める力が高かったり、エンゲージへの対応手段が豊富だったりする。アプローチを調整し、戦闘を受け入れるタイミングを慎重に選ぶ必要がある。

その他のマッチアップ

Items to Counter Yuumi

Buy these items to reduce this champion's effectiveness in your games.

Mikael's Blessing
Mikael's Blessing
Harmonic Echo
Harmonic Echo
Ardent Censer
Ardent Censer
Staff of Flowing Water
Morellonomicon
Morellonomicon

このチャンピオンへの対策

カウンターアングル

Yuumiとの対面は、回復阻害アイテムを買ったり、彼女のマナ切れを待つだけじゃ済まない。本当の戦略は、Yuumiと彼女のホストとの繋がりを断つことだ。彼女が離れるわずかな瞬間を突いてホストを倒すか、彼女のバフが強力になる前にオブジェクトを押し付けるかのどちらかだな。Yuumiに対する最良のカウンターは、Yuumiが単純なEスキルでキャンセルできない即時的な脅威を作り出すという共通点を持っていることが多い。フック、ターゲット指定エンゲージ、範囲バースト、または持続的なレーンプレッシャーは、Yuumiをより後方に追いやることを強制し、防御的にマナを消費させ、ドラゴン戦では弱体化して到着させることになる。

パッチの文脈

Yuumiは、戦闘時間を短縮するチャンピオンに対して苦戦する。彼女は長いトレード、生きているホスト、そしてEスキル、アーリ、サレンダー、アイテム、アルティメットを繋げる十分な時間を欲している。Blitzcrank、Leona、Pyke、Nautilus、またはThreshが即時の判断を強いると、Yuumiはそのアイデンティティの一部を失うことになる。彼女は常に離れることができず、ブロッカーになることもできず、そして彼女のADCはサステインが重要になる前に死ぬ可能性がある。Brand、Seraphine、Sona、またはNamiのようなプレッシャーメイジは、異なる問題を引き起こす。彼女のマナを削り、ウェーブをコントロールし、そして本当のオブジェクト前に回復を強いるのだ。

クイックリード

  • Yuumiを罰する最善の方法は、彼女の回復、バフ、アイテムが長期戦で価値をスタックする前に、迅速な判断を強いることだ。
  • フックとハードエンゲージは彼女にとって危険だ。なぜなら、それらは彼女の離脱タイミングか、彼女の価値の大部分を運ぶホストのどちらかを罰するからだ。
  • ポークとウェーブプレッシャーも彼女を打ち負かすことができる。もしYuumiがdragonより先にマナを使い果たせば、彼女は本来のインパクトの大部分を失うことになる。

カウンターの原型

離脱ウィンドウを罰するフック

Yuumiは、アタッチされている間はターゲット不可だが、移行中は無敵ではない。フックチャンピオンは、すべての離脱を危険なものにする。リソースの更新、視界の設置、またはホストの交代は、死のウィンドウになり得る。フックがYuumiではなくADCに当たったとしても、結果は依然として有利だ。なぜなら、彼女の価値の大部分はそのホストに集中しているからだ。したがって、Blitzcrank、Pyke、そしてThreshは、Yuumiにあまり積極的にプレイさせず、いくつかのパッシブな価値を諦めさせ、防御的にマナを消費させることになる。

チャンピオンの適応方法. Yuumiは、フックが使われたのを確認した後、またはウェーブが明らかに角度をブロックしている場合にのみ離脱すべきだ。彼女はまた、ホストがすでに捕まったのを待つのではなく、オブジェクト前にロケット、サレンダー、またはミカエルの準備をする必要がある。

ターゲット指定ハードエンゲージ

ターゲット指定ハードエンゲージは、フックとは異なる問題を生み出す。それは、キルを生み出すためにYuumiが必ずしも離脱する必要はない。LeonaとNautilusはホストを直接ロックし、クラウドコントロールをスタックし、YuumiにEスキル、サレンダー、防御的エンチャントをリアクティブに使うことを強いることができる。エンゲージが彼女のキーアイテムの前か、マナが低い時に起こった場合、彼女は戦闘を長期トレードに変えることができない。このカウンタータイプは、Yuumiに彼女のタイミングを選ばせるのではなく、テンポを課すため非常に強力だ。

チャンピオンの適応方法. Yuumiは、オールインレベルを尊重し、マイナーなポークではなく、本当のインパクトのためにEスキルを温存しなければならない。midのゲームでは、最もダメージを与えるホストだけでなく、最初のクラウドコントロールチェーンを生き残ることができるホストにアタッチすべきだ。

ポークとマナプレッシャー

Yuumiは、いつ回復し、いつホストを加速させるかを選びたい。ポークチャンピオンはその選択肢を奪う。すべての contested wave、範囲スキル、そして繰り返されるトレードは、彼女に本当の戦闘の前にマナを消費させる。Brandは、アタッチされているにもかかわらず複数のターゲットに影響を与える範囲ダメージで脅かす一方、Seraphine、Sona、そしてNamiは安定したレーンプレッシャーを維持できる。目標は必ずしもYuumiを即座に倒すことではなく、彼女をより少ないマナ、より少ないテンポ、そしてより少ないウェーブコントロールでdragonに到着させることだ。

チャンピオンの適応方法. Yuumiは、すべてのポークインスタンスに合わせるためにマナを無駄にすると、彼女のキットが戦闘を転換するはずだったタイミングを失うため、いくらかの小ダメージを受け入れるべきだ。そして重要なオブジェクト前にリセットすべきだ。

優先度の高いマッチアップ

Blitzcrank

Blitzcrankは、Yuumiの最も敏感なメカニズムであるトランジションを直接攻撃するため、説明すべき優先度の高いマッチアップだ。彼女がアタッチされている間、彼は彼女のADCを脅かすことができる。彼女が離れるとすぐに、彼はYuumi自身を罰することができる。したがって、このマッチアップは、生の回復よりもウェーブディシプリン、ビジョン、そしてフックアングルに関するものだ。NX উত্তেজনা4ENDは、自動的な離脱習慣を避け、ミニオンの後ろにプレイし、Blitzcrankが決定的なグラブを見つける前に防御ツールを準備する必要がある。
Leona

Leonaは、Yuumiに別の種類の危険を尊重させる。すなわち、ホストへの直接エンゲージだ。たとえYuumiが離脱しているのを捕まえなくても、彼女は回復が遅すぎるようにキャリーを十分に長くロックできる。マッチアップの鍵は、オールインレベルを予測し、本当のエンゲージのためにサレンダーまたはEスキルを温存し、マイナーなトレードでマナを無駄にしないことだ。Yuumiが準備されたツールを持ってmidゲームに到達できれば、彼女はいくつかのエンゲージを転換できる。もし彼女がレーンを早期に失えば、Leonaがリズムを決定する。

対面時のよくある間違い

対面時のよくある間違い

  • Yuumiに対して、終盤まで受動的に待つのは間違いだ。彼女のエンチャンターアイテムがスタックするほど、彼女のホストを倒すコストは高くなる。
  • Yuumiが本当のキャリーにアタッチされている間に、すべてのクラウドコントロールをタンクに使うと、あなたの最初のバーストの後に彼女のチームが戦闘をやり直すことを許してしまうことが多い。
  • フックまたはエンゲージアングルを準備せずにオブジェクトを強制すると、Yuumiはまさに彼女が望むもの、すなわち彼女のアルティメットとバフが前進をsupportできるような通路を手に入れることになる。
  • 彼女のマナを無視するのは間違いだ。満タンのマナのYuumiと、ほとんど空のマナのYuumiでは、戦闘を維持する能力は同じではない。
  • 戦闘に勝った後でも、敵のモバイルスローターがまだ生き残っている場合、彼女を追いかけるのは危険です。彼女に回復のチャンスを与えるより、オブジェクトに切り替える方が良い場合が多いです。

コーチングノート

  • Yuumiに勝つには、戦闘そのものだけでなく、オブジェクト前の30秒間をプレイしましょう。彼女を回復、リセット、またはマナなしで到着させることを強制できれば、すでに彼女の影響力を減らしています。
  • Yuumiを体力バーだけで判断しないでください。彼女の本当の脅威は、彼女のホストの状態、マナ、アルティメットの利用可能性、そしてまだ使用できる防御エンチャントを通して見られます。

FAQ

レーンでYuumiに勝つ方法は?

Yuumiにレーンで勝つには、彼女が徐々に回復できる小さなトレードに頼りすぎるのを避けましょう。最善の計画は、ウェーブをコントロールし、分離のウィンドウを脅かし、彼女のE、マナ、またはエグゾーストがシーケンス全体をカバーできないときにオールインを強制することです。フックやハードエンゲージも、ウェーブを通して無差別に投げるのではなく、ビジョンとブラシコントロールで準備する必要があります。Yuumiがdragonの前にマナを使いすぎると、レーンはすでに戦術的に勝利しています。

Yuumiに対してアンチヒールは十分ですか?

アンチヒールは役立ちますが、それだけでは十分ではありません。Yuumiは回復だけで勝つわけではありません。彼女はスピード、アイテムバフ、エアリー、エグゾースト、アルティメット、そして強力なホストの周りの再配置ももたらします。アンチヒールを購入しても、エンゲージが遅すぎたり、間違ったチャンピオンをターゲットにしたり、オブジェクトに満マナで到着させたりすると、それでも彼女は戦闘に勝つことができます。アンチヒールはsupportのテンポプランを強制する必要があります。彼女のスパイクの前に強制し、ホストを罰し、彼女のサステインウィンドウを減らしましょう。

なぜフックはYuumiに対してそれほど強力なのですか?

フックが強力なのは、Yuumiの2つの重要な状態を罰するからです。彼女がアタッチされている場合、彼女のホストにフックを着地させると、すぐにすべての圧力が彼女が保護しているターゲットに集中します。彼女がデタッチした場合、Yuumi自身が脆弱になり、安全に戻る前に死ぬ可能性があります。これにより、レーンを積極的にプレイする自由が減ります。デタッチウィンドウが少なくなり、パッシブバリューが減り、ビジョンが減り、プレッシャー下でより多くマナを消費することが多くなります。その自由の喪失が、フックを効果的にしている理由です。

Yuumiと彼女のホスト、どちらを先に倒すべきですか?

ほとんどの戦闘では、Yuumiを直接ターゲットにしようとするのではなく、Yuumiのバリューを運んでいるホストを倒すべきです。彼女はデタッチウィンドウ、スワップ中、またはホストが死んだときにのみ罰せられます。正しい決定はタイミングに依存します。彼女がデタッチされて露出している場合、彼女はフリーターゲットになります。そうでなければ、彼女が強化しているチャンピオンにバースト、クラウドコントロール、アンチヒールを調整する方が良いでしょう。ホストがすぐに死ぬと、Yuumiはアンカーを失い、そのバリューは急落します。