agosto de 2026 · Patch 7.2d
Support · SUPPORT

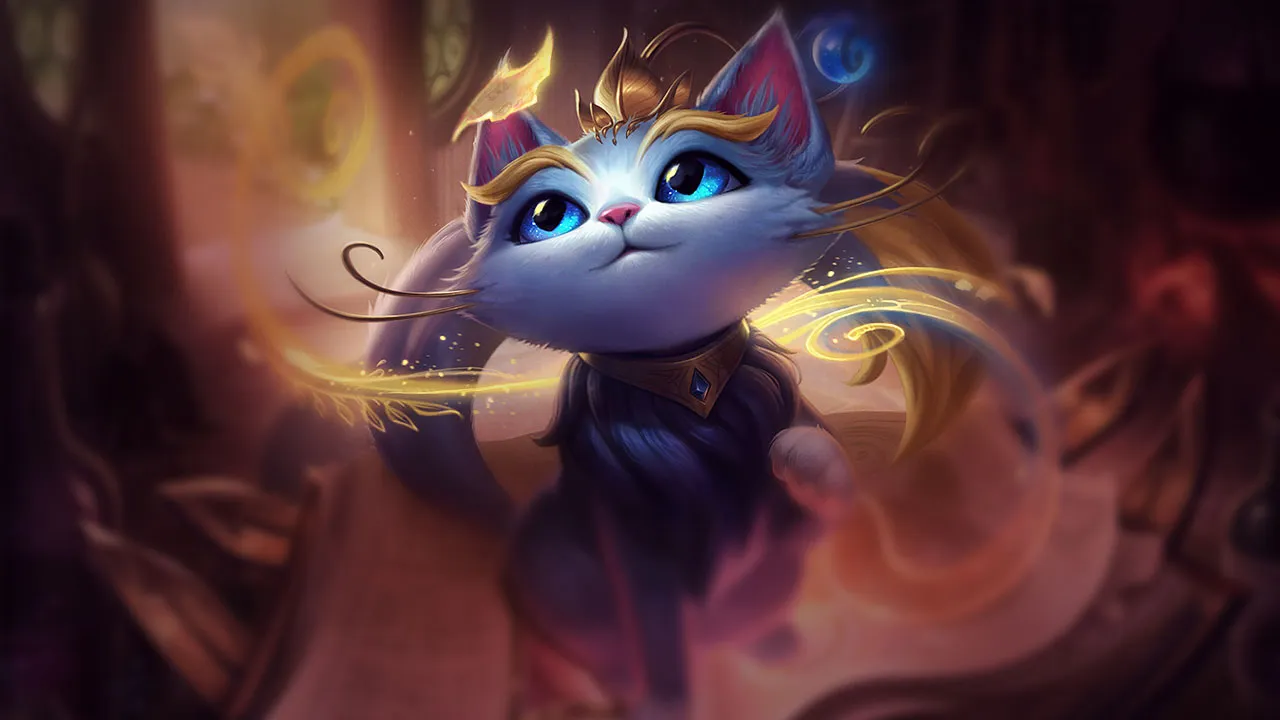
Guia de counters de Yuumi Wild Rift

Yuumi é counterada por composições que conseguem desanexá-la de seu hospedeiro ou ignorar seus escudos e curas através de anti-heal. Os carries aos quais ela se anexa tornam-se alvos prioritários — se o hospedeiro for morto, ela fica exposta. Burst simultâneo em múltiplos alvos esgota seus recursos.

★ SUPPORT Tier A
DANO
UTIL
TANK
DIFF
Win 46.0% #80 · ↓0pt
Pick 11.3% #3
Ban 45.3% #4

Guia de counters de Yuumi Wild Rift ★ Counter Sheet

Hard Counters

25

Esses campeões têm uma build e um estilo de jogo que superam diretamente o seu, o que pode tornar o controle da lane e o farm extremamente difíceis. As habilidades deles podem neutralizar seus principais pontos fortes ou te punir assim que você tenta jogar do seu jeito de sempre. Nesses matchups, o objetivo costuma ser reduzir os erros e buscar soluções fora do confronto direto.

Braum

Braum

projectile_blockscaling_gap This lane is exceptionally difficult because Braum's Unbreakable completely invalidates your offensive kit. Whenever you attempt to poke with Prowling Projectile, his directional shield absorbs it entirely, denying your mana-free pressure. Worse, when you launch Final Chapter to turn a fight, he can raise his shield to swallow every single wave, preventing the root from marking his allies and turning your primary teamfight tool into a useless light show. Ver detalhes
Braum

Por quê

This lane is exceptionally difficult because Braum's Unbreakable completely invalidates your offensive kit. Whenever you attempt to poke with Prowling Projectile, his directional shield absorbs it entirely, denying your mana-free pressure. Worse, when you launch Final Chapter to turn a fight, he can raise his shield to swallow every single wave, preventing the root from marking his allies and turning your primary teamfight tool into a useless light show.

Impacto na lane

Since your poke is neutralized, the opposing duo easily controls the wave. Your marksman is forced under tower, constantly dodging Winter's Bite while Braum freely zones you. Because your Prowling Projectile cannot land to help secure space, you are bled out of mana using Zoomies to sustain through passive damage. This lack of priority prevents early deep vision and leaves your jungler vulnerable to invades without any lane backup.

Como jogar

To survive, you must bait out Unbreakable before committing any resources. Watch for Braum to waste his shield protecting his marksman during a minor trade, then immediately launch Prowling Projectile during that brief downtime. Never cast Final Chapter unless his shield is on cooldown or he is facing away from your carry. If the lane is lost, attach to a mobile ally with You and Me! to safely proc Bop 'n' Block when Braum's crowd control is down.

Ficha completa →
Blitzcrank

Blitzcrank

easy_targetlane_pressure This matchup is brutally lopsided because You and Me! forces your marksman into an isolated two-versus-one. Since you are attached, Blitzcrank can ignore your presence and focus his entire zone of threat, driven by Rocket Grab, on your lone partner. Furthermore, detaching to retrieve mana and a shield with Bop 'n' Block is suicidal, as any hook or Power Fist knock-up will instantly kill you. Ver detalhes
Blitzcrank

Por quê

This matchup is brutally lopsided because You and Me! forces your marksman into an isolated two-versus-one. Since you are attached, Blitzcrank can ignore your presence and focus his entire zone of threat, driven by Rocket Grab, on your lone partner. Furthermore, detaching to retrieve mana and a shield with Bop 'n' Block is suicidal, as any hook or Power Fist knock-up will instantly kill you.

Impacto na lane

You will permanently lose control of the minion waves from level one. Your partner must constantly hide behind minions to avoid Rocket Grab, allowing Blitzcrank to dictate the wave's position. If the wave crashes under your turret, the threat of an under-tower hook or a sudden Overdrive rush makes farming incredibly stressful, while Prowling Projectile poke does too little to deter their aggressive positioning.

Como jogar

To survive, your primary goal is assisting your partner's movement. Do not detach to trigger Bop 'n' Block unless you have absolute confirmation that Rocket Grab is on cooldown. Instead, hoard your mana and prepare to cast Zoomies the very instant Blitzcrank activates Overdrive or begins his hook animation, giving your ally the vital movement speed needed to dodge. If a hook lands, immediately trigger Final Chapter to root them and prevent their follow-up.

Ficha completa →
Karma

Karma

pokelane_bully Karma dominates this matchup because her Inner Flame, especially when empowered by Mantra or Transcendent Embrace, deals massive area-of-effect damage that Yuumi cannot intercept while attached via You and Me!. Since your host carries the brunt of these explosive projectiles, your Zoomies healing and Bop 'n' Block shields are quickly overwhelmed. You cannot bodyblock the poke, leaving your ADC completely exposed to Karma's relentless ranged harassment. Ver detalhes
Karma

Por quê

Karma dominates this matchup because her Inner Flame, especially when empowered by Mantra or Transcendent Embrace, deals massive area-of-effect damage that Yuumi cannot intercept while attached via You and Me!. Since your host carries the brunt of these explosive projectiles, your Zoomies healing and Bop 'n' Block shields are quickly overwhelmed. You cannot bodyblock the poke, leaving your ADC completely exposed to Karma's relentless ranged harassment.

Impacto na lane

This constant splash damage forces your ADC off the minion wave, destroying your wave control. Karma and her partner will easily shove you under turret, chipping away at its plating. Your ADC will constantly sit at low health, forcing early, disadvantageous recalls that bleed gold and experience. Consequently, you will have zero priority to help secure river vision, leaving your jungler vulnerable to invades without any support.

Como jogar

To survive, prioritize survival over poke. Save Zoomies exclusively to mitigate Inner Flame blast damage, rather than using it for aggressive movement speed. You must detaching with You and Me! to trigger Bop 'n' Block only when Karma's Focused Resolve is on cooldown, otherwise she will easily root and kill you. If the wave crashes, hold Final Chapter to disengage her dives rather than trying to start fights you cannot win.

Ficha completa →
Janna

Janna

roamingmap_pressurepoke_war Janna dominates this matchup because Tailwind and Zephyr grant her unparalleled passive movement speed for roaming. Since you are attached to your ally with You and Me!, you cannot match her rotations. While Janna freely roams to create numerical advantages across the map, you are forced to remain passive, unable to match her swift movements or help your allies in time. Ver detalhes
Janna

Por quê

Janna dominates this matchup because Tailwind and Zephyr grant her unparalleled passive movement speed for roaming. Since you are attached to your ally with You and Me!, you cannot match her rotations. While Janna freely roams to create numerical advantages across the map, you are forced to remain passive, unable to match her swift movements or help your allies in time.

Impacto na lane

When Janna clears waves with Howling Gale and shields her marksman with Eye of the Storm, she easily secures lane priority. She then vanishes into the fog of war, leaving you trapped under your turret. This absence of pressure allows Janna to assist her jungler in the river and secure objectives, while your team suffers from her constant map-wide presence.

Como jogar

Cast Prowling Projectile to slow Janna down and disrupt her roaming attempts. If she leaves the lane to rotate, immediately detach from You and Me! to help your marksman shove the wave and pressure her turret. Hold onto Final Chapter to lock down her isolated partner while she is away, or to interrupt her team if she attempts a defensive Monsoon.

Ficha completa →
Alistar

Alistar

kill_laneroaming Alistar completely neutralizes Yuumi's utility because his *Headbutt* combined with *Pulverize* bypasses any protection she offers her host. Since Yuumi must remain attached via *You and Me!* to be effective, she cannot bodyblock this displacement combo. Furthermore, Alistar can shrug off the root from *Final Chapter* instantly using *Unbreakable Will*, making him impossible to peel once he engages. Ver detalhes
Alistar

Por quê

Alistar completely neutralizes Yuumi's utility because his *Headbutt* combined with *Pulverize* bypasses any protection she offers her host. Since Yuumi must remain attached via *You and Me!* to be effective, she cannot bodyblock this displacement combo. Furthermore, Alistar can shrug off the root from *Final Chapter* instantly using *Unbreakable Will*, making him impossible to peel once he engages.

Impacto na lane

The threat of a dive under your tower using *Unbreakable Will* forces your host to play extremely defensively, conceding wave control. This absolute lane priority allows Alistar to roam freely to secure river objectives or mid-lane ganks. Because you are tethered with *You and Me!*, you cannot match his rotations alone without dying to *Trample*, leaving your team at a map deficit.

Como jogar

Never follow Alistar into the river; instead, ping your jungler back and focus on securing tower plates. Maximize your *Prowling Projectile* to chip away at Alistar's health, making his engages risky. Only detach to trigger *Bop 'n' Block* when you see him use *Pulverize* on the wave, ensuring you are never caught in mid-air during *You and Me!*. Save your *Zoomies* charges to survive the post-engage burst.

Ficha completa →
Bard

Bard

roaminglane_pressure Bard completely neutralizes Yuumi's utility because her attachment via You and Me! leaves her ADC in a virtual one-on-two that cannot punish anyone. Since Yuumi cannot mount a hard engage, Bard safely abandons his marksman to collect chimes with Traveler’s Call. While he gains permanent scaling and map-wide pressure, Yuumi is stuck poking with Prowling Projectile, unable to threaten the lone enemy under tower. Ver detalhes
Bard

Por quê

Bard completely neutralizes Yuumi's utility because her attachment via You and Me! leaves her ADC in a virtual one-on-two that cannot punish anyone. Since Yuumi cannot mount a hard engage, Bard safely abandons his marksman to collect chimes with Traveler’s Call. While he gains permanent scaling and map-wide pressure, Yuumi is stuck poking with Prowling Projectile, unable to threaten the lone enemy under tower.

Impacto na lane

This dynamic turns the lane into a passive farm simulator where your ADC is slowly choked out. Bard places Caretaker’s Shrine to keep his partner healthy during his absences, rendering your trade attempts useless. When Bard returns via Magical Journey, he brings his jungler along, setting up easy dives. Your lane loses all priority, forcing your jungler to play without bot-lane support during early skirmishes.

Como jogar

To survive, you must actively exploit the brief windows when Bard is away. Detach immediately to trigger Bop 'n' Block on the lone enemy ADC, granting your partner a crucial shield and restoring your mana. Do not waste Zoomies on frivolous trades; conserve your mana specifically to match Bard's return. Finally, hold Final Chapter to disrupt enemies emerging from Magical Journey or to peel if Bard drops Tempered Fate on your tower.

Ficha completa →
Galio

Galio

kill_lanehard_engage Because you are permanently attached with You and Me!, your ADC has no frontline to block Galio's path. This allows him to freely aim and land Justice Punch without any physical obstruction. When you try to retaliate or disengage using Final Chapter, Galio can simply channel Shield of Durand, absorbing your magical waves with his spell's damage reduction before locking your partner down with a massive taunt. Ver detalhes
Galio

Por quê

Because you are permanently attached with You and Me!, your ADC has no frontline to block Galio's path. This allows him to freely aim and land Justice Punch without any physical obstruction. When you try to retaliate or disengage using Final Chapter, Galio can simply channel Shield of Durand, absorbing your magical waves with his spell's damage reduction before locking your partner down with a massive taunt.

Impacto na lane

This structural vulnerability forces your duo to play incredibly far back, conceding wave control completely. Any attempt to step up to trigger Bop 'n' Block invites an immediate Justice Punch into Winds of War combo, leading to massive health deficits. You will find yourselves trapped under tower, losing gold to dive setups, and unable to prevent Galio from utilizing Hero's Entrance to impact mid-lane skirmishes.

Como jogar

Do not detach to trigger your shield unless Justice Punch is strictly on cooldown; getting caught out of You and Me! by his crowd control means instant death. Maximize the slow on Prowling Projectile to disrupt his charge-up run. If Galio roams with Hero's Entrance, do not follow him through the river; instead, stay attached, push the wave hard to force him to lose tower plating, and prepare to transition to a bruiser teammate once the laning phase collapses.

Ficha completa →
Leona

Leona

kill_pressurepassive_punish Leona completely counters your attachment mechanic by focusing all her crowd control on your anchor. When she initiates with Zenith Blade followed by Shield of Daybreak, your host is locked in place and exposed to massive burst. Furthermore, if you attempt to detach to trigger Bop 'n' Block for mana, Leona's instant stun from Shield of Daybreak will interrupt your reattachment via You and Me!, leading to your immediate death. Ver detalhes
Leona

Por quê

Leona completely counters your attachment mechanic by focusing all her crowd control on your anchor. When she initiates with Zenith Blade followed by Shield of Daybreak, your host is locked in place and exposed to massive burst. Furthermore, if you attempt to detach to trigger Bop 'n' Block for mana, Leona's instant stun from Shield of Daybreak will interrupt your reattachment via You and Me!, leading to your immediate death.

Impacto na lane

This heavy threat forces you and your partner to play extremely defensively under your turret, conceding lane control entirely. Any attempt to step forward to poke with Prowling Projectile risks putting your host in range of Leona's engage. You will constantly struggle to maintain healthy life totals, forcing early recalls that cost your team dragon priority once Leona unlocks Solar Flare to dive you.

Como jogar

Never detach to activate Bop 'n' Block unless Leona has just wasted both Zenith Blade and Shield of Daybreak. Sit safely inside your host using You and Me! and max Zoomies first to sustain through her burst. Save your Final Chapter exclusively to disengage when she commits with Solar Flare. If she catches your host, use Zoomies immediately for the movement speed to help them dodge the follow-up explosion of Eclipse.

Ficha completa →
Milio

Milio

sustain_warrange_advantage Milio completely shuts down your poke potential. Because of Cozy Campfire, his marksman gains extra attack range, allowing them to safely harass your attached host from a distance where your Prowling Projectile cannot reliably retaliate. Furthermore, any attempts to poke are mitigated by Warm Hugs, while his passive Fired Up! ensures their counter-poke deals devastating burn damage that outpaces your early healing. Ver detalhes
Milio

Por quê

Milio completely shuts down your poke potential. Because of Cozy Campfire, his marksman gains extra attack range, allowing them to safely harass your attached host from a distance where your Prowling Projectile cannot reliably retaliate. Furthermore, any attempts to poke are mitigated by Warm Hugs, while his passive Fired Up! ensures their counter-poke deals devastating burn damage that outpaces your early healing.

Impacto na lane

This range disadvantage forces your host to play defensively under your own turret, conceding early wave control. Since you cannot safely detach to trigger Bop 'n' Block without risking a knockback from Ultra Mega Fire Kick, your mana pool quickly drains from relying solely on Zoomies. Your lane gets slowly chipped down, leaving you unable to assist your jungler in nearby river skirmishes.

Como jogar

You must position defensively and conserve your mana. Never detach for Bop 'n' Block unless you see Milio waste Ultra Mega Fire Kick, as the displacement will leave you incredibly vulnerable. Hold your Final Chapter for defensive disengages rather than aggressive plays, as his Breath of Life can instantly cleanse the root. If your host is forced to recall, focus on scaling safely to attach to a stronger ally later.

Ficha completa →
Lulu

Lulu

sustain_warharass Lulu completely neutralizes your early scaling by deploying Help, Pix! directly onto your host, immediately following it up with an angled, unavoidable Glitterlance. Since you remain attached via You and Me!, you cannot bodyblock these projectiles for your carry. The sheer damage outpacing your early Zoomies means Lulu establishes uncontested lane control, exploiting your inability to retaliate through her shields. Ver detalhes
Lulu

Por quê

Lulu completely neutralizes your early scaling by deploying Help, Pix! directly onto your host, immediately following it up with an angled, unavoidable Glitterlance. Since you remain attached via You and Me!, you cannot bodyblock these projectiles for your carry. The sheer damage outpacing your early Zoomies means Lulu establishes uncontested lane control, exploiting your inability to retaliate through her shields.

Impacto na lane

This constant pressure forces your carry to yield wave control, pushing you under tower where Lulu can safely harass with Glitterlance as you try to last-hit. You are forced into early, unfavorable recalls, draining your mana pools trying to spam Zoomies. This loss of priority prevents you from securing the lane, allowing Lulu's team to safely lock down early dragons while your tower slowly crumbles.

Como jogar

To survive, instruct your carry to let the minion waves crash, freezing them just outside your turret range to deny Lulu easy Help, Pix! angles. Only detach to trigger Bop 'n' Block when Lulu's Whimsy is on cooldown to avoid being polymorphed and killed instantly. Save Final Chapter strictly as a disengage tool when they dive, rather than trying to initiate trades you cannot win.

Ficha completa →
Lux

Lux

lane_pressureharass Because You and Me! keeps you untargetable, Lux can completely ignore you and focus her entire zone control on your host. She will easily predict your partner's movement to land Lucent Singularity and Light Binding. Since your host cannot dodge these dual-threat spells easily without your movement assistance, you are forced to constantly spam Zoomies to keep them healthy, rapidly draining your mana pool while Lux shields any counter-harass with Prismatic Barrier. Ver detalhes
Lux

Por quê

Because You and Me! keeps you untargetable, Lux can completely ignore you and focus her entire zone control on your host. She will easily predict your partner's movement to land Lucent Singularity and Light Binding. Since your host cannot dodge these dual-threat spells easily without your movement assistance, you are forced to constantly spam Zoomies to keep them healthy, rapidly draining your mana pool while Lux shields any counter-harass with Prismatic Barrier.

Impacto na lane

This constant poke completely ruins your lane control. Your carry is forced to yield minion waves and retreat under tower, where Lux's Lucent Singularity becomes even harder to avoid. Every wave pushed to your turret chips away at your tower's health, and if your host gets rooted by Light Binding, Lux's Final Spark combo will force an early recall or secure a kill, completely locking you out of the lane.

Como jogar

To survive, you must bait Lux's Light Binding before trying to regenerate mana. Watch her cooldowns; the moment she misses her root, detach to trigger Bop 'n' Block on a minion or Lux herself to gain a shield and mana, then immediately re-attach with You and Me!. Save Zoomies strictly for when your host is about to take lethal damage or needs the movement speed to dodge Lucent Singularity. If she holds her root, play safe and wait for Final Chapter to disengage.

Ficha completa →
Nautilus

Nautilus

hard_engagekill_lane Nautilus completely neutralizes your defensive utility once he hits level five. Because *You and Me!* keeps you attached to your marksman, you are forced to ride out his point-and-click *Depth Charge*. This unstoppable knock-up guarantees that both you and your host are locked down simultaneously, allowing Nautilus to easily chain *Dredge Line* and *Staggering Blow* onto your partner without any room for you to escape or react. Ver detalhes
Nautilus

Por quê

Nautilus completely neutralizes your defensive utility once he hits level five. Because *You and Me!* keeps you attached to your marksman, you are forced to ride out his point-and-click *Depth Charge*. This unstoppable knock-up guarantees that both you and your host are locked down simultaneously, allowing Nautilus to easily chain *Dredge Line* and *Staggering Blow* onto your partner without any room for you to escape or react.

Impacto na lane

This threat completely paralyzes your laning after the first few waves. You cannot step out to trigger *Bop 'n' Block* for mana and shields because a single *Dredge Line* means instant death. Once Nautilus unlocks his ultimate, your carry will be forced to play extremely far behind the caster minions, conceding wave control and plate gold, while you are forced to burn massive mana on *Zoomies* just to survive basic trades.

Como jogar

To survive this lane, you must hold *Final Chapter* strictly as a disengage tool to zone Nautilus after he launches *Depth Charge*. Never detach to use *Bop 'n' Block* if his hook is off cooldown; stay safely attached. If your host gets dragged in under tower, use *Zoomies* immediately for the movement speed burst to help them retreat rather than trying to turn the fight. Accept losing your outer turret early to safely farm near the inner tier.

Ficha completa →
Pyke

Pyke

squishy_targetroaming_advantage When you attach to your ADC using You and Me!, you simplify Pyke's targeting. He can easily land Bone Skewer on your host without worrying about your own body block. Once he hooks your ally, his lethal burst easily overwhelms the weak healing and high mana cost of Zoomies, as you lack any hard crowd control to stop his follow-up. Ver detalhes
Pyke

Por quê

When you attach to your ADC using You and Me!, you simplify Pyke's targeting. He can easily land Bone Skewer on your host without worrying about your own body block. Once he hooks your ally, his lethal burst easily overwhelms the weak healing and high mana cost of Zoomies, as you lack any hard crowd control to stop his follow-up.

Impacto na lane

This constant threat forces your carry to play extremely defensively, conceding the minion waves. Pyke will quickly crash the wave under your tower, then use Ghostwater Dive to roam toward mid or assist his jungler. Because you cannot match his map movement without risking getting caught alone in the river, your midlaner suffers immense pressure while you remain glued to a struggling marksman under tower.

Como jogar

To survive, never detach to trigger Bop 'n' Block if Pyke has Bone Skewer or Phantom Undertow ready, as any crowd control will lock your You and Me! on a five-second cooldown. Use Prowling Projectile to scout bushes where he might hide using Ghostwater Dive. If Pyke roams, do not follow him through the dark river; instead, help your marksman push the wave hard to punish his absence.

Ficha completa →
Rakan

Rakan

roamingengage_advantage Rakan completely neutralizes your defensive loop because detaching to trigger Bop 'n' Block is an open invitation for him to pop The Quickness and instantly charm you before you can cast You and Me!. Even if you remain attached to your host, Rakan's Grand Entrance is too fast and wide to regularly dodge, forcing you to burn Zoomies prematurely just to survive the knock-up follow-up. Ver detalhes
Rakan

Por quê

Rakan completely neutralizes your defensive loop because detaching to trigger Bop 'n' Block is an open invitation for him to pop The Quickness and instantly charm you before you can cast You and Me!. Even if you remain attached to your host, Rakan's Grand Entrance is too fast and wide to regularly dodge, forcing you to burn Zoomies prematurely just to survive the knock-up follow-up.

Impacto na lane

This threat strips away your lane control, forcing your host to play far behind the minion wave. If Rakan lands Grand Entrance, your health bar is instantly chunked, ruinously inflating your mana costs via emergency Zoomies casts. Once Rakan realizes you cannot contest the brush, he will crash the wave and use Battle Dance to quickly escape into the river, starting roams that you simply cannot follow on foot.

Como jogar

Never detach for Bop 'n' Block while Rakan has The Quickness active, as the lock-out on You and Me! means certain death. Instead, max Prowling Projectile to poke him down and chip away at Fey Feathers from safety. When Rakan inevitably roams, do not try to chase him through the river; instead, stay attached, help your host shove the wave under tower, and prepare Final Chapter to deter any dive attempts when he returns.

Ficha completa →
Nami

Nami

sustainharass Nami completely shuts down your main utility engine because her Aqua Prison is a death sentence whenever you detach. To regain mana and shield with Bop 'n' Block, you must leave your host, but Nami can easily predict this movement. Landing her bubble instantly locks you down, and because hard crowd control triggers a devastating five-second lockout on You and Me!, you will be left completely vulnerable. Ver detalhes
Nami

Por quê

Nami completely shuts down your main utility engine because her Aqua Prison is a death sentence whenever you detach. To regain mana and shield with Bop 'n' Block, you must leave your host, but Nami can easily predict this movement. Landing her bubble instantly locks you down, and because hard crowd control triggers a devastating five-second lockout on You and Me!, you will be left completely vulnerable.

Impacto na lane

This risk forces you to stay attached, starving your carry of Bop 'n' Block shields while your mana bar is quickly depleted by Zoomies. Nami leverages this by using Ebb and Flow and Tidecaller's Blessing to constantly harass your partner. Unable to trade back safely with Prowling Projectile, your lane is pushed under tower, forcing early recalls and leaving your jungler completely without priority.

Como jogar

You must strictly track Nami's Aqua Prison cooldown. Never detach to activate Bop 'n' Block while her bubble is available. If she misses Aqua Prison, you have a brief window to hop off, secure your shield, and immediately use You and Me! to reattach. When she holds her bubble indefinitely, accept that you must play purely as a heal-bot with Zoomies, conserving mana by only firing Prowling Projectile when absolutely necessary to slow her down.

Ficha completa →
Maokai

Maokai

hard_ccbush_control Maokai completely shuts down your laning dynamic due to the guaranteed nature of Twisted Advance. The moment he locks onto your anchor, detaching to proc Bop 'n' Block becomes a death sentence. You cannot safely step off to restore mana or shield, as Bramble Smash instantly interrupts you. This forces you to remain passively fused via You and Me!, turning every engage into a deadly double-kill opportunity. Ver detalhes
Maokai

Por quê

Maokai completely shuts down your laning dynamic due to the guaranteed nature of Twisted Advance. The moment he locks onto your anchor, detaching to proc Bop 'n' Block becomes a death sentence. You cannot safely step off to restore mana or shield, as Bramble Smash instantly interrupts you. This forces you to remain passively fused via You and Me!, turning every engage into a deadly double-kill opportunity.

Impacto na lane

Constantly zoned by Sapling Toss in the lane brushes, your marksman is forced into a defensive posture. Maokai easily orchestrates tower dives using Twisted Advance, meaning your turret offers little safety. Trades are inherently losing battles; you will burn through your mana pool casting Zoomies to survive, without any opportunity to safely recall. This pressure leaks into the river, giving the enemy free rein over neutral objectives.

Como jogar

To survive this lane, adopt a strict discipline: remain permanently attached with You and Me! as long as Maokai holds Twisted Advance. Use your Prowling Projectile to poke him from maximum range, punishing his attempts to walk up. If your partner gets caught, do not detach under any circumstance. Cast Zoomies instantly and prepare Final Chapter to disengage their follow-up. If the outer turret falls, migrate early to attach to your jungler for safety.

Ficha completa →
Seraphine

Seraphine

poke_advantageeasy_ccscaling_matchup When you attach with You and Me!, your ADC becomes a massive target. Since you cannot block skillshots, Seraphine easily directs her High Note and Beat Drop directly onto your partner. Worse, because you are physically sharing the same space, her Encore is guaranteed to charm you both instantly, turning your primary defensive mechanic into a grouping tool that maximizes her area-of-effect crowd control. Ver detalhes
Seraphine

Por quê

When you attach with You and Me!, your ADC becomes a massive target. Since you cannot block skillshots, Seraphine easily directs her High Note and Beat Drop directly onto your partner. Worse, because you are physically sharing the same space, her Encore is guaranteed to charm you both instantly, turning your primary defensive mechanic into a grouping tool that maximizes her area-of-effect crowd control.

Impacto na lane

Seraphine constantly shoves the wave while whittling down your ADC's health. You are forced to burn through your mana pool spamming Zoomies just to keep your partner alive, leaving you with little resources to trade back with Prowling Projectile. Under tower, the pressure intensifies as High Note's damage amplifies against low-health targets, forcing premature recalls and conceding early plates to her team.

Como jogar

To survive, you must regularly detach to trigger Bop 'n' Block, but only immediately after Seraphine wastes Beat Drop. When she casts Encore, you must instantly unattach with You and Me! to avoid both of you being charmed simultaneously, allowing you to cast Final Chapter from a safer angle to halt her follow-up. If your ADC falls behind, prepare to abandon them to attach to a tankier jungler who can absorb her poke.

Ficha completa →
Senna

Senna

free_scalingharass Because you spend most of your time attached via You and Me!, your ADC is left alone to face Senna's harass. This complete lack of early lane presence allows Senna to constantly target your partner with Piercing Darkness and basic attacks, harvesting Mist stacks effortlessly. Without a physical threat to zone her, Senna accelerates her infinite scaling from the very first waves, out-ranging you both before the mid-game even begins. Ver detalhes
Senna

Por quê

Because you spend most of your time attached via You and Me!, your ADC is left alone to face Senna's harass. This complete lack of early lane presence allows Senna to constantly target your partner with Piercing Darkness and basic attacks, harvesting Mist stacks effortlessly. Without a physical threat to zone her, Senna accelerates her infinite scaling from the very first waves, out-ranging you both before the mid-game even begins.

Impacto na lane

Under constant pressure, your ADC is forced under turret while Senna neutralizes your Prowling Projectile poke using the heal from Piercing Darkness. You are forced to deplete your mana pool spamming Zoomies just to keep your partner alive, preventing any active map rotations. By the time outer turrets fall, Senna has acquired enough bonus range to safely siege your lanes while shielding her team globally with Dawning Shadow.

Como jogar

To slow down her scaling, you must actively bait and track Last Embrace. Once that root is on cooldown, temporarily detach to trigger Bop 'n' Block, providing your ADC with a shield to absorb her basic attacks. Never use Zoomies reactively for minor poke; save your mana for when Senna commits to an aggressive trade. If she overextends to harvest a soul, immediately cast Final Chapter to lock her down and force a defensive Curse of the Black Mist.

Ficha completa →

Outros matchups

Desfavoráveis

2

Esses campeões têm ferramentas que geralmente dão a eles vantagem no confronto, sem tornar o matchup impossível de jogar. Eles podem ter mais alcance, mais capacidade de aguentar sua ofensiva ou mais formas de responder aos seus engajamentos. Você vai precisar adaptar sua abordagem e escolher com cuidado os momentos em que aceita a luta.

Outros matchups

Items to Counter Yuumi

Buy these items to reduce this champion's effectiveness in your games.

Mikael's Blessing
Mikael's Blessing
Harmonic Echo
Harmonic Echo
Ardent Censer
Ardent Censer
Staff of Flowing Water
Morellonomicon
Morellonomicon

Como counterar este campeão

Ângulo de counter

Jogar contra a Yuumi não se resume apenas a comprar itens anti-cura ou esperar que ela fique sem mana. O verdadeiro plano é romper o vínculo entre a Yuumi e seu hospedeiro: seja punindo os raros momentos em que ela se desliga, matando o carry antes que seus buffs repetidos se tornem valiosos, ou forçando objetivos antes que a equipe dela tenha tempo de escolher o hospedeiro correto. As melhores contramedidas existentes contra a Yuumi geralmente compartilham uma característica: elas criam uma ameaça imediata que a Yuumi não consegue cancelar com um simples E. Ganchos, engajamentos direcionados, explosões de área ou pressão sustentada na rota forçam a Yuumi a jogar mais recuada, gastar mana defensivamente e chegar mais fraca aos dragões.

Contexto do patch

A Yuumi tem dificuldade contra campeões que encurtam a luta. Ela precisa de trocas prolongadas, um alvo vivo e tempo suficiente para encadear E, Aery, Exhaust, itens e sua habilidade definitiva. Quando Blitzcrank, Leona, Pyke, Nautilus ou Thresh forçam uma decisão instantânea, Yuumi perde parte de sua identidade: ela nem sempre consegue se distanciar, não consegue bloquear com o corpo, e seu ADC pode morrer antes que a recuperação de vida faça diferença. Magos de pressão como Brand, Seraphine, Sona ou Nami criam um problema diferente: eles esgotam a mana dela, controlam a onda e a forçam a se curar antes dos objetivos reais.

Leitura rápida

  • A melhor maneira de punir a Yuumi é forçá-la a tomar uma decisão rápida antes que suas curas, bônus e itens possam acumular valor em uma luta prolongada.
  • Os “hooks” e os “hard engages” são perigosos para ela, pois penalizam tanto o momento em que ela se desliga quanto o fato de o host assumir a maior parte do seu valor.
  • A pressão de ataques rápidos e de ondas também pode derrotá-la: se Yuumi esgotar sua mana antes de dragon, ela perde grande parte de seu impacto real.

Arquétipos de counter

Hooks que penalizam o desanexamento de janelas

A Yuumi não pode ser alvejada enquanto estiver acoplada, mas não é invencível durante as transições. Campeões com ganchos tornam cada desligamento perigoso: renovar um recurso, colocar visão ou trocar de hospedeiro pode se tornar uma janela de morte. Mesmo que o gancho acerte o ADC em vez do Yuumi, o resultado ainda é favorável, pois a maior parte do valor dela está concentrada nesse hospedeiro. Blitzcrank, Pyke e Thresh, portanto, forçam Yuumi a jogar de forma menos ativa, abrir mão de parte do valor passivo e gastar mana defensivamente.

Como o campeão deve se adaptar. Yuumi só deve se soltar depois de ver o gancho sendo usado ou quando a onda bloquear claramente o ângulo. Ela também deve preparar Locket, Exhaust ou Mikael antes de chegar aos objetivos, em vez de esperar até que seu hospedeiro já tenha sido capturado.

Ataque direcionado e contundente

Um ataque direto e agressivo cria um problema diferente dos ganchos: nem sempre exige que Yuumi se afaste para conseguir uma morte. Leona e Nautilus podem imobilizar o host diretamente, acumular efeitos de controle de multidão e forçar Yuumi a usar E, Exhaust e encantamentos defensivos de forma reativa. Se o ataque ocorrer antes que ela obtenha seus itens-chave ou quando sua mana estiver baixa, ela não conseguirá transformar a luta em uma troca prolongada. Esse tipo de contra-ataque é muito forte porque impõe o ritmo à Yuumi, em vez de permitir que ela escolha o momento certo.

Como o campeão deve se adaptar. Yuumi deve respeitar os níveis de all-in e guardar E para o impacto real, não para ataques superficiais. Na partida mid, ela deve se aliar ao jogador capaz de sobreviver à primeira sequência de controle de grupo, e não apenas àquele que causa mais dano.

Ataques e pressão de mana

Yuumi quer decidir quando cura e quando acelera seu hospedeiro. Os campeões do tipo “poke” tiram essa escolha dela: cada onda disputada, feitiço de área e troca repetida a forçam a gastar mana antes da luta de verdade. A Brand ameaça com dano de área que pode afetar vários alvos, apesar de sua ligação, enquanto a Seraphine, a Sona e a Nami conseguem manter uma pressão constante na rota. O objetivo nem sempre é matar a Yuumi imediatamente, mas fazê-la chegar à fase dragon com menos mana, menos ritmo e menos controle sobre as ondas.

Como o campeão deve se adaptar. A Yuumi deve aceitar alguns pequenos danos em vez de se curar totalmente e, em seguida, se preparar novamente antes de objetivos importantes. Se ela desperdiçar mana respondendo a cada ataque de provocação, perderá o momento certo em que seu conjunto de habilidades deveria virar a luta.

Matchups prioritários

Blitzcrank

Blitzcrank é um confronto prioritário a ser explicado, pois ele ataca diretamente a mecânica mais sensível de Yuumi: a transição. Enquanto ela permanece ligada, ele pode ameaçar o ADC dela; assim que ela se desliga, ele pode punir a própria Yuumi. Portanto, esse confronto tem menos a ver com cura pura e mais com disciplina nas ondas, visão e ângulos de gancho. A Yuumi deve evitar hábitos de desligamento automático, jogar atrás dos lacaios e preparar ferramentas defensivas antes que a Blitzcrank consiga a captura decisiva.

Leona

Leona obriga Yuumi a levar em conta outro tipo de ameaça: o confronto direto com o host. Mesmo sem pegar Yuumi desprotegida, ela consegue imobilizar o carry por tempo suficiente para que a cura chegue tarde demais. A chave para essa partida é antecipar os momentos de all-in, guardar Exhaust ou E para o confronto decisivo e não desperdiçar mana em trocas insignificantes. Se a Yuumi chegar à partida contra a mid com suas ferramentas prontas, ela pode virar alguns confrontos; se perder a rota muito cedo, a Leona dita o ritmo.

Erros comuns contra ele

Erros comuns contra ele

  • Contra a Yuumi, ficar esperando passivamente pelo final da partida é um erro: quanto mais itens de encantador ela acumula, mais caro fica matá-la.
  • Usar todos os efeitos de controle de multidão em um tanque enquanto o Yuumi está ligado ao verdadeiro carry muitas vezes permite que a equipe dela repita a luta após o seu primeiro burst.
  • Forçar um objetivo sem preparar ângulos de ataque ou de engajamento dá à Yuumi exatamente o que ela quer: um corredor onde sua habilidade definitiva e seus bônus possam support um avanço.
  • Ignorar a mana dela é um erro. Um Yuumi com mana cheia e um Yuumi quase vazio não têm a mesma capacidade de se manter em combate.
  • Persegui-la após uma luta vencida pode se tornar perigoso se ela alcançar um hospedeiro móvel que ainda esteja vivo. Muitas vezes, é melhor converter o objetivo do que dar a ela outra oportunidade de se recuperar.

Notas do coach

  • Para derrotar a Yuumi, concentre-se nos trinta segundos que antecedem o objetivo, e não apenas na luta em si. Se você a forçar a se curar, reiniciar ou chegar sem mana, já terá reduzido o impacto dela.
  • Não avalie a Yuumi apenas pela barra de vida dela. Sua verdadeira ameaça é percebida pelo estado do hospedeiro, pela mana, pela disponibilidade da habilidade definitiva e pelo encantamento defensivo que ela ainda pode usar.

FAQ

Como derrotar o Yuumi na rota?

Para vencer a Yuumi na rota, evite depender apenas de pequenas trocas de dano que ela consiga se recuperar gradualmente. O melhor plano é controlar a onda, ameaçar as janelas de desengate e forçar all-ins quando o E dela, a mana ou o Exhaust não conseguirem cobrir toda a sequência. Ganchos e engajamentos agressivos também devem ser preparados com controle de visão e da mata, e não lançados aleatoriamente em meio à onda de minions. Se a Yuumi for forçada a gastar mana demais antes da dragon, a rota já está taticamente ganha.

O anti-cura é suficiente contra o Yuumi?

O Anti-heal ajuda, mas por si só não é suficiente. A Yuumi não vence apenas por meio da cura: ela também traz velocidade, bônus de itens, Aery, Exhaust, ultimate e reposicionamento ao redor de um host forte. Se você comprar o anti-cura, mas entrar na luta tarde demais, mirar no campeão errado ou deixar que ela chegue com mana cheia aos objetivos, ela ainda pode vencer a luta. O anti-cura deve ser parte de um plano de ritmo: forçar antes de seus picos de dano, punir o anfitrião e reduzir suas janelas de sustentação.

Por que os hooks são tão eficazes contra o Yuumi?

Os ganchos são poderosos porque prejudicam os dois estados importantes de Yuumi. Se ela estiver ligada, acertar um gancho em seu hospedeiro concentra imediatamente toda a pressão no alvo que ela está protegendo. Se ela se desligar, a própria Yuumi fica vulnerável e pode morrer antes de voltar para um local seguro. Isso reduz sua liberdade de jogar ativamente na rota: menos oportunidades de se desligar, menos valor passivo, menos visão e, muitas vezes, mais mana gasta sob pressão. Essa perda de liberdade é o que torna os ganchos tão eficazes.

É melhor matar a Yuumi ou o anfitrião dela primeiro?

Na maioria das lutas, você deve matar o hospedeiro que carrega o valor de Yuumi, em vez de tentar atacar Yuumi diretamente. Ela só fica vulnerável a ataques durante as janelas de desligamento, trocas ou quando seu hospedeiro morre. A decisão correta depende do momento certo: se ela estiver desligada e exposta, torna-se um alvo fácil; caso contrário, é melhor coordenar ataques concentrados, controle de grupo e habilidades anti-cura contra o campeão que ela está fortalecendo. Se o hospedeiro morrer rapidamente, o Yuumi perde sua âncora e seu valor cai drasticamente.