agosto de 2026 · Patch 7.2d
Tank · TOP · SUPPORT

Guia de counters de Ornn Wild Rift

Ornn tem dificuldades contra composições de alto dano mágico que ignoram seu acúmulo de armadura. Campeões que conseguem caitar (kite) ele fora do alcance corpo a corpo limitam suas trocas. Seu early game lento é uma janela de oportunidade para campeões com forte presença nos níveis iniciais.

★ TOP · SUPPORT Tier S
DANO
UTIL
TANK
DIFF
Win 50.4% #52 · ↓11pt
Pick 1.9% #31
Ban 0.1% #131

Guia de counters de Ornn Wild Rift ★ Counter Sheet

Hard Counters

3

Esses campeões têm uma build e um estilo de jogo que superam diretamente o seu, o que pode tornar o controle da lane e o farm extremamente difíceis. As habilidades deles podem neutralizar seus principais pontos fortes ou te punir assim que você tenta jogar do seu jeito de sempre. Nesses matchups, o objetivo costuma ser reduzir os erros e buscar soluções fora do confronto direto.

Olaf

Olaf

cc_immunitytrue_damage Olaf represents a mathematical nightmare for you because Ragnarok completely dismantles your crowd control-heavy identity. When he activates his ultimate, your primary defensive and offensive tools, namely Call of the Forge God and Searing Charge, fail to knock him up or slow him down. This immunity allows him to bypass your Bellows Breath brittle procs entirely while easily chasing you down. Ver detalhes
Olaf

Por quê

Olaf represents a mathematical nightmare for you because Ragnarok completely dismantles your crowd control-heavy identity. When he activates his ultimate, your primary defensive and offensive tools, namely Call of the Forge God and Searing Charge, fail to knock him up or slow him down. This immunity allows him to bypass your Bellows Breath brittle procs entirely while easily chasing you down.

Impacto na lane

From level six onwards, you lose the ability to safely contest the wave. If Olaf lands a single Undertow while you are extended past the midpoint, he can simply activate Ragnarok to ignore Searing Charge and run you down with Vicious Strikes. This constant threat forces you to surrender wave control, turtle under your tower, and absorb immense pressure.

Como jogar

To survive, you must anchor yourself to your turret and use Volcanic Rupture exclusively to farm from maximum range. Never initiate with Searing Charge; save this dash to escape toward your tower the instant he triggers Ragnarok. If he dives you, use Bellows Breath to shield yourself from Reckless Swing's true damage. Never waste Call of the Forge God on an active Ragnarok.

Ficha completa →
Fiora

Fiora

parry_timingeasy_vitals Fiora completely dominates this matchup because her Riposte directly counters your entire crowd control kit, especially the heavily telegraphed Searing Charge. If you attempt to dash into a pillar from Volcanic Rupture or natural terrain, she can easily react, parrying the knockup to stun you instead. This interaction, combined with her passive Duelist's Dance shredding your built-in tankiness with true damage, makes trading directly almost impossible as the game goes on. Ver detalhes
Fiora

Por quê

Fiora completely dominates this matchup because her Riposte directly counters your entire crowd control kit, especially the heavily telegraphed Searing Charge. If you attempt to dash into a pillar from Volcanic Rupture or natural terrain, she can easily react, parrying the knockup to stun you instead. This interaction, combined with her passive Duelist's Dance shredding your built-in tankiness with true damage, makes trading directly almost impossible as the game goes on.

Impacto na lane

You are forced into a defensive, low-resource lane under your own turret. Fiora will constantly use Lunge to poke your vitals and deny you minions. If you walk up to clear waves with Bellows Breath, she can initiate with Grand Challenge and chase you down. This constant pressure prevents you from helping your team, locking you in the side lane while she threatens to destroy your tower.

Como jogar

Never initiate with Searing Charge unless you have seen Fiora waste Riposte first. Instead, summon your Volcanic Rupture pillar as a psychological threat, delaying your dash to bait her parry. If she misuses her defensive tool, you have a brief fifteen-second cooldown window to safely clear the wave or use Bellows Breath to disengage. When she activates Grand Challenge, immediately hug a terrain wall to physically block her from hitting the final vital.

Ficha completa →
Vayne

Vayne

true_damagegank_setup Vayne completely neutralizes your defensive identity because Silver Bolts melts through the massive armor stats you acquire from Living Forge, rendering your passive tankiness useless. Furthermore, attempting to close the distance or escape with Searing Charge is highly unreliable, as a skilled Vayne will use Condemn to interrupt your dash mid-air, leaving you stranded, knocked back, and highly vulnerable to her relentless ranged harass. Ver detalhes
Vayne

Por quê

Vayne completely neutralizes your defensive identity because Silver Bolts melts through the massive armor stats you acquire from Living Forge, rendering your passive tankiness useless. Furthermore, attempting to close the distance or escape with Searing Charge is highly unreliable, as a skilled Vayne will use Condemn to interrupt your dash mid-air, leaving you stranded, knocked back, and highly vulnerable to her relentless ranged harass.

Impacto na lane

You are forced into a severe deficit from the first wave. Vayne uses Tumble to easily dodge the pillar from your Volcanic Rupture, ensuring you cannot safely farm from range. You will be pinned under your turret, constantly poked down while trying to last-hit. This bleed of health makes you vulnerable to dives during Final Hour, completely locking you out of top-side river skirmishes.

Como jogar

To survive, stay away from terrain corners where Condemn can stun you. Never initiate with Searing Charge; keep it strictly as a defensive tool, and only press it after Vayne has used her Tumble defensively. When she freezes the wave, use Volcanic Rupture solely to secure dying minions from maximum range. If you get dived, activate Bellows Breath to absorb her initial burst and secure the farm under turret.

Ficha completa →

Desfavoráveis

18

Esses campeões têm ferramentas que geralmente dão a eles vantagem no confronto, sem tornar o matchup impossível de jogar. Eles podem ter mais alcance, mais capacidade de aguentar sua ofensiva ou mais formas de responder aos seus engajamentos. Você vai precisar adaptar sua abordagem e escolher com cuidado os momentos em que aceita a luta.

Aatrox

Aatrox

unstoppableinterruptsustain While Bellows Breath grants you unstoppable status to completely negate the knockups from The Darkin Blade, Aatrox eventually wins out through sheer attrition. The healing from Deathbringer Stance combined with the passive physical vamp of Umbral Dash allows him to shrug off your Brittle procs. Even if you block his third Q strike, his sustained healing during extended trades bypasses your high natural resistances. Ver detalhes
Aatrox

Por quê

While Bellows Breath grants you unstoppable status to completely negate the knockups from The Darkin Blade, Aatrox eventually wins out through sheer attrition. The healing from Deathbringer Stance combined with the passive physical vamp of Umbral Dash allows him to shrug off your Brittle procs. Even if you block his third Q strike, his sustained healing during extended trades bypasses your high natural resistances.

Impacto na lane

This matchup turns into a battle of attrition where mistake tolerance is razor-thin. If Aatrox lands Infernal Chains, he forces you into a bad trade where he regenerates his health while chunking yours. You will constantly find yourself pushed under turret, needing Volcanic Rupture to secure minions from a safe distance. The lane is decided by how well you prevent him from freely activating World Ender to dive you.

Como jogar

Never initiate with Searing Charge while Aatrox has Umbral Dash available, as he will easily dodge your knockup and counter-attack. Instead, save Bellows Breath specifically for his third strike of The Darkin Blade to deny his crowd control. If he misses his first two swings, look for a quick short trade with Volcanic Rupture and a Brittle proc, then immediately disengage. If you drop low, use Call of the Forge God to clear the wave from safety and recall.

Ficha completa →
Gwen

Gwen

dodge_skillshotextended_trades Gwen is a nightmare for Ornn because her passive, A Thousand Cuts, naturally shreds your high-HP pool with percentage magic damage. The matchup becomes highly unfavorable because whenever you try to engage or disengage with Searing Charge, she can easily react with Skip 'n Slash to dodge your knockup. This leaves you completely defenseless, allowing her to punish you with heavy trades. Ver detalhes
Gwen

Por quê

Gwen is a nightmare for Ornn because her passive, A Thousand Cuts, naturally shreds your high-HP pool with percentage magic damage. The matchup becomes highly unfavorable because whenever you try to engage or disengage with Searing Charge, she can easily react with Skip 'n Slash to dodge your knockup. This leaves you completely defenseless, allowing her to punish you with heavy trades.

Impacto na lane

You will constantly find yourself pushed under turret, forced to farm from a distance using Volcanic Rupture. Trading is extremely risky; if Gwen deploys Hallowed Mist, your ranged poke is negated while she zones you off the wave. Any overextension allows her to activate Needlework, slowing you down to land her full Snip Snip! stacks, which quickly forces you into a bad recall or death.

Como jogar

Never initiate with Searing Charge unless you see Gwen waste her Skip 'n Slash first. Keep your distance and rely on Volcanic Rupture to collect minions safely. If she initiates with Needlework, use the unstoppable frame of Bellows Breath to mitigate the crowd control and reduce her burst. When she dashes forward, immediately retreat toward your turret; your primary goal is to survive and scale for teamfights with Call of the Forge God.

Ficha completa →
Ambessa

Ambessa

dodge_relianceshield_timing Ambessa's mobility from Drakehound's Step makes landing Volcanic Rupture and Searing Charge incredibly difficult. However, the true danger lies in her Repudiation. This shield completely negates the knockup from your Call of the Forge God or your Searing Charge. Without your signature crowd control, you cannot trigger Bellows Breath brittle stacks easily, turning what should be your primary engage tools into wasted cooldowns while she dances around you. Ver detalhes
Ambessa

Por quê

Ambessa's mobility from Drakehound's Step makes landing Volcanic Rupture and Searing Charge incredibly difficult. However, the true danger lies in her Repudiation. This shield completely negates the knockup from your Call of the Forge God or your Searing Charge. Without your signature crowd control, you cannot trigger Bellows Breath brittle stacks easily, turning what should be your primary engage tools into wasted cooldowns while she dances around you.

Impacto na lane

Because she can shrug off your crowd control, you cannot safely contest waves. If you miss Searing Charge or have it absorbed by Repudiation, Ambessa will instantly punish you with Cunning Sweep and Lacerate, chunking your health. This forces you to freeze near your turret, giving up early priority. You will be stuck using Living Forge under tower while she roams freely with Public Execution to impact the map.

Como jogar

Never initiate with Call of the Forge God while her Repudiation is active. Instead, bait her shield by positioning near a pillar from Volcanic Rupture, threatening a charge but holding your Searing Charge. Wait out the brief shield duration before committing. If she wastes Repudiation to block simple poke, you have a brief window to unleash your full combo. If she catches you with Public Execution, immediately retaliate with Bellows Breath to apply Brittle and micro-stun her when she lands.

Ficha completa →
Darius

Darius

unstoppable_baitfree_stacks Darius thrives in extended trades due to Hemorrhage, making raw stat-checking impossible for you. The matchup revolves around a high-stakes waiting game: Darius wants to wait out the shield and unstoppable frames of your Bellows Breath before pulling you with Apprehend. If you trigger this defense too early, he will easily hook you back, apply Crippling Strike, and stack his passive toward a lethal Noxian Guillotine. Ver detalhes
Darius

Por quê

Darius thrives in extended trades due to Hemorrhage, making raw stat-checking impossible for you. The matchup revolves around a high-stakes waiting game: Darius wants to wait out the shield and unstoppable frames of your Bellows Breath before pulling you with Apprehend. If you trigger this defense too early, he will easily hook you back, apply Crippling Strike, and stack his passive toward a lethal Noxian Guillotine.

Impacto na lane

This dynamic forces you into a defensive posture under your own turret. Contesting minion waves directly is extremely risky, as any short trade can turn deadly if Darius lands the outer edge of Decimate to heal. Getting pulled far from safety means giving up priority, forcing you to bleed gold and experience to avoid giving him easy stacks for Noxian Guillotine.

Como jogar

Play safely back and rely on the pillar from Volcanic Rupture to secure distant last hits. Never initiate trades with Bellows Breath; instead, hold it as a reactive tool to negate the displacement of Apprehend when he steps up. If his pull is on cooldown, you can safely disengage using Searing Charge. Under your own tower, use Call of the Forge God to disrupt his dive and reset the fight.

Ficha completa →
Gnar

Gnar

kitingshred Gnar's mobility in Mini form makes it incredibly hard for Ornn to land his signature burst. Whenever you try to setup Volcanic Rupture into Searing Charge, Gnar simply uses Hop to bounce away, neutralizing your primary engage tool. Without the knockup, you cannot easily proc Bellows Breath's Brittle effect, leaving you vulnerable to his ranged harass via Boomerang Throw. Ver detalhes
Gnar

Por quê

Gnar's mobility in Mini form makes it incredibly hard for Ornn to land his signature burst. Whenever you try to setup Volcanic Rupture into Searing Charge, Gnar simply uses Hop to bounce away, neutralizing your primary engage tool. Without the knockup, you cannot easily proc Bellows Breath's Brittle effect, leaving you vulnerable to his ranged harass via Boomerang Throw.

Impacto na lane

Because Gnar can safely disengage, he dictates the minion waves. He will constantly slow you with Boomerang Throw and trigger Hyper to shred your health while you try to last hit. If you push blindly, you risk getting frozen out. You are forced to surrender early priority, absorbing pressure under your turret while waiting for his Rage Gene to force him into Mega Gnar where he loses his ranged safety.

Como jogar

Play defensively near your turret and focus on freezing the wave. Never initiate with Searing Charge while Gnar's Hop is available; instead, use Volcanic Rupture solely to secure distant minions. Wait for him to transform via Rage Gene. Once he is in Mega Gnar form, he becomes a melee target, making it much easier to hit Call of the Forge God or trade with Bellows Breath without being kited to death.

Ficha completa →
Kennen

Kennen

ranged_pokedisengage Kennen dominates this matchup because he can completely negate your primary engage tool. Whenever you attempt to set up a knockup by casting Volcanic Rupture and aiming your Searing Charge at the resulting pillar, Kennen can instantly activate Lightning Rush to speed out of the impact zone. This mobility, combined with his constant ranged harass from Thundering Shuriken, prevents you from ever locking him down. Ver detalhes
Kennen

Por quê

Kennen dominates this matchup because he can completely negate your primary engage tool. Whenever you attempt to set up a knockup by casting Volcanic Rupture and aiming your Searing Charge at the resulting pillar, Kennen can instantly activate Lightning Rush to speed out of the impact zone. This mobility, combined with his constant ranged harass from Thundering Shuriken, prevents you from ever locking him down.

Impacto na lane

Because your offensive threat is neutralized, Kennen can freely slow-push waves and poke you under tower. Attempting to contest the wave directly results in taking multiple stacks of Mark of the Storm, leading to stuns from Electrical Surge. You are forced to surrender early priority, meaning you will absorb constant chip damage while struggling to secure last hits, delaying your Living Forge purchases.

Como jogar

To survive, you must keep the minion wave frozen just outside your tower range. Use Volcanic Rupture solely to secure distant minions, not to fish for trades. Never initiate with Searing Charge unless you have seen Kennen waste Lightning Rush. If he activates Slicing Maelstrom, immediately use Bellows Breath to gain Unstoppable status, blocking his stun, and use Call of the Forge God to disengage.

Ficha completa →
Mordekaiser

Mordekaiser

ultimate_timingstat_steal Mordekaiser naturally dominates Ornn due to his AP-based anti-tank profile. Darkness Rise shreds Ornn's health pool in extended fights, while Obliterate punishes CSing. However, this matchup pivots entirely on Ornn's Bellows Breath. The unstoppable frames can completely negate Death's Grasp or, with precise timing, cancel the cast of Realm of Death, preventing Mordekaiser from dragging you into his stat-stealing dimension. Ver detalhes
Mordekaiser

Por quê

Mordekaiser naturally dominates Ornn due to his AP-based anti-tank profile. Darkness Rise shreds Ornn's health pool in extended fights, while Obliterate punishes CSing. However, this matchup pivots entirely on Ornn's Bellows Breath. The unstoppable frames can completely negate Death's Grasp or, with precise timing, cancel the cast of Realm of Death, preventing Mordekaiser from dragging you into his stat-stealing dimension.

Impacto na lane

Because Mordekaiser easily triggers Darkness Rise and shields with Indestructible, you cannot contest long trades. You are constantly pushed under tower, sacrificing early priority. If you fail to block Death's Grasp, you are forced into a disastrous trade. Post-level 5, your tower becomes your only safety, as stepping too far up invites Realm of Death, forcing you to play purely for defensive wave clear.

Como jogar

Never initiate with Searing Charge unless Mordekaiser has wasted his abilities. Keep Bellows Breath ready exclusively to react to his animations. When you see him raise his mace for Realm of Death or cast the claw of Death's Grasp, immediately use Bellows Breath to absorb the crowd control. If he misses these, use Volcanic Rupture to slow him, then escape. If trapped in his ultimate, focus on survival using Call of the Forge God to delay his assault.

Ficha completa →
Nasus

Nasus

free_farmscaling_lane While Living Forge ensures you scale incredibly well into the late game, you lack the early burst to punish Nasus's weak start. Any trade you force with Volcanic Rupture is quickly negated by his Soul Eater lifesteal. This allows him to freely stack Siphoning Strike on every minion wave, easily outscaling your raw tank stats without facing any real threat of dying in the early levels. Ver detalhes
Nasus

Por quê

While Living Forge ensures you scale incredibly well into the late game, you lack the early burst to punish Nasus's weak start. Any trade you force with Volcanic Rupture is quickly negated by his Soul Eater lifesteal. This allows him to freely stack Siphoning Strike on every minion wave, easily outscaling your raw tank stats without facing any real threat of dying in the early levels.

Impacto na lane

Your lack of kill pressure means Nasus can comfortably freeze the wave near his tower. If you accidentally push using Bellows Breath, you hand him a safe zone to farm Siphoning Strike. Once he acquires Fury of the Sands, he will easily shrug off your crowd control, turn the lane into a split-push nightmare, and force you to defend your turret instead of helping your team.

Como jogar

To survive, you must maintain a freeze on your side of the lane. Only use Volcanic Rupture to last-hit from a distance, never to harass. If Nasus slows you with Wither and activates Fury of the Sands, immediately time Bellows Breath to negate the movement speed reduction with its unstoppable state. Save Searing Charge solely as an escape tool toward your own tower, and use Call of the Forge God to disrupt his ultimate duration from safety.

Ficha completa →
Yone

Yone

tetheringcc_chain Yone's hybrid damage from Way of the Hunter makes it difficult for Ornn to itemize early defenses effectively, creating a widening scaling gap. While Ornn wants to stack armor, Yone's critical strikes and magic damage slice through your high health pool. Furthermore, Yone can easily dodge Volcanic Rupture with his Mortal Steel dashes, meaning he dictates the pace of trades while you slowly fall behind in pure dueling power. Ver detalhes
Yone

Por quê

Yone's hybrid damage from Way of the Hunter makes it difficult for Ornn to itemize early defenses effectively, creating a widening scaling gap. While Ornn wants to stack armor, Yone's critical strikes and magic damage slice through your high health pool. Furthermore, Yone can easily dodge Volcanic Rupture with his Mortal Steel dashes, meaning he dictates the pace of trades while you slowly fall behind in pure dueling power.

Impacto na lane

You will constantly find yourself pushed under turret as Yone uses Spirit Cleave to absorb your trade attempts and secure wave priority. His Soul Unbound allows him to execute free harass sequences even when you try to freeze. This constant pressure chip-damages your tower, forcing you into defensive recall timings that cost you plates and prevent you from helping your jungler contest the top-side river.

Como jogar

To survive, track his clone. When Yone activates Soul Unbound, immediately place a Volcanic Rupture pillar directly on his return marker. The moment he snaps back, ram your pillar with Searing Charge to guarantee a massive knockup, then follow up with Bellows Breath to apply Brittle. Outside of this specific window, stay near your turret and never waste your dash aggressively, keeping it solely to escape his Fate Sealed.

Ficha completa →
Volibear

Volibear

unstoppable_timingshort_trades Volibear dominates extended skirmishes because The Relentless Storm ramps up his attack speed, while successive casts of Frenzied Maul keep him healthy. Ornn struggles to match this natural sustain. However, you can deny his primary initiation. Activating Bellows Breath right as Volibear sprints at you with Thundering Smash makes you unstoppable, absorbing the stun and letting you trigger Brittle for a strong burst before he can recover. Ver detalhes
Volibear

Por quê

Volibear dominates extended skirmishes because The Relentless Storm ramps up his attack speed, while successive casts of Frenzied Maul keep him healthy. Ornn struggles to match this natural sustain. However, you can deny his primary initiation. Activating Bellows Breath right as Volibear sprints at you with Thundering Smash makes you unstoppable, absorbing the stun and letting you trigger Brittle for a strong burst before he can recover.

Impacto na lane

Volibear will constantly push the wave using the lightning from The Relentless Storm. If you fail to block Thundering Smash, he will drop Sky Splitter for a massive shield and easily chunk your health bar with Frenzied Maul. This forces you to forfeit gold under tower, where you are never truly safe once he unlocks Stormbringer to disable your turret.

Como jogar

Always hold Bellows Breath as a defensive tool; never use it just to clear minions. When Volibear activates Thundering Smash and runs forward, press it immediately to block the stun, then hit him to proc Brittle and walk away. If you miss this window, immediately use Searing Charge backward to escape his Sky Splitter circle. Never contest the wave while marked by Frenzied Maul, as his second bite will completely out-sustain your damage.

Ficha completa →
Rumble

Rumble

mr_rushdisengage Rumble's relentless magic damage and constant flame harass will rapidly chip away at your health bar whenever you step up to farm. Because Rumble thrives in extended trades, trying to fight back with Bellows Breath or a Searing Charge combo often results in taking more damage than you inflict. Your survival hinges entirely on Living Forge, which lets you craft Magic Resist items on the fly without giving up lane pressure. Ver detalhes
Rumble

Por quê

Rumble's relentless magic damage and constant flame harass will rapidly chip away at your health bar whenever you step up to farm. Because Rumble thrives in extended trades, trying to fight back with Bellows Breath or a Searing Charge combo often results in taking more damage than you inflict. Your survival hinges entirely on Living Forge, which lets you craft Magic Resist items on the fly without giving up lane pressure.

Impacto na lane

Rumble will constantly shove the wave to trap you under tower, attempting to poke you down while you secure last hits. Normally, this relentless pressure forces frequent, costly recalls that bleed gold and turret plates. By leveraging your passive to build Magic Resist in real-time, you can absorb his fire, stabilize your health bar, and deny him the easy tower pressure or roam windows he desperately wants.

Como jogar

Prioritize buying pure Magic Resist components with Living Forge as soon as you accumulate the gold. Do not use Searing Charge offensively; keep this dash ready to escape his flame sweeps or to knock him back if he tries to dive you. Use the pillar from Volcanic Rupture to secure distant minions safely. If your health drops dangerously low before you can complete your first item, use Call of the Forge God to clear the wave and secure a safe recall.

Ficha completa →
Heimerdinger

Heimerdinger

wave_shovepoke Heimerdinger dominates this matchup by establishing absolute territory with his H-28G Evolution Turret setup. Whenever you attempt to close the distance, your engage is highly telegraphed. Because Searing Charge forces you into a straight, predictable path towards your Volcanic Rupture pillar, Heimerdinger can easily react and land a max-range CH-2 Electron Storm Grenade. This instantly cancels your dash, leaving you stunned, isolated, and exposed to heavy turret beam damage. Ver detalhes
Heimerdinger

Por quê

Heimerdinger dominates this matchup by establishing absolute territory with his H-28G Evolution Turret setup. Whenever you attempt to close the distance, your engage is highly telegraphed. Because Searing Charge forces you into a straight, predictable path towards your Volcanic Rupture pillar, Heimerdinger can easily react and land a max-range CH-2 Electron Storm Grenade. This instantly cancels your dash, leaving you stunned, isolated, and exposed to heavy turret beam damage.

Impacto na lane

You will find yourself constantly pushed under your turret under a barrage of H-28G Evolution Turret lasers. This constant pressure limits your ability to use Living Forge safely, as any backstep to craft gives Heimerdinger free plates. Tanking both Hextech Micro-Rockets and turret shots while trying to clear waves quickly depletes your health bar, forcing early recalls and letting Heimerdinger dictate the top-lane priority without needing to roam.

Como jogar

To survive, stand completely outside the straight line between Heimerdinger and your Volcanic Rupture pillar to avoid baiting yourself into an interrupted Searing Charge. Use Bellows Breath solely to shield and clear incoming waves under your tower rather than looking for trades. Never launch your forward dash while his CH-2 Electron Storm Grenade is available. Instead, rely on Call of the Forge God from maximum range to initiate fights, forcing him to use UPGRADE!!! defensively.

Ficha completa →
Teemo

Teemo

gank_setupmr_rush Teemo's constant harassment with Toxic Shot and Blinding Dart severely punishes your melee range, forcing you to play defensively. Since Ornn cannot easily close the gap early on without taking heavy damage, Teemo controls the spacing using Move Quick. However, because Teemo has no hard dashes to dodge skillshots, your Call of the Forge God acts as the ultimate equalizer, enabling long-range engages he cannot easily escape. Ver detalhes
Teemo

Por quê

Teemo's constant harassment with Toxic Shot and Blinding Dart severely punishes your melee range, forcing you to play defensively. Since Ornn cannot easily close the gap early on without taking heavy damage, Teemo controls the spacing using Move Quick. However, because Teemo has no hard dashes to dodge skillshots, your Call of the Forge God acts as the ultimate equalizer, enabling long-range engages he cannot easily escape.

Impacto na lane

The lane quickly becomes a war of attrition where you must concede early priority. Teemo will constantly push the wave, using Noxious Trap to secure the river and lane bushes. If you step up to contest minions with basic attacks, you will lose massive health. Your tower will constantly be under pressure, forcing you to craft items under turret using Living Forge to avoid bad recalls.

Como jogar

Let the wave crash and use Volcanic Rupture to safely last-hit from a distance. Save Searing Charge strictly for disengaging when Teemo tries to chase you down with Move Quick, rather than using it to trade. Once you unlock Call of the Forge God, call for your jungler and initiate from long range; Teemo's lack of mobility tools makes him incredibly vulnerable to your ram's knock-up, turning an oppressive lane into an easy kill.

Ficha completa →
Sett

Sett

unstoppable_timingshield_management Sett dominates short trades with Knuckle Down and Pit Grit, but Ornn can completely neutralize Sett's primary engage tools. By timing Bellows Breath perfectly, you become Unstoppable, completely negating the displacement of Facebreaker or the suppression from The Show Stopper. If you fail this timing, Sett will drag you into a losing brawl where his true damage from Haymaker melts your tank stats. Ver detalhes
Sett

Por quê

Sett dominates short trades with Knuckle Down and Pit Grit, but Ornn can completely neutralize Sett's primary engage tools. By timing Bellows Breath perfectly, you become Unstoppable, completely negating the displacement of Facebreaker or the suppression from The Show Stopper. If you fail this timing, Sett will drag you into a losing brawl where his true damage from Haymaker melts your tank stats.

Impacto na lane

This matchup forces you to play defensively near your tower. If Sett freezes, you cannot contest with basic attacks due to Pit Grit's passive healing. Every time you try to secure minions with Volcanic Rupture, you risk Sett using Knuckle Down to close the gap. If he grabs you with Facebreaker while your defensive tools are offline, he easily sets up a massive Haymaker shield, forcing an early recall.

Como jogar

Never initiate trades with Searing Charge; save it strictly to escape after Sett wastes his pull. Keep Bellows Breath ready specifically for when Sett lunges forward to cast Facebreaker or starts the animation for The Show Stopper. If you successfully block his crowd control, immediately disengage while his Haymaker grit decays. If Sett manages to ult you, wait out his shield before attempting a counter-engage with Call of the Forge God from safety.

Ficha completa →
Singed

Singed

grounded_effectproxy_defense Singed's ability to ground you with Mega Adhesive completely disables your only mobility tool, Searing Charge. While standing in this sticky zone, you cannot dash to trigger the knock-up on your Volcanic Rupture pillar. This restriction allows Singed to freely position around you, applying Poison Trail and using Fling to toss you deep into his poison cloud without any fear of an immediate counter-engage. Ver detalhes
Singed

Por quê

Singed's ability to ground you with Mega Adhesive completely disables your only mobility tool, Searing Charge. While standing in this sticky zone, you cannot dash to trigger the knock-up on your Volcanic Rupture pillar. This restriction allows Singed to freely position around you, applying Poison Trail and using Fling to toss you deep into his poison cloud without any fear of an immediate counter-engage.

Impacto na lane

The laning phase becomes a constant struggle for wave control. Because your Searing Charge is easily countered by Mega Adhesive, you cannot safely contest Singed when he clears waves with Poison Trail. This grants him easy lane priority to roam or proxy. You are forced to constantly clear under your turret using Bellows Breath and Volcanic Rupture, draining your mana while he exerts map pressure.

Como jogar

Never use Searing Charge offensively unless Singed has already wasted Mega Adhesive, as being grounded mid-fight leaves you entirely defenseless. When he tries to proxy, do not chase him into his poison; instead, focus on securing your farm under turret using Bellows Breath. If he activates Insanity Potion to dive or run you down, immediately cast Call of the Forge God to slow his approach and safely disengage.

Ficha completa →

Outros matchups

Skill Matchups

18

Esses confrontos são, acima de tudo, duelos de execução: os dois campeões têm formas reais de levar vantagem. Uma habilidade importante esquivada, um engajamento bem antecipado ou um erro de posicionamento podem ser suficientes para decidir o duelo. Conhecer o matchup e reconhecer as janelas de ação certas faz toda a diferença.

Camille

Camille

interruptscaling_gap This skill matchup revolves around the high-stakes interaction between your ultimates. Camille can activate The Hextech Ultimatum to gain displacement immunity, completely dodging the crucial second charge of your Call of the Forge God. Additionally, her Adaptive Defenses shield mitigates your Bellows Breath trading power unless you carefully track its passive cooldown before initiating fights. Ver detalhes
Camille

Por quê

This skill matchup revolves around the high-stakes interaction between your ultimates. Camille can activate The Hextech Ultimatum to gain displacement immunity, completely dodging the crucial second charge of your Call of the Forge God. Additionally, her Adaptive Defenses shield mitigates your Bellows Breath trading power unless you carefully track its passive cooldown before initiating fights.

Impacto na lane

The threat of Camille's Hookshot forces you to play defensively near your turret, as her mobility makes overextending highly punishable. Post-level five, her ability to hold The Hextech Ultimatum neutralizes your kill pressure, turning the lane into a tense stalemate where she will attempt to scale and chip away at your tower using Precision Protocol.

Como jogar

To win this, trigger the unstoppable status of Bellows Breath to absorb the stun from her Hookshot when she dives off the terrain. Never cast the second charge of Call of the Forge God immediately; delay your headbutt to bait out her ultimate, or wait until she wastes her mobility before committing with a Volcanic Rupture pillar and Searing Charge combo.

Ficha completa →
Garen

Garen

tenacity_checkarmor_shred This matchup is a pure test of execution centered around Garen's ability to negate your crowd control. The defining moment of every trade relies on Courage. If Garen activates this shield to absorb the impact of your Searing Charge, the massive tenacity bonus allows him to shrug off the brittle knockup almost instantly. This prevents you from executing your full combo while leaving you exposed to a devastating Judgment spin. Ver detalhes
Garen

Por quê

This matchup is a pure test of execution centered around Garen's ability to negate your crowd control. The defining moment of every trade relies on Courage. If Garen activates this shield to absorb the impact of your Searing Charge, the massive tenacity bonus allows him to shrug off the brittle knockup almost instantly. This prevents you from executing your full combo while leaving you exposed to a devastating Judgment spin.

Impacto na lane

Because of Garen's Perseverance, short trades are useless unless you can consistently break his passive. When you fail your Searing Charge knockup due to his mitigation, Garen will freeze the wave or force you back with Demacian Justice if you remain low. Missing your crowd control window gives him free reign to shred your armor and push you under tower, starving you of forge opportunities.

Como jogar

To win these trades, you must bait out Courage before committing. Start by poking with Volcanic Rupture to threaten an engage. If he panics and shields, wait out the brief duration of his defense before using Bellows Breath and Searing Charge. If he silences you first with Decisive Strike, use the displacement of Call of the Forge God to disengage and reset your positioning rather than fighting back immediately.

Ficha completa →
Dr. Mundo

Dr. Mundo

percent_health_shredcc_negation This lane is a constant struggle for lane priority. While Dr. Mundo relies on Goes Where He Pleases to shrug off your crowd control, your Bellows Breath is the ultimate counter-tool. By applying Brittle, your subsequent basic attack triggers a knockback that immediately shatters his passive canister while delivering massive percent-health damage. This interaction bypasses his natural bulk and forces a race for wave control. Ver detalhes
Dr. Mundo

Por quê

This lane is a constant struggle for lane priority. While Dr. Mundo relies on Goes Where He Pleases to shrug off your crowd control, your Bellows Breath is the ultimate counter-tool. By applying Brittle, your subsequent basic attack triggers a knockback that immediately shatters his passive canister while delivering massive percent-health damage. This interaction bypasses his natural bulk and forces a race for wave control.

Impacto na lane

Because both of you possess high sustain and wave clear, the lane quickly becomes a battle of positioning behind minions. You must block his Infected Bonesaw using the wave while seeking angles to land Volcanic Rupture. If you fail to pop his passive before he activates Maximum Dosage, Mundo can safely push you under tower, forcing you to lose tempo and preventing you from using Living Forge safely.

Como jogar

Stand firmly inside your minion wave to deny his cleaver poke, and save Searing Charge strictly for disengages or after his passive has been popped. When trading, wait for him to step up for a last hit with Blunt Force Trauma, then immediately unleash Bellows Breath to trigger Brittle. If he manages to escape with his canister or heals through Heart Zapper, immediately retreat to your tower and focus on farming.

Ficha completa →
Irelia

Irelia

extended_tradessustain The dynamic of this matchup hinges on how you land your crowd control against her extreme mobility. While your Bellows Breath is crucial to shredding her, a skilled Irelia will reactively cast Bladesurge onto a nearby minion to dash out of your fire cone, completely avoiding the Brittle mark. Without this debuff, your Searing Charge or basic attacks won't trigger the knockback or bonus damage needed to match her Ionian Fervor stacks. Ver detalhes
Irelia

Por quê

The dynamic of this matchup hinges on how you land your crowd control against her extreme mobility. While your Bellows Breath is crucial to shredding her, a skilled Irelia will reactively cast Bladesurge onto a nearby minion to dash out of your fire cone, completely avoiding the Brittle mark. Without this debuff, your Searing Charge or basic attacks won't trigger the knockback or bonus damage needed to match her Ionian Fervor stacks.

Impacto na lane

This mobility advantage forces you to play defensively near your turret. Every time she mispositions, you want to retaliate, but missing Bellows Breath because of a sudden Bladesurge leaves you vulnerable to an extended trade where her Ionian Fervor can melt your health. If she lands Flawless Duet or Vanguard's Edge, she can dive you easily, turning missed trades into lost plates or an early forced recall.

Como jogar

To win this battle of execution, never lead a trade with Bellows Breath. Instead, bait her Bladesurge by standing near low-health allied minions, and use your Volcanic Rupture to slow her first. Only activate your fire breath when she has no easy reset targets or after you successfully interrupt her with a Searing Charge knockup. If she misses her Flawless Duet, that is your green light to aggressively zone her from the wave.

Ficha completa →
Gragas

Gragas

cc_interruptneutral_lane This matchup is a war of attrition where Gragas relies on Happy Hour to heal back your poke, while you use Living Forge to stay in lane without recalling. The critical pivot is Gragas using Body Slam to cancel your Searing Charge mid-dash or disrupt you right as Bellows Breath applies Brittle. Because Body Slam has priority over your charge, he can completely deny your knock-up setup and winning trades. Ver detalhes
Gragas

Por quê

This matchup is a war of attrition where Gragas relies on Happy Hour to heal back your poke, while you use Living Forge to stay in lane without recalling. The critical pivot is Gragas using Body Slam to cancel your Searing Charge mid-dash or disrupt you right as Bellows Breath applies Brittle. Because Body Slam has priority over your charge, he can completely deny your knock-up setup and winning trades.

Impacto na lane

Gragas will constantly throw Barrel Roll to slow your push and chip away at your health bar. If you recklessly use Volcanic Rupture and attempt to engage, a quick Body Slam into Drunken Rage leaves you taking heavy magic damage without being able to trade back. The lane becomes a slow, methodical chess match where whoever wastes their primary movement tool first loses control of the minion wave.

Como jogar

To win this stalemate, bait out his Body Slam before committing to a hard trade. Position yourself near your Volcanic Rupture pillar but do not immediately cast Searing Charge; wait to see if he panics and charges first. If he uses Body Slam offensively, you have a clear fifteen-second window to retaliate with Bellows Breath and Call of the Forge God to chunk him down. If he holds his displacement, simply focus on farming and out-scaling.

Ficha completa →
Jayce

Jayce

interrupttank_matchup This lane is a pure contest of reaction times and spell tracking. The match hinges entirely on how Jayce uses Thundering Blow. If you attempt to initiate with Searing Charge, he can interrupt your dash mid-air. Furthermore, if you activate Bellows Breath to apply Brittle, a quick hammer-form knockback denies your follow-up auto-attack, neutralizing your main trading tool. Ver detalhes
Jayce

Por quê

This lane is a pure contest of reaction times and spell tracking. The match hinges entirely on how Jayce uses Thundering Blow. If you attempt to initiate with Searing Charge, he can interrupt your dash mid-air. Furthermore, if you activate Bellows Breath to apply Brittle, a quick hammer-form knockback denies your follow-up auto-attack, neutralizing your main trading tool.

Impacto na lane

Because Jayce can disengage at will, you cannot force short trades. You are often pushed under turret while he pokes with Transform Mercury Cannon. However, if he wastes his hammer form cooldowns, the pressure reverses instantly. Misusing his knockback leaves him incredibly vulnerable to Call of the Forge God engages, turning a passive farming lane into an immediate kill threat.

Como jogar

To win this, bait his melee form swap by positioning near your Volcanic Rupture pillar. Hold Searing Charge until you see him commit To the Skies! or waste Thundering Blow. If he knocks you away early, use Living Forge to craft armor in lane without resetting, maintaining your health pool until Call of the Forge God is available to lock him down from a safe distance.

Ficha completa →
Jax

Jax

brittle_procsplit_push This matchup revolves around a tense mind game regarding your brittle application. While Bellows Breath is your primary tool for winning short trades, Jax possesses a hard counter in Counter Strike. By activating his defensive stance, he completely dodges the basic attack required to trigger the brittle explosion, neutralizing your burst potential and leaving you vulnerable to a heavy counter-attack. Ver detalhes
Jax

Por quê

This matchup revolves around a tense mind game regarding your brittle application. While Bellows Breath is your primary tool for winning short trades, Jax possesses a hard counter in Counter Strike. By activating his defensive stance, he completely dodges the basic attack required to trigger the brittle explosion, neutralizing your burst potential and leaving you vulnerable to a heavy counter-attack.

Impacto na lane

Because you cannot easily trade into him, wave positioning becomes your lifeline. Allowing Jax to stack Relentless Assault on minion waves gives him the leverage to crash large waves and poke you under tower with Leap Strike and Empower. If you mismanage the lane state, he will quickly chip away at your turret plates, outscaling you and threatening to split-push your entire side of the map.

Como jogar

Never initiate with Bellows Breath while his defensive options are up. Instead, poke from safety using Volcanic Rupture. If Jax initiates with Leap Strike and immediately triggers Counter Strike, use Searing Charge to dash away toward safety before the stun lands. Only commit to popping brittle marks after you have successfully baited out his dodge, or use the knock-up from Call of the Forge God to disengage if he catches you off guard.

Ficha completa →
K'Santé

K'Santé

cc_buffertank_duel This tank duel is a test of patience centered on the unstoppable frame of K'Santé's Path Maker. Whenever you summon the ram with Call of the Forge God, K'Santé can easily time his charge to ignore the R2 knock-up entirely. Because his Dauntless Instinct provides consistent healing and Ntofo Strikes keeps you checked, you cannot easily force him out without playing around his defensive immunity. Ver detalhes
K'Santé

Por quê

This tank duel is a test of patience centered on the unstoppable frame of K'Santé's Path Maker. Whenever you summon the ram with Call of the Forge God, K'Santé can easily time his charge to ignore the R2 knock-up entirely. Because his Dauntless Instinct provides consistent healing and Ntofo Strikes keeps you checked, you cannot easily force him out without playing around his defensive immunity.

Impacto na lane

You will experience a slow-paced lane where health bars fluctuate but rarely drop to zero instantly. Ntofo Strikes allows K'Santé to threaten third-hit knock-ups during wave states, forcing you to use Volcanic Rupture to farm safely from a distance. Because both of you possess high durability, trades are determined by who mismanages their defensive cooldowns, making tower dives risky and extended freeze attempts common.

Como jogar

To win this mental battle, never cast the second activation of Call of the Forge God immediately if K'Santé is holding Path Maker. Delay your headbutt to bait out his damage reduction stance, or wait for him to waste his dash, Footwork, before committing. If he triggers All Out, quickly disengage using Searing Charge against your Volcanic Rupture pillar to escape his enhanced offensive stats until his ultimate form expires.

Ficha completa →
Akali

Akali

shroud_playshort_trades This matchup revolves around a high-stakes movement duel. Your primary threat is Akali using Shuriken Flip to reactively hop away when you launch Searing Charge. If she successfully avoids your knockup this way, she can instantly reactivate the shuriken to fly back onto you, triggering Assassin's Mark to chunk your health bar while your main escape and crowd control tool is on cooldown. Ver detalhes
Akali

Por quê

This matchup revolves around a high-stakes movement duel. Your primary threat is Akali using Shuriken Flip to reactively hop away when you launch Searing Charge. If she successfully avoids your knockup this way, she can instantly reactivate the shuriken to fly back onto you, triggering Assassin's Mark to chunk your health bar while your main escape and crowd control tool is on cooldown.

Impacto na lane

Because of this threat, you cannot freely crash waves. If you use your abilities to push, Akali will drop Twilight Shroud to zone you from the farm or freeze near her turret. Missing a trade means she dictates the wave pace, forcing you to take heavy damage from Five Point Strike every time you step up to collect minions, eventually forcing a bad recall that costs you turret plates.

Como jogar

To neutralise her mobility, never initiate with Searing Charge. Instead, use Volcanic Rupture to poke her from a distance and force her to move. Keep your distance and focus on farming with Living Forge to build resistance. If she burns Shuriken Flip offensively or misses it, that is your cue to look for a quick Bellows Breath trade. Should she shroud, step back immediately and wait out the cloud before stepping up again.

Ficha completa →
Maokai

Maokai

dodge_skillshotsustain_battle This tank matchup is dictated by a crucial interaction with Ornn's ultimate. While both champions boast high durability, Maokai holds a massive defensive trump card: the brief untargetability during Twisted Advance allows him to completely bypass the knock-up from the second charge of Call of the Forge God. Because this interaction neutralizes Ornn's primary teamfight and skirmish tool, the lane remains a highly volatile test of mechanical timing. Ver detalhes
Maokai

Por quê

This tank matchup is dictated by a crucial interaction with Ornn's ultimate. While both champions boast high durability, Maokai holds a massive defensive trump card: the brief untargetability during Twisted Advance allows him to completely bypass the knock-up from the second charge of Call of the Forge God. Because this interaction neutralizes Ornn's primary teamfight and skirmish tool, the lane remains a highly volatile test of mechanical timing.

Impacto na lane

During the laning phase, you cannot rely on standard all-ins. If you blindly throw out your ultimate, Maokai will negate it, sustain back up using Sap Magic, and turn the trade. This dynamic forces a slower, wave-focused lane where both of you trade grasp procs. Short trades with Volcanic Rupture and Bellows Breath are easily neutralized by his healing, meaning neither tank can easily secure solo kills.

Como jogar

To win this battle of patience, never initiate with Call of the Forge God while Maokai has his root available. Instead, bait his Twisted Advance by walking up for a basic trade. Once he commits and lands, use the Unstoppable frames of Bellows Breath to negate his follow-up Bramble Smash knockback. Only redirect your ram once he has already spent his dash, ensuring your crowd control connects.

Ficha completa →
Kayle

Kayle

easy_scalingdodge_skills This matchup is a pure scaling race decided by whether Ornn can lock down Kayle before she evolves. The pivotal interaction hinges on Ornn's Searing Charge. When Ornn attempts to engage using his Volcanic Rupture pillar, Kayle can instantly activate Celestial Blessing to gain the necessary movement speed to step out of the knock-up radius, leaving Ornn exposed to her ranged retaliatory attacks. Ver detalhes
Kayle

Por quê

This matchup is a pure scaling race decided by whether Ornn can lock down Kayle before she evolves. The pivotal interaction hinges on Ornn's Searing Charge. When Ornn attempts to engage using his Volcanic Rupture pillar, Kayle can instantly activate Celestial Blessing to gain the necessary movement speed to step out of the knock-up radius, leaving Ornn exposed to her ranged retaliatory attacks.

Impacto na lane

Since Kayle can neutralize your primary engage tool, early wave control remains neutral. If you waste Searing Charge, Kayle will punish you from distance with Starfire Spellblade and Radiant Blast, chipping away your health pool. This prevents you from executing clean recalls, allowing her to safely farm towards her Divine Ascent milestones while you struggle to leverage your Living Forge advantage.

Como jogar

To win this execution battle, never launch Searing Charge immediately after spawning your Volcanic Rupture pillar. Instead, walk forward to bait out Celestial Blessing. Once she wastes her movement speed burst, use Bellows Breath to apply brittle before unleashing Call of the Forge God. If she saves Divine Judgment to block your ultimate, immediately reposition and focus on forging defensive stats using Living Forge.

Ficha completa →
Urgot

Urgot

unstoppable_timingdisengage This skill matchup revolves around a high-stakes reaction test. Urgot relies on Disdain to fling you backward, allowing him to easily circle you and trigger multiple shotgun knees from Echoing Flames. However, Ornn can completely nullify this displacement using the unstoppable frame of Bellows Breath. Denying this flip prevents Urgot from accessing his passive's massive damage zones, keeping the trade entirely even. Ver detalhes
Urgot

Por quê

This skill matchup revolves around a high-stakes reaction test. Urgot relies on Disdain to fling you backward, allowing him to easily circle you and trigger multiple shotgun knees from Echoing Flames. However, Ornn can completely nullify this displacement using the unstoppable frame of Bellows Breath. Denying this flip prevents Urgot from accessing his passive's massive damage zones, keeping the trade entirely even.

Impacto na lane

Missing this crucial timing shifts wave control entirely to Urgot. If Disdain connects, his Purge melts your health bar, forcing an early recall or leaving you vulnerable to Fear Beyond Death under tower. Conversely, when you successfully block his charge, Urgot is left overextended in your wave with his primary shield on cooldown, allowing you to contest the push and protect your tower plates.

Como jogar

Never initiate with Searing Charge while Urgot has Disdain ready, as he will interrupt your dash mid-air. Instead, stand near your Volcanic Rupture pillar to bait his forward charge. Keep your finger on Bellows Breath and activate it the split second you see his dash animation begin. If you misstime it and get flipped, immediately use Searing Charge to escape toward your tower before his Purge can shred your health.

Ficha completa →
Poppy

Poppy

dash_blockscaling This skill matchup revolves entirely around the interaction between your mobility and her defensive zone. While Ornn wants to use Volcanic Rupture to set up a terrain-shattering Searing Charge, Poppy's Steadfast Presence acts as an absolute counter-measure, grounding you and inflicting damage. Because her barrier cancels your main knockup tool on reaction, neither tank can easily force an engagement without respect for the other's defensive tools. Ver detalhes
Poppy

Por quê

This skill matchup revolves entirely around the interaction between your mobility and her defensive zone. While Ornn wants to use Volcanic Rupture to set up a terrain-shattering Searing Charge, Poppy's Steadfast Presence acts as an absolute counter-measure, grounding you and inflicting damage. Because her barrier cancels your main knockup tool on reaction, neither tank can easily force an engagement without respect for the other's defensive tools.

Impacto na lane

During wave states, you cannot blindly thin the minion wave near walls, as Poppy will look to slam you. Since your Searing Charge is locked down by her active Steadfast Presence, short trades are dictated by who holds their breath. If you waste your dash into her barrier, she wins the trade easily and secures wave priority, forcing you under turret where farming with Bellows Breath becomes your only safe response.

Como jogar

To bypass her defense, spawn a pillar with Volcanic Rupture and walk toward it threateningly without pressing Searing Charge. Force her to panic-activate Steadfast Presence. Once her golden barrier fades, you have a fifteen-second window where your knockup is guaranteed. If she refuses to bite, redirect your focus: use Bellows Breath to apply Brittle and trade with basic attacks, saving Call of the Forge God to initiate when her defensive spell is completely down.

Ficha completa →
Riven

Riven

unstoppable_timingarmor_stack This skill matchup hinges entirely on how you respond to Riven's aggressive combos. Since Riven relies on the third strike of Broken Wings to disrupt your flow, your Bellows Breath is your ultimate counter-tool. Activating it right as she leaps uses your unstoppable status to completely negate her knock-up, leaving her vulnerable to a heavy Brittle proc. Mistiming this allows her Ki Burst to lock you down effortlessly. Ver detalhes
Riven

Por quê

This skill matchup hinges entirely on how you respond to Riven's aggressive combos. Since Riven relies on the third strike of Broken Wings to disrupt your flow, your Bellows Breath is your ultimate counter-tool. Activating it right as she leaps uses your unstoppable status to completely negate her knock-up, leaving her vulnerable to a heavy Brittle proc. Mistiming this allows her Ki Burst to lock you down effortlessly.

Impacto na lane

The lane dynamic fluctuates based on Riven's ability cooldowns. When her Broken Wings is offline, you can safely walk up to contest the wave, using Volcanic Rupture to poke and secure minions. However, if she baits out your Bellows Breath, she gains complete wave control, pushing you under tower where she can safely chip away at your health using Valor to absorb return fire.

Como jogar

To win this duel, never initiate trades with Searing Charge unless her mobility spells are fully exhausted. Instead, hold your ground near your turret and wait for her to engage. When she initiates with Broken Wings, track her third cast rhythm. Cast Bellows Breath directly into her descent, follow up with an auto-attack to consume the Brittle mark, and then use Volcanic Rupture to block her retreat. If she activates Blade of the Exile, immediately disengage using Call of the Forge God to survive.

Ficha completa →
Yasuo

Yasuo

projectile_blockbait_cooldown This even matchup hinges entirely on how Yasuo's Wind Wall interacts with Ornn's Call of the Forge God. While Ornn wants to initiate teamfights or trades with his massive ram, a reactive Yasuo can completely dissolve the projectile with a single defensive cast. Yasuo relies on Sweeping Blade to dance around Volcanic Rupture pillars, meaning Ornn cannot easily land Searing Charge knock-ups without first stripping away Yasuo's high mobility and his Way of the Wanderer shield. Ver detalhes
Yasuo

Por quê

This even matchup hinges entirely on how Yasuo's Wind Wall interacts with Ornn's Call of the Forge God. While Ornn wants to initiate teamfights or trades with his massive ram, a reactive Yasuo can completely dissolve the projectile with a single defensive cast. Yasuo relies on Sweeping Blade to dance around Volcanic Rupture pillars, meaning Ornn cannot easily land Searing Charge knock-ups without first stripping away Yasuo's high mobility and his Way of the Wanderer shield.

Impacto na lane

During the laning phase, Yasuo will constantly push the wave using Steel Tempest while looking for short trades. Ornn can neutralise Yasuo's aggressive Sweeping Blade dashes by casting Bellows Breath to apply Brittle and gain unstoppable status against the tornado from Steel Tempest. However, if Ornn wastes Call of the Forge God into an active Wind Wall, he loses all kill pressure, allowing Yasuo to safely scale, farm, and threaten Last Breath setups.

Como jogar

To win this lane, you must never launch Call of the Forge God when Yasuo has Wind Wall available. Instead, poke his Way of the Wanderer shield down with Volcanic Rupture from a safe distance. Force him to use his wind barrier by threatening a Searing Charge engage near a pillar. If he panics and deploys it, you have a massive twenty-second window to safely unleash your ultimate. Hold Bellows Breath specifically to block the knock-up from his third Steel Tempest, preventing his Last Breath follow-up.

Ficha completa →

Outros matchups

Favoráveis

7

Esses campeões geralmente têm dificuldade para responder às suas principais forças, o que te dá mais liberdade para abordar o confronto. Você costuma ter várias formas de pressioná-los e forçar trocas a seu favor. Aproveite essa vantagem para impor seu ritmo, em vez de dar tempo para eles se estabilizarem.

Jarvan IV

Jarvan IV

tank_matchupunstoppable This matchup leans heavily in your favor because Jarvan IV relies entirely on his Demacian Standard and Dragon Strike combo to initiate favorable trades. By timing Bellows Breath to gain unstoppable status, you completely negate his knockup. Denied his crowd control, Jarvan IV is left exposed in a prolonged melee trade where your Brittle procs easily out-damage his Martial Cadence as the game goes on. Ver detalhes
Jarvan IV

Por quê

This matchup leans heavily in your favor because Jarvan IV relies entirely on his Demacian Standard and Dragon Strike combo to initiate favorable trades. By timing Bellows Breath to gain unstoppable status, you completely negate his knockup. Denied his crowd control, Jarvan IV is left exposed in a prolonged melee trade where your Brittle procs easily out-damage his Martial Cadence as the game goes on.

Impacto na lane

Once Jarvan IV misses or has his flag-and-drag combo neutralized, his massive cooldowns leave him entirely defenseless. You can freely control the wave, forcing him to farm under tower where his Golden Aegis cannot save him from under-tower poke. This massive pressure gap ensures you forge items lane-side via Living Forge while he is forced into terrible recall timings, creating a gold and scaling advantage.

Como jogar

Never initiate with Bellows Breath; always hold it as a counter-reaction to the moment he drops his Demacian Standard. If he attempts to trap you with Cataclysm, do not panic. Use the arena walls he creates to trigger your Searing Charge knockup, then follow up immediately with Call of the Forge God to turn his own terrain into a lethal trap. If you misstime your unstoppable window, disengage immediately with Volcanic Rupture to slow his pursuit.

Ficha completa →
Renekton

Renekton

armor_stackunstoppable_timing Ornn dominates this matchup because he can completely neutralize Renekton's primary trade setup. When Renekton uses Slice and Dice to close the gap, you can immediately activate Bellows Breath. The unstoppable status of your breath blocks the stun from Ruthless Predator, while applying Brittle. This lets you trade back immediately with massive percentage-health damage, turning his aggressive dive into a losing exchange. Ver detalhes
Renekton

Por quê

Ornn dominates this matchup because he can completely neutralize Renekton's primary trade setup. When Renekton uses Slice and Dice to close the gap, you can immediately activate Bellows Breath. The unstoppable status of your breath blocks the stun from Ruthless Predator, while applying Brittle. This lets you trade back immediately with massive percentage-health damage, turning his aggressive dive into a losing exchange.

Impacto na lane

This interaction shifts the lane tempo entirely in your favor. Renekton relies on chunking you down to control the wave, but failing his stun combo leaves him vulnerable to your counter-shove. Thanks to Living Forge, you can continuously buy defensive stats directly in lane, while Renekton is forced to recall to spend his gold. This creates an insurmountable item advantage that prevents him from ever diving you under tower.

Como jogar

To secure this lead, never waste Bellows Breath on the minion wave. Always hold it as a direct counter-tool for when Renekton dashes. If he activates Dominus, do not panic; use Volcanic Rupture to slow him down and create a pillar, then immediately follow up with Searing Charge to escape his ultimate's aura. Once his fury decays and his ultimate ends, initiate with Call of the Forge God to crush him.

Ficha completa →
Malphite

Malphite

magic_damagescaling_gap Malphite naturally stacks armor to boost Ground Slam and withstand physical damage, but this defense is entirely useless against your kit. When you use Bellows Breath, you inflict percent-health magic damage and apply Brittle. Consuming this mark with a basic attack bypasses his Granite Shield and high armor, melting his health bar in short, bursty trades while his own magic damage scales poorly. Ver detalhes
Malphite

Por quê

Malphite naturally stacks armor to boost Ground Slam and withstand physical damage, but this defense is entirely useless against your kit. When you use Bellows Breath, you inflict percent-health magic damage and apply Brittle. Consuming this mark with a basic attack bypasses his Granite Shield and high armor, melting his health bar in short, bursty trades while his own magic damage scales poorly.

Impacto na lane

Because Malphite cannot match your wave clear or trade effectively, you dictate the lane's flow. His Seismic Shard poke will quickly drain his mana pool without breaking your sustain, allowing you to crash waves at will. Since he cannot match your short-trade burst, you can constantly threaten him under tower or comfortably use Living Forge to build items in lane, extending your item advantage without giving him a free recall window.

Como jogar

Initiate trades with Volcanic Rupture to summon a pillar, then slide in with Searing Charge to knock him up if he mispositions. Immediately follow up with Bellows Breath to apply Brittle and clap him with an auto-attack. If he reacts with Unstoppable Force to escape or counter-engage, use the unstoppable frame of your own Bellows Breath to completely negate his knock-up. Should you miss your pillar setup, simply back off and wait for your cooldowns rather than letting him retaliate with Thunderclap.

Ficha completa →
Sion

Sion

cc_interruptscaling Ornn dominates this matchup because he completely neutralizes Sion's main lane-clear and trade tool. Whenever Sion tries to channel Decimating Smash to clear waves or harass, you can summon a pillar with Volcanic Rupture and immediately use Searing Charge against it. This knock-up cancels his charge-up entirely. Since Living Forge provides massive stat scaling, you naturally outclass Sion's passive HP stacking without letting him dictate the lane. Ver detalhes
Sion

Por quê

Ornn dominates this matchup because he completely neutralizes Sion's main lane-clear and trade tool. Whenever Sion tries to channel Decimating Smash to clear waves or harass, you can summon a pillar with Volcanic Rupture and immediately use Searing Charge against it. This knock-up cancels his charge-up entirely. Since Living Forge provides massive stat scaling, you naturally outclass Sion's passive HP stacking without letting him dictate the lane.

Impacto na lane

Sion cannot easily crash waves or execute his proxy strategies because you dictate the wave state. Because you can cancel Decimating Smash, he is forced to use Soul Furnace or Roar of the Slayer to farm, which drains his mana quickly. This allows you to freeze the wave near your turret, forcing him into overextended positions where he is highly vulnerable to your full Bellows Breath brittle combos.

Como jogar

Position yourself slightly to the side of the minion wave so Sion has to choose between aiming Decimating Smash at the minions or at you. Always hold Searing Charge specifically to interrupt his channel; never waste it for raw mobility. If he tries to escape or engage with Unstoppable Onslaught, block his path by summoning a Volcanic Rupture pillar directly in his trajectory to force a premature crash, or use Call of the Forge God to counter-engage.

Ficha completa →
Tryndamere

Tryndamere

armor_stackkite_out Ornn naturally counters Tryndamere's ultimate-heavy diving playstyle. When Tryndamere pops Undying Rage, Ornn has the perfect toolkit to neutralize his invulnerability. By linking Searing Charge off terrain or a pillar and following up with Call of the Forge God, Ornn can chain knock-ups together, wasting the entire five-second duration of Tryndamere's death-defying state while completely halting his auto-attacks. Ver detalhes
Tryndamere

Por quê

Ornn naturally counters Tryndamere's ultimate-heavy diving playstyle. When Tryndamere pops Undying Rage, Ornn has the perfect toolkit to neutralize his invulnerability. By linking Searing Charge off terrain or a pillar and following up with Call of the Forge God, Ornn can chain knock-ups together, wasting the entire five-second duration of Tryndamere's death-defying state while completely halting his auto-attacks.

Impacto na lane

This interaction transforms the lane into a zone of absolute trade denial. Tryndamere cannot safely use Spinning Slash forward, as any aggressive dash leaves him vulnerable to a counter-engage. Since Ornn easily stacks armor, Tryndamere's critical strikes from Battle Fury lose their threat. Tryndamere is forced to waste Bloodlust on lane sustain rather than scaling, stripping away his early-game lane pressure and tower-taking threat.

Como jogar

To secure this advantage, pivot your early purchases toward heavy armor components immediately instead of magic resistance. During skirmishes, never initiate with Searing Charge; instead, save this mobility tool to disrupt Tryndamere the moment he activates Undying Rage. If he tries to escape with Spinning Slash, immediately deploy Call of the Forge God to pull him back into your crowd control chain, ensuring his ultimate runs out safely before he can reach his tower.

Ficha completa →
Shen

Shen

cc_interruptglobal_pressure You hold a distinct advantage here because your scaling outclasses Shen's, and you possess the perfect tools to completely negate his global ultimate. Whenever Shen channels Stand United to save his team, you can immediately cancel it. Combining Volcanic Rupture to summon a pillar with a quick Searing Charge, or launching Call of the Forge God, will instantly interrupt his teleportation, trapping him in lane with you while wasting his most impactful cooldown. Ver detalhes
Shen

Por quê

You hold a distinct advantage here because your scaling outclasses Shen's, and you possess the perfect tools to completely negate his global ultimate. Whenever Shen channels Stand United to save his team, you can immediately cancel it. Combining Volcanic Rupture to summon a pillar with a quick Searing Charge, or launching Call of the Forge God, will instantly interrupt his teleportation, trapping him in lane with you while wasting his most impactful cooldown.

Impacto na lane

This interaction dictates the entire tempo of the lane, stripping Shen of his map-wide threat. He is forced to play defensively, knowing any attempt to use Stand United in your vision will be punished. If he retreats into his fog of war to cast it, you gain free priority to crash waves and take turret plates. Furthermore, his Spirit's Refuge cannot block the heavy magic damage from your Bellows Breath, ensuring you dominate short trades.

Como jogar

To secure this matchup, always hold Searing Charge once Shen unlocks his ultimate. Avoid using your dash aggressively unless you know his teleport is on cooldown. Watch his movement closely; the moment he steps back to channel Stand United, deploy Volcanic Rupture at his feet and ram it with Searing Charge to knock him up. If he manages to distance himself, trigger Call of the Forge God to interrupt him from afar. Use Bellows Breath to block his Shadow Dash taunt and apply Brittle.

Ficha completa →

Outros matchups

Items to Counter Ornn

Buy these items to reduce this champion's effectiveness in your games.

Thornmail
Thornmail
Force of Nature
Force of Nature
Abyssal Mask
Abyssal Mask
Frozen Heart
Frozen Heart
Sunfire Aegis
Sunfire Aegis

Como counterar este campeão

Ângulo de counter

Contrariar o Ornn não se resume simplesmente a derrotá-lo na rota. Muitas partidas contra ele são vencidas ao quebrar seu ritmo: impedindo-o de alcançar objetivos com recursos suficientes, forçando-o a responder na rota lateral ou guardando ferramentas defensivas para se esquivar do segundo lançamento da ultimate, em vez de entrar em pânico com o primeiro. Os campeões já identificados como difíceis para ele geralmente exploram uma de suas principais fraquezas: duelos prolongados, dano verdadeiro, mobilidade após o início do combate ou a capacidade de impedir lutas de frente a fundo. O segredo é não dar a ele o terreno que ele quer. Se ele jogar no rio com visão, pilares posicionados e sua equipe atrás dele, a luta se torna muito favorável para o Ornn. Se ele tiver que usar a ultimate de muito longe ou defender uma rota lateral sob pressão, seu impacto cai drasticamente.

Contexto do patch

O Ornn tem dificuldades quando o adversário transforma a partida em um confronto individual antes que ela se torne uma luta em equipe. Os jogadores de linha do Top que conseguem ameaçá-lo em duelos, ignorar parte de sua armadura ou sair do alcance de seus efeitos de controle de multidão o forçam a jogar mais recuado, atrasando suas rotações. Em lutas em equipe, os melhores contra-ataques não se limitam a acertá-lo: eles evitam se agrupar na linha de alcance de sua ultimate, mantêm um dash ou uma resposta defensiva para o segundo lançamento e, então, punem sua equipe enquanto a investida falha. O plano vencedor é, portanto, duplo: mantê-lo desconfortável na rota e, em seguida, impedir o acesso aos corredores onde seu kit se torna fácil demais de executar.

Leitura rápida

  • Não entre em pânico na primeira ativação da habilidade definitiva: a verdadeira ameaça costuma ser a segunda ativação, somada ao ataque subsequente da equipe dele.
  • Faça com que o Ornn responda na rota lateral antes dos objetivos para reduzir o valor do seu ataque em grupo.
  • Evite corredores estreitos sem visibilidade: as habilidades Q, E e a habilidade definitiva ficam muito mais difíceis de se esquivar nesses locais.

Arquétipos de counter

Duelistas antitanque e ameaças de dano real

Esses perfis atacam o Ornn exatamente onde ele normalmente busca segurança: trocas prolongadas e controle da rota lateral. O Fiora e o Gwen ameaçam sua resistência com dano difícil de absorver, enquanto o Darius pode reduzir sua capacidade de atuar na linha de frente. O problema para o Ornn não é apenas perder vida; é ser forçado a usar feitiços defensivamente, abrir mão da prioridade nas ondas e chegar aos objetivos sem o timing ideal. Quanto mais o duelo se prolonga, mais incômodo se torna seu plano de tanque utilitário.

Como o campeão deve se adaptar. Ornn deve encurtar os confrontos, jogar em torno do Grasp, manter o E para se desengajar ou punir um erro evidente e, em seguida, direcionar seu valor para os objetivos. Buscar duelos prolongados raramente é lucrativo; ele precisa sobreviver de forma limpa e forçar confrontos em que sua equipe possa atacar por trás dele.

Mobilidade e penalidade após o engajamento

Esses campeões tornam as investidas de Ornn menos certeiras. Camille pode se aproveitar das oportunidades dela e criar pressão lateral que força Ornn a reagir. Jax pode prolongar as trocas e punir os momentos em que Ornn já tiver usado seu controle de grupo. O Kennen ameaça a retaguarda, enquanto o Ornn tenta impor seu próprio combate de frente a trás. A ideia comum é simples: eles não ficam passivamente no caminho da ultimate dele. Eles movimentam o combate, mantêm uma resposta pronta e, então, punem o espaço criado pelo compromisso dele.

Como o campeão deve se adaptar. Ornn deve evitar usar suas habilidades finais de forma excessivamente previsível e dar mais ênfase à ameaça do que à execução imediata. Contra esses tipos de adversários, ele geralmente ganha vantagem ao esperar que o inimigo dê um impulso, salte ou se aproxime antes de selecionar um alvo, em vez de iniciar a luta muito cedo.

Alcance, manobras de kiting e negação de contato

Os campeões de longo alcance tornam a rota do Ornn mais difícil, pois o forçam a receber dano antes que ele consiga realmente usar seu kit. O Vayne ameaça sua capacidade de tankar por meio de dano e reposicionamento, enquanto o Teemo pode atrapalhar suas trocas rápidas e retardar seu controle de ondas. O perigo não é apenas a pressão na rota: se o Ornn perder muitos recursos antes dos objetivos, ele não poderá mais desempenhar seu papel na linha de frente com a mesma confiança. Um Ornn com pouca vida se envolve pior nos combates e se torna mais previsível.

Como o campeão deve se adaptar. Ornn precisa aceitar abrir mão de um pouco de CS, preservar a vida e usar Q para controlar o espaço, em vez de responder a cada ataque. O objetivo é alcançar os primeiros objetivos com a ultimate disponível, e não provar que ele consegue vencer uma rota que, por natureza, é desconfortável para ele.

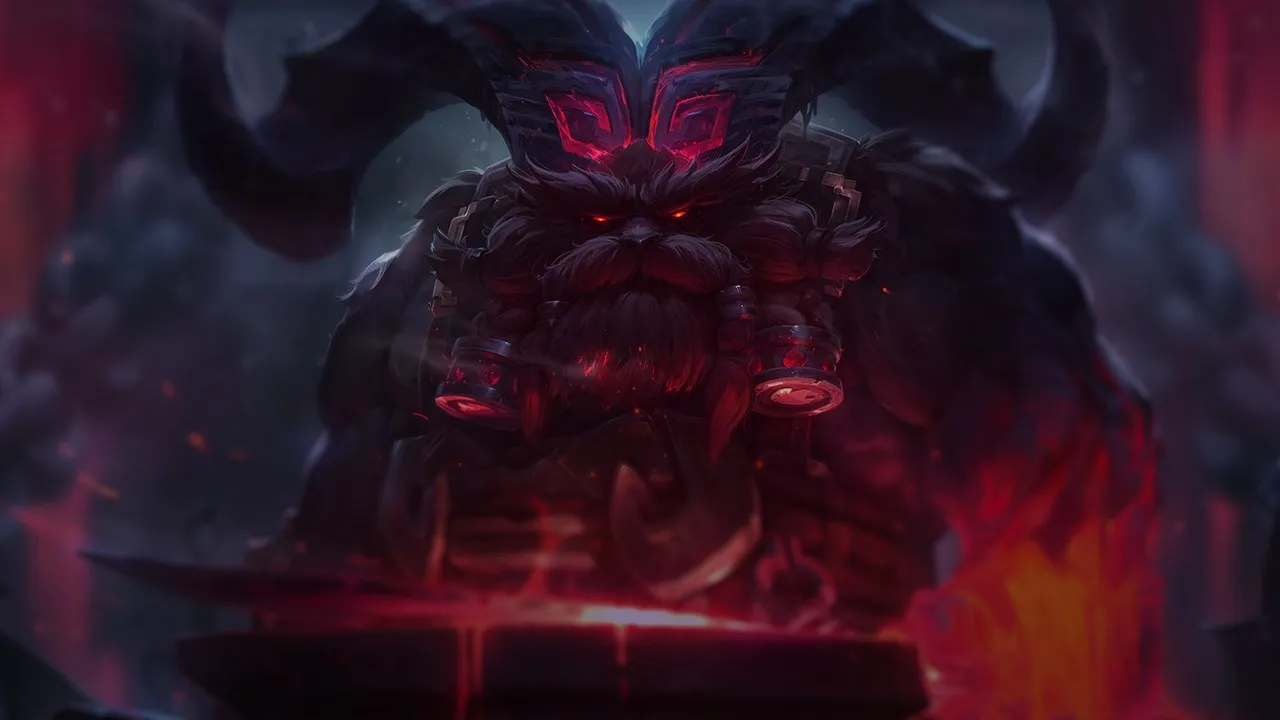
Matchups prioritários

Fiora

Fiora é um confronto prioritário a ser compreendido, pois ela inverte a lógica habitual de Ornn. Normalmente, ele busca absorver o primeiro contato, aplicar seu controle de multidão e, em seguida, deixar que sua equipe avance. Contra o Fiora, qualquer feitiço importante pode se tornar uma oportunidade de punição se ela mantiver o Riposte ou prolongar o duelo com golpes nos pontos vitais. Ornn deve, portanto, jogar com muito mais cautela: trocas curtas, controle de ondas, nada de combos completos diante de um Riposte óbvio e, acima de tudo, uma transição rápida para os objetivos. Se ele tentar vencer a rota por orgulho, estará dando a Fiora exatamente o ritmo que ela quer.

Vayne

Vayne obriga Ornn a resolver um problema diferente: ele não pode simplesmente se tornar mais resistente e esperar que o jogo fique mais fácil. O alcance dela, o reposicionamento e a capacidade de punir tanques fazem com que cada erro de posicionamento saia muito caro. O plano de Ornn deve ser paciente: preservar a vida, evitar confrontos forçados na rota e, então, buscar lutas em que Vayne não tenha espaço lateral. Áreas estreitas continuam sendo seu melhor aliado, mas somente se sua equipe puder realmente ameaçá-la após o segundo lançamento da ultimate.

Erros comuns contra ele

Erros comuns contra ele

  • Agrupar-se em um grupo de cinco em um corredor do rio sem visão, enquanto Ornn tem sua habilidade definitiva disponível.
  • Usar o “dash” ou o “anti-CC” na primeira ativação da ultimate e, então, ficar sem nenhuma resposta para a segunda.
  • Deixá-lo alcançar os objetivos sem esforço, com muita vida, o Flash disponível e o terreno já sob seu controle.
  • Tentar eliminar o Ornn primeiro nas lutas em equipe, enquanto seus carries já estão posicionados para causar dano.
  • Esquecer que o Q dele pode criar um ângulo para o E, mesmo quando o pilar não parece ameaçador à primeira vista.

Notas do coach

  • Para derrotar o Ornn, faça com que ele perca o controle do terreno. Se ele decidir onde a luta começa, você já estará caindo na armadilha dele.

  • A melhor estratégia contra o Ornn costuma ser a paciência: guardar uma resposta para a segunda habilidade definitiva vale mais do que reagir cedo demais à primeira.

FAQ

Como se joga contra a habilidade definitiva do Ornn?

É preciso distinguir entre o primeiro e o segundo lançamento. O primeiro mostra a trajetória e costuma causar pânico nos jogadores, mas o verdadeiro perigo vem do segundo lançamento, que faz o carneiro recuar e causa o arremesso para cima decisivo. Se possível, reserve um dash, um feitiço defensivo ou um movimento lateral para o segundo lançamento. A melhor contra-estratégia também é evitar linhas retas nos corredores de objetivos, pois o Ornn foi projetado especificamente para que o terreno dificulte as esquivas.

Você deve priorizar o Ornn nas lutas em equipe?

Não necessariamente. Se o Ornn entrar em combate enquanto seus carries estão livres atrás dele, atacá-lo primeiro pode simplesmente dar tempo à equipe dele. Você deve observar principalmente a distância entre o Ornn e seus causadores de dano. Se ele estiver isolado após avançar demais, faz sentido atacá-lo. Mas se a equipe dele estiver bem posicionada, é melhor se esquivar ou absorver o controle de grupo dele e, em seguida, ameaçar os campeões que estão respondendo ao ataque dele.


Por que os duelistas experientes incomodam tanto o Ornn?

Ornn quer se manter na rota, controlar a onda e, em seguida, direcionar seu valor para os objetivos. Duelistas fortes impedem que ele faça isso sem esforço. Eles o forçam a usar feitiços defensivamente, tornam trocas prolongadas perigosas e podem criar pressão na rota lateral, afastando-o de sua equipe. Mesmo que o Ornn continue sendo útil mais tarde, perder muito ritmo contra esses campeões reduz a qualidade de suas primeiras habilidades definitivas pelo mapa.

Como impedir que o Ornn domine os objetivos?

Você precisa se preparar para o objetivo antes que ele o faça, não apenas reagir quando ele chegar. Tenha uma visão clara, evite entradas em grupo, force-o a escolher entre defender uma onda e se juntar à equipe dele, depois mantenha espaço lateral para desviar do seu ultimate. Se você esperar em um corredor estreito sem visão, estará oferecendo a ele a situação ideal. O objetivo é tornar o ataque dele previsível ou muito custoso, não deixar que ele escolha o momento perfeito.