
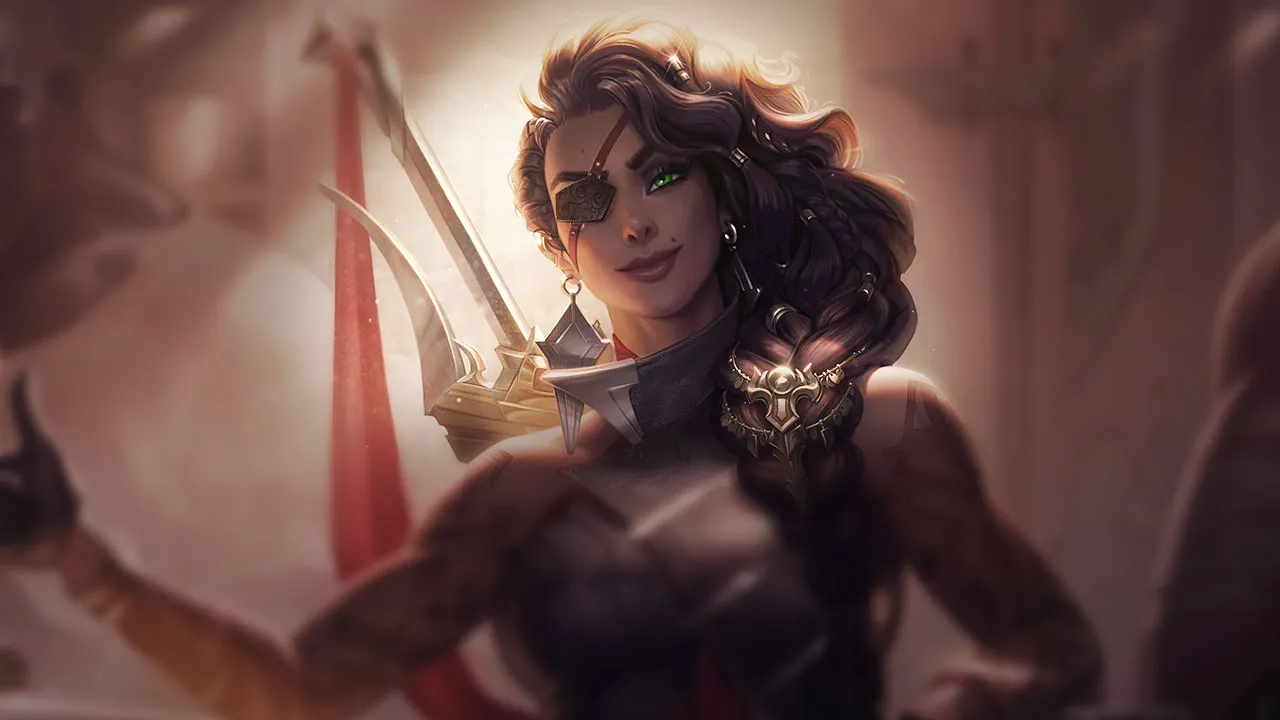
Samira Wild Rift カウンターガイド
ハードカウンター
1これらのチャンピオンは、こちらのビルドやプレイスタイルを真正面から上回る構成を持ち、レーン戦のコントロールとファームを極めて難しくする。彼らのスキルはこちらの主要な強みを無効化し、いつも通りのプランを実行しようとした瞬間に手痛い反撃を受けさせてくる。こうしたマッチアップでは、ミスを最小限に抑え、正面からの対決以外で解決策を探すことが重要になる。

Draven+2
Draven は構造的な counter です。Draven の Stand Aside が、あなたの Inferno Trigger のチャネリングを即座にキャンセルするからです。Daredevil Impulse を S ランクまで貯めて Wild Rush で dive しても、腕のある相手は displacement を温存するだけで、あなたの ult をすぐに止めてしまいます。ult の大きな回復と DPS がなければ、Draven は連続する Spinning Axe を使った素のダメージ勝負の trade で、あなたを簡単に上回ります。
Dravenのビルド →
詳細を見る
理由
Draven は構造的な counter です。Draven の Stand Aside が、あなたの Inferno Trigger のチャネリングを即座にキャンセルするからです。Daredevil Impulse を S ランクまで貯めて Wild Rush で dive しても、腕のある相手は displacement を温存するだけで、あなたの ult をすぐに止めてしまいます。ult の大きな回復と DPS がなければ、Draven は連続する Spinning Axe を使った素のダメージ勝負の trade で、あなたを簡単に上回ります。
レーン戦への影響
この封じ込めの関係により、あなたの laning phase は完全に麻痺します。Draven は Spinning Axe による序盤の優れたダメージを使って wave を crash させ、タワー下のあなたを poke します。Draven は Blood Rush で距離をコントロールできるため、あなたは効果的に trade し返せません。戦いに踏み込むことは不可能になり、lane priority を手放して守りに回り、Draven が League of Draven のスタックを換金するのを防ぐしかありません。
立ち回り方
生き残るには、徹底した規律と Draven の cooldown を読んだ立ち回りが必要です。last hit は Flair で離れた位置から確保し、Blade Whirl は Draven の ult の Whirling Death を無力化するか、タワー下で致命的なダメージを防ぐ場合にのみ温存してください。Draven が Stand Aside を無駄にしたのをはっきり確認するまでは、Wild Rush で仕掛けないでください。Draven が displacement を辛抱強く温存している場合は、farm の遅れを受け入れてタワーの近くにとどまり、先に jungler が Draven の立ち位置を崩してくれるのを待ってください。
不利なマッチアップ
10これらのチャンピオンは、マッチアップ自体を絶望的にするわけではないが、対面で優位に立ちやすいツールを持っている。射程が長かったり、攻撃を受け止める力が高かったり、エンゲージへの対応手段が豊富だったりする。アプローチを調整し、戦闘を受け入れるタイミングを慎重に選ぶ必要がある。

Caitlyn+1
Caitlyn は構造的に大きな優位を持っています。足元に Yordle Snap Trap を置いて、ダッシュ中のあなたの Wild Rush を止められるからです。ただし、この lane は cooldown を巡る度胸比べです。Caitlyn はあなたを zone できますが、Blade Whirl が使える状態なら、Caitlyn は安全に Ace in the Hole をチャネリングできません。ult の弾を簡単に消されてしまうからです。
Caitlynのビルド →
詳細を見る
理由
Caitlyn は構造的に大きな優位を持っています。足元に Yordle Snap Trap を置いて、ダッシュ中のあなたの Wild Rush を止められるからです。ただし、この lane は cooldown を巡る度胸比べです。Caitlyn はあなたを zone できますが、Blade Whirl が使える状態なら、Caitlyn は安全に Ace in the Hole をチャネリングできません。ult の弾を簡単に消されてしまうからです。
レーン戦への影響
Caitlyn の優れたレンジと Yordle Snap Trap の設置により、あなたはタワー下に押し込まれ、体力を削られ、序盤のタワープレートでも差をつけられます。無策に all-in を強行すると、罠にかかって強烈な Headshot を受けることになります。この圧力で roam の可能性が制限され、あなたは bot lane に釘付けにされ、その間に Caitlyn のチームがマップの priority を握ります。Caitlyn の cooldown のミスを罰しない限り、この状況は変わりません。
立ち回り方
Caitlyn が Yordle Snap Trap や 90 Caliber Net を無駄にしたのを確認するまでは、Wild Rush で仕掛けないでください。代わりに安全な farm に集中し、Caitlyn の Piltover Peacemaker に自分の Flair で応戦しましょう。Blade Whirl は厳密に温存してください。Caitlyn があなたや味方を仕留めようと苦し紛れに Ace in the Hole を撃ってきたら、前に出て弾を防いでください。劣勢になった場合は、kill を渡すよりタワープレートを譲ってください。

Kalista+1
Kalista は all-in のリズムを握っています。Fate's Call を温存して Oathsworn の味方を引き寄せ、あなたに向けて飛ばすことで、あなたを打ち上げて Inferno Trigger を即座にキャンセルできるからです。Blade Whirl で飛んでくる Pierce の槍を壊し、Kalista の Rend のスタックを抑えることはできますが、Kalista の ult による打ち上げは止められず、主力のダメージ源なしで非常に無防備になります。
Kalistaのビルド →
詳細を見る
理由
Kalista は all-in のリズムを握っています。Fate's Call を温存して Oathsworn の味方を引き寄せ、あなたに向けて飛ばすことで、あなたを打ち上げて Inferno Trigger を即座にキャンセルできるからです。Blade Whirl で飛んでくる Pierce の槍を壊し、Kalista の Rend のスタックを抑えることはできますが、Kalista の ult による打ち上げは止められず、主力のダメージ源なしで非常に無防備になります。
レーン戦への影響
序盤のレベル帯では、Kalista は Martial Poise を使って Flair の射程から常に跳び退きつつ、minion に槍を刺して Rend を簡単にリセットします。この絶え間ない poke のせいで、あなたはタワー下での farm を強いられ、体力を削られ、Daredevil Impulse のスタックも貯められません。Wild Rush で無理に engage しようとしても、Kalista は簡単に後ろへ kite して、前に出すぎたあなたを仕留めようとします。
立ち回り方
この lane を生き延びるには、守りの立ち回りに徹し、安全な距離から Flair で farm することに集中する必要があります。Kalista が Fate's Call をすでに使ったか、Kalista の Support が呼び戻せないほど遠い場合を除き、Wild Rush で engage しないでください。Kalista が積極的に前へ跳んできたら、Blade Whirl で Pierce を防いで Rend のスタックが素早く溜まるのを阻止し、すぐに下がってください。Inferno Trigger をチャネリングする前に、jungler が Kalista を拘束してくれるのを待ってください。

Yunara+1
Yunara の Vow of the First Lands によるハイブリッドのクリティカルダメージは、特に Cultivation of Spirit を発動した状態では、正面からの trade を致命的にします。ただし、Yunara の攻めの勢いは Arc of Judgment を当てることに大きく依存しています。あなたが反応できないと、Yunara はあなたを減速させ、Kanmei's Steps で簡単に距離を取ってきます。Samira の Blade Whirl は究極の counter ツールで、その重要な projectile を消して Yunara の setup を潰せます。
Yunaraのビルド →
詳細を見る
理由
Yunara の Vow of the First Lands によるハイブリッドのクリティカルダメージは、特に Cultivation of Spirit を発動した状態では、正面からの trade を致命的にします。ただし、Yunara の攻めの勢いは Arc of Judgment を当てることに大きく依存しています。あなたが反応できないと、Yunara はあなたを減速させ、Kanmei's Steps で簡単に距離を取ってきます。Samira の Blade Whirl は究極の counter ツールで、その重要な projectile を消して Yunara の setup を潰せます。
レーン戦への影響
Yunara は Cultivation of Spirit の跳ねる攻撃で常に wave を push し、あなたをタワー下に追い込んで poke で削ろうとしてきます。Yunara は簡単に距離を取れるため、安全に Daredevil Impulse のスタイルスタックを貯めるのに苦労します。守りの円を無駄にすると、Yunara はすぐに Transcend One's Self を発動して dive してくるか、あなたに recall を強いて dragon の priority を失わせます。
立ち回り方
距離を保ち、Yunara の立ち位置を見ながら Flair での farm に集中してください。Arc of Judgment が自分に向かってくるアニメーションを確認するまでは、必ず Blade Whirl を温存してください。この projectile を防げば、Yunara は強化状態になれません。無事に消せたら、Cultivation of Spirit が切れるのを待ってから、Wild Rush で距離を詰めて Daredevil Impulse を貯めてください。Yunara が早めに Transcend One's Self を発動した場合は、圧倒的なハイブリッドダメージを避けるため、すぐに下がってください。

Xayah+1
Xayah は、あなたの主な勝ち筋を直接潰します。Daredevil Impulse を貯めて Inferno Trigger を発動しようとするたびに、Xayah は Featherstorm を即座に使ってターゲット不可になり、あなたの ult を完全に無駄にできます。さらに、Wild Rush で前に dive して無理に engage しようとすると、Xayah にとって絶好の位置に入ってしまい、Bladecaller で羽根を呼び戻されて、戦闘の最中に root されます。
Xayahのビルド →
詳細を見る
理由
Xayah は、あなたの主な勝ち筋を直接潰します。Daredevil Impulse を貯めて Inferno Trigger を発動しようとするたびに、Xayah は Featherstorm を即座に使ってターゲット不可になり、あなたの ult を完全に無駄にできます。さらに、Wild Rush で前に dive して無理に engage しようとすると、Xayah にとって絶好の位置に入ってしまい、Bladecaller で羽根を呼び戻されて、戦闘の最中に root されます。
レーン戦への影響
この関係により、お互いに消極的な laning phase になり、wave を簡単に crash させることも dive を決めることもできません。Xayah は Clean Cuts と Double Daggers で安全に wave を処理でき、残された羽根があなたの動きを制限します。前方への積極的なダッシュはすべて罰せられるため、体力の trade は非常に危険になります。タワー下で守りに回ることになると priority を失い、Xayah に序盤の dragon の主導権を握られます。
立ち回り方
生き残るには、辛抱強い誘いの駆け引きをする必要があります。Xayah の ult が使える間は、Wild Rush で仕掛けないでください。代わりに、Flair で安全な位置から poke し、Blade Whirl は、Double Daggers の羽根が呼び戻される前に壊すためだけに温存してください。Xayah の直線的な羽根のパッシブを避けるため、minion wave に対して斜めの位置に立ってください。Inferno Trigger を発動するのは、Xayah が守りのために Featherstorm を使わされた後だけにしてください。

Ezreal+1
Ezreal はこの matchup を支配しています。Arcane Shift が Wild Rush による engage に対する即時の脱出手段になり、あなたの攻めの勢いを奪うからです。Ezreal はあなたの脅威範囲から blink で抜け出せるため、Mystic Shot と Essence Flux で常に poke を狙ってきます。Ezreal は圧力で勝つタイプで、あなたの Blade Whirl を吐かせてから初めて full の burst を叩き込み、あなたを無防備にします。
Ezrealのビルド →
詳細を見る
理由
Ezreal はこの matchup を支配しています。Arcane Shift が Wild Rush による engage に対する即時の脱出手段になり、あなたの攻めの勢いを奪うからです。Ezreal はあなたの脅威範囲から blink で抜け出せるため、Mystic Shot と Essence Flux で常に poke を狙ってきます。Ezreal は圧力で勝つタイプで、あなたの Blade Whirl を吐かせてから初めて full の burst を叩き込み、あなたを無防備にします。
レーン戦への影響
この守りの安全網により、あなたは消極的な姿勢を強いられ、安全な farm が難しくなります。Flair を使うために前に出るたびに、minion の隙間から Mystic Shot をもらう危険があります。trade は大きく偏っており、無理に戦おうとしても Ezreal は blink で下がるだけで、あなたは前に出た状態で counter-poke を受けて脆くなり、lane priority を失います。
立ち回り方
勝つための唯一の道は規律です。Ezreal の Arcane Shift が使える間は Wild Rush で仕掛けず、歩いて近づいて短い trade を狙ってください。Blade Whirl は、単発の通常攻撃にあわてて使うのではなく、Ezreal の Essence Flux と Mystic Shot の burst combo を防ぐためだけに温存してください。Ezreal が blink を無駄に使ったら、それこそが Inferno Trigger で all-in するまさに合図です。

Varus+1
Varus は Piercing Arrow と Hail of Arrows のレンジの優位を悪用してこの lane を支配し、あなたを低い体力のまま engage できない状態にします。ただし、Varus の安全は完全に ult にかかっています。Varus の主な防御手段は projectile なので、Blade Whirl で Chain of Corruption を防げば、Varus の唯一の自衛手段、つまり peel が完全に失われ、動けない Varus は Wild Rush による full の dive の格好の的になります。
Varusのビルド →
詳細を見る
理由
Varus は Piercing Arrow と Hail of Arrows のレンジの優位を悪用してこの lane を支配し、あなたを低い体力のまま engage できない状態にします。ただし、Varus の安全は完全に ult にかかっています。Varus の主な防御手段は projectile なので、Blade Whirl で Chain of Corruption を防げば、Varus の唯一の自衛手段、つまり peel が完全に失われ、動けない Varus は Wild Rush による full の dive の格好の的になります。
レーン戦への影響
Varus は Blighted Quiver のスタックを簡単に発動して wave を処理しながらあなたの体力を削るため、あなたは常にタワー下に押し込まれます。Living Vengeance の攻撃速度バフがある Varus に対して、通常攻撃での trade はできません。この圧力により、あなたは守りに回って序盤の priority を譲り、Varus の重要な ult が無駄撃ちされるか、止められる状態になるまさにその瞬間を待つことになります。
立ち回り方
Varus の通常の Piercing Arrow や Hail of Arrows の poke に Blade Whirl を無駄にしないでください。Varus の ult のためだけに温存する必要があります。動き続けて Varus の矢を避け、Varus が Chain of Corruption を撃つのを待ってください。そのアニメーションが見えた瞬間にバリアを発動して projectile を飲み込み、すぐに Wild Rush で距離を詰めます。続けて Flair で Daredevil Impulse を素早く貯め、Varus が後退する前に Inferno Trigger を放ってください。

Lucian+1
Lucian は短い小競り合いを支配します。Lightslinger と Piercing Light が、あなたの序盤の Flair の poke を burst で上回るからです。この matchup は危険な心理戦にかかっています。Lucian は通常の trade であなたの Blade Whirl を吐かせ、あなたの守りの円が cooldown に入るまで The Culling による大きな DPS を温存したがります。Blade Whirl で誘いに成功すれば、Lucian は弾を消される心配なく ult であなたを簡単に削れます。
Lucianのビルド →
詳細を見る
理由
Lucian は短い小競り合いを支配します。Lightslinger と Piercing Light が、あなたの序盤の Flair の poke を burst で上回るからです。この matchup は危険な心理戦にかかっています。Lucian は通常の trade であなたの Blade Whirl を吐かせ、あなたの守りの円が cooldown に入るまで The Culling による大きな DPS を温存したがります。Blade Whirl で誘いに成功すれば、Lucian は弾を消される心配なく ult であなたを簡単に削れます。
レーン戦への影響
Lucian の攻撃的な Relentless Pursuit により、Lucian は wave の位置取りを握り、あなたが Daredevil Impulse のスタイルを貯めようと前に出るたびに罰してきます。あなたは常にタワー下に押し込まれ、minion 越しの Piercing Light の直線攻撃で体力を削られ続けます。この圧力のせいで、安全に Wild Rush のリセットを探すことが難しくなり、Lucian に雪だるま式の kill を与えないために、守りに回って序盤の priority を譲ることになります。
立ち回り方
Lucian の Ardent Blaze や単純な二連打に、先走って Blade Whirl を無駄にしないでください。Lucian の ult に対抗するため、このツールを積極的に温存する必要があります。Lucian が The Culling をチャネリングしているのが見えたら、すぐに Blade Whirl を発動して連射を吸収してください。Lucian が ult なしで Relentless Pursuit を使って前にダッシュしてきた場合は、Flair で距離を取って farm し、Lucian の二連攻撃のパッシブを使い切ってから初めて Wild Rush で滑り込んでください。
その他のマッチアップ



スキル次第のマッチアップ
3このマッチアップは何よりもまず実行力の勝負であり、両者ともに優位を取れる現実的な手段を持っている。重要なスキルを一つ避けられるか、エンゲージを正しく読めるか、あるいはたった一つの位置取りのミスが、勝敗を分けることもある。マッチアップを理解し、行動すべき瞬間を見極める力がとりわけ重要になる。

Tristana±0
これは単一の projectile で勝敗が決まる、burst ダメージの完全な競争です。Tristana は Rapid Fire で Explosive Charge を最大までスタックさせ、あなたを粉砕することに頼っています。しかし、Samira には最適なツール、Blade Whirl があります。飛んでくる爆弾を防げば、Tristana の主力ダメージ源を消せて、Tristana は通常攻撃しかない無防備な状態になり、その間にあなたは自由に Daredevil Impulse を貯めて Inferno Trigger に到達できます。
Tristanaのビルド →
詳細を見る
理由
これは単一の projectile で勝敗が決まる、burst ダメージの完全な競争です。Tristana は Rapid Fire で Explosive Charge を最大までスタックさせ、あなたを粉砕することに頼っています。しかし、Samira には最適なツール、Blade Whirl があります。飛んでくる爆弾を防げば、Tristana の主力ダメージ源を消せて、Tristana は通常攻撃しかない無防備な状態になり、その間にあなたは自由に Daredevil Impulse を貯めて Inferno Trigger に到達できます。
レーン戦への影響
Tristana はパッシブの Draw a Bead によるレンジの優位で poke しようとし、爆発するパッシブが発動するにつれて自然に wave を push します。lane の主導権は、Explosive Charge が使える状態か cooldown 中かにかかっています。Tristana が無駄撃ちするか、あなたが防ぐかすれば、Tristana は守りに回るか Rocket Jump で逃げるしかなくなり、タワーへの圧力が完全に止まり、あなたが engage する priority を完全に握れます。
立ち回り方
Tristana が爆発系スキルの cooldown を持っている間は、Wild Rush で仕掛けないでください。代わりに Tristana を前に誘い出し、アニメーションを注意深く見てください。Tristana が Explosive Charge を撃ったのが見えた瞬間に、すぐ Blade Whirl を発動して、飛んでいる爆弾を壊してください。爆弾がなくなったら、すぐに Wild Rush でダッシュして入り、Flair で斬りつけて、Tristana に Buster Shot で押し返される前に Daredevil Impulse を Inferno Trigger まで素早く貯めてください。

Kai'Sa±0
この matchup は、projectile を無効化することを軸にした、純粋な反応速度の勝負です。Kai'Sa は、あなたを孤立させて Icathian Rain の burst を最大化し、Void Seeker を当てて Second Skin をスタックさせることに頼っています。しかし、反応して使った Blade Whirl なら、これら両方の主力ダメージ源を同時に飲み込めます。この burst を防げば Kai'Sa の決闘力を奪えますが、タイミングを外すと、Kai'Sa の高 DPS のパッシブによる処刑にまったく無防備になります。
Kai'Saのビルド →
詳細を見る
理由
この matchup は、projectile を無効化することを軸にした、純粋な反応速度の勝負です。Kai'Sa は、あなたを孤立させて Icathian Rain の burst を最大化し、Void Seeker を当てて Second Skin をスタックさせることに頼っています。しかし、反応して使った Blade Whirl なら、これら両方の主力ダメージ源を同時に飲み込めます。この burst を防げば Kai'Sa の決闘力を奪えますが、タイミングを外すと、Kai'Sa の高 DPS のパッシブによる処刑にまったく無防備になります。
レーン戦への影響
trade のペース全体が、あなたの守りの回転が使えるかどうかにかかっています。Blade Whirl が使える間、Kai'Sa は守りに回らざるを得ず、wave の主導権を譲るため、あなたは安全に farm したり、Flair でスタイルスタックを貯めたりできます。この守りのツールを無駄にすると、Kai'Sa はすぐに Supercharge で攻撃的に位置取りし、あなたを minion から孤立させ、Inferno Trigger に届く前にタワー下で致命的な trade を強いてきます。
立ち回り方
Kai'Sa が Void Seeker をすでに無駄にしたのを確認するまでは、Wild Rush で trade を仕掛けないでください。Blade Whirl が cooldown 中の場合は、Icathian Rain のダメージを薄めるために minion wave の近くに立ってください。Kai'Sa が Killer Instinct で距離を詰めようとしてきたら、その場で踏みとどまり、すぐに Blade Whirl で飛んでくるミサイルの連射を吸収し、それから素早い Flair と Wild Rush の combo で反撃して Daredevil Impulse をスタックさせ、trade をひっくり返してください。
その他のマッチアップ

有利なマッチアップ
11これらのチャンピオンは、こちらの主要な強みに効果的に対応するのが難しく、より自由に対面を組み立てることができる。プレッシャーをかけて有利な交換を引き出す手段は複数あることが多い。相手が態勢を立て直す時間を与えるのではなく、この優位を活かして主導権を握ろう。

Jhin−1
この matchup はあなたに大きく有利です。Blade Whirl が Jhin の主な burst ツールを完全に無力化するからです。処刑に特化した 4 発目の Whisper の弾や、長射程の Curtain Call の弾を、守りのバリアでタイミングよく飲み込めば、Jhin のクリティカルダメージを奪えます。これらの重要なスパイクがなければ、Jhin はあなたの素の DPS に太刀打ちできず、入念に振り付けられた reload ベースのリズムが、あなたが踏み込むときに大きな弱点になります。
Jhinのビルド →
詳細を見る
理由
この matchup はあなたに大きく有利です。Blade Whirl が Jhin の主な burst ツールを完全に無力化するからです。処刑に特化した 4 発目の Whisper の弾や、長射程の Curtain Call の弾を、守りのバリアでタイミングよく飲み込めば、Jhin のクリティカルダメージを奪えます。これらの重要なスパイクがなければ、Jhin はあなたの素の DPS に太刀打ちできず、入念に振り付けられた reload ベースのリズムが、あなたが踏み込むときに大きな弱点になります。
レーン戦への影響
lane では、Jhin の reload のタイミングを突くことで trade のリズムを握れます。Jhin の Whisper の残弾が 0 になると、Jhin は完全に無防備になり、歩いて近づいて Flair を当て、minion wave から Jhin を押し出せます。この圧力のせいで、Jhin は Dancing Grenade を使った楽な wave 処理の setup ができず、あなたは簡単に wave を crash させて priority を確保したり、support と組んで壊滅的な dive を仕掛けたりできます。
立ち回り方
Blade Whirl は、Jhin の 4 発目の弾のため、または、使われるとあなたを root する Deadly Flourish を防ぐためだけに、常に温存してください。Jhin が Curtain Call をチャネリングしてその場に固定されているときは、逃げずに、minion か Jhin 自身を通り抜けるように Wild Rush で距離を詰め、Flair と Daredevil Impulse でスタイルポイントを貯めて、Jhin の目の前で Inferno Trigger を素早く発動し、同時に Jhin の ult の弾も破壊してください。

Jinx−1
この matchup では、Samira の爆発的な burst が Jinx の機動力のなさを簡単に圧倒するため、Samira が支配します。ただし、全体の展開は Jinx の Flame Chompers にかかっています。Jinx があなたの Wild Rush を読んで、Jinx 自身や support の足元に罠を置くと、あなたのダッシュは即座に中断されます。これにより combo が空中で止まり、Daredevil Impulse のスタックを持たないまま取り残され、Inferno Trigger を発動する前に撃ち殺されてしまいます。
Jinxのビルド →
詳細を見る
理由
この matchup では、Samira の爆発的な burst が Jinx の機動力のなさを簡単に圧倒するため、Samira が支配します。ただし、全体の展開は Jinx の Flame Chompers にかかっています。Jinx があなたの Wild Rush を読んで、Jinx 自身や support の足元に罠を置くと、あなたのダッシュは即座に中断されます。これにより combo が空中で止まり、Daredevil Impulse のスタックを持たないまま取り残され、Inferno Trigger を発動する前に撃ち殺されてしまいます。
レーン戦への影響
あなたに即座に kill される脅威があるため、Jinx は Switcheroo! のロケット形態を使って遠くから farm せざるを得ず、mana を消費します。これにより、あなたは自然と wave を crash させて dive を狙う priority を得られます。ただし、うかつに Flame Chompers に突っ込むと kill の圧力をすべて失い、Jinx はカウンターで kill を取って Get Excited! を発動し、プレートを取り、あなたの手に負えないところまで dragon 側の lane を雪だるま式に有利にしてしまいます。
立ち回り方
リードを確保するには、Flame Chompers が使える間は、まっすぐ engage しないでください。代わりに、Jinx を誘って Zap! を撃たせて Blade Whirl で消すか、先に support に Jinx の罠を守りのために使わせてください。chompers が cooldown に入ったら、すぐに Wild Rush を斜めに使って Jinx の直線の視線を避け、近距離の Flair で Daredevil Impulse を素早くスタックさせてから、Inferno Trigger を放って、Jinx が逃げる前に仕留めてください。

Miss Fortune−1
この matchup はあなたに大きく有利です。Blade Whirl が Miss Fortune の teamfight での存在感全体に対する究極の counter になるからです。Miss Fortune が Bullet Time をチャネリングした瞬間に Blade Whirl を一度押せば、Miss Fortune の扇状の弾幕全体が消え、代名詞のスペルがまったく役に立たなくなります。あなたの守りの回転が使える間は Miss Fortune が安全に ult を使えないため、この関係で圧力は完全に Miss Fortune 側に移ります。
Miss Fortuneのビルド →
詳細を見る
理由
この matchup はあなたに大きく有利です。Blade Whirl が Miss Fortune の teamfight での存在感全体に対する究極の counter になるからです。Miss Fortune が Bullet Time をチャネリングした瞬間に Blade Whirl を一度押せば、Miss Fortune の扇状の弾幕全体が消え、代名詞のスペルがまったく役に立たなくなります。あなたの守りの回転が使える間は Miss Fortune が安全に ult を使えないため、この関係で圧力は完全に Miss Fortune 側に移ります。
レーン戦への影響
lane では、この関係により Miss Fortune は、あなたのタワー下や drake fight で Bullet Time を使ってあなたを zone することができません。Miss Fortune は短い Double Up の跳弾や Make It Rain での poke に頼るしかなくなります。あなたは Miss Fortune の ult を恐れる必要がないので、積極的に wave を push し、Wild Rush で直接 engage を狙えます。守りの回転を温存している限り、Miss Fortune の ult では窮地を脱せないからです。
立ち回り方
Miss Fortune の通常の Double Up の跳弾や Make It Rain のスローを防ぐために Blade Whirl を無駄にしないでください。この重要な cooldown は、必ず Bullet Time のためだけに温存してください。Miss Fortune が ult を撃つのをためらっている場合は、Flair と通常攻撃で Daredevil Impulse のスタイルポイントを貯めてから、Wild Rush で dive してください。Miss Fortune に先にあなたのシールドを誘われてしまった場合は、minion を通り抜けるように Wild Rush を使ってすぐに離脱し、Miss Fortune の ult の大きな扇状範囲から逃れてください。

Akshan−1
この matchup はあなたに大きく有利です。あなたの守りの能力が Akshan の攻撃力を完全に封じるからです。Akshan の主な burst と機動力は Heroic Swing から生まれ、長射程の処刑は Comeuppance に頼っています。どちらのスキルも別々の projectile を放つため、あなたの Blade Whirl はそのすべての弾を吸収できます。Akshan の swing のダメージと ult を無力化することで、Akshan から kill を取る圧力を奪い、正面からの衝突のすべてに勝てます。
Akshanのビルド →
詳細を見る
理由
この matchup はあなたに大きく有利です。あなたの守りの能力が Akshan の攻撃力を完全に封じるからです。Akshan の主な burst と機動力は Heroic Swing から生まれ、長射程の処刑は Comeuppance に頼っています。どちらのスキルも別々の projectile を放つため、あなたの Blade Whirl はそのすべての弾を吸収できます。Akshan の swing のダメージと ult を無力化することで、Akshan から kill を取る圧力を奪い、正面からの衝突のすべてに勝てます。
レーン戦への影響
laning phase では、Akshan は消極的に立ち回らざるを得ません。あなたは物理ダメージを簡単に防いで Wild Rush で逆に engage できるため、Akshan は trade や wave の処理に Heroic Swing を積極的に使えません。これにより、あなたは wave のペースを握り、安全に Daredevil Impulse のパッシブをスタックさせられ、Akshan が roam して Scoundrels を狩るために普段頼っている序盤の lane priority を奪えます。
立ち回り方
Akshan の Avengerang の poke に Blade Whirl を無駄にしないでください。価値の高い場面のためだけに温存してください。Akshan が Heroic Swing のためにフックを壁に付けたら、円を発動して Akshan のダメージを消し、すぐに Wild Rush でダッシュして入ってください。Akshan が Comeuppance をチャネリングしている場合は、射線の真正面に立って回転してください。Akshan の重要な cooldown を防いだら、Flair の combo を full で決めて Inferno Trigger を解放し、Akshan を仕留めてください。

Sivir−1
この matchup はあなたに大きく有利です。Blade Whirl が Sivir の主な脅威の Boomerang Blade を完全に無効化するからです。Sivir の巨大な projectile の行きと帰りの両方を消すことで、Sivir の主な burst ダメージ源と waveclear を封じられます。このスペルの圧力がなければ、Sivir は離れた位置から安全に Fleet of Foot の移動速度をスタックできず、あなたの積極的なダッシュ範囲にとても脆くなります。
Sivirのビルド →
詳細を見る
理由
この matchup はあなたに大きく有利です。Blade Whirl が Sivir の主な脅威の Boomerang Blade を完全に無効化するからです。Sivir の巨大な projectile の行きと帰りの両方を消すことで、Sivir の主な burst ダメージ源と waveclear を封じられます。このスペルの圧力がなければ、Sivir は離れた位置から安全に Fleet of Foot の移動速度をスタックできず、あなたの積極的なダッシュ範囲にとても脆くなります。
レーン戦への影響
Sivir の主な処理ツールを消せるため、Sivir は代名詞の wave 圧力を失います。Sivir は push のために Ricochet の跳弾だけに頼らざるを得ず、wave により近づく必要があります。これで Sivir はあなたの Wild Rush の射程内に入ります。Sivir が Boomerang Blade で trade しようとしても、mana とダメージを大きく失うだけで、あなたは好きなように freeze や slow-push ができます。
立ち回り方
小さな poke に Blade Whirl を無駄にせず、Boomerang Blade の発動アニメーションのためだけに温存してください。Sivir の blade を壊したら、すぐに Wild Rush で engage して、Sivir にあわてて Spell Shield を使わせてください。combo を full で決める前に、素早い Flair で Sivir のシールドを簡単に割れます。Sivir がタワー下で極端に安全に立ち回る場合は、wave を push したまま Flair で体力を削り、簡単な dive に備えてスタイルポイントを温存してください。

Kog'Maw−2
この matchup はあなたに大きく有利に傾きます。Kog'Maw は自衛と、あなたのアーマーを削るために skillshot に頼っているからです。Blade Whirl を正しいタイミングで使えば、Caustic Spittle と Void Ooze のスローを完全に消せます。あなたを寄せつけない、または耐久を下げるこれらのツールがなければ、Kog'Maw は機動力がないため、あなたが Wild Rush を発動して距離を詰めたときの格好の的になります。
Kog'Mawのビルド →
詳細を見る
理由
この matchup はあなたに大きく有利に傾きます。Kog'Maw は自衛と、あなたのアーマーを削るために skillshot に頼っているからです。Blade Whirl を正しいタイミングで使えば、Caustic Spittle と Void Ooze のスローを完全に消せます。あなたを寄せつけない、または耐久を下げるこれらのツールがなければ、Kog'Maw は機動力がないため、あなたが Wild Rush を発動して距離を詰めたときの格好の的になります。
レーン戦への影響
Kog'Maw はあなたの突然の engage を恐れるため、非常に消極的に立ち回り、Bio-Arcane Barrage の最大射程から farm せざるを得ません。これで、あなたは自分のタワー付近で wave の位置を握れます。Kog'Maw が CS を取りに歩いて近づいたり、Living Artillery で poke しようとしたりした場合は、簡単に zone でき、大きなゴールドリードを築きつつ、Kog'Maw に river を越えることを怖がらせ続けられます。
立ち回り方
minion wave と平行に積極的な位置を取り、Kog'Maw に farm するか守りの位置取りをするかの選択を迫ってください。Kog'Maw の通常の Bio-Arcane Barrage の通常攻撃を防ぐのに Blade Whirl を使わず、Caustic Spittle か Void Ooze を撃ってきたときのためだけに温存してください。それらの projectile をバリアで飲み込んだら、すぐに minion を通り抜けるか Kog'Maw に直接 Wild Rush を使って、Daredevil Impulse をスタックさせ、Inferno Trigger を放ってください。失敗した場合は、Kog'Maw のパッシブの Icathian Surprise の爆発を避けるため、minion のラインの後ろまで下がってください。

Twitch−2
この matchup は、ult が解放されるとあなたに大きく有利に傾きます。Twitch は安全な距離から戦闘を貫通するために Spray and Pray に頼っていますが、あなたの Blade Whirl は Twitch の ult の弾をすべて完全に消せます。Twitch の主な teamfight ダメージ源を無力化することでレンジの優位が失われ、Twitch は壊滅的な Wild Rush のダッシュと簡単な Inferno Trigger の setup にさらされ、実戦では Twitch の Ambush はまったく役に立ちません。
Twitchのビルド →
詳細を見る
理由
この matchup は、ult が解放されるとあなたに大きく有利に傾きます。Twitch は安全な距離から戦闘を貫通するために Spray and Pray に頼っていますが、あなたの Blade Whirl は Twitch の ult の弾をすべて完全に消せます。Twitch の主な teamfight ダメージ源を無力化することでレンジの優位が失われ、Twitch は壊滅的な Wild Rush のダッシュと簡単な Inferno Trigger の setup にさらされ、実戦では Twitch の Ambush はまったく役に立ちません。
レーン戦への影響
あなたは最初の burst に反応して防げるため、Twitch は Ambush で奇襲することが簡単にはできません。これにより、Twitch は minion の後ろで消極的に立ち回らざるを得ず、あなたは wave をゆっくり push し、好きなタイミングで crash させられます。Twitch は Spray and Pray で安全に trade できないため、recall のタイミングを決めるのはあなたで、dragon pit を完全に支配し、あなたが dive の機会を探している間、Twitch はタワー下でゴールドを失い続けます。
立ち回り方
Blade Whirl で仕掛けないでください。代わりに、少し前に出て Twitch を誘い、Spray and Pray を発動させ、すぐに守りのバリアを展開して貫通する弾を吸収してください。Twitch の ult が無駄になった瞬間に、Deadly Venom をスタックされる前に距離を詰めるため、Wild Rush から始まる Daredevil Impulse の combo を素早く決めてください。ブロックのタイミングを誤った場合は、Twitch の Contaminate に仕留められないよう、minion を通り抜ける守りのダッシュで離脱してください。

Ashe−2
この lane はあなたが主導権を握れます。Blade Whirl が Ashe の ult を完全に無力化するからです。Ashe が Enchanted Crystal Arrow で engage や自衛をしようとしても、Ashe の巨大な projectile を即座に消せます。この stun がなければ、Ashe にはあなたを止める強力な CC が一切ありません。Ashe が矢をあなたのバリアに無駄撃ちした瞬間、Ashe はあなたの高 burst の Wild Rush による all-in に対して完全に無防備です。
Asheのビルド →
詳細を見る
理由
この lane はあなたが主導権を握れます。Blade Whirl が Ashe の ult を完全に無力化するからです。Ashe が Enchanted Crystal Arrow で engage や自衛をしようとしても、Ashe の巨大な projectile を即座に消せます。この stun がなければ、Ashe にはあなたを止める強力な CC が一切ありません。Ashe が矢をあなたのバリアに無駄撃ちした瞬間、Ashe はあなたの高 burst の Wild Rush による all-in に対して完全に無防備です。
レーン戦への影響
Ashe の lane 圧力は、Volley で体力を削り、Frost Shot で減速させることに頼っています。しかし、あなたがレベル 5 に到達すると、Blade Whirl の脅威により Ashe は極めて安全に立ち回らざるを得なくなります。Ashe は、突然の engage を受ける危険を冒さずに、Ranger's Focus をスタックさせるために歩いて近づくことができません。この恐怖のおかげで、あなたは wave の priority を握り、Ashe を minion から zone したり、wave を crash させて dive の setup をしたりできます。
立ち回り方
積極的な位置を取って Volley を誘い出してください。ただし、Ashe の通常の poke を防ぐために Blade Whirl を無駄にしないでください。守りの回転は Enchanted Crystal Arrow のためだけに温存してください。Ashe の ult を消したら、すぐに Ashe を通り抜けるように Wild Rush を発動し、Flair と通常攻撃で Daredevil Impulse のスタイルを素早くスタックさせ、Inferno Trigger を放ってください。判断を誤って Blade Whirl を早く使ってしまった場合は、長い cooldown が戻るまで、すぐにタワーの射程まで下がってください。
その他のマッチアップ



Samira対策アイテム
これらのアイテムを購入すると、このチャンピオンの影響力を抑えられます。

| マッチアップ | 判定 | 有利度 | 勝率 | ピック率 |
|---|---|---|---|---|
| Draven | ハードカウンター | +2 | 47.2% | 5.4% |
| Smolder | 不利なマッチアップ | +1 | 52.6% | 9.1% |
| Varus | 不利なマッチアップ | +1 | 51.1% | 6.2% |
| Xayah | 不利なマッチアップ | +1 | 50.9% | 5.2% |
| Ezreal | 不利なマッチアップ | +1 | 50.4% | 7.8% |
| Kalista | 不利なマッチアップ | +1 | 50.4% | 7.3% |
| Caitlyn | 不利なマッチアップ | +1 | 49.7% | 15.7% |
| Yunara | 不利なマッチアップ | +1 | 49.5% | 6.5% |
| Vayne | 不利なマッチアップ | +1 | 48.7% | 6.5% |
| Lucian | 不利なマッチアップ | +1 | 47.3% | 3.1% |
| Nilah | 不利なマッチアップ | +1 | — | — |
| Kai'Sa | スキル次第のマッチアップ | ±0 | 50.1% | 16.3% |
| Zeri | スキル次第のマッチアップ | ±0 | 49.0% | 1.2% |
| Tristana | スキル次第のマッチアップ | ±0 | 48.6% | 11.4% |
| Jinx | 有利なマッチアップ | −1 | 50.4% | 13.3% |
| Jhin | 有利なマッチアップ | −1 | 49.5% | 15.9% |
| Sivir | 有利なマッチアップ | −1 | 49.4% | 3.9% |
| Miss Fortune | 有利なマッチアップ | −1 | 48.8% | 12.8% |
| Akshan | 有利なマッチアップ | −1 | — | — |
| Corki | 有利なマッチアップ | −1 | — | — |
| Senna | 有利なマッチアップ | −1 | — | — |
| Ziggs | 有利なマッチアップ | −1 | — | — |
| Ashe | 有利なマッチアップ | −2 | 52.9% | 9.7% |
| Kog'Maw | 有利なマッチアップ | −2 | 52.9% | 2.7% |
| Twitch | 有利なマッチアップ | −2 | 49.9% | 9.9% |
有利度:Wild Rift Coreの公式判定(−3〜+3)で、各行に記載されたチャンピオンの視点から見た値です。勝率とピック率:このロールにおける相手チャンピオン自身の数値 — Wild Rift CN · Challenger、Patch 7.3c。直接対決の勝率ではありません。