Eylül 2026 · Patch 7.2d
Bruiser · MID · TOP

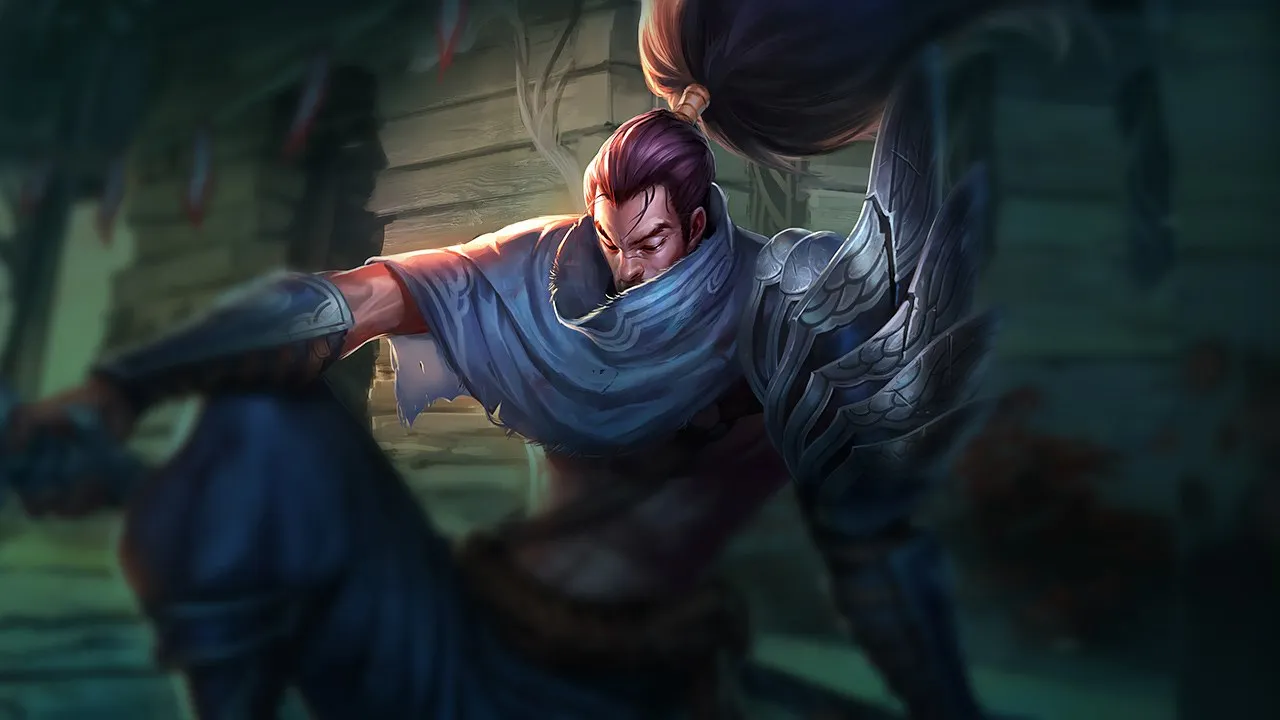
Yasuo Wild Rift Counter Rehberi

Yasuo, wind wall yeteneğini aşan magic damage kompozisyonlarına karşı savunmasızdır. Uzun menzilli poke veya anlık CC profilleri, onun dash'lerinden önce etkisini azaltır. Eşyalardan önceki early game kırılganlığı, onun birincil zayıflık penceresidir.

★ MID · TOP Tier S
HASAR
UTIL
TANK
DIFF
Win 48.4% #76 · ↓0pt
Pick 10.6% #3
Ban 12.5% #20

Yasuo Wild Rift Counter Rehberi ★ Counter Sheet

Hard Counter

2

Bu şampiyonlar, seninkini doğrudan geride bırakan bir build ve oynanış tarzına sahip, bu da lane kontrolünü ve farmı son derece zorlaştırabilir. Yetenekleri temel güçlerini etkisiz hale getirebilir ya da her zamanki planını oynamaya çalıştığın anda seni cezalandırabilir. Bu matchuplarda amaç genellikle hataları en aza indirmek ve doğrudan çatışmanın dışında çözümler bulmaktır.

Malphite

Malphite

attack_speed_slowhard_counter This matchup is an uphill battle because Malphite's armor stacking directly counters your physical damage. When you dash in, his Ground Slam crushes your attack speed, which completely halts your DPS and slows down your Steel Tempest tornado generation. Furthermore, your Wind Wall is entirely useless against his ultimate, Unstoppable Force, leaving you completely vulnerable to his heavy airborne engage. Detayları gör
Malphite

Neden

This matchup is an uphill battle because Malphite's armor stacking directly counters your physical damage. When you dash in, his Ground Slam crushes your attack speed, which completely halts your DPS and slows down your Steel Tempest tornado generation. Furthermore, your Wind Wall is entirely useless against his ultimate, Unstoppable Force, leaving you completely vulnerable to his heavy airborne engage.

Lane etkisi

You will struggle to maintain wave control as Malphite uses Granite Shield to absorb your poke and Ground Slam to punish your melee farm. Once he reaches level five, his Unstoppable Force dictates the lane, forcing you to play under your turret. You cannot trade safely, meaning you lose priority and are forced to watch him assist his jungler while you struggle to farm.

Nasıl oynanır

To survive, you must play around Malphite's ability windows. Never commit to extended trades using Sweeping Blade while his Ground Slam is available; instead, bait this attack-speed cripple out, step back, and only strike during its brief cooldown. Keep his Granite Shield down with quick Steel Tempest pokes. If he misses Unstoppable Force or uses it elsewhere, that is your only real window to aggressively look for a Last Breath setup.

Tam profil →
Vex

Vex

anti_dashshield_management Every time you use Sweeping Blade through minions, you trigger Vex's Doom 'n Gloom, marking yourself with Gloom. This makes you incredibly vulnerable because Vex can immediately detonate this mark with Mistral Bolt or Looming Darkness. Worse, if you dash directly onto her, she will interrupt your engage instantly using a Doom-infused Personal Space, fearing you mid-dash while gaining a massive shield that absorbs your trade potential. Detayları gör
Vex

Neden

Every time you use Sweeping Blade through minions, you trigger Vex's Doom 'n Gloom, marking yourself with Gloom. This makes you incredibly vulnerable because Vex can immediately detonate this mark with Mistral Bolt or Looming Darkness. Worse, if you dash directly onto her, she will interrupt your engage instantly using a Doom-infused Personal Space, fearing you mid-dash while gaining a massive shield that absorbs your trade potential.

Lane etkisi

You cannot freely use your mobility to secure priority, meaning Vex safely shoves waves from distance. Your health bar gets chipped down whenever you attempt to stack Steel Tempest. Every aggressive Sweeping Blade trade ends in a negative HP transition, forcing you to play under tower, lose early plates, and yield mid-lane priority. This prevents you from securing scuttle crabs or helping your jungler contest early skirmishes.

Nasıl oynanır

To survive, you must track the red bar under Vex's health that indicates Doom is fully charged. Never use Sweeping Blade forward while her fear is active. Instead, bait out Mistral Bolt or Looming Darkness, using Wind Wall to block her projectiles if you get caught. Only trade when her Doom passive is on cooldown. If she holds her fear indefinitely, concede priority, farm safely with Steel Tempest's tornado, and wait for a sidelane setup.

Tam profil →

Dezavantajlı

7

Bu şampiyonlar, matchup'ı tamamen oynanmaz hale getirmeden genellikle çatışmada avantaj sağlayan araçlara sahiptir. Daha fazla menzilleri, senin saldırılarını daha iyi karşılama kapasiteleri veya engage'lerine karşılık verecek daha fazla yolları olabilir. Yaklaşımını buna göre uyarlaman ve dövüşü kabul edeceğin anları dikkatle seçmen gerekir.

Karma

Karma

anti_mobilityshield_breaker Karma controls this lane because her ranged poke constantly threatens you. While your Wind Wall completely negates her Inner Flame projectiles, she has an unblockable answer when you dash in. If you close the distance, she can immediately attach her Focused Resolve tether. Since Wind Wall cannot break this link, she easily roots you, shields herself with Inspire, and walks away completely unscathed while your defensive tool is wasted. Detayları gör
Karma

Neden

Karma controls this lane because her ranged poke constantly threatens you. While your Wind Wall completely negates her Inner Flame projectiles, she has an unblockable answer when you dash in. If you close the distance, she can immediately attach her Focused Resolve tether. Since Wind Wall cannot break this link, she easily roots you, shields herself with Inspire, and walks away completely unscathed while your defensive tool is wasted.

Lane etkisi

This dynamic forces you into a passive posture under your own turret early on. Karma constantly shoves the wave using Mantra-infused Inner Flame while chipping away at your Way of the Wanderer shield. You will find yourself forced to sacrifice minion gold to preserve your health, meaning you cannot easily roam to help your jungler. If you overextend without Wind Wall available, her tether setup guarantees easy ganks for her team.

Nasıl oynanır

To survive, you must bait out her Focused Resolve before committing to any extended trade. Use Sweeping Blade on minions to dance around her skillshots, but only dash directly onto her after her tether is on cooldown. If she links you, immediately Sweeping Blade away to break the range before the root triggers. Always stack your Steel Tempest twice to threaten her with a tornado, forcing her to play defensively and respect your Last Breath potential.

Tam profil →
Lissandra

Lissandra

anti_mobilityshield_management Lissandra holds the keys to Yasuo's aggression. While Yasuo can use Wind Wall to negate her Ice Shard poke and intercept the claw of Glacial Path, he has no protection against her instant self-centered Ring of Frost or her point-and-click Frozen Tomb. This makes diving her or engaging blindly extremely risky, as she can lock him down instantly without having to aim projectiles. Detayları gör
Lissandra

Neden

Lissandra holds the keys to Yasuo's aggression. While Yasuo can use Wind Wall to negate her Ice Shard poke and intercept the claw of Glacial Path, he has no protection against her instant self-centered Ring of Frost or her point-and-click Frozen Tomb. This makes diving her or engaging blindly extremely risky, as she can lock him down instantly without having to aim projectiles.

Lane etkisi

You cannot easily crash waves or force trades when her defensive tools are up. Every time you dash forward with Sweeping Blade, you risk getting rooted by Ring of Frost under her tower. If you get caught too close to her turret post-level 5, Frozen Tomb sets up effortless ganks, forcing you to play defensively and concede priority unless she wastes her lockdown tools.

Nasıl oynanır

Bait her crowd control before committing your mobility. Stand slightly outside her wave to force her to choose between shoving with Ice Shard or poking you. Only use Sweeping Blade aggressively if her Ring of Frost is on cooldown. If she advances with Glacial Path, immediately drop Wind Wall to block her teleportation path and stop her follow-up. When Frozen Tomb is available, never dash beyond the midpoint of the lane without a fully charged Steel Tempest ready to zone her.

Tam profil →
Yone

Yone

melee_duelknockup_clash This matchup is a lethal dance of dashes where Yone holds the advantage. Way of the Hunter allows Yone to shred through your Way of the Wanderer shield with mixed damage. The lane hinges entirely on how you react to his third Mortal Steel. If you get hit by his flying whirlwind, Yone can instantly chain Fate Sealed, leaving you no room to escape his full burst. Detayları gör
Yone

Neden

This matchup is a lethal dance of dashes where Yone holds the advantage. Way of the Hunter allows Yone to shred through your Way of the Wanderer shield with mixed damage. The lane hinges entirely on how you react to his third Mortal Steel. If you get hit by his flying whirlwind, Yone can instantly chain Fate Sealed, leaving you no room to escape his full burst.

Lane etkisi

Yone dictates the lane rhythm using Spirit Cleave to absorb your Steel Tempest pokes while trading. When he activates Soul Unbound, his threat range expands drastically, forcing you to play defensively near your turret. This constant pressure limits your wave control, as you cannot safely stand near the minion wave to stack your own Steel Tempest without risking a lethal trade, conceding early priority to Yone.

Nasıl oynanır

To survive, you must manage your minion wave to always keep a dash target behind you. The moment Yone gains his second stack of Mortal Steel, prepare your Sweeping Blade to dash laterally through a minion, dodging his tornado. If you misplay and get caught without a dash target, you must deploy Wind Wall instantly to block the projectile. Only trade when his spirit returns during Soul Unbound, punishing his retreat.

Tam profil →

Diğer eşleşmeler

Skill Matchup

3

Bu eşleşmeler her şeyden önce yürütme düellosudur: her iki şampiyon da avantaj elde etmek için gerçek yollara sahiptir. Kaçırılan önemli bir yetenek, doğru öngörülen bir engage ya da tek bir pozisyon hatası düelloyu bir tarafa çevirebilir. Matchup'ı bilmek ve doğru anları tanımak burada özellikle önemlidir.

Akali

Akali

shroud_playmobility This duel is dictated by how you deploy your Wind Wall against Akali's direct threats. While your Wind Wall can completely negate her Five Point Strike poke and prevent her from marking you with Shuriken Flip, you lose all offensive momentum when she retreats into Twilight Shroud. Since you cannot target her with auto-attacks or Sweeping Blade inside her smoke, the lane remains a pure test of baiting her stealth. Detayları gör
Akali

Neden

This duel is dictated by how you deploy your Wind Wall against Akali's direct threats. While your Wind Wall can completely negate her Five Point Strike poke and prevent her from marking you with Shuriken Flip, you lose all offensive momentum when she retreats into Twilight Shroud. Since you cannot target her with auto-attacks or Sweeping Blade inside her smoke, the lane remains a pure test of baiting her stealth.

Lane etkisi

Health bars swing wildly depending on Shuriken Flip landing. If Akali misses her tag because you blocked it or dodged with Sweeping Blade, she cannot dive you under tower or trigger her passive Assassin's Mark. However, wasting your Wind Wall early leaves you completely vulnerable to her Five Point Strike harass, forcing you into an early recall or giving up priority to her superior roaming potential.

Nasıl oynanır

Never cast Wind Wall preemptively; hold it specifically to react to her Shuriken Flip projectile or her Five Point Strike burst. When she drops Twilight Shroud, immediately disengage using Sweeping Blade on a minion to dash backward. Do not attempt to stack Steel Tempest or force a trade inside her zone of invisibility. Wait out the smoke, then re-engage with your tornado ready to set up Last Breath.

Tam profil →
Aurora

Aurora

wind_wallskirmish The matchup revolves around Yasuo's ability to deny Aurora's primary trading tool, Twofold Hex. Both the initial forward projectile and the subsequent recall sweep can be entirely deleted by a well-timed Wind Wall. Since Aurora relies heavily on stacking Spirit Abjuration through her Twofold Hex hits to trigger her healing and bonus magic damage, blocking this core spell completely cripples her offensive threat and leaves her vulnerable to counter-engages. Detayları gör
Aurora

Neden

The matchup revolves around Yasuo's ability to deny Aurora's primary trading tool, Twofold Hex. Both the initial forward projectile and the subsequent recall sweep can be entirely deleted by a well-timed Wind Wall. Since Aurora relies heavily on stacking Spirit Abjuration through her Twofold Hex hits to trigger her healing and bonus magic damage, blocking this core spell completely cripples her offensive threat and leaves her vulnerable to counter-engages.

Lane etkisi

When Wind Wall is active, Yasuo dictates lane pressure, forcing Aurora to play defensively with Across the Veil or concede minion priority. However, wasting Wind Wall allows Aurora to freely pop Way of the Wanderer from range and setup a dive using Between Worlds. The entire wave dynamic swings on this single cooldown; without it, Yasuo gets zoned, but with it, he can safely stack Steel Tempest.

Nasıl oynanır

Never cast Wind Wall preemptively. Wait for the animation of Twofold Hex, or save it to block the return recast if you get hit by the first half. Use Sweeping Blade through minions to dodge her E, The Weirding, which knocks her back and slows you. If Aurora traps you inside Between Worlds, do not panic-dash into the borders; instead, hold your Steel Tempest tornado to disrupt her teleports and look for a Last Breath setup to lock her down mid-air.

Tam profil →
Irelia

Irelia

projectile_blockingextended_trades This volatile matchup hinges entirely on how you employ Wind Wall to intercept Irelia's setup tools. Both Flawless Duet and Vanguard's Edge are blockable projectiles; neutralizing either denies her the marks required to reset Bladesurge. Without these marks, she cannot easily stack Ionian Fervor or dance through the minion wave, stripping away her mobility and burst potential while leaving her exposed to your counter-engage. Detayları gör
Irelia

Neden

This volatile matchup hinges entirely on how you employ Wind Wall to intercept Irelia's setup tools. Both Flawless Duet and Vanguard's Edge are blockable projectiles; neutralizing either denies her the marks required to reset Bladesurge. Without these marks, she cannot easily stack Ionian Fervor or dance through the minion wave, stripping away her mobility and burst potential while leaving her exposed to your counter-engage.

Lane etkisi

Minion waves become a highly contested combat zone where both of you seek mobility. Irelia will constantly prep low-health minions for Bladesurge, while you must stack Steel Tempest. If you waste Wind Wall, she will instantly trigger Vanguard's Edge to lock you down under threat of death. Conversely, holding your wall forces her to play defensively, preventing her from securing easy priority or executing dives.

Nasıl oynanır

Never cast Wind Wall preemptively; hold it specifically for the second blade of Flawless Duet or the initial cast of Vanguard's Edge. If she starts channeling Defiant Dance, do not waste your third Steel Tempest tornado, as she will easily absorb the damage. Instead, use Sweeping Blade to dash through her wave to dodge her stun if your wall is on cooldown, then immediately unleash Last Breath once she is airborne.

Tam profil →

Avantajlı

36

Bu şampiyonlar genellikle senin temel güçlerine etkili şekilde karşılık veremez, bu da çatışmaya daha fazla özgürlükle yaklaşmanı sağlar. Onları baskı altına almak ve lehine dönen trade'ler zorlamak için genellikle birden fazla yolun vardır. Onlara rahat bir pozisyona dönme fırsatı vermek yerine, bu avantajı kendi temponu dayatmak için kullan.

Aurelion Sol

Aurelion Sol

wind_wallmelee_dive This matchup is heavily skewed in your favor because Wind Wall completely neutralizes Aurelion Sol's primary tools. When he attempts to zone you or clear waves with Singularity, your wall deletes the projectile placement entirely. More importantly, his main DPS tool, Breath of Light, is completely blocked by your wind barrier, leaving him defenseless and unable to stack Cosmic Creator while you freely gap-close. Detayları gör
Aurelion Sol

Neden

This matchup is heavily skewed in your favor because Wind Wall completely neutralizes Aurelion Sol's primary tools. When he attempts to zone you or clear waves with Singularity, your wall deletes the projectile placement entirely. More importantly, his main DPS tool, Breath of Light, is completely blocked by your wind barrier, leaving him defenseless and unable to stack Cosmic Creator while you freely gap-close.

Lane etkisi

Aurelion Sol is forced into a passive stance, unable to safely channel Breath of Light to secure last hits or collect Stardust. You easily dictate the wave's position using Sweeping Blade to dash through minions, forcing him under tower where his weak early waveclear hurts him. Denied his scaling passive, his map rotations via Astral Flight are delayed, giving you free priority to roam.

Nasıl oynanır

Position yourself aggressively near his caster minions, ready to react. Never waste Wind Wall defensively against his basic attacks; hold it specifically for the moment he locks himself in place to channel Breath of Light or drops Singularity. Once you block his channel, immediately use Sweeping Blade to dash onto him, charge your Steel Tempest, and unleash Last Breath. If he tries to escape with Astral Flight, your tornado will knock him down mid-flight.

Tam profil →
Seraphine

Seraphine

wind_wallmobility_threat Yasuo completely shuts down Seraphine's zoning potential in Mid. Her entire spell rotation is slow and highly predictable. You can nullify her massive team-fight ultimate Encore or her main crowd control Beat Drop with a well-timed Wind Wall. Furthermore, her primary poke, High Note, is easily avoided because Sweeping Blade gives you the mobility to dash through minion waves, rendering her slow skillshots entirely useless. Detayları gör
Seraphine

Neden

Yasuo completely shuts down Seraphine's zoning potential in Mid. Her entire spell rotation is slow and highly predictable. You can nullify her massive team-fight ultimate Encore or her main crowd control Beat Drop with a well-timed Wind Wall. Furthermore, her primary poke, High Note, is easily avoided because Sweeping Blade gives you the mobility to dash through minion waves, rendering her slow skillshots entirely useless.

Lane etkisi

Seraphine is forced to play extremely far back, losing control over the minion waves. Since she cannot land Beat Drop or poke you down with High Note through your Way of the Wanderer shield and Wind Wall, you dictate the pace of the lane. She will struggle to secure farm under her turret while you maintain constant pressure, preventing her from ever assisting her jungler.

Nasıl oynanır

Do not waste your Wind Wall on her basic poke. Instead, hold it specifically for her Encore or an empowered Beat Drop that could root you. Use Sweeping Blade to aggressively dash through her caster minions, building up Steel Tempest charges to threaten her with a tornado. Once she misses her slow skillshots, immediately engage with Last Breath when you land a knockup.

Tam profil →
Kai'Sa

Kai'Sa

wind_wallall_in Yasuo completely shuts down Kai'Sa's trading potential in the mid lane because his Wind Wall acts as a hard counter to her primary damage sources. When she attempts to burst you, deploying your barrier completely deletes both the missiles of her Icathian Rain and the long-range snipe of her Void Seeker. This leaves her with only basic attacks to trigger Second Skin, stripping away her duel-winning burst. Detayları gör
Kai'Sa

Neden

Yasuo completely shuts down Kai'Sa's trading potential in the mid lane because his Wind Wall acts as a hard counter to her primary damage sources. When she attempts to burst you, deploying your barrier completely deletes both the missiles of her Icathian Rain and the long-range snipe of her Void Seeker. This leaves her with only basic attacks to trigger Second Skin, stripping away her duel-winning burst.

Lane etkisi

This dynamic allows you to dominate the wave state from the first minutes. Since Kai'Sa cannot easily poke you out or clear waves safely without exposing herself to a Sweeping Blade engage, she is forced to play under her turret. This constant pressure denies her priority, permitting you to secure roaming windows while her lack of wave clear keeps her trapped, stalling her evolution timings.

Nasıl oynanır

Capitalize on this advantage by holding your Wind Wall specifically for her Icathian Rain animation. Dash through the minion wave with Sweeping Blade to force her to react, then drop the wall to absorb her missiles before executing a knock-up with Steel Tempest. If she uses Supercharge to escape or reposition, track her movement speed buff and prepare Last Breath to catch her as soon as she becomes visible again.

Tam profil →
Lux

Lux

wind_wallmobilityspacing This matchup is heavily slanted in your favor because Wind Wall completely neutralizes Lux's entire offensive kit. By erasing both Light Binding and Lucent Singularity, you deny her any chance of rooting you or poking you down. Without these projectiles to trigger Illumination, she cannot trade back effectively, leaving her completely exposed to your close-range pressure once her defenses are dissolved. Detayları gör
Lux

Neden

This matchup is heavily slanted in your favor because Wind Wall completely neutralizes Lux's entire offensive kit. By erasing both Light Binding and Lucent Singularity, you deny her any chance of rooting you or poking you down. Without these projectiles to trigger Illumination, she cannot trade back effectively, leaving her completely exposed to your close-range pressure once her defenses are dissolved.

Lane etkisi

You dictate the minion wave completely. Lux is forced to play incredibly far back, often burning Prismatic Barrier just to step up for farm. Because her Light Binding is blocked, you can use Sweeping Blade through the minions to force aggressive trades without fearing a counter-root. This constant pressure quickly forces her under tower, securing early priority.

Nasıl oynanır

Save Wind Wall specifically for her Light Binding or when she tries to detonate Lucent Singularity on the wave. Dash aggressively through the frontline minions with Sweeping Blade, stack Steel Tempest to prepare your knockup, and immediately launch Last Breath once she is airborne. If you misplace your wall, temporarily back off to let Way of the Wanderer absorb her poke.

Tam profil →
Varus

Varus

wind_wallgap_closemobility_threat This matchup heavily favors you because Wind Wall is the ultimate counter to Varus's entire kit. A well-placed wall completely dissolves his Chain of Corruption, stripping away his only reliable self-peel, while also absorbing fully charged Piercing Arrow shots. Without these critical projectiles to detonate his Blighted Quiver stacks, Varus loses both his primary burst damage and his ability to keep you at a distance. Detayları gör
Varus

Neden

This matchup heavily favors you because Wind Wall is the ultimate counter to Varus's entire kit. A well-placed wall completely dissolves his Chain of Corruption, stripping away his only reliable self-peel, while also absorbing fully charged Piercing Arrow shots. Without these critical projectiles to detonate his Blighted Quiver stacks, Varus loses both his primary burst damage and his ability to keep you at a distance.

Lane etkisi

Because Varus constantly fears losing his ultimate, he must play defensively, allowing you to dictate the wave state. You can easily build pressure with Steel Tempest and crash waves to secure roam timers. Since he cannot safely poke you through your Way of the Wanderer shield without risking a deadly all-in, you will naturally command a health lead and easily force him under his turret.

Nasıl oynanır

Your primary rule is to hold Wind Wall specifically for his Chain of Corruption. Dash through the minion wave using Sweeping Blade to close the distance, then bait his ultimate. Once you block it, immediately commit with Steel Tempest to prepare your knock-up and execute him with Last Breath. If you accidentally waste your wall early, retreat immediately and play safely near your turret until the cooldown recovers, as you are highly vulnerable without it.

Tam profil →
Brand

Brand

defensespacing Brand relies entirely on landing his combos to trigger Blaze, but your Wind Wall completely nullifies both his stun initiator, Sear, and his high-damage ultimate, Pyroclasm. By intercepting these key projectiles, you strip him of his self-peel and burst potential. Without his stun threat, Brand becomes an immobile, defenseless target vulnerable to your rapid engagements. Detayları gör
Brand

Neden

Brand relies entirely on landing his combos to trigger Blaze, but your Wind Wall completely nullifies both his stun initiator, Sear, and his high-damage ultimate, Pyroclasm. By intercepting these key projectiles, you strip him of his self-peel and burst potential. Without his stun threat, Brand becomes an immobile, defenseless target vulnerable to your rapid engagements.

Lane etkisi

You control the pace of this lane. Brand is forced to play extremely far back, terrified of walking up to use Pillar of Flame on the wave because a simple Sweeping Blade can gap-close instantly. This allows you to freely stack Steel Tempest and threaten dives. Whenever his Sear is blocked, he must abandon the wave entirely, giving you free priority to roam or crash.

Nasıl oynanır

Bait out Pillar of Flame by walking near the minions, using your Way of the Wanderer shield to absorb chip damage from Conflagration. The moment he misses his circle, dash through the wave with Sweeping Blade to force his panic Sear. Hold your Wind Wall exclusively for this projectile or his Pyroclasm. If you misplay your wall, immediately retreat using minions to reset, as you are vulnerable until its long cooldown returns.

Tam profil →
Kassadin

Kassadin

physical_damageearly_defense Kassadin relies heavily on Null Sphere to poke and generate a magic shield from Void Stone to mitigate trades. However, because Null Sphere is a projectile, Yasuo can easily block it using Wind Wall. This completely denies Kassadin's defensive shield, leaving him entirely exposed to Yasuo's physical damage from Steel Tempest and auto-attacks, which bypasses his magic-resist-focused nature. Detayları gör
Kassadin

Neden

Kassadin relies heavily on Null Sphere to poke and generate a magic shield from Void Stone to mitigate trades. However, because Null Sphere is a projectile, Yasuo can easily block it using Wind Wall. This completely denies Kassadin's defensive shield, leaving him entirely exposed to Yasuo's physical damage from Steel Tempest and auto-attacks, which bypasses his magic-resist-focused nature.

Lane etkisi

This interaction lets Yasuo dictate the wave state right from the first waves. Since Kassadin cannot trade back effectively without his shield, you can slow push to stack waves, forcing him under tower where he struggles to last-hit. Yasuo can trade freely under the enemy turret, using Sweeping Blade to dash in and out of tower range while chipping Kassadin's health down, securing massive priority.

Nasıl oynanır

To execute this, hold Wind Wall specifically for Kassadin's Null Sphere. Don't waste it on his other spells. Dash through the minion wave with Sweeping Blade to close the distance, and the moment you see the purple orb animation, drop your wall. Once Null Sphere is blocked, unleash your Steel Tempest strikes to stack your tornado. If he tries to escape using Riftwalk post-level five, use your stacked tornado to knock him up and follow up instantly with Last Breath.

Tam profil →
Twisted Fate

Twisted Fate

wind_wallall_in_threat Yasuo dominates this matchup because his Wind Wall completely nullifies Twisted Fate's primary self-defense tool, Pick a Card. When Twisted Fate locks in his yellow gold card to stun you, a well-timed Wind Wall deletes the projectile entirely. Without this crucial crowd control to keep you at bay, the card master has no way to halt your aggressive Sweeping Blade dashes, leaving him completely exposed. Detayları gör
Twisted Fate

Neden

Yasuo dominates this matchup because his Wind Wall completely nullifies Twisted Fate's primary self-defense tool, Pick a Card. When Twisted Fate locks in his yellow gold card to stun you, a well-timed Wind Wall deletes the projectile entirely. Without this crucial crowd control to keep you at bay, the card master has no way to halt your aggressive Sweeping Blade dashes, leaving him completely exposed.

Lane etkisi

This interaction completely stifles Twisted Fate's laning phase, forcing him to play extremely defensively. He cannot safely use Pick a Card to secure last hits or poke without risking an all-in. This allows you to dictate wave state at will. Whenever his gold card is wasted or on cooldown, you command absolute lane priority, trapping him under his turret and neutralizing his map-wide threat with Destiny.

Nasıl oynanır

Watch the cycling colors of Pick a Card closely. When the yellow card is selected, prepare to react. Dash through the minion wave using Sweeping Blade to close the distance, but do not panic-cast Wind Wall; wait for the actual throwing animation. If you successfully block his gold card, immediately commit to a trade. Stack Steel Tempest to prepare your knock-up, and unleash Last Breath to finish him off before his cooldowns return.

Tam profil →
Veigar

Veigar

spacingdefense Yasuo dominates this matchup because his Wind Wall completely nullifies Veigar's primary damage sources, Baleful Strike and his execution ultimate Primordial Burst. Furthermore, Veigar's zoning tool, Event Horizon, loses its safety value. Sweeping Blade gives you the high-speed mobility needed to dash through minions and maneuver inside or around the cage's perimeter before the stun walls fully materialize, rendering his Dark Matter easy to dodge. Detayları gör
Veigar

Neden

Yasuo dominates this matchup because his Wind Wall completely nullifies Veigar's primary damage sources, Baleful Strike and his execution ultimate Primordial Burst. Furthermore, Veigar's zoning tool, Event Horizon, loses its safety value. Sweeping Blade gives you the high-speed mobility needed to dash through minions and maneuver inside or around the cage's perimeter before the stun walls fully materialize, rendering his Dark Matter easy to dodge.

Lane etkisi

From the first waves, you can easily crash minions because Veigar cannot step up to contest with Baleful Strike without risking a sudden engage. If he drops Event Horizon defensively, he is completely vulnerable for its long cooldown. You force him to farm under tower, bleeding his mana pool, while your passive shield from Way of the Wanderer absorbs his occasional basic attacks, giving you total mid-lane priority.

Nasıl oynanır

Never waste Wind Wall on simple poke; save it exclusively to block Primordial Burst or a crucial Baleful Strike that would otherwise stun you. When Veigar casts Event Horizon, do not panic. Use Sweeping Blade on an incoming minion to dash out of the cage's center before the boundary arms, or dash directly onto him if he steps too close to his own perimeter. Prepare a Steel Tempest tornado during his downtime to force an easy Last Breath.

Tam profil →
Ziggs

Ziggs

wind_wall_valuegap_close Yasuo dominates Ziggs because his Wind Wall neutralizes Ziggs's entire poke kit. Ziggs relies heavily on Bouncing Bomb to farm and poke from safety, but a single well-placed wall deletes these projectiles entirely. Even Ziggs's ultimate, Mega Inferno Bomb, can have its massive impact area negated by Wind Wall if intercepted in flight, stripping the yordle of his primary zoning and damage tools. Detayları gör
Ziggs

Neden

Yasuo dominates Ziggs because his Wind Wall neutralizes Ziggs's entire poke kit. Ziggs relies heavily on Bouncing Bomb to farm and poke from safety, but a single well-placed wall deletes these projectiles entirely. Even Ziggs's ultimate, Mega Inferno Bomb, can have its massive impact area negated by Wind Wall if intercepted in flight, stripping the yordle of his primary zoning and damage tools.

Lane etkisi

Because Ziggs cannot easily bypass your defensive wall, you dictate the wave tempo. You can freeze the minions near your turret, forcing Ziggs to overextend to secure CS with his long-range spells. If he steps up too far to use Satchel Charge or Hexplosive Minefield, you can immediately dive through the wave using Sweeping Blade, forcing trades that he cannot win due to your Way of the Wanderer shield soaking his basic attacks.

Nasıl oynanır

Constantly position yourself slightly to the side of the minion wave. This forces Ziggs to choose between aiming Bouncing Bomb at you or the wave. Hold your Wind Wall specifically for his Bouncing Bomb or to block his escape route if you decide to engage. When he drops Hexplosive Minefield to slow you down, use Sweeping Blade laterally through clean minions to bypass the mines, then knock him up with Steel Tempest to unleash Last Breath for an easy kill.

Tam profil →

Diğer eşleşmeler

Items to Counter Yasuo

Buy these items to reduce this champion's effectiveness in your games.

Ange gardien
Ange gardien
Mâchoire de Malmortius
Rappel mortel
Rappel mortel

Bu şampiyon nasıl counterlanır

Counter açısı

Yasuo’e karşı etkili stratejileri anlamak, sadece düelloda onu kimin öldürdüğüne değil, ritmini neyin bozduğuna da bakmak anlamına gelir. Yasuo, kullanışlı bir dalga, tehditkar bir Q3, önemli büyü için hazır bir Rüzgâr Duvarı ve kritik vuruşu gerçek hasara dönüştürmek için yeterli zamana ihtiyaç duyar. Bu nedenle en iyi karşı stratejiler, onun bu koşulları bir araya getirmesini engelleyenlerdir: Q'yu biriktirmeden önce ani hasar vermek, atılmasından hemen sonra kontrol uygulamak, takas öncesinde pasif kalkanını ortadan kaldıran poke atmak ya da garantisiz bir giriş yapmaya zorlayan hareket kabiliyeti. Karşı strateji sayfası, oyuncuların Yasuo’in neden bir dalga verildiğinde tehlikeli hale geldiğini, ancak cooldown’ları yanlış sırayla zorlandığında çok daha kırılgan hale geldiğini anlamalarına yardımcı olmalıdır.

Patch bağlamı

Mevcut yamada, Yasuo en çok kendi temposunu bozabilen şampiyonlara karşı zorlanıyor. Fizz, Malphite veya Annie, onun sahaya girişini belirgin bir etkiyle cezalandırabilir; Vex, Akali, Diana, Zed ve Ahri ise ani hasar, geri çekilme veya Rüzgar Duvarı'nın her şeyi çözemediği açıları tehdit ettikleri için rakibin hamlelerini tahmin etmeyi zorlaştırır. Öte yandan, listelenen avantajlı eşleşmeler genellikle mesafeye veya Yasuo’in bozabileceği büyülere daha bağımlı şampiyonlardır. Mesele, Yasuo’in otomatik olarak kaybettiği değildir: birçok koridorda kazanabilir. Ancak gerçek takas gerçekleşmeden önce pasif kalkanını, dalgasını ve Rüzgar Duvarı’nı kaybederse, rakibini alt etme yeteneği çok daha sınırlı hale gelir.

Hızlı okuma

  • Yasuo’i yenmenin en iyi yolu, onun ideal sırasını bozmaktır: pasif kalkan, Q birikimleri, Rüzgâr Duvarı ve ardından tüm gücüyle saldırı. Bu araçlardan birini çok erken kullanmaya zorlarsanız, dövüşü daha öngörülebilir hale gelir.
  • E yeteneği hazır durumdayken dalganın içinde durmayın: ona hareket kabiliyeti, kaçma imkânları ve Q3 için daha iyi bir konuma erişim imkânı vermiş olursunuz.
  • Takasın sonucunu gerçekten belirleyen kitle kontrolü veya menzilli saldırıyı kullanmadan önce, daha az etkili bir büyüyle “Bait Wind Wall” uygulayın.

Counter arketipleri

Patlama ve giriş cezası

Bu eşleşme türü Yasuo’e karşı etkili oluyor çünkü onu her girişi ciddiye almaya zorluyor. Yasuo genellikle dalgayı geçmek, Q'yu biriktirmek ve Rüzgar Duvarı'nı kullanarak düşmanın tepkisini kontrol etmek ister. Patlama hasarı veren şampiyonlar tam da bu anı cezalandırır: Eğer çok uzağa atılırsa, takas öncesinde pasif kalkanını kaybederse ya da Rüzgar Duvarı'nı yanlış büyüye kullanırsa, DPS'sini uygulayamadan ölebilir. Yasuo için sorun sadece aldığı hasar değil, aynı zamanda her zaman Q3'ü hazırlamak veya Last Breath'i temiz bir şekilde dönüştürmek için yeterli zamana sahip olmamasıdır.

Şampiyon nasıl uyum sağlamalı. Yasuo, hamleleri kısaltmalı, dalgayı kendine daha yakın tutmalı ve jungle bilgisi olmadan derin hamlelerden kaçınmalıdır. Rüzgâr Duvarı, küçük bir takas kazanmak için değil, hamleyi gerçekten kilitleyen büyü için saklanmalıdır.

Sert kalabalık kontrolü ve doğrudan çatışma

Yasuo hareketlidir, ancak dövüşü uzatmak istediği anda hareketsiz hale getirilirse bu hareket kabiliyeti pek bir anlam ifade etmez. Sert kitle kontrolü, onun temel stratejisini bozar: yeniden konumlanmak için atılma, baskıyı sürdürmek için Q, rakibin tepkisini etkisiz hale getirmek için Rüzgâr Duvarı ve ardından uygun bir fırsatta Son Nefes. Girişinden sonra kontrol isabet ettiğinde veya kalkanı düştüğünde, Yasuo artık mekanikleri hasara dönüştüremez. Bu eşleşmeler tehlikelidir çünkü rakiplerin her zaman onu kovalamasına gerek yoktur: genellikle onun kendiliğinden gelmesini beklerler.

Şampiyon nasıl uyum sağlamalı. Yasuo, daha çok ikinci dalga tehdidi olarak hareket etmelidir. İlk temas noktası olmak yerine, kilit öneme sahip kitle kontrol yeteneklerinin kullanılması veya takımının açılımı zorlamasını beklemeli, ardından Q3 veya Last Breath ile oyuna girmelidir.

Hareketlilik ve duvara yaslanması zor açılar

Yasuo, çatışmanın net bir hat üzerinde gerçekleşmesinden hoşlanır: bu sayede Rüzgâr Duvarı’nı yerleştirebilir, mesafeyi okuyabilir ve kasırgasını hazırlayabilir. Hareketli şampiyonlar, açıları değiştirerek, onu savunma amaçlı E yeteneğini kullanmaya zorlayarak ya da belirleyici büyüyü engelleyeceğinden emin olmadan Rüzgâr Duvarı’nı kullanmaya mecbur bırakarak bu okuma sürecini bozarlar. Akali, Diana veya Ahri, Yasuo’in duvarı korumak, peşinden koşmak ya da kalkanını korumak için geri çekilmek arasında seçim yapması gereken durumlar yaratabilir. Ne kadar çok tereddüt ederse, Q3’ünün baskısı o kadar azalır ve all-in hamlesi o kadar kolay tahmin edilebilir hale gelir.

Şampiyon nasıl uyum sağlamalı. Yasuo, her düşman hamlesinin peşine düşmekten kaçınmalıdır. Dalga etrafında oynamalı, Q3’ü alan baskısı olarak kullanmalı ve rakibin yeniden konumlanma yeteneğini tüketmesini bekledikten sonra harekete geçmelidir.

Öncelikli matchuplar

Fizz

Fizz, Yasuo’in en belirgin zayıf noktası olan giriş zamanlamasına saldırdığı için açıklanması gereken öncelikli bir eşleşmedir. Eğer Yasuo dalgaya çok erken dalarsa ya da önemsiz bir çatışmayı kontrol etmek için Rüzgâr Duvarı’nı boşa harcarsaydı, Fizz bu hareketin bitmesini bekleyip ani bir saldırıyla cezalandırabilir. Bu eşleşmede mesele sadece balığı kaçırmakla sınırlı değildir: Yasuo’in öncelikle savunma araçları hazır hale gelmeden uzun takaslardan kaçınması gerekir. En iyi stratejisi, dalgayı kontrol altında tutmak, Q3’ü kullanarak çok derine girmeden tehdit oluşturmak ve ancak Fizz gerçek bir kaynak harcadıktan sonra harekete geçmektir.




Malphite

Malphite önemlidir çünkü Yasuo’in farklı bir sınırını ortaya koyar: hareket kabiliyeti olsa bile, Yasuo her zaman temas anını seçmez. Malphite, doğrudan çatışmaya zorlayabilir, koşu mesafesini ortadan kaldırabilir ve Yasuo’i, mekaniklerin kendisinin koruduğunu hissettiği anlarda cezalandırabilir. Yasuo için bu eşleşme, daha takım odaklı bir okuma gerektirir: küçük çatışmaları kazanmak yeterli değildir, gruplandırılmış bir ulti açısı vermemek zorundadır. Takım savaşlarında Yasuo, genellikle Malphite'in niyetini ortaya koymasını beklemek zorundadır; aksi takdirde, Rüzgar Duvarı'nın engelleyemeyeceği kitle kontrolü için mükemmel bir hedef haline gelir.

Ona karşı yaygın hatalar

Ona karşı yaygın hatalar

  • Minion dalgasının içinde dururken Yasuo ile karşı karşıya kalmak: Bu durum ona serbest atılımlar, Q vuruş açıları ve bazen de karşılıklı saldırıdan sonra kaçış imkânı sağlar.
  • Önce daha önemsiz bir kaynakla dikkatini çekmek yerine, anahtar büyüyü doğrudan Rüzgâr Duvarı’na kullanmak.
  • Q3’ü dikkate almama: Mevcut bir kasırga, Yasuo hemen hareket etmese bile şeridi değiştirir.
  • Pasif kalkanı veya Phantom Dancer’ı kontrol etmeden Last Breath’ten sonra onun peşine düşmek: Yasuo, kazanılmış gibi görünen bir çatışmanın gidişatını tersine çevirebilir.
  • İki kritik hasar eşyası aldıktan sonra ona uzun süreli çatışmalar yaşatmak: Çatışma ne kadar uzun sürerse, tekrarlanan Q yeteneklerinin ve olası can kazanımının değeri o kadar artar.

Koç notları

  • Yasuo’e karşı oynarken, ilk hedefiniz genellikle asıl çatışma başlamadan önce onun pasif kalkanını ortadan kaldırmaktır. Eğer doğrudan kalkanına saldırırsanız, ona bedava hareket alanı vermiş olursunuz.
  • Şampiyonu kadar dalgasını da takip edin. Yakınında minyon bulunmayan bir Yasuo, üç dashi olan bir Yasuo’e kıyasla kontrol edilmesi çok daha kolaydır.

FAQ

MID lane oyununda Yasuo’i nasıl yenebilirim?

Önceliğiniz, her çatışmada onu öldürmeye çalışmak yerine pencerelerini kontrol etmek olmalıdır. Hafif bir büyüyle pasif kalkanını kaldırın, E yeteneği hazır olduğunda dalganın içinde kalmaktan kaçının, ardından gerçek kitle kontrol veya ani hasar büyünüzü kullanmadan önce Rüzgâr Duvarı’nı kullanmaya zorlayın. Q3 yeteneği hazır olduğunda, düz bir çizgide oynamak yerine geri çekilin veya açınızı değiştirin. Yasuo, rakip E yeteneğini kullanarak içeri girdikten, hayatta kalmak için Rüzgar Duvarı'nı kullandıktan ve çıkmak için geriye minyon kalmadığında cezalandırılması çok daha kolay hale gelir.

Yasuo’e karşı sert kalabalık kontrolü neden bu kadar etkili?

Yasuo’in değer yaratabilmesi için sürekli hareket etmesi gerekir: ani hamle, Q, yeniden konumlanma ve ardından ultisini takiben takip. Sert kitle kontrolü, bu zinciri en önemli anda kırar. Bu sadece onu bir saniye durdurmakla kalmaz; esas olarak Q3, kritik pasif ve Rüzgar Duvarı'nı gerçek hasara dönüştürmesini engeller. Eğer sahaya girdikten hemen sonra kontrol altına alınırsa, genellikle çıkış yolunu kaybeder ve standart bir bruiser'dan çok daha kırılgan hale gelir.

Minion dalgaları sırasında Yasuo ile savaşmaktan kaçınmalı mısınız?

Evet, çoğu durumda. Bir dalga, Yasuo’e birden fazla fırsat sunar; bu da kaçmak, Q’yu isabet ettirmek ve takas mesafesini seçmek için daha fazla açı anlamına gelir. Ham düelloyu kazandığını düşünsen bile, dalga, anahtar büyünü kullanmaya zorladıktan sonra onun oyundan çıkmasına izin verebilir. Doğru yaklaşım, dalga seyrek veya kontrol altındayken ya da mevcut minyonlara E'sini çoktan kullanmışsa onu cezalandırmaktır. Seçenekleri ne kadar az olursa, kararlarını okumak o kadar kolay olur.

Wind Wall, Yasuo’e poke yapılmasını imkansız hale getiriyor mu?

Hayır. Rüzgâr Duvarı çok güçlüdür, ancak bir bekleme süresi vardır ve her türlü baskıyı engellemez. Doğru strateji, onu bir seçim yapmaya zorlamaktır: ya poke’dan kaçınmak için duvarını kullanır, ya da gerçek all-in’i belirleyecek büyü için saklar. Küçük bir kaynak harcayarak pasif kalkanını ortadan kaldırabilir ve ardından Rüzgar Duvarı'nın bekleme süresinin dolmasını bekleyebilirseniz, Yasuo'in dalgadan daha uzakta oynamak zorunda kalacağı bir fırsat penceresi yaratmış olursunuz. Poke, hedef öncesinde veya önemli bir takas öncesinde rakibin araçlarını kullanmaya zorladığında etkili hale gelir.



















































































