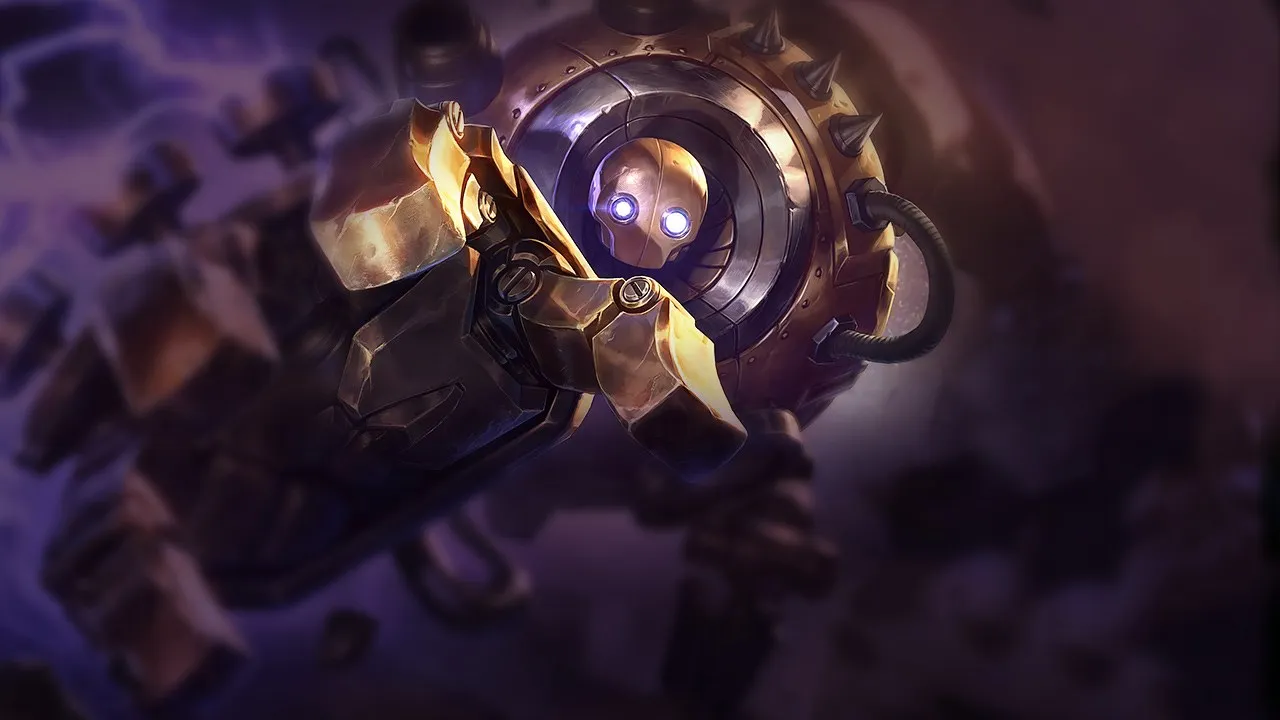
Blitzcrank loses effectiveness against champions who can block or predict his hooks. Poke or disengage compositions force him to play cautiously. Good positioning behind minions completely neutralizes his lane impact.
★ SUPPORTTier S
DMG
UTIL
TANK
DIFF
Win49.0%#53 · ↓2pt
Pick7.0%#8
Ban1.8%#59
Blitzcrank Wild Rift Counters Guide
Hard Counters
6
These champions have a build and playstyle that directly overpower yours, which can make controlling the lane and farming extremely difficult. Their kit can neutralize your core strengths or punish you the moment you try to play your usual game plan. In these matchups, the goal is often to minimize mistakes and look for ways to win outside of direct confrontation.
TanksCrowd controlUsing Rocket Grab on Leona is essentially doing her job for her. Instead of forcing her to risk missing Zenith Blade to close the distance, pulling her brings her directly into melee range of your ADC. This instantly allows her to apply Shield of Daybreak for an easy stun, while popping Eclipse to absorb any retaliatory damage and triggering Sunlight marks to shred your carry's health.Leona build →See details
Leona
The interaction that decides it
Pulling Leona with Rocket Grab saves her the trouble of using Zenith Blade, placing her in perfect position to stun your ADC with Shield of Daybreak.
Why
Using Rocket Grab on Leona is essentially doing her job for her. Instead of forcing her to risk missing Zenith Blade to close the distance, pulling her brings her directly into melee range of your ADC. This instantly allows her to apply Shield of Daybreak for an easy stun, while popping Eclipse to absorb any retaliatory damage and triggering Sunlight marks to shred your carry's health.
Lane impact
Because your main threat is neutralized, you lose all lane pressure. Leona can stand aggressively inside or ahead of the minion wave, knowing that a defensive Rocket Grab only helps her team. Your ADC is forced to farm under tower, constantly threatened by Solar Flare dives, while Leona easily secures brush control and denies you any opportunity to peel effectively.
How to play
Never throw a blind Rocket Grab in this lane. Stand parallel to or slightly behind your ADC, using Power Fist as a counter-engage tool to knock Leona up the moment she tries to dash in with Zenith Blade. Save your hook exclusively for moments when Leona overcommits too far from her partner, allowing you to pull the enemy carry instead. If Leona targets you, rely on Mana Barrier to survive the burst.
Hard counterShieldsMorgana shuts you down because her Black Shield completely absorbs the crowd control of your Rocket Grab. Since she can reactively cast it on whoever you target, your primary hook threat is entirely neutralized. If you attempt a pull, her magical shield absorbs the stun and displacement, leaving you vulnerable to a counter-engage via Dark Binding while your main ability is on its extremely long cooldown.Morgana build →See details
Morgana
The interaction that decides it
Morgana can reactively cast Black Shield to completely block Rocket Grab, neutralizing Blitzcrank's entire lane presence.
Why
Morgana shuts you down because her Black Shield completely absorbs the crowd control of your Rocket Grab. Since she can reactively cast it on whoever you target, your primary hook threat is entirely neutralized. If you attempt a pull, her magical shield absorbs the stun and displacement, leaving you vulnerable to a counter-engage via Dark Binding while your main ability is on its extremely long cooldown.
Lane impact
This interaction paralyzes your laning phase, stripping away your brush control. Knowing she can block Rocket Grab, Morgana's duo can safely shove waves, forcing you under turret. You are constantly threatened by Tormented Shadow poke and Dark Binding. If you waste your hook, you yield absolute priority, allowing them to freely chip your tower or force bad recall timings while your Mana Barrier remains your only survival tool.
How to play
To survive, you must play a mental game with her reaction time. Use Overdrive to run directly at them, threatening a melee Power Fist knock-up. This often panics Morgana into casting Black Shield early. Once her shield is active on one target, immediately redirect your Rocket Grab to the other unguarded opponent. Alternatively, if she mispositions, use the instant silence of Static Field to prevent her from casting her shield entirely before throwing your hook.
TanksCrowd controlLanding Rocket Grab on Alistar is actively self-sabotaging. By pulling this tanky minotaur directly into your space, you save him from using Headbutt as a gap-closer, allowing him to instantly follow up with Pulverize on your nearby ADC. Even if you try to knock him up with Power Fist, his Unbreakable Will cleanses the disable, turning your primary tool into his perfect engage vector.Alistar build →See details
Alistar
The interaction that decides it
If Blitzcrank pulls Alistar with Rocket Grab, it saves Alistar a gap-closer and allows him to easily Pulverize the enemy ADC.
Why
Landing Rocket Grab on Alistar is actively self-sabotaging. By pulling this tanky minotaur directly into your space, you save him from using Headbutt as a gap-closer, allowing him to instantly follow up with Pulverize on your nearby ADC. Even if you try to knock him up with Power Fist, his Unbreakable Will cleanses the disable, turning your primary tool into his perfect engage vector.
Lane impact
This dynamic completely paralyzes your lane presence. Since throwing Rocket Grab at the support is a deadly mistake, the enemy duo can stand aggressively behind their minions without fear. Your ADC is forced to concede wave control, resulting in you being pushed under tower while Alistar comfortably sustains through minor poke using Triumphant Roar.
How to play
You must adopt a highly disciplined defensive posture. Stand slightly behind or parallel to your ADC, never in front. Keep Rocket Grab strictly off cooldown; its mere threat is your only leverage to prevent Alistar from walking up to trigger Trample. If he does initiate with Headbutt on your carry, do not panic-hook him. Instead, use Overdrive to reposition and target your hook exclusively on the enemy ADC.
TanksCrowd controlYour primary tool for aggression plays directly into Nautilus's hands. Pulling him closer with Rocket Grab saves him the trouble of using Dredge Line to close the gap. Once in melee range, he easily triggers Staggering Blow to lock you or your carry down, while mitigating your retaliation with Titan's Wrath. You are essentially delivering a massive crowd-control threat to your ally.Nautilus build →See details
Nautilus
The interaction that decides it
Hooking Nautilus with Rocket Grab pulls a massive tank directly into melee range, allowing him to easily trigger Staggering Blow.
Why
Your primary tool for aggression plays directly into Nautilus's hands. Pulling him closer with Rocket Grab saves him the trouble of using Dredge Line to close the gap. Once in melee range, he easily triggers Staggering Blow to lock you or your carry down, while mitigating your retaliation with Titan's Wrath. You are essentially delivering a massive crowd-control threat to your ally.
Lane impact
Because your hook is a liability, you lose all lane pressure. Nautilus can stand in front of his minion wave, using Riptide to push and zone your carry. You cannot safely threaten his ADC because he acts as a human shield. Attempting to force an engage will result in a counter-engage with Depth Charge, forcing early recalls and bleeding tower plates.
How to play
To survive, you must play defensively and hold Rocket Grab purely as a disengage threat. Position yourself parallel to your carry to block Nautilus's Dredge Line with your own body, relying on Mana Barrier to survive his burst. If he misses his hook, quickly activate Overdrive and Power Fist to target his vulnerable carry. If Depth Charge is cast on your ally, use Static Field to silence his follow-up.
These champions have tools that generally give them the edge in a fight, without making the matchup unwinnable. They might have more range, a better ability to soak up your offense, or more ways to answer your engages. You'll need to adapt your approach and carefully pick your moments to accept a fight.
Crowd controlTanksPulling Galio is often a trap. If you land Rocket Grab on him, you essentially do his job for him by bringing him into point-blank range. This allows him to immediately channel a devastating Shield of Durand, taunting both you and your ADC. He can follow up with Justice Punch to knock you up, turning your proactive hook into an ideal setup for his own counter-engage.Galio build →See details
Galio
The interaction that decides it
If Blitzcrank pulls Galio with Rocket Grab, Galio can immediately unleash a full-charge Shield of Durand on the enemy bot lane.
Why
Pulling Galio is often a trap. If you land Rocket Grab on him, you essentially do his job for him by bringing him into point-blank range. This allows him to immediately channel a devastating Shield of Durand, taunting both you and your ADC. He can follow up with Justice Punch to knock you up, turning your proactive hook into an ideal setup for his own counter-engage.
Lane impact
This interaction forces your duo into a passive posture, as your primary threat tool is effectively neutralized. If you fish for hooks blindly, you risk pulling a tank who wants to be close enough to clear waves with Winds of War and Colossal Smash. Missing your grab or pulling him into your wave grants him free control, allowing him to push you under tower and roam with Hero's Entrance.
How to play
To survive, you must adjust your positioning and hold Rocket Grab as a defensive deterrent rather than an initiation tool. Stand parallel to your minion wave and target his ADC exclusively when Galio steps up to trigger Colossal Smash. If you accidentally pull him, immediately activate Power Fist to knock him up before he can fully channel Shield of Durand, then use Overdrive's speed boost to disengage. Only look for aggressive pulls when his Justice Punch is on cooldown.
ShieldsPokeZyra completely shuts down your offensive threat because she can reactively block Rocket Grab. By placing a seed with Rampant Growth directly in the path of your incoming hook, she instantly spawns a plant that absorbs the projectile. This reactive utility denial means you cannot simply throw your hook on cooldown, as her Garden of Thorns and Grasping Roots will punish any failed attempt while she remains safely behind her botanical shield.Zyra build →See details
Zyra
The interaction that decides it
Zyra can block Rocket Grab on reaction by spawning plants with Rampant Growth directly in the path of the hook.
Why
Zyra completely shuts down your offensive threat because she can reactively block Rocket Grab. By placing a seed with Rampant Growth directly in the path of your incoming hook, she instantly spawns a plant that absorbs the projectile. This reactive utility denial means you cannot simply throw your hook on cooldown, as her Garden of Thorns and Grasping Roots will punish any failed attempt while she remains safely behind her botanical shield.
Lane impact
Because your main threat is neutralized, Zyra freely controls the minion waves. She will constantly push you under tower using Deadly Spines and Rampant Growth plants. This constant siege chips away at your Mana Barrier and forces you into defensive positioning. Any missed Rocket Grab gives her a massive window to lock you down with Grasping Roots and unleash Stranglethorns, destroying your health bar and forcing early recalls.
How to play
To survive, you must play the vision game and abuse the bushes. Force Zyra to waste her Rampant Growth seeds on zone control rather than saving them to block your hook. Walk forward aggressively with Overdrive to threaten a direct Power Fist knock-up instead of leading with Rocket Grab. If she panics and uses Grasping Roots, that is your cue to strike. Hold your grab until her seeds are depleted or when you have a clear, unreactable angle from the fog of war.
PeelLanding your Rocket Grab usually guarantees a kill, but Thresh completely neutralizes this pressure with Dark Passage. The moment you pull his marksman, he can toss his lantern from safety, allowing them to escape before you can even chain Power Fist. Because Thresh can stay positioned far back, your pick potential is heavily mitigated, turning your primary threat into a wasted cooldown.Thresh build →See details
Thresh
The interaction that decides it
Thresh can throw Dark Passage to rescue any ally pulled by Rocket Grab, neutralizing Blitzcrank's pick potential.
Why
Landing your Rocket Grab usually guarantees a kill, but Thresh completely neutralizes this pressure with Dark Passage. The moment you pull his marksman, he can toss his lantern from safety, allowing them to escape before you can even chain Power Fist. Because Thresh can stay positioned far back, your pick potential is heavily mitigated, turning your primary threat into a wasted cooldown.
Lane impact
This interaction strips away your early lane pressure, forcing you to play defensively near your turret. Since grabbing the enemy carry is pointless while Thresh has his lantern ready, you are often forced to target Thresh himself. However, pulling a tanky warden who can immediately retaliate with Flay and The Box makes your trades incredibly risky, leaving your own ADC vulnerable to easy counter-attacks.
How to play
To bypass this safety net, never throw your Rocket Grab blindly. Instead, activate Overdrive to run directly at them, threatening a raw Power Fist knock-up. This psychological pressure often forces Thresh to panic-throw Dark Passage early. Once that lantern is on its long cooldown, you have a brief window to look for a real hook. Alternatively, try to stand directly on top of the thrown lantern to block the enemy's click path.
TanksDodgingThis lane is highly unfavorable because Maokai possesses a direct counter to your primary threat. When you cast Rocket Grab, a skilled Maokai can react instantly with Twisted Advance. Because he becomes untargetable during his root-dash, he completely nullifies your hook mid-air while simultaneously locking you down. This turns your main pick potential into an easy engage tool for him.Maokai build →See details
Maokai
The interaction that decides it
Maokai can use the brief untargetability of Twisted Advance to completely dodge Rocket Grab if timed perfectly.
Why
This lane is highly unfavorable because Maokai possesses a direct counter to your primary threat. When you cast Rocket Grab, a skilled Maokai can react instantly with Twisted Advance. Because he becomes untargetable during his root-dash, he completely nullifies your hook mid-air while simultaneously locking you down. This turns your main pick potential into an easy engage tool for him.
Lane impact
You cannot safely threaten the bush with Overdrive because Maokai's Sapling Toss controls the brush vision and chips away your health. If you miss a Rocket Grab, Maokai immediately zones your ADC with Nature's Grasp or engages with Twisted Advance, forcing you to use Power Fist defensively. This makes pushing waves extremely risky, pinning you under tower while trying to preserve your Mana Barrier.
How to play
Never initiate with Rocket Grab when Maokai has Twisted Advance ready. Instead, use Overdrive to run up and threaten with Power Fist directly. Force him to use Twisted Advance defensively on you, then quickly use Static Field to silence him and interrupt his follow-up Bramble Smash. Only throw your grab after he has committed his dash to another target, or use it to pull his ADC when Maokai is out of range to intercept.
MobilityCounter-engageRakan is a highly elusive target for your Rocket Grab due to his superb mobility. He will constantly bait your hook by dancing on the edge of your range, knowing he can easily dash back to safety using Battle Dance if you fire it. Should you miss, his reaction is swift: he will immediately punish your downtime by launching a counter-engage with Grand Entrance.Rakan build →See details
Rakan
The interaction that decides it
Rakan can easily bait Rocket Grab and escape using Battle Dance, or counter-engage immediately with Grand Entrance.
Why
Rakan is a highly elusive target for your Rocket Grab due to his superb mobility. He will constantly bait your hook by dancing on the edge of your range, knowing he can easily dash back to safety using Battle Dance if you fire it. Should you miss, his reaction is swift: he will immediately punish your downtime by launching a counter-engage with Grand Entrance.
Lane impact
This constant threat neutralizes your lane presence, forcing you to play defensively. Missing a hook hands Rakan absolute control over the wave. He will freely poke with Gleaming Quill to sustain his partner, while threatening a sudden dive using The Quickness and Grand Entrance. You will find yourself pushed under turret, relying heavily on your Mana Barrier to survive their aggressive pressure.
How to play
You must never throw a speculative Rocket Grab. Hold your hook to maintain passive pressure and stay behind your minion wave. Use Overdrive to close the distance and threaten him with Power Fist directly instead of trying to grab him at range. If he misses Grand Entrance, that is your cue to strike. When he activates The Quickness, time your Static Field perfectly to silence his engage.
ShieldsPeelThis matchup is tough because Braum directly neutralizes the impact of your Rocket Grab. Even if you manage to hook the enemy marksman, Braum can instantly use Stand Behind Me to leap to his ally's side and raise Unbreakable. By doing so, he absorbs all incoming burst and follow-up projectiles from your carry, rendering your Power Fist combo completely ineffective and leaving you vulnerable to counter-engages.Braum build →See details
Braum
The interaction that decides it
Braum can intercept the follow-up damage of a hook by jumping to his ally with Stand Behind Me and raising Unbreakable.
Why
This matchup is tough because Braum directly neutralizes the impact of your Rocket Grab. Even if you manage to hook the enemy marksman, Braum can instantly use Stand Behind Me to leap to his ally's side and raise Unbreakable. By doing so, he absorbs all incoming burst and follow-up projectiles from your carry, rendering your Power Fist combo completely ineffective and leaving you vulnerable to counter-engages.
Lane impact
Under the constant threat of this negation, the laning phase slows down dramatically. You cannot throw Rocket Grab blindly, as Braum can bodyblock it or punish you with Concussive Blows after a Winter's Bite slow. Missing your grab allows the enemy duo to dictate wave tempo, shoving you under turret and trapping you in lane, which severely limits your ability to find roam opportunities.
How to play
To survive, stand off to the side to create a wider angle that forces Braum to split his attention away from his carry. If they separate, pressure with Overdrive and Power Fist without committing your hook. You must hold Rocket Grab until he wastes Unbreakable or moves out of range for Stand Behind Me. In skirmishes, trigger Static Field early to silence him, preventing him from raising his defensive wall.
These matchups are above all duels of execution: both champions have credible ways to gain the upper hand. Dodging one key ability, anticipating an engage correctly, or a single positioning mistake can be enough to tip the duel one way or the other. Knowing the matchup and recognizing the right windows to act are especially important here.
SurvivalMobilityThis matchup is defined by a dramatic shift in power once ultimates unlock. Before level six, Zilean is highly vulnerable to your Rocket Grab and Power Fist combo, which can easily force a flash. However, once he accesses Chronoshift, the dynamic changes completely. He can instantly negate your successful hooks by reviving whoever you pull, turning your primary engage tool into a wasted cooldown.Zilean build →See details
Zilean
The interaction that decides it
Zilean can completely negate a successful pick post-6 by casting Chronoshift on the target of Rocket Grab.
Why
This matchup is defined by a dramatic shift in power once ultimates unlock. Before level six, Zilean is highly vulnerable to your Rocket Grab and Power Fist combo, which can easily force a flash. However, once he accesses Chronoshift, the dynamic changes completely. He can instantly negate your successful hooks by reviving whoever you pull, turning your primary engage tool into a wasted cooldown.
Lane impact
Early on, your presence zones Zilean away from the wave, though his Time Bomb poke can make holding bushes painful. The lane's pressure completely flips after level six. You can no longer fish for hooks near their tower without massive risk, as Chronoshift will absorb your burst damage, leaving you overextended while Zilean counters with Twisted Timeflow.
How to play
To bypass his ultimate, master the timing of your Static Field. When you land a Rocket Grab, immediately follow up with your ultimate's silence before he can react with Chronoshift. If his ultimate is active, hold your grab and use Overdrive to bait out his Temporal Mirage. Force him to waste his resurrection on a fake target, then strike.
PokeMobilityThis lane is a pure test of reaction speeds centered around your hook. Karma relies entirely on the sudden movement speed burst from Inspire to dodge your Rocket Grab on reaction. Because she lacks hard defensive dashes, she is incredibly vulnerable to being burst down if caught. If she mismanages this shield or is forced to use it defensively against poke rather than your hook, she cannot survive your Power Fist follow-up.Karma build →See details
Karma
The interaction that decides it
Karma uses the movement speed from Inspire to dodge Rocket Grab, but is easily burst down if she is caught without it.
Why
This lane is a pure test of reaction speeds centered around your hook. Karma relies entirely on the sudden movement speed burst from Inspire to dodge your Rocket Grab on reaction. Because she lacks hard defensive dashes, she is incredibly vulnerable to being burst down if caught. If she mismanages this shield or is forced to use it defensively against poke rather than your hook, she cannot survive your Power Fist follow-up.
Lane impact
Karma will constantly try to push waves and poke you down with Inner Flame. Missing your Rocket Grab grants her total lane control, allowing her to safely apply pressure with Focused Resolve without fearing retaliation. Conversely, holding your hook denies her the freedom to walk up and harass, forcing her to play defensively and preventing her from securing easy tower plating.
How to play
Never throw a max-range Rocket Grab when Karma has Inspire ready. Instead, activate Overdrive and run directly at her to bait out her shield. Once her movement speed decay begins or the shield expires, immediately pull her in. If she snares you with Focused Resolve, rely on Mana Barrier to absorb the trade while you counter-engage with Power Fist to disrupt her tether before the root triggers.
MobilityDisengageThis matchup is a pure test of prediction versus reaction speed. Janna relies on the passive movement speed from Tailwind and Zephyr to bait and dodge your hooks. However, her fragile health pool makes her incredibly vulnerable. If you can bypass her swiftness and land a single clean Rocket Grab into Power Fist, she lacks the defensive stats to survive the ensuing burst, even with Eye of the Storm.Janna build →See details
Janna
The interaction that decides it
Janna's passive Tailwind makes her highly elusive, but she lacks the health pool to survive a successful Rocket Grab into Power Fist.
Why
This matchup is a pure test of prediction versus reaction speed. Janna relies on the passive movement speed from Tailwind and Zephyr to bait and dodge your hooks. However, her fragile health pool makes her incredibly vulnerable. If you can bypass her swiftness and land a single clean Rocket Grab into Power Fist, she lacks the defensive stats to survive the ensuing burst, even with Eye of the Storm.
Lane impact
The lane's pressure hinges entirely on the cooldown of your Rocket Grab. When it is available, Janna must play defensively behind her minions, limiting her ability to poke with Zephyr. If you miss, however, she will immediately use Howling Gale and Eye of the Storm to push the wave and harass you under tower, completely stripping away your lane presence until your hook is back online.
How to play
To succeed, never throw max-range hooks at a highly mobile Janna. Instead, activate Overdrive to close the distance and force her to react with Howling Gale. Once she releases her whirlwind, use that brief window to align your Rocket Grab. If she tries to disengage with Monsoon, use Static Field immediately to silence her and interrupt the channel, securing the kill before she can heal her ADC.
MobilityMechanicsThis matchup is a high-stakes game of chicken. Pyke relies on baiting your Rocket Grab by utilizing Ghostwater Dive for camouflage and Phantom Undertow to dash away and dodge. However, Pyke's baseline durability is extremely low. If you can predict his movement and land a clean Rocket Grab, his Gift of the Drowned Ones passive won't save him from a swift, lethal burst.Pyke build →See details
Pyke
The interaction that decides it
Pyke can use Ghostwater Dive and Phantom Undertow to easily bait and dodge Rocket Grab, but is fragile if actually caught.
Why
This matchup is a high-stakes game of chicken. Pyke relies on baiting your Rocket Grab by utilizing Ghostwater Dive for camouflage and Phantom Undertow to dash away and dodge. However, Pyke's baseline durability is extremely low. If you can predict his movement and land a clean Rocket Grab, his Gift of the Drowned Ones passive won't save him from a swift, lethal burst.
Lane impact
The lane's tempo is dictated by brush control and hook pressure. Pyke will constantly fish for Bone Skewer charges from the fog of war. If you miss Rocket Grab, you lose all presence, allowing Pyke to immediately initiate with Phantom Undertow and dictate the wave's state. Missing your hook gives Pyke the freedom to roam or dive your ADC under tower with Death from Below.
How to play
Never throw max-range Rocket Grab attempts when Pyke has Phantom Undertow available. Instead, activate Overdrive to close the gap and threaten him with Power Fist first. This forces Pyke to panic-dash, exposing him to an easy follow-up Rocket Grab once his mobility is on cooldown. If he utilizes Ghostwater Dive, stick close to your carry to interrupt his Bone Skewer charge with an immediate Static Field silence.
These champions generally struggle to answer your main strengths, which lets you approach the matchup with more freedom. You often have several ways to pressure them and force trades that go in your favor. Use this advantage to dictate the pace rather than giving them time to get back into a comfortable position.
CooldownsBlitzcrank dominates this matchup because while Lulu can use Wild Growth to bail out her hooked ADC, she herself is incredibly fragile. Dragging Lulu with Rocket Grab completely bypasses her defensive utility for her partner. If she is caught, she is forced to self-cast Help, Pix! or Whimsy, leaving her marksman entirely defenseless against your rapid Power Fist knock-up and the silencing burst of Static Field.Lulu build →See details
Lulu
The interaction that decides it
Lulu can use Wild Growth to save a hooked ally, but she remains a highly vulnerable target herself if caught out of position.
Why
Blitzcrank dominates this matchup because while Lulu can use Wild Growth to bail out her hooked ADC, she herself is incredibly fragile. Dragging Lulu with Rocket Grab completely bypasses her defensive utility for her partner. If she is caught, she is forced to self-cast Help, Pix! or Whimsy, leaving her marksman entirely defenseless against your rapid Power Fist knock-up and the silencing burst of Static Field.
Lane impact
This threat completely paralyzes Lulu’s ability to walk up and poke with Glitterlance or Help, Pix!. Fear of Rocket Grab forces her to play far behind her minion wave, conceding bush control to you. When she wastes Whimsy on her ally for movement speed, you gain a massive window to step forward, zoning her away from experience and securing total lane dominance.
How to play
Actively target Lulu rather than her marksman to neutralize her saving ultimate. Use the bushes to hide your presence and activate Overdrive to run past minions, forcing her to panic. Hold Rocket Grab until she steps up to cast Help, Pix!, then pull her directly. Immediately follow up with Power Fist and chain it into Static Field to silence her, preventing her from casting Wild Growth or polymorphing you with Whimsy.
All-inYou hold the upper hand because Milio struggles to protect his carry once you land Rocket Grab. While his Warm Hugs shield can absorb some initial burst damage, he lacks the hard peel to stop you from chaining Power Fist. Before he unlocks Breath of Life, Milio's only defensive tool is a slow, predictive Ultra Mega Fire Kick, which cannot save an ally who has already been pulled directly into your melee range.Milio build →See details
Milio
The interaction that decides it
Milio can mitigate the burst of a hook with Warm Hugs, but cannot easily peel Blitzcrank off his ADC without his ultimate.
Why
You hold the upper hand because Milio struggles to protect his carry once you land Rocket Grab. While his Warm Hugs shield can absorb some initial burst damage, he lacks the hard peel to stop you from chaining Power Fist. Before he unlocks Breath of Life, Milio's only defensive tool is a slow, predictive Ultra Mega Fire Kick, which cannot save an ally who has already been pulled directly into your melee range.
Lane impact
This dynamic forces Milio and his marksman to play extremely defensively, conceding wave control to avoid your hook range. You can easily zone them off the minion wave, creating a health lead through threatened engages. When Milio attempts to use Cozy Campfire to help his carry farm from afar, it locks them into a predictable area, making them highly vulnerable to a sudden Overdrive engagement that forces early recalls or secures kills.
How to play
Activate Overdrive to sprint forward and force Milio to prematurely waste Warm Hugs or Ultra Mega Fire Kick. Once these defensive tools are on cooldown, immediately aim your Rocket Grab at his carry. If Milio reaches level five and has Breath of Life available, do not commit all your crowd control at once; instead, use Power Fist to bait out his ultimate, then silence him instantly with Static Field to prevent him from saving his teammate.
Counter-engageAssassinBlitzcrank holds the upper hand because Nami is extremely fragile, making her an easy target for Rocket Grab. However, the matchup is decided by her counter-engage. If you grab Nami or her ADC, she will immediately cast Aqua Prison on your ADC to interrupt their follow-up damage. This bubble negates your burst and allows Ebb and Flow to bounce, turning a pick into a losing trade.Nami build →See details
Nami
The interaction that decides it
Nami can counter-engage with Aqua Prison on the enemy ADC when Blitzcrank lands a hook, turning the trade around.
Why
Blitzcrank holds the upper hand because Nami is extremely fragile, making her an easy target for Rocket Grab. However, the matchup is decided by her counter-engage. If you grab Nami or her ADC, she will immediately cast Aqua Prison on your ADC to interrupt their follow-up damage. This bubble negates your burst and allows Ebb and Flow to bounce, turning a pick into a losing trade.
Lane impact
This interaction forces a tense stand-off during the early levels. Every time Rocket Grab is available, Nami must play defensively, giving your duo control over the minion waves. However, if you waste your hook, Nami will immediately use Surging Tides and Tidecaller's Blessing to aggressively poke you down. Her Tidal Wave at level five makes blind hooks dangerous, as she can disengage your entire team.
How to play
To secure your advantage, you must bait out Aqua Prison before committing. Activate Overdrive to run at Nami or her ally, forcing her to panic-cast her bubble. When her bubble is down, you have a long window to land a guaranteed Rocket Grab followed by Power Fist and Static Field without any threat of a turnaround. If she holds her bubble, simply walk up to use Power Fist first, saving your hook for her escape attempt.
Crowd controlBlitzcrank holds the upper hand against Soraka's fragile defense, but her Equinox poses a direct threat to your combo. When you land Rocket Grab, Soraka can instantly drop Equinox beneath you, silencing you to block your Power Fist follow-up. Since her Astral Infusion sustain is useless if she is dead, bypassing this specific silence interaction is the key to winning this lane.Soraka build →See details
Soraka
The interaction that decides it
Soraka can cast Equinox directly under Blitzcrank when he lands a hook, silencing him and preventing the Power Fist follow-up.
Why
Blitzcrank holds the upper hand against Soraka's fragile defense, but her Equinox poses a direct threat to your combo. When you land Rocket Grab, Soraka can instantly drop Equinox beneath you, silencing you to block your Power Fist follow-up. Since her Astral Infusion sustain is useless if she is dead, bypassing this specific silence interaction is the key to winning this lane.
Lane impact
Soraka wants to wear you down with Starcall while using Astral Infusion to keep her ally healthy. However, the constant threat of Rocket Grab forces her into a defensive posture. If she steps up to poke or wastes Equinox to zone, she loses her only safety net. This allows you to walk up with Overdrive, push the wave, and freeze her under her own turret.
How to play
To counter her Equinox silence, use Overdrive to run at her and bait the zone before throwing Rocket Grab. If you do pull her or her ally, step out of the Equinox circle immediately before activating Power Fist. When her health drops, her Salvation speed won't save her if you initiate with Static Field, silencing her to prevent her from casting Astral Infusion or Wish.
PicksEarly pressureThis lane swings heavily in your favor because Yuumi’s signature mechanic, You and Me!, forces her to attach to her marksman. By doing so, she removes her own physical presence from the lane, leaving her partner completely exposed. This turns the lane into a functional two-versus-one scenario where your Rocket Grab has a completely clear path to the lone ADC, with no secondary target available to block your hook.Yuumi build →See details
Yuumi
The interaction that decides it
Yuumi is forced to attach with You and Me!, leaving her partner to face Rocket Grab in a functional two-versus-one lane.
Why
This lane swings heavily in your favor because Yuumi’s signature mechanic, You and Me!, forces her to attach to her marksman. By doing so, she removes her own physical presence from the lane, leaving her partner completely exposed. This turns the lane into a functional two-versus-one scenario where your Rocket Grab has a completely clear path to the lone ADC, with no secondary target available to block your hook.
Lane impact
You dictate the minion waves from level one. By keeping the wave near your tower or slowly building a massive push, you force the enemy ADC to step up to farm under constant threat. Because Yuumi cannot trade health effectively without detaching for Bop 'n' Block, the enemy duo is forced to concede lane priority, allowing you to dive them easily or deny gold under their own turret.
How to play
Avoid throwing your Rocket Grab aimlessly; its mere availability zones the enemy ADC completely. Instead, use the threat of Overdrive to walk up and force their movement. Should Yuumi greedy-detach to trigger Bop 'n' Block or save mana on Zoomies, immediately target her with Power Fist to interrupt her re-attachment. If you miss a hook, fall back behind your minions until your cooldowns return to prevent Prowling Projectile poke.
AssassinEarly pressureSona's fragile health pool and complete lack of mobility or hard crowd control before unlocking Crescendo make her the ultimate target. Her defensive utility from Aria of Perseverance and Song of Celerity cannot mitigate displacement. Connecting a single Rocket Grab into Power Fist completely bypasses her sustain and guarantees an immediate, clean burst.Sona build →See details
Sona
The interaction that decides it
Sona lacks any defensive mobility or hard CC pre-6, making her an incredibly easy target for Rocket Grab into Power Fist.
Why
Sona's fragile health pool and complete lack of mobility or hard crowd control before unlocking Crescendo make her the ultimate target. Her defensive utility from Aria of Perseverance and Song of Celerity cannot mitigate displacement. Connecting a single Rocket Grab into Power Fist completely bypasses her sustain and guarantees an immediate, clean burst.
Lane impact
This matchup forces Sona to play incredibly deep behind her minions, preventing her from safely poking with Hymn of Valor or building up Power Chord. You gain uncontested control over the lane brushes. Since she cannot step up to contest, you can easily freeze the minion wave near your turret and force her into highly vulnerable positions.
How to play
Camp the lane brushes to maintain supreme zone control. Focus your pressure entirely on Sona rather than her partner. Use Overdrive to run directly at her, knock her up with Power Fist first, and hold Rocket Grab until she attempts to flee. Once she reaches level six, bait out Crescendo before committing your full crowd control chain.
Crowd controlMap pressureBard's necessity to roam for Traveler’s Call creates an immediate lane vulnerability. The moment he leaves his marksman to collect chimes, your lethal kill threat via Rocket Grab becomes inescapable for the isolated survivor. Without Cosmic Binding to peel or immediate Caretaker’s Shrine setups to heal, the lone enemy cannot step up to farm without risking a fatal pull and a quick Power Fist knock-up.Bard build →See details
Bard
The interaction that decides it
If Bard roams to collect chimes, Blitzcrank can easily dive or zone Bard's isolated ADC with Rocket Grab.
Why
Bard's necessity to roam for Traveler’s Call creates an immediate lane vulnerability. The moment he leaves his marksman to collect chimes, your lethal kill threat via Rocket Grab becomes inescapable for the isolated survivor. Without Cosmic Binding to peel or immediate Caretaker’s Shrine setups to heal, the lone enemy cannot step up to farm without risking a fatal pull and a quick Power Fist knock-up.
Lane impact
This dynamic transforms the laning phase into a relentless zoning pressure cooker. You do not even need to cast Rocket Grab to dictate the wave; your threatening posture near the brushes forces the lone shooter off the gold entirely. If they try to freeze or soak experience, you can easily dive them under their own tower, utilizing Mana Barrier to absorb the turret shots while securing an easy kill.
How to play
Position yourself aggressively in the forward lane brushes the second you see Bard depart to collect chimes. Hold your Rocket Grab to maintain maximum psychological pressure, forcing the enemy marksman to give up entire waves. If Bard attempts to return through a wall using Magical Journey, position yourself at the exit to buffer Power Fist, or silence him instantly with Static Field to prevent a last-second Tempered Fate rescue.
AssassinSeraphine is incredibly vulnerable to Blitzcrank because of how she casts her main poke. Whenever she uses High Note, she is locked into a lengthy casting animation that forces her to stand completely still. This brief self-root makes her pathing highly predictable, giving you the perfect stationary target to land a clean Rocket Grab. Once pulled, her fragile health pool cannot survive your immediate burst from Power Fist and Static Field.Seraphine build →See details
Seraphine
The interaction that decides it
Seraphine's long casting animations on High Note make her stationary and highly predictable, leaving her open to Rocket Grab.
Why
Seraphine is incredibly vulnerable to Blitzcrank because of how she casts her main poke. Whenever she uses High Note, she is locked into a lengthy casting animation that forces her to stand completely still. This brief self-root makes her pathing highly predictable, giving you the perfect stationary target to land a clean Rocket Grab. Once pulled, her fragile health pool cannot survive your immediate burst from Power Fist and Static Field.
Lane impact
This dynamic completely paralyzes Seraphine's ability to pressure the wave. She cannot safely use High Note or Beat Drop to push or poke without risking immediate death, forcing her to play far behind her minions. Consequently, you command complete bush control, starving her of gold and keeping her health low. Any attempt she makes to step up and trigger her Stage Presence notes results in a fatal all-in under your terms.
How to play
Position yourself aggressively inside the lane bushes to narrow her safe zones. Never throw your Rocket Grab blindly; instead, track her passive meter for Stage Presence. The moment she steps up to cast an Echo-amplified High Note, fire your hook directly at her feet during her cast animation. If she plays extremely safe and hides behind her wave, activate Overdrive to run her down, forcing her to miss Beat Drop before executing a point-blank Power Fist.
PokeAssassinLux wants to abuse her range with Lucent Singularity to chip away at your health. However, she has zero mobility and relies entirely on Light Binding to stop threats. If you find an angle where Rocket Grab can bypass the minion wave, her Prismatic Barrier won't save her from your displacement. She is incredibly squishy, and a single successful hook means she must burn spells or die.Lux build →See details
Lux
The interaction that decides it
Lux can poke from extreme range with Lucent Singularity, but is completely defenseless if Rocket Grab bypasses her minion wave.
Why
Lux wants to abuse her range with Lucent Singularity to chip away at your health. However, she has zero mobility and relies entirely on Light Binding to stop threats. If you find an angle where Rocket Grab can bypass the minion wave, her Prismatic Barrier won't save her from your displacement. She is incredibly squishy, and a single successful hook means she must burn spells or die.
Lane impact
Lux is forced to play extremely defensively, often wasting Lucent Singularity on the wave to stay safe behind her minions. This prevents her from setting up her Illumination passive on your carry. The threat of Rocket Grab completely denies her the freedom to step up and poke. If she misses Light Binding, you immediately control the bushes, forcing her under her turret.
How to play
Stand parallel to or slightly ahead of your minion wave, using Overdrive to threaten hook angles. Never throw Rocket Grab while her Light Binding is up and she is safely behind minions. Instead, walk forward to bait out her root. Once Light Binding is on cooldown or she steps out of the wave to cast Lucent Singularity, throw your hook. If you miss, immediately fall back and let Mana Barrier protect you from her counter-poke.
AssassinBlitzcrank dominates this matchup because Senna's unique Basic Attack animation forces her to stand still longer than other marksmen. This sluggish windup is the perfect setup for Rocket Grab. Whenever she attempts to collect Mist souls or poke with Piercing Darkness, she locks herself into a predictable, stationary state, completely neutralizing her range advantage and making her an easy target for your hook.Senna build →See details
Senna
The interaction that decides it
Senna's long attack windup on her basic attacks makes her temporarily stationary, offering a highly predictable window for Rocket Grab.
Why
Blitzcrank dominates this matchup because Senna's unique Basic Attack animation forces her to stand still longer than other marksmen. This sluggish windup is the perfect setup for Rocket Grab. Whenever she attempts to collect Mist souls or poke with Piercing Darkness, she locks herself into a predictable, stationary state, completely neutralizing her range advantage and making her an easy target for your hook.
Lane impact
This threat forces Senna to play extremely defensively, conceding early lane control. She cannot safely step up to harvest souls or contest the minion wave without risking a fatal pull. If she attempts to trade with Last Embrace, you can easily dodge it while she's pressured. Consequently, you can freeze the wave near your tower, starving her of gold and Mist, while forcing her to take awkward, deep recall timings.
How to play
Position yourself aggressively in the unwarded brush to constantly threaten with Rocket Grab. Wait specifically for the exact moment her Basic Attack animation begins on a minion or yourself before throwing your hook. If she tries to escape using Curse of the Black Mist, activate Overdrive to close the gap and knock her up with Power Fist instead of blindly throwing your hook into the shroud. If you miss, immediately retreat behind your minion wave to prevent her from punishing you with Piercing Darkness.
Edge: Wild Rift Core canonical verdict (−3 to +3), shown from the point of view of the champion named in the row. Win rate and pick rate: the opponent's own rate in this role — Wild Rift CN · Challenger, Patch 7.3c. Not a head-to-head win rate.
How to counter this champion
Counter angle
Understanding Blitzcrank counters isn’t just about listing champions, but understanding what breaks his play pattern. Blitz only works if he can create clean picks. Anything that denies that moment — shields, mobility, peel, vision control — becomes a natural counter. This page doesn’t replace detailed matchups, but provides a broader understanding of why certain profiles shut him down and how to adapt.
Patch context
Blitzcrank relies heavily on a single tool: his hook. This makes his kit predictable and therefore counterable with the right tools. Champions that neutralize or absorb hooks, or make picks ineffective, drastically reduce his value. As the game progresses and defensive tools increase, Blitz naturally loses impact, explaining his stronger early/mid presence.
Quick read
Shields and anti-pick tools reduce his impact.
Tanks turn his hooks into mistakes.
Disciplined positioning makes him useless.
Counter archetypes
Anti-hook / protection
These profiles directly negate the value of Blitz’s hook. With shields, cleanses, or defensive mobility, Blitz loses his core identity. Even when he lands a hook, the target is not punishable, completely breaking his impact and turning each attempt into unnecessary risk.
How the champion adapts. Look for alternative angles or play for peel.
Heavy frontline
These champions punish poorly targeted hooks. Pulling a tank often results in a bad fight. Their ability to protect their backline also reduces Blitz’s chances of finding a vulnerable target, making him predictable and ineffective.
How the champion adapts. Wait for mistakes instead of forcing plays.
Competitive engage
These supports provide more reliable and less risky engage than Blitz. Even without hooks, they can force clean fights. Blitz relies too much on a specific moment, creating a disadvantage in controlling fights.
Morgana is arguably Blitzcrank’s most direct counter. Her Black Shield completely neutralizes hook threat. Even on mistakes, she can instantly protect her target. This forces Blitz to play around her cooldowns, heavily slowing his tempo.
Common mistakes against him
Common mistakes against him
Forcing hooks against defensive comps.
Hooking a tank as an engage.
Ignoring enemy cooldowns.
Staying too long in fights.
Not playing around vision.
Coach notes
Not all hooks are worth taking.
A good Blitz plays around enemy cooldowns.
FAQ
Why is Morgana so strong against Blitz?
Because she directly nullifies his core mechanic. Her Black Shield prevents hook CC and makes the target immune to picks. Blitz must wait for a specific cooldown, drastically limiting his playmaking freedom.
Can Blitzcrank play against tanks?
Yes, but carefully. Tanks punish poorly targeted hooks. You must be selective and avoid engaging without kill potential. In these matchups, Blitz should play more passively and wait for mistakes.
How to play against engage supports?
Avoid frontal engages. Blitz is not built to directly compete with these champions in teamfights. He must play flanks and look for picks before fights start.
Is Blitzcrank useless in late game?
Not useless, but much more dependent on enemy mistakes. Defensive tools and positioning make picks rarer. He must play smarter and more opportunistically.